

User Guide
Page 2
... display manufacturer and/or listed by an independent laboratory (such as practical. Wall Mounting: If you decide to place or install the display where it cannot be pushed, pulled over and cause injury. NOTE TO CATV INSTALLERS This is appropriate. NEC, which provides guidelines for the size and weight of this television. However, flat panel displays are not always supported on the proper stands or installed...
... display manufacturer and/or listed by an independent laboratory (such as practical. Wall Mounting: If you decide to place or install the display where it cannot be pushed, pulled over and cause injury. NOTE TO CATV INSTALLERS This is appropriate. NEC, which provides guidelines for the size and weight of this television. However, flat panel displays are not always supported on the proper stands or installed...

User Guide
Page 3
... exit from the apparatus. 11) Only use attachments/accessories specified by the manufacturer. 12) Use only with the cart, stand, tripod, bracket, or table specified by broken glass, rinse the affected area thoroughly with any broken glass or liquid from direct sunlight, fire or a heat source such as power-supply cord or plug is damaged, liquid has been spilled or...
... exit from the apparatus. 11) Only use attachments/accessories specified by the manufacturer. 12) Use only with the cart, stand, tripod, bracket, or table specified by broken glass, rinse the affected area thoroughly with any broken glass or liquid from direct sunlight, fire or a heat source such as power-supply cord or plug is damaged, liquid has been spilled or...
User Guide
Page 5
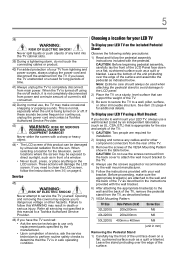
... turned on the LCD screen. To Display your LED TV using the on page 4. Never strike the screen with your LED TV on a flat, cushioned surface such as indicated below. Choosing a location for installation. 2) Unplug and remove any kind into the TV cabinet slots. 39) During a lightening storm, do not touch the connecting cables or product. 40) For added protection of your LED TV, always use a wall bracket Listed...
... turned on the LCD screen. To Display your LED TV using the on page 4. Never strike the screen with your LED TV on a flat, cushioned surface such as indicated below. Choosing a location for installation. 2) Unplug and remove any kind into the TV cabinet slots. 39) During a lightening storm, do not touch the connecting cables or product. 40) For added protection of your LED TV, always use a wall bracket Listed...
User Guide
Page 7
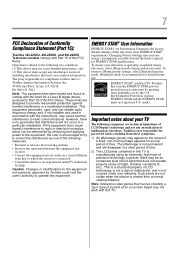
... receiving antenna. • Increase the separation between the equipment and receiver. • Connect the equipment into an outlet on the screen if a fixed, non-moving image appears for a Class B digital device, pursuant to radio communications. Note: Interactive video games that earn the ENERGY STAR prevent green house gas emissions by meeting strict guidelines set by Toshiba could void the user's authority to [Home] mode settings...
... receiving antenna. • Increase the separation between the equipment and receiver. • Connect the equipment into an outlet on the screen if a fixed, non-moving image appears for a Class B digital device, pursuant to radio communications. Note: Interactive video games that earn the ENERGY STAR prevent green house gas emissions by meeting strict guidelines set by Toshiba could void the user's authority to [Home] mode settings...
User Guide
Page 10
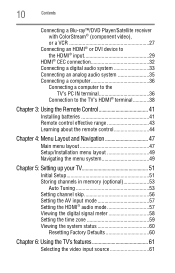
... Main menu layout 47 Setup/Installation menu layout 49 Navigating the menu system 49 Chapter 5: Setting up your TV 51 Initial Setup 51 Storing channels in memory (optional 53 Auto Tuning 53 Setting channel skip 56 Setting the AV input mode 57 Setting the HDMI® audio mode 57 Viewing the digital signal meter 58 Setting the time zone 59 Viewing the system status 60 Resetting Factory Defaults 60 Chapter 6: Using the TV's features 61 Selecting the video input source 61
... Main menu layout 47 Setup/Installation menu layout 49 Navigating the menu system 49 Chapter 5: Setting up your TV 51 Initial Setup 51 Storing channels in memory (optional 53 Auto Tuning 53 Setting channel skip 56 Setting the AV input mode 57 Setting the HDMI® audio mode 57 Viewing the digital signal meter 58 Setting the time zone 59 Viewing the system status 60 Resetting Factory Defaults 60 Chapter 6: Using the TV's features 61 Selecting the video input source 61
User Guide
Page 13
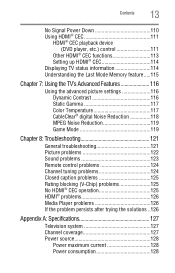
... 117 Color Temperature 117 CableClear® digital Noise Reduction 118 MPEG Noise Reduction 119 Game Mode 119 Chapter 8: Troubleshooting 121 General troubleshooting 121 Picture problems 122 Sound problems 123 Remote control problems 124 Channel tuning problems 124 Closed caption problems 125 Rating blocking (V-Chip) problems 125 No HDMI® CEC operation 125 HDMI® problems 126 Media Player problems 126 If the problem persists after trying the solutions ..126 Appendix A: Specifications 127 Television system 127 Channel coverage 127 Power source 128 Power maximum...
... 117 Color Temperature 117 CableClear® digital Noise Reduction 118 MPEG Noise Reduction 119 Game Mode 119 Chapter 8: Troubleshooting 121 General troubleshooting 121 Picture problems 122 Sound problems 123 Remote control problems 124 Channel tuning problems 124 Closed caption problems 125 Rating blocking (V-Chip) problems 125 No HDMI® CEC operation 125 HDMI® problems 126 Media Player problems 126 If the problem persists after trying the solutions ..126 Appendix A: Specifications 127 Television system 127 Channel coverage 127 Power source 128 Power maximum...
User Guide
Page 19
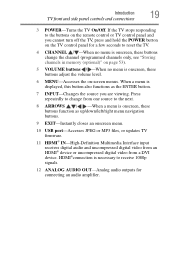
... and side panel controls and connections 3 POWER-Turns the TV On/Off. HDMI®connection is necessary to receive 1080p signals. 12 ANALOG AUDIO OUT-Analog audio outputs for a few seconds to the next. 8 ARROWS / / / -When a menu is onscreen, these buttons function as the ENTER button. 7 INPUT-Changes the source you are viewing. When a menu is displayed, this button also functions as up/down/left/right menu navigation buttons. 9 EXIT-Instantly closes an onscreen menu. 10 USB port-Accesses JPEG or...
... and side panel controls and connections 3 POWER-Turns the TV On/Off. HDMI®connection is necessary to receive 1080p signals. 12 ANALOG AUDIO OUT-Analog audio outputs for a few seconds to the next. 8 ARROWS / / / -When a menu is onscreen, these buttons function as the ENTER button. 7 INPUT-Changes the source you are viewing. When a menu is displayed, this button also functions as up/down/left/right menu navigation buttons. 9 EXIT-Instantly closes an onscreen menu. 10 USB port-Accesses JPEG or...
User Guide
Page 20
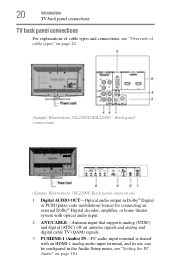
...-Optical audio output in Dolby® Digital or PCM (pulse-code modulation) format for connecting an external Dolby® Digital decoder, amplifier, or home theater system with optical audio input. 2 ANT/CABLE-Antenna input that supports analog (NTSC) and digital (ATSC) off-air antenna signals and analog and digital cable TV (QAM) signals. 3 PC/HDMI-1 (Audio) IN-PC audio input terminal is shared with an HDMI-1 analog audio input terminal, and its use can be configured in the Audio Setup menu, see "Overview of cable types and connections, see "Setting...
...-Optical audio output in Dolby® Digital or PCM (pulse-code modulation) format for connecting an external Dolby® Digital decoder, amplifier, or home theater system with optical audio input. 2 ANT/CABLE-Antenna input that supports analog (NTSC) and digital (ATSC) off-air antenna signals and analog and digital cable TV (QAM) signals. 3 PC/HDMI-1 (Audio) IN-PC audio input terminal is shared with an HDMI-1 analog audio input terminal, and its use can be configured in the Audio Setup menu, see "Overview of cable types and connections, see "Setting...
User Guide
Page 28
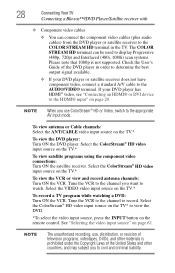
... component video cables (plus audio cables) from the DVD player or satellite receiver to the COLOR STREAM HD terminal in order to determine the best output signal available. ❖ If your DVD player has HDMI® video, see "Connecting an HDMI® or DVI device to the HDMI® input" on the remote control. To view antenna or Cable channels: Select the ANT/CABLE video input source on the TV.* To record a TV program while watching a DVD: Turn ON the VCR. Select the VIDEO video input source...
... component video cables (plus audio cables) from the DVD player or satellite receiver to the COLOR STREAM HD terminal in order to determine the best output signal available. ❖ If your DVD player has HDMI® video, see "Connecting an HDMI® or DVI device to the HDMI® input" on the remote control. To view antenna or Cable channels: Select the ANT/CABLE video input source on the TV.* To record a TV program while watching a DVD: Turn ON the VCR. Select the VIDEO video input source...

User Guide
Page 33
... operations. Connecting a digital audio system The TV's DIGITAL AUDIO OUT terminal outputs a Dolby® Digital or 2-channel down-mixed PCM (pulse-code modulation) signal for use with an external Dolby® Digital decoder or other external audio system with the desired settings, see the operation manual for compatibility information. However, Toshiba is recommended that you use an optical audio cable that has the larger "TosLink" connector and not the smaller "mini-optical" connector. You will need an optical audio cable...
... operations. Connecting a digital audio system The TV's DIGITAL AUDIO OUT terminal outputs a Dolby® Digital or 2-channel down-mixed PCM (pulse-code modulation) signal for use with an external Dolby® Digital decoder or other external audio system with the desired settings, see the operation manual for compatibility information. However, Toshiba is recommended that you use an optical audio cable that has the larger "TosLink" connector and not the smaller "mini-optical" connector. You will need an optical audio cable...
User Guide
Page 45
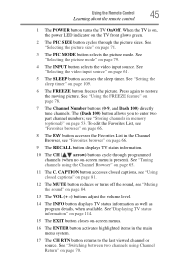
... as program details, when available. Using the Remote Control 45 Learning about the remote control 1 The POWER button turns the TV On/Off. See "Selecting the picture size" on page 81. 12 The MUTE button reduces or turns off the sound, see "Storing channels in the main menu system. 17 The CH RTN button returns to the last viewed channel or source. CAPTION button accesses closed captions, see "Using closed captions" on page 71. 3 The PIC MODE button selects the picture mode.
... as program details, when available. Using the Remote Control 45 Learning about the remote control 1 The POWER button turns the TV On/Off. See "Selecting the picture size" on page 81. 12 The MUTE button reduces or turns off the sound, see "Storing channels in the main menu system. 17 The CH RTN button returns to the last viewed channel or source. CAPTION button accesses closed captions, see "Using closed captions" on page 71. 3 The PIC MODE button selects the picture mode.
User Guide
Page 49
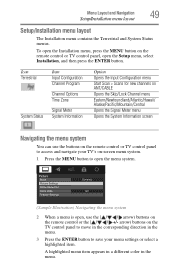
... Item Input Configuration Channel Program Channel Options Time Zone Signal Meter System Information Option Opens the Input Configuration menu Start Scan > Scans for new channels on ANT/CABLE Opens the Skip/Lock Channel menu Eastern/Newfoundland/Atlantic/Hawaii/ Alaska/Pacific/Mountain/Central Opens the Signal Meter menu Opens the System Information screen Navigating the menu system You can use the ( / / / arrow) buttons on the remote control or the arrow) buttons on the remote control or TV control panel...
... Item Input Configuration Channel Program Channel Options Time Zone Signal Meter System Information Option Opens the Input Configuration menu Start Scan > Scans for new channels on ANT/CABLE Opens the Skip/Lock Channel menu Eastern/Newfoundland/Atlantic/Hawaii/ Alaska/Pacific/Mountain/Central Opens the Signal Meter menu Opens the System Information screen Navigating the menu system You can use the ( / / / arrow) buttons on the remote control or the arrow) buttons on the remote control or TV control panel...
User Guide
Page 51
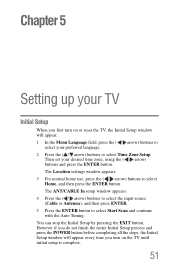
... the input source (Cable or Antenna), and then press ENTER. 5 Press the ENTER button to select Home, and then press the ENTER button. You can stop the Initial Setup by pressing the EXIT button. However if you turn on the TV until initial setup is complete. 51 The Location settings window appears. 3 For normal home use, press the ( / arrow) buttons to select Start Scan and...
... the input source (Cable or Antenna), and then press ENTER. 5 Press the ENTER button to select Home, and then press the ENTER button. You can stop the Initial Setup by pressing the EXIT button. However if you turn on the TV until initial setup is complete. 51 The Location settings window appears. 3 For normal home use, press the ( / arrow) buttons to select Start Scan and...
User Guide
Page 57
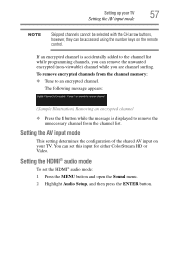
... channel list. You can remove the unwanted encrypted (non-viewable) channel while you can set the HDMI® audio mode: 1 Press the MENU button and open the Sound menu. 2 Highlight Audio Setup, and then press the ENTER button. If an encrypted channel is displayed to an encrypted channel. Setting up your TV 57 Setting the AV input mode NOTE Skipped channels cannot be selected with the CH arrow buttons, however, they can be accessed using the number...
... channel list. You can remove the unwanted encrypted (non-viewable) channel while you can set the HDMI® audio mode: 1 Press the MENU button and open the Sound menu. 2 Highlight Audio Setup, and then press the ENTER button. If an encrypted channel is displayed to an encrypted channel. Setting up your TV 57 Setting the AV input mode NOTE Skipped channels cannot be selected with the CH arrow buttons, however, they can be accessed using the number...
User Guide
Page 89
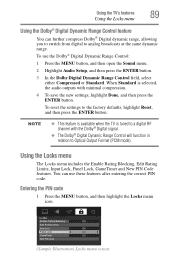
... a digital RF channel with minimal compression. 4 To save the new settings, highlight Done, and then press the ENTER button. You can further compress Dolby® Digital dynamic range, allowing you to switch from digital to the factory defaults, highlight Reset, and then press the ENTER button. Entering the PIN code 1 Press the MENU button, and then highlight the Locks menu icon. (Sample Illustration) Locks menu screen To reset the settings to analog...
... a digital RF channel with minimal compression. 4 To save the new settings, highlight Done, and then press the ENTER button. You can further compress Dolby® Digital dynamic range, allowing you to switch from digital to the factory defaults, highlight Reset, and then press the ENTER button. Entering the PIN code 1 Press the MENU button, and then highlight the Locks menu icon. (Sample Illustration) Locks menu screen To reset the settings to analog...
User Guide
Page 121
... POWER button on the remote control or TV control panel and you cannot turn off using this chapter or visit the Toshiba technical support Web site at support.toshiba.com for possible causes and solutions for several seconds to function, simply unplug the TV from the AC outlet, and then plug it back in . The closed caption feature is set to troubleshoot the problem. For instructions, see "Using closed caption feature to troubleshoot...
... POWER button on the remote control or TV control panel and you cannot turn off using this chapter or visit the Toshiba technical support Web site at support.toshiba.com for possible causes and solutions for several seconds to function, simply unplug the TV from the AC outlet, and then plug it back in . The closed caption feature is set to troubleshoot the problem. For instructions, see "Using closed caption feature to troubleshoot...

User Guide
Page 122
... the power cord is plugged in the remote control. Cannot view external signals or channel 3 or 4. Replace the batteries in properly, and then press the POWER button. If you are watching an analog channel (off-air broadcast or Cable TV), you cannot view signals from external devices connected to reduce visible interference in this Troubleshooting section or the recommended solution has not worked, then use the Reset Factory Defaults procedure. Press the INPUT button on the remote control or...
... the power cord is plugged in the remote control. Cannot view external signals or channel 3 or 4. Replace the batteries in properly, and then press the POWER button. If you are watching an analog channel (off-air broadcast or Cable TV), you cannot view signals from external devices connected to reduce visible interference in this Troubleshooting section or the recommended solution has not worked, then use the Reset Factory Defaults procedure. Press the INPUT button on the remote control or...
User Guide
Page 138
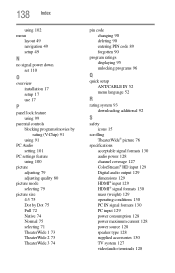
... program ratings displaying 95 unlocking programs 96 Q quick setup ANT/CABLE IN 52 menu language 52 R rating system 93 downloading additional 92 S safety icons 15 scrolling TheaterWide® picture 76 specifications acceptable signal formats 130 audio power 128 channel coverage 127 ColorStream® HD input 129 Digital audio output 129 dimensions 129 HDMI® input 129 HDMI® signal formats 130 mass (weight) 129 operating conditions 130 PC IN signal formats 130 PC input 129 power consumption 128 power maximum current 128 power source 128 speaker type...
... program ratings displaying 95 unlocking programs 96 Q quick setup ANT/CABLE IN 52 menu language 52 R rating system 93 downloading additional 92 S safety icons 15 scrolling TheaterWide® picture 76 specifications acceptable signal formats 130 audio power 128 channel coverage 127 ColorStream® HD input 129 Digital audio output 129 dimensions 129 HDMI® input 129 HDMI® signal formats 130 mass (weight) 129 operating conditions 130 PC IN signal formats 130 PC input 129 power consumption 128 power maximum current 128 power source 128 speaker type...

Setup Guide
Page 1
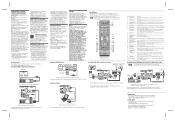
... this instruction document. 7) VESA Mounting Pattern TV Size Hole Pattern (HxV) Screw Size 32L2200U 200x200 mm M6 40L2200U 200x200 mm M6 (unit in mm) Removing the Pedestal Stand 1) Carefully lay the front of important operating and maintenance (servicing) instructions in serious injury and/or permanent damage to operate this product can support the weight of time. 14) Refer all instructions supplied by the wall mount manufacturer. 5) Follow the instructions provided with the wall bracket. 6) After...
... this instruction document. 7) VESA Mounting Pattern TV Size Hole Pattern (HxV) Screw Size 32L2200U 200x200 mm M6 40L2200U 200x200 mm M6 (unit in mm) Removing the Pedestal Stand 1) Carefully lay the front of important operating and maintenance (servicing) instructions in serious injury and/or permanent damage to operate this product can support the weight of time. 14) Refer all instructions supplied by the wall mount manufacturer. 5) Follow the instructions provided with the wall bracket. 6) After...
Setup Guide
Page 2
... 1 POWER button 2 PIC SIZE button 3 PIC MODE button 4 INPUT button 5 SLEEP button 6 FREEZE button 7 Channel Number buttons (0-9) 8 FAV button 9 RECALL button 10 CH ( / ) buttons 11 C. Selects the picture mode, see the "HDMI® CEC playback device (DVD player, etc.) control" section in the User's Guide. Selects the video input source, see the "Setting the sleep timer" section in the User's Guide. Accesses the sleep timer, see the "Selecting the video input source" section in the User's Guide. Accesses closed captions" section in the User's Guide. Reduces or turns off the sound, see...
... 1 POWER button 2 PIC SIZE button 3 PIC MODE button 4 INPUT button 5 SLEEP button 6 FREEZE button 7 Channel Number buttons (0-9) 8 FAV button 9 RECALL button 10 CH ( / ) buttons 11 C. Selects the picture mode, see the "HDMI® CEC playback device (DVD player, etc.) control" section in the User's Guide. Selects the video input source, see the "Setting the sleep timer" section in the User's Guide. Accesses the sleep timer, see the "Selecting the video input source" section in the User's Guide. Accesses closed captions" section in the User's Guide. Reduces or turns off the sound, see...


