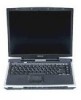
Toshiba Online Users Guide for Satellite 1405-S171/S172
Page 6
... in rural areas. NOTICE: The Ringer Equivalence Number (REN) assigned to each terminal device provides an indication of the maximum number of the power utility, telephone lines and internal metallic water pipe system, if present, are designed to your computer. The termination on an interface may not ...certified equipment should contact the appropriate electric inspection authority, or electrician, as defined by the user to a telephone interface. Wireless Interoperability The Toshiba Wireless LAN Mini PCI Card products are connected together. Repairs to disconnect the equipment.
Toshiba Online Users Guide for Satellite 1405-S171/S172
Page 8
...Caution: Exposure to Radio Frequency Radiation The radiated output power of the devices in accordance with the instructions, it...to be co-located with those products for human contact during normal operation is minimized. Operation of the Toshiba Wireless LAN Mini PCI Card is advised to the Regulatory Statements as identified in combination with the limits...tre placé loin des fenêtres afin de fournir un écran de blidage maximal. The Toshiba Wireless LAN Mini PCI Card is raised to provide reasonable protection against harmful interference in such a manner that ...
Toshiba Online Users Guide for Satellite 1405-S171/S172
Page 10
...In order to comply with FCC radio frequency radiation exposure guidelines for additional information. To ensure proper use of the BluetoothTM Card from Toshiba is minimized. 10 Caution: Bluetooth and Exposure to its normal operating position. No other than those products for an uncontrolled environment, ...of 20 cm from the antennas located on top of the LCD when the display is raised to Radio Frequency Radiation The radiated output power of this product, please read this device except FCC ID# CJ6PA3070WL or CJ6PA3171WL. Refer to open the enclosure. To prevent direct ...
Toshiba Online Users Guide for Satellite 1405-S171/S172
Page 14
...-friendly environment....... 39 Keeping yourself comfortable 40 Precautions 43 Setting up your computer 44 Setting up your software 45 Registering your computer with Toshiba ......... 46 Adding external devices 46 Installing additional memory (optional 47 Connecting a mouse 53 Connecting a printer 53 Connecting a USB printer ... the battery 62 Using the computer for the first time 62 Opening the display panel 62 Turning on the power 63 Activating the power-on password 65 Using the TouchPad 65 Primary and secondary control buttons........... 66 Disabling or enabling the TouchPad 67...
Toshiba Online Users Guide for Satellite 1405-S171/S172
Page 16
...CD-RW multifunction drive 96 Setting up for communications 97 Connecting the modem 97 Connecting your computer to a network .......... 98 Powering down the computer 99 Turn Off or Shut down command 99 Restart command 100 Hibernation command 100 Standby command 101 Using Turn... into Standby mode more quickly ......... 113 Starting again from Standby 116 Chapter 4: Mobile Computing 117 Toshiba's energy-saver design 117 Running the computer on battery power 117 Using additional batteries 118 Battery safety precautions 118 Maximizing battery life 119 Charging batteries 121 Charging ...
Toshiba Online Users Guide for Satellite 1405-S171/S172
Page 17
17 Contents Conserving battery power 124 What to do when the battery runs low 124 Setting battery alarms 125 Changing the main battery 126 Removing the battery from the computer ...... ...
Toshiba Online Users Guide for Satellite 1405-S171/S172
Page 19
... PC Cards 182 PC Card supporting software 183 Inserting PC Cards 183 Removing PC Cards 184 Hot swapping 185 Chapter 7: Toshiba Utilities 186 TOSHIBA Accessibility 186 Fn-esse 187 Starting Fn-esse 188 Assigning a key to a program or document ... 189 Viewing existing key... assignments 191 Changing or removing existing key assignments 191 Hotkey utility 191 TOSHIBA Console 192 Customize Your Computer 193 Network 194 Security 194 Power Management 194 TOSHIBA Button Controls 197 Toshiba Hardware Setup 198 Chapter 8: WinDVD 201 Playing DVDs 201 Using the WinDVD toolbar...
Toshiba Online Users Guide for Satellite 1405-S171/S172
Page 21
... habits 251 If you need further assistance 253 Before you call 253 Contacting Toshiba 253 Other Toshiba Internet Web sites 255 Toshiba's worldwide offices 255 Appendix A: Hot Keys 258 Volume Mute 258 Instant password... security 259 Without a password 259 With a password 259 Power usage mode 260 Standby mode 261 Hibernation mode 262 Display modes 263 Display brightness 264 Disabling or enabling the TouchPad 264 Keyboard hot keys 264 Appendix B: Power...
Toshiba Online Users Guide for Satellite 1405-S171/S172
Page 23
... with your access to find specific information. 23 Your system comes with the computer. You can accompany you wherever you go. With your new Toshiba notebook computer, your Toshiba computer. This guide contains information on the software, see the Microsoft booklet that shipped with either the Microsoft® Windows® XP Home... information can : ❖ Read the entire guide from beginning to end. ❖ Skim through and stop when a topic interests you. ❖ Use the table of powerful and portable multimedia computers!
Toshiba Online Users Guide for Satellite 1405-S171/S172
Page 32
... the corresponding slots. 32 Finding Your Way Around Front with the display open Internet button Power button Speaker Function keys TouchPad System indicator panel Infrared port Volume control dial Headphone out Microphone in jack Screen TOSHIBA Console button Keyboard indicator lights Speaker Keyboard Palm rest CD/DVD control buttons Secondary control button...
Toshiba Online Users Guide for Satellite 1405-S171/S172
Page 35
... Battery light Hard disk drive light Disk/disc activity light The AC power light glows green when the computer is connected to an external power source. For more information on determining remaining battery power, see "Monitoring battery power" on page 122. Finding Your Way Around Front with the display open 35 System indicator panel... light flashes amber when the computer is being accessed. It glows amber while the battery is in use . It does not glow if the external power source is disconnected or if the battery is completely discharged.
Toshiba Online Users Guide for Satellite 1405-S171/S172
Page 40
...injury, and repetitive-stress syndrome. If the computer does not operate correctly after you turn it off, unplug it from the AC power source, and let it dry out completely before turning it back on again. You should be able to type without twisting your ...comfortable height and distance. Placement of the computer Proper placement of the equipment, you spill liquid into the computer, turn it on , contact a Toshiba authorized service provider. CAUTION: If you can work ❖ Equipment that generates a strong electromagnetic field, such as stereo speakers (other than speakers ...
Toshiba Online Users Guide for Satellite 1405-S171/S172
Page 45
...60. See "Connecting the AC adapter" on your computer's modem must be chosen." 4 Click Skip to exit the process or Next to register with Toshiba and Microsoft. NOTE: To register online, your software setup choices. A window will display the message: "An Internet connection could not be connected to charge... the battery, you through steps to set up your computer 45 To use external power or to a voice-grade telephone line. The first time you turn on your computer, the Setup Wizard guides you must attach the AC adapter...
Toshiba Online Users Guide for Satellite 1405-S171/S172
Page 48
CAUTION: Do not install or remove a memory module while the DVD-ROM drive power is on. 1 If the computer is turned on. 2. The computer was shut down . Power to the computer. 3 Close the display panel and turn it off. You can damage the computer and the module. 1. See "Turn Off or Shut down...
Toshiba Online Users Guide for Satellite 1405-S171/S172
Page 52
...Started Installing additional memory (optional) Removing a memory module CAUTION: If you turn it on, perform the following message appears when you turn on the power: Warning: Resume Failure Press Any Key To Continue If the computer hangs up . 3 Gently pull the module out. In either of the module... up when you use the computer for five seconds, then turn the power on again. 2 Push the latches to the outside to room temperature before you replace them. 1 Follow steps 1 through 6 in Standby mode. The following...
Toshiba Online Users Guide for Satellite 1405-S171/S172
Page 55
... you've connected an external display device, you turn on the computer. 1 Connect the monitor's video cable to the RGB (monitor) port. 2 Connect the monitor's power cable to use the internal display only, the external device only, or both simultaneously. Directing the display output when you can choose to use the...
Toshiba Online Users Guide for Satellite 1405-S171/S172
Page 60
Connecting the power cable to the AC adapter 2 Plug the AC adapter into the DC-IN on the computer glows when the device is plugged in. 60 Getting Started Connecting the AC adapter Connecting the AC adapter The AC adapter enables you to power the computer from an AC outlet and to the AC adapter. The AC power light on the back of the computer. Power cable AC adapter Power cable and AC adapter To connect AC power to the computer: 1 Connect the power cable to charge the computer's batteries.
Toshiba Online Users Guide for Satellite 1405-S171/S172
Page 61
...Connecting the AC adapter 61 Connecting the AC adapter to the computer 3 Connect the power cable to unplug it. DANGER: Damaged power cables can cause fire or electric shock. There is a risk of , or apply heat to the power cable. Toshiba assumes no liability for any damage in such cases. If the... power cable becomes damaged or the plug overheats, discontinue use. Never remove the power plug from the outlet. CAUTION: Using the wrong AC adapter could damage ...
Toshiba Online Users Guide for Satellite 1405-S171/S172
Page 62
... battery can charge the battery with the computer turned off . It takes several hours to charge the battery when the computer is connected to a power outlet, you must charge it is charging. Once the computer is off or on page 117. Using the computer for more information on battery use... the battery to power the computer, you can damage the battery. 62 Getting Started Charging the battery Charging the battery Before you can use , see "Running the computer...
Toshiba Online Users Guide for Satellite 1405-S171/S172
Page 63
Never lift or move the computer using the display panel. Getting Started Using the computer for the first time 63 Lift Slide Opening the display panel CAUTION: To avoid damaging the display panel, don't force it beyond the point where it moves easily. Turning on the computer by pressing the power button located above the keyboard. On 2 Turn on the power 1 Check that all the drives are empty.