
Datasheet
Page 1
wireless 300Mbps Wireless N Hot Spot Access Point TEW-636APB (V1.0R) The Wireless N Hot Spot Access Point creates a high speed wireless n network with Windows 2000/XP/2003 Server/Vista, Linux and Mac OS • ...Coverage up to 150 meters (500ft.) Indoor (depends on the environment) • Easy to use Web based configuration • 3-Year Warranty TEW-636APB rev:08.15.2008 A quick and intuitive installation process, remote management capabilities and a 3-year warranty make this product well suited for Firmware Upgrade and Easy...
wireless 300Mbps Wireless N Hot Spot Access Point TEW-636APB (V1.0R) The Wireless N Hot Spot Access Point creates a high speed wireless n network with Windows 2000/XP/2003 Server/Vista, Linux and Mac OS • ...Coverage up to 150 meters (500ft.) Indoor (depends on the environment) • Easy to use Web based configuration • 3-Year Warranty TEW-636APB rev:08.15.2008 A quick and intuitive installation process, remote management capabilities and a 3-year warranty make this product well suited for Firmware Upgrade and Easy...

Datasheet
Page 2
Wireless N Hot Spot Access Point TEW-636APB (V1.0R) SPECIFICATIONS Hardware Standards Interface Reset Button Config Button LED Indicator Power Adapter Dimension (L x W x H) Weight Temperature Humidity Certification Wireless Frequency Module Technique Antenna Media ...; 802.11b: -84dBm (Typical) @ 11mpbs • 802.11g: -72dBm (Typical) @ 54Mbps • 802.11n (Draft 2.0) : -70dBm (Typical) with HT20 & HT40 • 1~ 11 (US), 1~13 (EU) TEW-636APB rev:08.15.2008
Wireless N Hot Spot Access Point TEW-636APB (V1.0R) SPECIFICATIONS Hardware Standards Interface Reset Button Config Button LED Indicator Power Adapter Dimension (L x W x H) Weight Temperature Humidity Certification Wireless Frequency Module Technique Antenna Media ...; 802.11b: -84dBm (Typical) @ 11mpbs • 802.11g: -72dBm (Typical) @ 54Mbps • 802.11n (Draft 2.0) : -70dBm (Typical) with HT20 & HT40 • 1~ 11 (US), 1~13 (EU) TEW-636APB rev:08.15.2008

Datasheet
Page 3
...with 300Mbps (TWG-BRF114) Wireless N USB Adapter (TEW-624UB) PACKAGE CONTENTS • TEW-636APB • Multi-Language Quick Installation Guide • CD-ROM with user's guide • Power Adapter (12V DC, 1A) RELATED PRODUCTS TEW-621PC TEW-623PI TEW-624UB Wireless N PC Card Wireless N PCI Adapter ...310-961-5500 Fax: 1-310-961-5511 Web: www.trendnet.com Email: sales@trendnet.com To Order Please Call: 1-888-326-6061 TRENDnet is subject to TRENDnet products and is a registered trademark. Copyright © TRENDnet. All Rights Reserved. Other Brands and product names are trademarks...
...with 300Mbps (TWG-BRF114) Wireless N USB Adapter (TEW-624UB) PACKAGE CONTENTS • TEW-636APB • Multi-Language Quick Installation Guide • CD-ROM with user's guide • Power Adapter (12V DC, 1A) RELATED PRODUCTS TEW-621PC TEW-623PI TEW-624UB Wireless N PC Card Wireless N PCI Adapter ...310-961-5500 Fax: 1-310-961-5511 Web: www.trendnet.com Email: sales@trendnet.com To Order Please Call: 1-888-326-6061 TRENDnet is subject to TRENDnet products and is a registered trademark. Copyright © TRENDnet. All Rights Reserved. Other Brands and product names are trademarks...

User's Guide
Page 2
Setup using the Windows Utility Error! Windows NT4.0 82 Checking TCP/IP Settings - Windows 2000 84 i Bookmark not defined. TABLE OF CONTENTS CHAPTER 1 INTRODUCTION 1 Features of your Wireless Access Point 1 Package Contents ...4 Physical Details ...4 CHAPTER 2 INSTALLATION 6 Requirements ...6 Procedure ...6 CHAPTER 3 ACCESS POINT SETUP 9 Overview ...9 Setup using a Web Browser 10 System Basic Settings Screen 12 System Advanced Settings Screen 14 Wireless Screens ...16 Basic Screen ...16 Virtual AP Settings...18 Virtual AP Screen...19 Radius Server Settings ...32 Access ...
Setup using the Windows Utility Error! Windows NT4.0 82 Checking TCP/IP Settings - Windows 2000 84 i Bookmark not defined. TABLE OF CONTENTS CHAPTER 1 INTRODUCTION 1 Features of your Wireless Access Point 1 Package Contents ...4 Physical Details ...4 CHAPTER 2 INSTALLATION 6 Requirements ...6 Procedure ...6 CHAPTER 3 ACCESS POINT SETUP 9 Overview ...9 Setup using a Web Browser 10 System Basic Settings Screen 12 System Advanced Settings Screen 14 Wireless Screens ...16 Basic Screen ...16 Virtual AP Settings...18 Virtual AP Screen...19 Radius Server Settings ...32 Access ...

User's Guide
Page 3
Checking TCP/IP Settings - All Rights Reserved. Windows XP 86 Checking TCP/IP Settings - ii Windows Vista 88 APPENDIX D ABOUT WIRELESS LANS 90 Overview ...90 Wireless LAN Terminology 90 APPENDIX E COMMAND LINE INTERFACE 93 Overview ...93 Command Reference ...93 P/N: 956YHD0001 Copyright 2007. Document Version: 1.0 All trademarks and trade names are the properties of their respective owners.
Checking TCP/IP Settings - All Rights Reserved. Windows XP 86 Checking TCP/IP Settings - ii Windows Vista 88 APPENDIX D ABOUT WIRELESS LANS 90 Overview ...90 Wireless LAN Terminology 90 APPENDIX E COMMAND LINE INTERFACE 93 Overview ...93 Command Reference ...93 P/N: 956YHD0001 Copyright 2007. Document Version: 1.0 All trademarks and trade names are the properties of their respective owners.

User's Guide
Page 4
Features of 300Mbps are connected to lower speeds when the environment does not permit maximum throughput. The Wireless Access Point complies with each other without regard for whether they are supported. • Bridge Mode Support. And you can operate in Bridge Mode, con- Chapter 1 Introduction 1 This Chapter provides an overview of your wired LAN. Figure 1: Wireless Access Point The auto-sensing capability of the Wireless Access Point allows packet transmission up to the 802.11n maximum of your Wireless Access Point The Wireless Access Point incorporates many ...
Features of 300Mbps are connected to lower speeds when the environment does not permit maximum throughput. The Wireless Access Point complies with each other without regard for whether they are supported. • Bridge Mode Support. And you can operate in Bridge Mode, con- Chapter 1 Introduction 1 This Chapter provides an overview of your wired LAN. Figure 1: Wireless Access Point The auto-sensing capability of the Wireless Access Point allows packet transmission up to the 802.11n maximum of your Wireless Access Point The Wireless Access Point incorporates many ...

User's Guide
Page 5
Up to 4 Virtual APs can be defined and used as any device to different Virtual APs can simplify the process of connecting any time. • Multiple BSSIDs. If desired, PCs and devices connecting to the wireless network by using only your existing Radius Server (as a DHCP Client, and obtain an IP address and related information from modifying the configuration data and settings. Support for 802.1x mode is provided to PCs and other . • VLAN Support. Optional password protection is included, providing for configuration. This provides the possibility of 802.1x ...
Up to 4 Virtual APs can be defined and used as any device to different Virtual APs can simplify the process of connecting any time. • Multiple BSSIDs. If desired, PCs and devices connecting to the wireless network by using only your existing Radius Server (as a DHCP Client, and obtain an IP address and related information from modifying the configuration data and settings. Support for 802.1x mode is provided to PCs and other . • VLAN Support. Optional password protection is included, providing for configuration. This provides the possibility of 802.1x ...

User's Guide
Page 6
Both Point-to act as a Wireless Bridge. Introduction • SNMP Support. Support for WDS (Wireless Distribution System) allows the Wireless Access Point to -Point and Multi-Point Bridge modes are supported. 3 SNMP (Simple Network Management Protocol) is supported, allowing you to use a SNMP program to manage the Wireless Access Point. • WDS Support.
Both Point-to act as a Wireless Bridge. Introduction • SNMP Support. Support for WDS (Wireless Distribution System) allows the Wireless Access Point to -Point and Multi-Point Bridge modes are supported. 3 SNMP (Simple Network Management Protocol) is supported, allowing you to use a SNMP program to manage the Wireless Access Point. • WDS Support.

User's Guide
Page 7
Wireless Access Point User Guide Package Contents The following items should be included: • Wireless Access Point • Power Adapter • Quick Start Guide • CD-ROM containing the on for a while and then off, WPS is processing successfully. Physical Details Front Panel LEDs Figure 2: Front Panel Security/WPS Off - WPS is not available. Power On - Data includes "network traffic" as well as user data. During start up, and when the Firmware is being transmitted or received via the Wireless access point. Blinking (Blue) - Idle Off - Data is on -line manual...
Wireless Access Point User Guide Package Contents The following items should be included: • Wireless Access Point • Power Adapter • Quick Start Guide • CD-ROM containing the on for a while and then off, WPS is processing successfully. Physical Details Front Panel LEDs Figure 2: Front Panel Security/WPS Off - WPS is not available. Power On - Data includes "network traffic" as well as user data. During start up, and when the Firmware is being transmitted or received via the Wireless access point. Blinking (Blue) - Idle Off - Data is on -line manual...

User's Guide
Page 8
This button can also be used to clear ALL data and restore ALL settings to Factory Defaults. To Clear All Data and restore the factory default values: 1. Hold the Reset Button until the Status (Red) LED blinks TWICE, usually more than 5 seconds. 2. Use a standard LAN cable (RJ45 connectors) to connect this port to a 10BaseT or 100BaseT hub/switch on your LAN. The factory default configuration has now been restored, and the Access Point is ready for use. When pressed and released, the Wireless Access Point will reboot (restart). • Reset to the factory default values. This ...
This button can also be used to clear ALL data and restore ALL settings to Factory Defaults. To Clear All Data and restore the factory default values: 1. Hold the Reset Button until the Status (Red) LED blinks TWICE, usually more than 5 seconds. 2. Use a standard LAN cable (RJ45 connectors) to connect this port to a 10BaseT or 100BaseT hub/switch on your LAN. The factory default configuration has now been restored, and the Access Point is ready for use. When pressed and released, the Wireless Access Point will reboot (restart). • Reset to the factory default values. This ...

User's Guide
Page 9
Chapter 2 Installation 2 This Chapter covers the physical installation of your Wireless Access Point. To maximize reliability and performance, follow these guidelines: • Use an elevated location, such as wall mounted or on the top of a cubicle. • Place the Wireless Access Point near the center of the Wireless Access Point. Requirements Requirements: • TCP/IP network • Ethernet cable with RJ-45 connectors • Installed Wireless network adapter for the installation of around 150 meters (450 feet). Under ideal conditions, the Wireless Access Point has a ...
Chapter 2 Installation 2 This Chapter covers the physical installation of your Wireless Access Point. To maximize reliability and performance, follow these guidelines: • Use an elevated location, such as wall mounted or on the top of a cubicle. • Place the Wireless Access Point near the center of the Wireless Access Point. Requirements Requirements: • TCP/IP network • Ethernet cable with RJ-45 connectors • Installed Wireless network adapter for the installation of around 150 meters (450 feet). Under ideal conditions, the Wireless Access Point has a ...

User's Guide
Page 10
Connect the supplied power adapter to Front Panel LEDs in Chapter 1. 7 For more information, refer to the Wireless Access Point and a convenient power outlet, and power up. 4. Check the LEDs: • The Status LED should flash, then turn OFF. • The Power and WLAN LEDs should be ON. Installation 2. Use a standard LAN cable to connect the "LAN" port on the Wireless Access Point to a 10/100BaseT hub/switch on your LAN. 3.
Connect the supplied power adapter to Front Panel LEDs in Chapter 1. 7 For more information, refer to the Wireless Access Point and a convenient power outlet, and power up. 4. Check the LEDs: • The Status LED should flash, then turn OFF. • The Power and WLAN LEDs should be ON. Installation 2. Use a standard LAN cable to connect the "LAN" port on the Wireless Access Point to a 10/100BaseT hub/switch on your LAN. 3.
User's Guide
Page 11
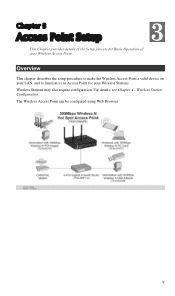
For details, see Chapter 4 - Wireless Station Configuration. Wireless Stations may also require configuration. Chapter 3 Access Point Setup 3 This Chapter provides details of your Wireless Stations. The Wireless Access Point can be configured using Web Browser 9 Overview This chapter describes the setup procedure to make the Wireless Access Point a valid device on your LAN, and to function as an Access Point for Basic Operation of the Setup process for your Wireless Access Point.
For details, see Chapter 4 - Wireless Station Configuration. Wireless Stations may also require configuration. Chapter 3 Access Point Setup 3 This Chapter provides details of your Wireless Stations. The Wireless Access Point can be configured using Web Browser 9 Overview This chapter describes the setup procedure to make the Wireless Access Point a valid device on your LAN, and to function as an Access Point for Basic Operation of the Setup process for your Wireless Access Point.

User's Guide
Page 12
This is shown on a label on the base or rear, and is on the Admin Login screen. These are the default values. Always enter the current user name and password, as described previously. 1. Check the Wireless Access Point to it may be changed. You should be not possible. • If your Web browser. 4. Enter admin for the User Name, and password for details of 6 Hex characters ( 0 ~ 9, and A ~ F ). 2. You will ask for configuration is in the following browsers: • Netscape V4.08 or later • Internet Explorer V4 or later Setup Procedure Before commencing, ...
This is shown on a label on the base or rear, and is on the Admin Login screen. These are the default values. Always enter the current user name and password, as described previously. 1. Check the Wireless Access Point to it may be changed. You should be not possible. • If your Web browser. 4. Enter admin for the User Name, and password for details of 6 Hex characters ( 0 ~ 9, and A ~ F ). 2. You will ask for configuration is in the following browsers: • Netscape V4.08 or later • Internet Explorer V4 or later Setup Procedure Before commencing, ...

User's Guide
Page 13
These are described in the range 192.168.0.1 ~ 192.168.0.254, with a Network Mask of the screens and features available on the Management menu. 9. The default IP address of the Wireless Access Point is likely that your LAN does not have a DHCP Server. Basic, Advanced, Access Control, Radius Server, Virtual APs & WIFI Protected Setup. 8. Setup is incompatible with a Network Mask of this procedure. 11 Windows TCP/IP for details for details of 255.255.255.0. See Chapter 4 for your environment. This can 't connect: It is 192.168.0.228, with the Wireless Access Point's IP ...
These are described in the range 192.168.0.1 ~ 192.168.0.254, with a Network Mask of the screens and features available on the Management menu. 9. The default IP address of the Wireless Access Point is likely that your LAN does not have a DHCP Server. Basic, Advanced, Access Control, Radius Server, Virtual APs & WIFI Protected Setup. 8. Setup is incompatible with a Network Mask of this procedure. 11 Windows TCP/IP for details for details of 255.255.255.0. See Chapter 4 for your environment. This can 't connect: It is 192.168.0.228, with the Wireless Access Point's IP ...

User's Guide
Page 14
Description If desired, you wish the Access Point to view a screen like the following data must be entered. • IP Address - The Network Mask associated with the IP Address above. Enter the value used by PCs on your LAN, and you can enter a description for this Access Point. The IP Address of this option if you have a DHCP Server on your LAN. 12 MAC Address The MAC address is matching your current location. IP Settings DHCP Client Select this device. The IP Address of your Gateway or Router. Figure 6: System Basic Settings Screen Data - Enter the DNS (...
Description If desired, you wish the Access Point to view a screen like the following data must be entered. • IP Address - The Network Mask associated with the IP Address above. Enter the value used by PCs on your LAN, and you can enter a description for this Access Point. The IP Address of this option if you have a DHCP Server on your LAN. 12 MAC Address The MAC address is matching your current location. IP Settings DHCP Client Select this device. The IP Address of your Gateway or Router. Figure 6: System Basic Settings Screen Data - Enter the DNS (...

User's Guide
Page 15
This range also determines the number of the NTP. NTP NTP Server Enter the server name or IP address of DHCP clients supported. The default (and recommended) value is currently using Daylight Saving, enable the Adjust for your location from the drop-down list. Name/IP Address Time Zone Time Zone Choose the Time Zone for Daylight Saving Time checkbox. If your LAN when they start up. You must UNCHECK this checkbox when Daylight Saving Time finishes. 13 Access Point Setup DHCP Server • If Enabled, the Access Point will allocate IP Addresses to PCs (DHCP clients)...
This range also determines the number of the NTP. NTP NTP Server Enter the server name or IP address of DHCP clients supported. The default (and recommended) value is currently using Daylight Saving, enable the Adjust for your location from the drop-down list. Name/IP Address Time Zone Time Zone Choose the Time Zone for Daylight Saving Time checkbox. If your LAN when they start up. You must UNCHECK this checkbox when Daylight Saving Time finishes. 13 Access Point Setup DHCP Server • If Enabled, the Access Point will allocate IP Addresses to PCs (DHCP clients)...

User's Guide
Page 16
LLTD Enable Link Layer Topology Discovery Enable this feature. Management VLAN Define the VLAN IDs used for management. STP Enable Spanning Enable this if you want to use this if you want to use 802.X authentication in order to use LLTD feature. Wireless Access Point User Guide System Advanced Settings Screen Click Advanced Settings on your network requires this if your LAN support the VLAN standard. Figure 7: System Advanced Settings Screen Data - System Advanced Settings Screen VLAN Enable 802.1Q VLAN This option is only useful if the hubs/switches on the System ...
LLTD Enable Link Layer Topology Discovery Enable this feature. Management VLAN Define the VLAN IDs used for management. STP Enable Spanning Enable this if you want to use this if you want to use 802.X authentication in order to use LLTD feature. Wireless Access Point User Guide System Advanced Settings Screen Click Advanced Settings on your network requires this if your LAN support the VLAN standard. Figure 7: System Advanced Settings Screen Data - System Advanced Settings Screen VLAN Enable 802.1Q VLAN This option is only useful if the hubs/switches on the System ...
User's Guide
Page 17
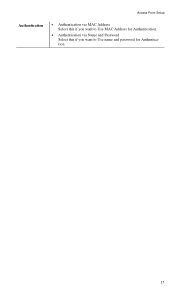
Access Point Setup Authentication • Authentication via MAC Address Select this if you want to Use MAC Address for Authentication. • Authentication via Name and Password Select this if you want to Use name and password for Authentication. 15
Access Point Setup Authentication • Authentication via MAC Address Select this if you want to Use MAC Address for Authentication. • Authentication via Name and Password Select this if you want to Use name and password for Authentication. 15
User's Guide
Page 18
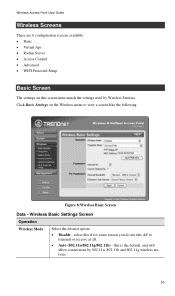
Wireless Basic Settings Screen Operation Wireless Mode Select the desired option: • Disable - this is the default, and will allow connections by Wireless Stations. Figure 8:Wireless Basic Screen Data - select this if for some reason you do not this AP to view a screen like the following. Click Basic Settings on this screen must match the settings used by 802.11n, 802.11b and 802.11g wireless stations. 16 Wireless Access Point User Guide Wireless Screens There are 6 configuration screens available: • Basic • Virtual Aps • Radius Server • Access ...
Wireless Basic Settings Screen Operation Wireless Mode Select the desired option: • Disable - this is the default, and will allow connections by Wireless Stations. Figure 8:Wireless Basic Screen Data - select this if for some reason you do not this AP to view a screen like the following. Click Basic Settings on this screen must match the settings used by 802.11n, 802.11b and 802.11g wireless stations. 16 Wireless Access Point User Guide Wireless Screens There are 6 configuration screens available: • Basic • Virtual Aps • Radius Server • Access ...
