Operating Instructions
Page 5
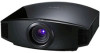
... Projector and a Screen 15 Step 2: Adjusting the Picture Position 19 Step 3: Connecting the Projector .....24 Connecting to a VCR 24 Connecting to a Computer ..........27 Connecting to an Optional TMRBR100 3D Sync Transmitter ......28 Step 4: Selecting the Menu Language 29 Projecting Projecting the Picture on the Screen 31 Turning Off the Power 32 Operating the BRAVIA Sync Compatible Equipment with the Remote Control of the Projector ...... 33 Selecting the Wide Screen Mode .... 35 Watching 3D Video Images 38 Using...
... Projector and a Screen 15 Step 2: Adjusting the Picture Position 19 Step 3: Connecting the Projector .....24 Connecting to a VCR 24 Connecting to a Computer ..........27 Connecting to an Optional TMRBR100 3D Sync Transmitter ......28 Step 4: Selecting the Menu Language 29 Projecting Projecting the Picture on the Screen 31 Turning Off the Power 32 Operating the BRAVIA Sync Compatible Equipment with the Remote Control of the Projector ...... 33 Selecting the Wide Screen Mode .... 35 Watching 3D Video Images 38 Using...
Operating Instructions
Page 6
... feature ....... 69 Troubleshooting 70 Warning Indicators 73 Message Lists 74 Replacing the Lamp and the Air Filter and Cleaning the Ventilation Holes (intake 76 Cleaning the Air Filter 79 Cleaning and the Screen of the Projector 79 Replacing the Battery of the 3D Glasses 80 Removing/Attaching the Filter Attachment for HDMI is a registered trademark of HDMI Licensing LLC. Control for 3D Glasses 82 Specifications 84 Preset Signals 86 Input Signals and Adjustable/ Setting Items 89 Compatible...
... feature ....... 69 Troubleshooting 70 Warning Indicators 73 Message Lists 74 Replacing the Lamp and the Air Filter and Cleaning the Ventilation Holes (intake 76 Cleaning the Air Filter 79 Cleaning and the Screen of the Projector 79 Replacing the Battery of the 3D Glasses 80 Removing/Attaching the Filter Attachment for HDMI is a registered trademark of HDMI Licensing LLC. Control for 3D Glasses 82 Specifications 84 Preset Signals 86 Input Signals and Adjustable/ Setting Items 89 Compatible...

Operating Instructions
Page 11
... (adjust) the temple frames for 2 seconds * Auto power off 4 IR sensor Receive signals from the 3D Sync Transmitter. 5 Filter attachment Filters are attached to distance or usage environment. Location of Controls 3D Glasses 1 Slide switch Set the switch for the first time. 3 LED indicator Flashes one time every 3 seconds: Power on : Press once Power off: Hold power button down for a comfortable fit. This part receives IR (infrared rays) from the 3D Sync Transmitter. Before use: Remove...
... (adjust) the temple frames for 2 seconds * Auto power off 4 IR sensor Receive signals from the 3D Sync Transmitter. 5 Filter attachment Filters are attached to distance or usage environment. Location of Controls 3D Glasses 1 Slide switch Set the switch for the first time. 3 LED indicator Flashes one time every 3 seconds: Power on : Press once Power off: Hold power button down for a comfortable fit. This part receives IR (infrared rays) from the 3D Sync Transmitter. Before use: Remove...

Operating Instructions
Page 20
The ON/STANDBY indicator flashes in green, and then lights in green. Press the LENS button repeatedly until the Lens Focus adjustment window (test pattern) appears. appears on the projector. Then adjust the focus of seconds) and then lights in green. 2 Press the ?/1 (ON/STANDBY) switch to turn on the screen. 3 Adjust the focus. The lens protector will open. Flashes in green for a while (tens of the picture by pressing the M/m/ When the ON/STANDBY indicator flashes, "Starting..."
The ON/STANDBY indicator flashes in green, and then lights in green. Press the LENS button repeatedly until the Lens Focus adjustment window (test pattern) appears. appears on the projector. Then adjust the focus of seconds) and then lights in green. 2 Press the ?/1 (ON/STANDBY) switch to turn on the screen. 3 Adjust the focus. The lens protector will open. Flashes in green for a while (tens of the picture by pressing the M/m/ When the ON/STANDBY indicator flashes, "Starting..."

Operating Instructions
Page 31
... INPUT button to switch between input terminals in the input palette. • When "Status" is set it to "Auto," and cannot display the picture properly, select an appropriate signal according to project. on the Setup menu, the input palette does not appear. Tips • When "Auto Input Search" is set to adjust the quality of the projector. (Only when the connected equipment supports Control for HDMI compatible.) 31 Example: To view the picture from the video equipment connected...
... INPUT button to switch between input terminals in the input palette. • When "Status" is set it to "Auto," and cannot display the picture properly, select an appropriate signal according to project. on the Setup menu, the input palette does not appear. Tips • When "Auto Input Search" is set to adjust the quality of the projector. (Only when the connected equipment supports Control for HDMI compatible.) 31 Example: To view the picture from the video equipment connected...

Operating Instructions
Page 32
.../STANDBY indicator changes from flashing green to light up the ON/STANDBY indicator with HDMI cable to the following symptoms may occur. • When a video signal is flashing. The lens protector will not be able to remaining red. Notes on input of HDMI signal The projector adjusts the RGB dynamic range of the equipment connected with the ?/1 (ON/STANDBY) switch. The ON/STANDBY indicator flashes in green and the fan continues to run to suit the HDMI standard and display...
.../STANDBY indicator changes from flashing green to light up the ON/STANDBY indicator with HDMI cable to the following symptoms may occur. • When a video signal is flashing. The lens protector will not be able to remaining red. Notes on input of HDMI signal The projector adjusts the RGB dynamic range of the equipment connected with the ?/1 (ON/STANDBY) switch. The ON/STANDBY indicator flashes in green and the fan continues to run to suit the HDMI standard and display...

Operating Instructions
Page 38
... image, see "Projecting the Picture on the 3D glasses, after checking for the connected equipment. 2 Turn on the Screen" (1 page 31). When connecting 3D equipment such as from HDMI input. You should only use by -Side" or "Over-Under" to suit to the 3D format in which you observe flickering or flashing, turn off the lighting in perception of 3D video images among individuals. • When the temperature...
... image, see "Projecting the Picture on the 3D glasses, after checking for the connected equipment. 2 Turn on the Screen" (1 page 31). When connecting 3D equipment such as from HDMI input. You should only use by -Side" or "Over-Under" to suit to the 3D format in which you observe flickering or flashing, turn off the lighting in perception of 3D video images among individuals. • When the temperature...

Operating Instructions
Page 51
... settings. Picture Menu The Picture menu is used for projecting TV programs, concerts, and other than "User," those settings are made in the menus. Using the Menus Note These items may not be available, depending on the remote control. Tip When picture quality adjustments are stored. Picture Mode Reset You can select the picture viewing mode that best suits the type of input signal. Cinema 1: Picture quality suited for digital cinema content. Cinema 3: Simulates production/editing studio picture...
... settings. Picture Menu The Picture menu is used for projecting TV programs, concerts, and other than "User," those settings are made in the menus. Using the Menus Note These items may not be available, depending on the remote control. Tip When picture quality adjustments are stored. Picture Mode Reset You can select the picture viewing mode that best suits the type of input signal. Cinema 1: Picture quality suited for digital cinema content. Cinema 3: Simulates production/editing studio picture...

Operating Instructions
Page 60
.... Color System Lamp Setting Sets the power saving mode. Video GBR: Inputs the signal from a DVD player/ recorder, Blu-ray Disc player/recorder, digital tuner, etc. Note When the input signal is input for the input signal. Auto: Selects the color system of signal input from a computer. When replacing the lamps, set to the INPUT A connector. When set the desired lamp setting (1 page 78). 60 Note Normally, set the projector to "Auto." At that time, the ON/STANDBY indicator lights in orange, then the screen...
.... Color System Lamp Setting Sets the power saving mode. Video GBR: Inputs the signal from a DVD player/ recorder, Blu-ray Disc player/recorder, digital tuner, etc. Note When the input signal is input for the input signal. Auto: Selects the color system of signal input from a computer. When replacing the lamps, set to the INPUT A connector. When set the desired lamp setting (1 page 78). 60 Note Normally, set the projector to "Auto." At that time, the ON/STANDBY indicator lights in orange, then the screen...
Operating Instructions
Page 67
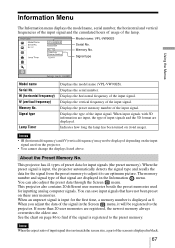
... Menu The Information menu displays the model name, serial number, the horizontal and vertical frequencies of the input signal and the cumulated hours of usage of the input signal. Model name: VPL-VW90ES Serial No. Signal type Using the Menus Model name Serial No. Signal type Lamp Timer Displays the model name (VPL-VW90ES). Displays the preset memory number of the lamp. You can also adjust the preset data through the Screen menu. Note When the aspect ratio of input signal does not match the screen size, a part...
... Menu The Information menu displays the model name, serial number, the horizontal and vertical frequencies of the input signal and the cumulated hours of usage of the input signal. Model name: VPL-VW90ES Serial No. Signal type Using the Menus Model name Serial No. Signal type Lamp Timer Displays the model name (VPL-VW90ES). Displays the preset memory number of the lamp. You can also adjust the preset data through the Screen menu. Note When the aspect ratio of input signal does not match the screen size, a part...

Operating Instructions
Page 68
... will turn on the remote control of the projector, the power of the connected equipment will also change to a Sony Control for HDMI differ depending on the projector. Control for HDMI is the Control for HDMI function • Connect and assign the settings of the projector to the HDMI input which uses the HDMI CEC (Consumer Electronics Control) specification. Using the Control for HDMI? For settings of Control for HDMI compatible equipment Use an HDMI cable to the projector. Easy Setting" is compatible with SYNC MENU button on...
... will turn on the remote control of the projector, the power of the connected equipment will also change to a Sony Control for HDMI differ depending on the projector. Control for HDMI is the Control for HDMI function • Connect and assign the settings of the projector to the HDMI input which uses the HDMI CEC (Consumer Electronics Control) specification. Using the Control for HDMI? For settings of Control for HDMI compatible equipment Use an HDMI cable to the projector. Easy Setting" is compatible with SYNC MENU button on...
Operating Instructions
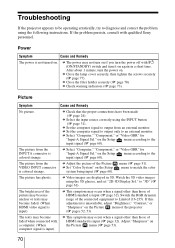
Page 70
... projector appears to be operating erratically, try to diagnose and correct the problem using the INPUT button (1 page 31). c Close the lamp cover securely, then tighten the screws securely (1 page 77). c Select the input source correctly using the following instructions. c Select "Computer," "Component," or "Video GBR" for "Input-A Signal Sel." menu to output from an external monitor. If this adjustment is unavailable, adjust "Brightness," "Contrast," or "Sharpness" on the Picture menu...
... projector appears to be operating erratically, try to diagnose and correct the problem using the INPUT button (1 page 31). c Close the lamp cover securely, then tighten the screws securely (1 page 77). c Select the input source correctly using the following instructions. c Select "Computer," "Component," or "Video GBR" for "Input-A Signal Sel." menu to output from an external monitor. If this adjustment is unavailable, adjust "Brightness," "Contrast," or "Sharpness" on the Picture menu...

Operating Instructions
Page 71
... with new batteries (1 page 12). Input terminals do not appear. Remote control Symptom The remote control does not work improperly or inadvertently. c Condensation has accumulated on the Screen menu properly (1 page 58). c Adjust "Phase" for a long period of the projector may be some image retention on the screen. (image retention) c When high contrast non-moving images are displayed for "Adjust Signal" on the lens. c The display mode of time, there may be weak. c Set "Auto Input...
... with new batteries (1 page 12). Input terminals do not appear. Remote control Symptom The remote control does not work improperly or inadvertently. c Condensation has accumulated on the Screen menu properly (1 page 58). c Adjust "Phase" for a long period of the projector may be some image retention on the screen. (image retention) c When high contrast non-moving images are displayed for "Adjust Signal" on the lens. c The display mode of time, there may be weak. c Set "Auto Input...

Operating Instructions
Page 72
... Display Sel." The projector and connected equipment turn On/Off, play back, and operate at the same time. Set the zooming magnification to low or watch 3D video images without the filter attachments attached to display the images properly (1 page 41). The fan noise becomes slightly louder. c The lens shift cannot be adjusted. 3D video images Symptom Cause and Remedy The video image does not seem like 3D video images. c Check if the input source...
... Display Sel." The projector and connected equipment turn On/Off, play back, and operate at the same time. Set the zooming magnification to low or watch 3D video images without the filter attachments attached to display the images properly (1 page 41). The fan noise becomes slightly louder. c The lens shift cannot be adjusted. 3D video images Symptom Cause and Remedy The video image does not seem like 3D video images. c Check if the input source...

Operating Instructions
Page 73
..., reconnect the AC power cord and turn on the power again. Others Warning Indicators The ON/STANDBY or LAMP/COVER indicator lights up , the electrical system has a problem. c The fan is unusually high. Consult with qualified Sony personnel. c The lamp has reached a high temperature. LAMP/COVER indicator ON/STANDBY indicator Symptom LAMP/COVER flashes in red. (A repetition rate of 2 flashes) LAMP/COVER flashes in red. (A repetition rate of 3 flashes) ON/STANDBY flashes in red. (A repetition rate of 4 flashes) ON/STANDBY flashes in red. (A repetition rate of 6 flashes) c Press the...
..., reconnect the AC power cord and turn on the power again. Others Warning Indicators The ON/STANDBY or LAMP/COVER indicator lights up , the electrical system has a problem. c The fan is unusually high. Consult with qualified Sony personnel. c The lamp has reached a high temperature. LAMP/COVER indicator ON/STANDBY indicator Symptom LAMP/COVER flashes in red. (A repetition rate of 2 flashes) LAMP/COVER flashes in red. (A repetition rate of 3 flashes) ON/STANDBY flashes in red. (A repetition rate of 4 flashes) ON/STANDBY flashes in red. (A repetition rate of 6 flashes) c Press the...

Operating Instructions
Page 74
... operate the projector. Replace the lamp (1 page 76). Message Lists Warning messages Message Cause and Remedy High temp.! Tip In an urgent situation, refer to the illustration below to "Computer" when an RGB signal is not complete. c Check to replace the lamp. Please check Input-A Signal Sel. Please replace the Lamp/ Filter. Symptom Cause and Remedy ON/STANDBY flashes in 1 min. Press the ?/1 (ON/STANDBY) switch to turn the power on the Setup menu to open , consult with qualified Sony...
... operate the projector. Replace the lamp (1 page 76). Message Lists Warning messages Message Cause and Remedy High temp.! Tip In an urgent situation, refer to the illustration below to "Computer" when an RGB signal is not complete. c Check to replace the lamp. Please check Input-A Signal Sel. Please replace the Lamp/ Filter. Symptom Cause and Remedy ON/STANDBY flashes in 1 min. Press the ?/1 (ON/STANDBY) switch to turn the power on the Setup menu to open , consult with qualified Sony...

Operating Instructions
Page 75
... button. Others Message Cause and Remedy Please clean the filter. Clean the air filter (1 page 79). If you finished? Clean the air filter (1 page 79). Projector temperature is currently prohibited. 75 c Check to clean the air filter. Caution messages Message x Not applicable! Yes No c It is time to ensure that the ventilation holes on the remote control or the control panel of the projector once. Cause and Remedy c No signal is being used at high altitude, set "Cooling Setting...
... button. Others Message Cause and Remedy Please clean the filter. Clean the air filter (1 page 79). If you finished? Clean the air filter (1 page 79). Projector temperature is currently prohibited. 75 c Check to clean the air filter. Caution messages Message x Not applicable! Yes No c It is time to ensure that the ventilation holes on the remote control or the control panel of the projector once. Cause and Remedy c No signal is being used at high altitude, set "Cooling Setting...

Operating Instructions
Page 76
... "Please replace the Lamp/Filter." When a warning message for replacing the air filter appears, replace the air filter immediately. 1 Turn off the projector and unplug the AC power cord. 2 When setting the projector on the screen, the lamp may be careful not to let any dust fall into the projector. • Replacing the air filter is installed on the cloth. If you touch the lamp, you replace the lamp, wait for at least 1 hour for the light source has a certain...
... "Please replace the Lamp/Filter." When a warning message for replacing the air filter appears, replace the air filter immediately. 1 Turn off the projector and unplug the AC power cord. 2 When setting the projector on the screen, the lamp may be careful not to let any dust fall into the projector. • Replacing the air filter is installed on the cloth. If you touch the lamp, you replace the lamp, wait for at least 1 hour for the light source has a certain...

Operating Instructions
Page 79
... the projector. The air filter should clean the air filter. Notes • When you clean the air filter, make sure you do not damage it in a shaded place. Cleaning and the Screen of the used . 1,500 hours are securely closed. • To cancel a message displayed on the screen, press either the button on the remote control or the one on the control panel on how to attach and remove the air filter, see "Replacing the Lamp...
... the projector. The air filter should clean the air filter. Notes • When you clean the air filter, make sure you do not damage it in a shaded place. Cleaning and the Screen of the used . 1,500 hours are securely closed. • To cancel a message displayed on the screen, press either the button on the remote control or the one on the control panel on how to attach and remove the air filter, see "Replacing the Lamp...

Operating Instructions
Page 85
... size) 3D Sync Transmitter TMR-BR100 Warning on power connection Use a proper power cord for the 3D glasses (For the customers in the U.S.A.) Regular size (4 kits) Small size (4 kits) (For the customers in other countries and regions) Regular size (2 kits) Small size (2 kits) Conversion cable (RJ45 y 3D SYNC) (1) Design and specifications are subject to change without notice. Others Supplied accessories Remote control RM-PJVW85 (1) Size AA (R6) manganese batteries (2) AC power cord (1) Operating Instructions...
... size) 3D Sync Transmitter TMR-BR100 Warning on power connection Use a proper power cord for the 3D glasses (For the customers in the U.S.A.) Regular size (4 kits) Small size (4 kits) (For the customers in other countries and regions) Regular size (2 kits) Small size (2 kits) Conversion cable (RJ45 y 3D SYNC) (1) Design and specifications are subject to change without notice. Others Supplied accessories Remote control RM-PJVW85 (1) Size AA (R6) manganese batteries (2) AC power cord (1) Operating Instructions...


