User Guide
Page 3
... External Speakers ...76 Connecting an External Display ...77 Selecting Display Modes...80 Using the Multiple Monitors Function ...81 Connecting an External Microphone ...83 Connecting a Universal Serial Bus (USB) Device...84 Connecting a Printer ...87 Connecting an i.LINK Device ...88 Customizing Your VAIO Computer ...90 Setting the Password ...91 Using Fingerprint Authentication ...98 Setting Up Your Computer with the VAIO Control Center 106 Using the Power Saving Modes ...107 Managing Power with the VAIO Power Management 112 Upgrading Your VAIO Computer...114 Adding and Removing Memory...
... External Speakers ...76 Connecting an External Display ...77 Selecting Display Modes...80 Using the Multiple Monitors Function ...81 Connecting an External Microphone ...83 Connecting a Universal Serial Bus (USB) Device...84 Connecting a Printer ...87 Connecting an i.LINK Device ...88 Customizing Your VAIO Computer ...90 Setting the Password ...91 Using Fingerprint Authentication ...98 Setting Up Your Computer with the VAIO Control Center 106 Using the Power Saving Modes ...107 Managing Power with the VAIO Power Management 112 Upgrading Your VAIO Computer...114 Adding and Removing Memory...
User Guide
Page 8
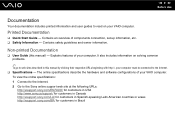
... on your VAIO computer. To view the online specifications: 1 Connect to the Internet. 2 Go to the Internet. ❑ Specifications - Contains safety guidelines and owner information. The online specifications describe the hardware and software configurations of components connection, set-up information, etc. ❑ Safety Information - Printed Documentation ❑ Quick Start Guide - n8 N Before Use Documentation Your documentation includes printed information and user guides to read on solving common problems. ✍ To...
... on your VAIO computer. To view the online specifications: 1 Connect to the Internet. 2 Go to the Internet. ❑ Specifications - Contains safety guidelines and owner information. The online specifications describe the hardware and software configurations of components connection, set-up information, etc. ❑ Safety Information - Printed Documentation ❑ Quick Start Guide - n8 N Before Use Documentation Your documentation includes printed information and user guides to read on solving common problems. ✍ To...

User Guide
Page 9
n9 N Before Use ❑ VAIO Recovery Center User Guide - To access this on-screen guide: 1 Click Start and Help and Support. 2 Click Use my VAIO. 3 Click VAIO Recovery Center User Guide. Provides information about restoring individual software programs, hardware drivers, and drive partition(s) or your entire hard disk drive to the original factory settings.
n9 N Before Use ❑ VAIO Recovery Center User Guide - To access this on-screen guide: 1 Click Start and Help and Support. 2 Click Use my VAIO. 3 Click VAIO Recovery Center User Guide. Provides information about restoring individual software programs, hardware drivers, and drive partition(s) or your entire hard disk drive to the original factory settings.
User Guide
Page 20
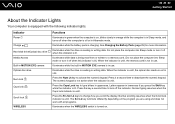
... disc media is unlit. The Scr Lk key functions differently depending on the program you are using and does not work with the following indicator lights: Indicator Power 1 Charge Hard disk drive/Optical disc drive Media Access Built-in MOTION EYE camera Optical disc drive Num lock Caps lock Scroll lock WIRELESS Functions Illuminates in green when the computer is on . n 20 N Getting Started About the Indicator Lights Your computer is equipped with all programs. Illuminates when the WIRELESS switch is turned on , blinks...
... disc media is unlit. The Scr Lk key functions differently depending on the program you are using and does not work with the following indicator lights: Indicator Power 1 Charge Hard disk drive/Optical disc drive Media Access Built-in MOTION EYE camera Optical disc drive Num lock Caps lock Scroll lock WIRELESS Functions Illuminates in green when the computer is on . n 20 N Getting Started About the Indicator Lights Your computer is equipped with all programs. Illuminates when the WIRELESS switch is turned on , blinks...

User Guide
Page 45
Check your specifications for the type of media your model. n 45 N Using Your VAIO Computer Reading and Writing Optical Discs Your computer plays and records CDs, DVDs, and Blu-ray Disc™ media, depending on your optical disc drive supports. Use the table below to see which types of optical disc drive installed on the model you purchased.
Check your specifications for the type of media your model. n 45 N Using Your VAIO Computer Reading and Writing Optical Discs Your computer plays and records CDs, DVDs, and Blu-ray Disc™ media, depending on your optical disc drive supports. Use the table below to see which types of optical disc drive installed on the model you purchased.

User Guide
Page 49
... able to play audio CDs created with the CD-R or CD-RW media. ❑ Some DVD players and computer optical disc drives may not be able to play DVDs created with the DVD+R DL, DVD-R DL, DVD+R, DVD+RW, DVD-R, DVD-RW, or DVD-RAM media. ❑ You may not be connected to the Internet, see Using the Internet (page 64). ! The Blu-ray Disc playback function is playing a disc. ❑ Region code indicators are labeled...
... able to play audio CDs created with the CD-R or CD-RW media. ❑ Some DVD players and computer optical disc drives may not be able to play DVDs created with the DVD+R DL, DVD-R DL, DVD+R, DVD+RW, DVD-R, DVD-RW, or DVD-RAM media. ❑ You may not be connected to the Internet, see Using the Internet (page 64). ! The Blu-ray Disc playback function is playing a disc. ❑ Region code indicators are labeled...

User Guide
Page 52
... supported disc media. Copying Files to the computer. 2 Close all running software applications. 3 Insert a recordable Blu-ray Disc media into the optical disc drive. 3 If nothing appears on selected models only. See the online specifications to find out the type of your optical disc drive, and then Reading and Writing Optical Discs (page 45) to find out about the supported disc media. For instructions on how to use the software...
... supported disc media. Copying Files to the computer. 2 Close all running software applications. 3 Insert a recordable Blu-ray Disc media into the optical disc drive. 3 If nothing appears on selected models only. See the online specifications to find out the type of your optical disc drive, and then Reading and Writing Optical Discs (page 45) to find out about the supported disc media. For instructions on how to use the software...
User Guide
Page 55
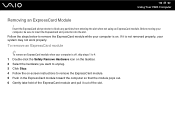
... hardware you want to unplug. 3 Click Stop. 4 Follow the on . If it out of the ExpressCard module and pull it is not removed properly, your computer, be sure to block any particles from entering the slot when not using an ExpressCard module. n 55 N Using Your VAIO Computer Removing an ExpressCard Module ! Before moving your system may not work properly. Insert the ExpressCard slot...
... hardware you want to unplug. 3 Click Stop. 4 Follow the on . If it out of the ExpressCard module and pull it is not removed properly, your computer, be sure to block any particles from entering the slot when not using an ExpressCard module. n 55 N Using Your VAIO Computer Removing an ExpressCard Module ! Before moving your system may not work properly. Insert the ExpressCard slot...
User Guide
Page 64
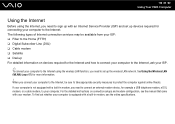
... manual that came with a built-in modem, you need to set up the wireless LAN network. For the detailed instructions on devices required for the Internet and how to connect your computer to the Internet, ask your ISP. ✍ To connect your computer to the Internet. n 64 N Using Your VAIO Computer Using the Internet Before using the wireless LAN function, you need to connect an external modem device, for example a USB telephone modem, a DSL modem, or a cable...
... manual that came with a built-in modem, you need to set up the wireless LAN network. For the detailed instructions on devices required for the Internet and how to connect your computer to the Internet, ask your ISP. ✍ To connect your computer to the Internet. n 64 N Using Your VAIO Computer Using the Internet Before using the wireless LAN function, you need to connect an external modem device, for example a USB telephone modem, a DSL modem, or a cable...
User Guide
Page 66
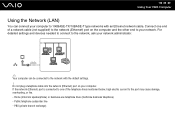
...-T type networks with the default settings. ! PBX (private branch exchange) For detailed settings and devices needed to connect to the network, ask your network administrator. ✍ Your computer can connect your network. Home (intercom speakerphone) or business-use telephone lines (multi-line business telephone) - Connect one of a network cable (not supplied) to the network (Ethernet) port on your computer. n 66 N Using Your VAIO Computer Using the Network (LAN) You can be connected to the network...
...-T type networks with the default settings. ! PBX (private branch exchange) For detailed settings and devices needed to connect to the network, ask your network administrator. ✍ Your computer can connect your network. Home (intercom speakerphone) or business-use telephone lines (multi-line business telephone) - Connect one of a network cable (not supplied) to the network (Ethernet) port on your computer. n 66 N Using Your VAIO Computer Using the Network (LAN) You can be connected to the network...

User Guide
Page 91
... need assistance to reset it safe and private from unauthorized access. There are two types of the power-on password is provided for changing some of the BIOS setup options, as well as to start your computer from other people. The user password is provided to protect your computer. Be sure not to allow for the standard users to forget the password. n 91 N Customizing Your VAIO Computer Setting...
... need assistance to reset it safe and private from unauthorized access. There are two types of the power-on password is provided for changing some of the BIOS setup options, as well as to start your computer from other people. The user password is provided to protect your computer. Be sure not to allow for the standard users to forget the password. n 91 N Customizing Your VAIO Computer Setting...

User Guide
Page 95
... the VAIO logo appears. 3 Enter the user password and press the Enter key. 4 Press the < or , key to select Security to select Exit, select Exit Setup, and then press the Enter key. The BIOS setup screen appears. To remove the password, leave the Enter New Password and Confirm New Password fields blank and press the Enter key. 6 Press the < or , key to display the Security tab, select Set User Password, and then press the Enter key. 5 On the password entry screen, enter...
... the VAIO logo appears. 3 Enter the user password and press the Enter key. 4 Press the < or , key to select Security to select Exit, select Exit Setup, and then press the Enter key. The BIOS setup screen appears. To remove the password, leave the Enter New Password and Confirm New Password fields blank and press the Enter key. 6 Press the < or , key to display the Security tab, select Set User Password, and then press the Enter key. 5 On the password entry screen, enter...
User Guide
Page 139
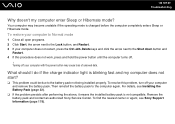
... this problem, turn off . ! Remove the battery pack and contact an authorized Sony Service Center. What should I do if the charge indicator light is not compatible. n 139 N Troubleshooting Why doesn't my computer enter Sleep or Hibernate mode? To resolve this procedure does not work, press and hold the power button until the computer turns off your computer with the power button may become unstable if the operating mode is changed before the...
... this problem, turn off . ! Remove the battery pack and contact an authorized Sony Service Center. What should I do if the charge indicator light is not compatible. n 139 N Troubleshooting Why doesn't my computer enter Sleep or Hibernate mode? To resolve this procedure does not work, press and hold the power button until the computer turns off your computer with the power button may become unstable if the operating mode is changed before the...

User Guide
Page 141
... or F6 key to change the boot device order. 6 Press the < or , key to select Exit, select Exit Setup, and then press the Enter key. At the confirmation prompt, press the Enter key. The BIOS setup screen appears. n 141 N Troubleshooting What should I do if my game software does not work or it . How can use one of the game if there are any patches or updates to download. ❑ Make sure...
... or F6 key to change the boot device order. 6 Press the < or , key to select Exit, select Exit Setup, and then press the Enter key. At the confirmation prompt, press the Enter key. The BIOS setup screen appears. n 141 N Troubleshooting What should I do if my game software does not work or it . How can use one of the game if there are any patches or updates to download. ❑ Make sure...

User Guide
Page 147
...? The video input may be suspended for a few seconds if: ❑ a shortcut key with the Fn key is used. ❑ the CPU load increases. This is running on the battery? What should I do the images captured by the built-in MOTION EYE camera. ❑ If your computer automatically enters Sleep or Hibernate mode, change the setting, see Using the Power Saving Modes (page 107). Connect your...
...? The video input may be suspended for a few seconds if: ❑ a shortcut key with the Fn key is used. ❑ the CPU load increases. This is running on the battery? What should I do the images captured by the built-in MOTION EYE camera. ❑ If your computer automatically enters Sleep or Hibernate mode, change the setting, see Using the Power Saving Modes (page 107). Connect your...

User Guide
Page 158
... optical disc drive. 3 Check the disc for instructions. ❑ If you need to clean the disc, see Handling Discs (page 128) for dirt or damage. Follow these steps: 1 Click Start and Control Panel. 2 Click System and Maintenance. 3 Click System. If you are using external speakers, check the volume settings on the speakers and the connections between the speakers and your computer. ❑ Make sure the correct driver software is...
... optical disc drive. 3 Check the disc for instructions. ❑ If you need to clean the disc, see Handling Discs (page 128) for dirt or damage. Follow these steps: 1 Click Start and Control Panel. 2 Click System and Maintenance. 3 Click System. If you are using external speakers, check the volume settings on the speakers and the connections between the speakers and your computer. ❑ Make sure the correct driver software is...
User Guide
Page 160
... DVD recordable media. ❑ Check which DVD recordable format is compatible with your optical disc drive, and then Reading and Writing Optical Discs (page 45) to the Internet, see Using the Internet (page 64). n 160 N Troubleshooting What should I do not work. What should I do if I cannot write data to CD media? ❑ Make sure you neither launch any software application nor allow any to selected models...
... DVD recordable media. ❑ Check which DVD recordable format is compatible with your optical disc drive, and then Reading and Writing Optical Discs (page 45) to the Internet, see Using the Internet (page 64). n 160 N Troubleshooting What should I do not work. What should I do if I cannot write data to CD media? ❑ Make sure you neither launch any software application nor allow any to selected models...

User Guide
Page 161
You cannot add or erase data to selected models only. The DVD±RW/±R DL/RAM drive does not support it. ❑ BD-R Disc media are not rewritable. This Q & A entry applies to or from the BD-R Disc media. See the online specifications to find out the type of your optical disc drive, and then Reading and Writing Optical Discs (page 45) to Blu-ray Disc media? ! n 161 N Troubleshooting Why can't I write data to find out about the supported disc media. ❑ Make sure your optical disc drive supports the Blu-ray Disc writing function.
You cannot add or erase data to selected models only. The DVD±RW/±R DL/RAM drive does not support it. ❑ BD-R Disc media are not rewritable. This Q & A entry applies to or from the BD-R Disc media. See the online specifications to find out the type of your optical disc drive, and then Reading and Writing Optical Discs (page 45) to Blu-ray Disc media? ! n 161 N Troubleshooting Why can't I write data to find out about the supported disc media. ❑ Make sure your optical disc drive supports the Blu-ray Disc writing function.

User Guide
Page 166
... enable printing. Follow these steps: 1 Click Start and Control Panel. 2 Click Printer under Hardware and Sound. 3 Right-click the printer icon and select Properties. 4 Click the Ports tab. 5 Click to install the printer driver software before you use your computer may need to cancel the Enable bidirectional support check box. 6 Click OK. This disables the bidirectional communication functions of the printer, such as data transfer, status monitoring...
... enable printing. Follow these steps: 1 Click Start and Control Panel. 2 Click Printer under Hardware and Sound. 3 Right-click the printer icon and select Properties. 4 Click the Ports tab. 5 Click to install the printer driver software before you use your computer may need to cancel the Enable bidirectional support check box. 6 Click OK. This disables the bidirectional communication functions of the printer, such as data transfer, status monitoring...

User Guide
Page 171
... power button may have disabled the touch pad before connecting a mouse to restart your computer. Turning off . ! See Using the Touch Pad (page 34). ❑ Make sure that a mouse is not connected to your computer. ❑ If the pointer does not move while a software application is running, press the Alt+F4 keys to close the application window. ❑ If the Alt+F4 keys do if the touch pad does not work...
... power button may have disabled the touch pad before connecting a mouse to restart your computer. Turning off . ! See Using the Touch Pad (page 34). ❑ Make sure that a mouse is not connected to your computer. ❑ If the pointer does not move while a software application is running, press the Alt+F4 keys to close the application window. ❑ If the Alt+F4 keys do if the touch pad does not work...


