User Guide
Page 2
... Lights 16 Setting Up Your Computer 17 Shutting Down Your Computer Safely 20 Using the Power Saving Mode 21 Updating Your Computer 23 Using Your VAIO Computer 24 Using the Keyboard 25 Using the Built-in Camera 27 Using the Optical Disc Drive 28 Using "Memory Stick 35... ..........56 Connecting a USB Device 57 Connecting an i.LINK Device 59 Customizing Your VAIO Computer 61 Setting the Password 62 Using the VAIO Control Center 67 Upgrading Your VAIO Computer 68 Adding and Removing Memory 69 Precautions 75 Safety Information 76 Care and Maintenance Information 77 Handling Your...
... Lights 16 Setting Up Your Computer 17 Shutting Down Your Computer Safely 20 Using the Power Saving Mode 21 Updating Your Computer 23 Using Your VAIO Computer 24 Using the Keyboard 25 Using the Built-in Camera 27 Using the Optical Disc Drive 28 Using "Memory Stick 35... ..........56 Connecting a USB Device 57 Connecting an i.LINK Device 59 Customizing Your VAIO Computer 61 Setting the Password 62 Using the VAIO Control Center 67 Upgrading Your VAIO Computer 68 Adding and Removing Memory 69 Precautions 75 Safety Information 76 Care and Maintenance Information 77 Handling Your...
User Guide
Page 29
Using Your VAIO Computer > Using the Optical Disc Drive n 29 N ! Be sure to bring the computer back into Normal mode before removing the disc. Do not remove the optical disc while your computer is in gently. ! Be sure to hold the back of the drive tray when placing/removing a disc onto/from the drive tray. 4 Close the drive tray by pushing it in Sleep mode. Do not exert pressure on the drive tray.
Using Your VAIO Computer > Using the Optical Disc Drive n 29 N ! Be sure to bring the computer back into Normal mode before removing the disc. Do not remove the optical disc while your computer is in gently. ! Be sure to hold the back of the drive tray when placing/removing a disc onto/from the drive tray. 4 Close the drive tray by pushing it in Sleep mode. Do not exert pressure on the drive tray.

User Guide
Page 30
BD- Use non-cartridge discs or discs with a removable cartridge. *2 Writing data to single-sided DVD-RAM ...-ray Disc P P P P PR*5 P P PR PR PR PR PR P P Combo *1 The DVD±RW/RAM disc drive on your computer does not support BD-RE Disc media in Version 1.0 format and Blu-ray Disc media with a cartridge. *4 Supports writing data to...disc is not supported. Using Your VAIO Computer > Using the Optical Disc Drive n 30 N Supported Disc Media Your computer plays and records CDs, DVDs, and Blu-ray Disc™ media, depending on your computer does not support the DVD-RAM ...
BD- Use non-cartridge discs or discs with a removable cartridge. *2 Writing data to single-sided DVD-RAM ...-ray Disc P P P P PR*5 P P PR PR PR PR PR P P Combo *1 The DVD±RW/RAM disc drive on your computer does not support BD-RE Disc media in Version 1.0 format and Blu-ray Disc media with a cartridge. *4 Supports writing data to...disc is not supported. Using Your VAIO Computer > Using the Optical Disc Drive n 30 N Supported Disc Media Your computer plays and records CDs, DVDs, and Blu-ray Disc™ media, depending on your computer does not support the DVD-RAM ...

User Guide
Page 85
... To avoid damaging your solid state drive ❑ Do not turn off the power or restart your computer while reading or writing data to the solid state drive. ❑ Do not remove the solid state drive from magnets. ❑ Do not place your computer in a location subject to find out...built-in storage device (hard disk drive or solid state drive) has a high storage density and reads or writes data in temperature. ❑ Do not remove the hard disk drive from your computer. To avoid damaging your hard disk drive ❑ Do not subject your computer to extreme changes in a short time...
... To avoid damaging your solid state drive ❑ Do not turn off the power or restart your computer while reading or writing data to the solid state drive. ❑ Do not remove the solid state drive from magnets. ❑ Do not place your computer in a location subject to find out...built-in storage device (hard disk drive or solid state drive) has a high storage density and reads or writes data in temperature. ❑ Do not remove the hard disk drive from your computer. To avoid damaging your hard disk drive ❑ Do not subject your computer to extreme changes in a short time...

User Guide
Page 102
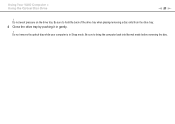
...button or the Fn+E keys. ❑ If the drive eject button or the Fn+E keys do if the drive tray does not open? ❑ Make sure your computer is trying to read may cause loss of unsaved data. 2 Remove the disc from the optical disc drive. 3 Check the disc for instructions. If you ...need to restart the computer. ! The disc that your computer is on the optical disc...
...button or the Fn+E keys. ❑ If the drive eject button or the Fn+E keys do if the drive tray does not open? ❑ Make sure your computer is trying to read may cause loss of unsaved data. 2 Remove the disc from the optical disc drive. 3 Check the disc for instructions. If you ...need to restart the computer. ! The disc that your computer is on the optical disc...
User Guide
Page 103
...to the manufacturer's instructions. ❑ If a disc is inserted into the optical disc drive with the Ctrl+Alt+Delete keys may cause loss of unsaved data. 2 Remove the disc from the optical disc drive. 3 Check the disc for instructions. ❑ If you are using external speakers, check... the volume settings on the speakers and the connections between the speakers and your computer will stop responding. Press the button ...
...to the manufacturer's instructions. ❑ If a disc is inserted into the optical disc drive with the Ctrl+Alt+Delete keys may cause loss of unsaved data. 2 Remove the disc from the optical disc drive. 3 Check the disc for instructions. ❑ If you are using external speakers, check... the volume settings on the speakers and the connections between the speakers and your computer will stop responding. Press the button ...

User Guide
Page 113
... Disks n 113 N Floppy Disks Why doesn't the Safely Remove Hardware icon appear on the floppy disk drive turns off. 3 Push the eject button to remove the disk, and unplug the USB floppy disk drive from your computer. 4 Reconnect the floppy disk drive by plugging the USB cable into the USB port. 5 Restart... the computer by clicking Start, the arrow next to...
... Disks n 113 N Floppy Disks Why doesn't the Safely Remove Hardware icon appear on the floppy disk drive turns off. 3 Push the eject button to remove the disk, and unplug the USB floppy disk drive from your computer. 4 Reconnect the floppy disk drive by plugging the USB cable into the USB port. 5 Restart... the computer by clicking Start, the arrow next to...


