Operating Instructions (primary manual)
Page 7
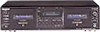
...to ON (TC-WE675 only) and select the same position that the tape was recorded in-B or C. 3) "Dolby", "HX Pro", and the double-D symbol are trademarks of Dolby Laboratories. 3 Set DIRECTION MODE. Fast-forward or rewind M or m when the deck is operating. Adjust the volume on deck A or normal...-speed dubbing (but not during playback on the amplifier. The deck starts playing. Do not press POWER or A while the tape deck is stopped Take out the cassette A after playing back five times. 4 Press...
...to ON (TC-WE675 only) and select the same position that the tape was recorded in-B or C. 3) "Dolby", "HX Pro", and the double-D symbol are trademarks of Dolby Laboratories. 3 Set DIRECTION MODE. Fast-forward or rewind M or m when the deck is operating. Adjust the volume on deck A or normal...-speed dubbing (but not during playback on the amplifier. The deck starts playing. Do not press POWER or A while the tape deck is stopped Take out the cassette A after playing back five times. 4 Press...
Operating Instructions (primary manual)
Page 8
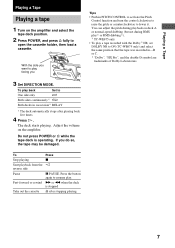
Note Check the direction indicator of the cassette 8 For example, to locate 2 tracks ahead, press twice. RMS Play (TC-WE675 only) By creating a program, you can play back tracks on a tape (Memory Play). When you locate a track on ...) MEMORY repeatedly until "M" appears in any order that you turn off the tape deck. Multi-AMS/Auto Play/Memory Play You can even locate a specific point anywhere on deck A in the display. A particular point on a deck whenever the other deck is playing, recording (except during dubbing), or in the display. 0 3 H FRONT RMS BACK 1 2 3 ...
Note Check the direction indicator of the cassette 8 For example, to locate 2 tracks ahead, press twice. RMS Play (TC-WE675 only) By creating a program, you can play back tracks on a tape (Memory Play). When you locate a track on ...) MEMORY repeatedly until "M" appears in any order that you turn off the tape deck. Multi-AMS/Auto Play/Memory Play You can even locate a specific point anywhere on deck A in the display. A particular point on a deck whenever the other deck is playing, recording (except during dubbing), or in the display. 0 3 H FRONT RMS BACK 1 2 3 ...
Operating Instructions (primary manual)
Page 10
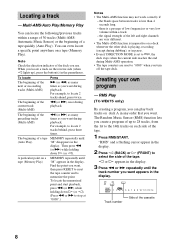
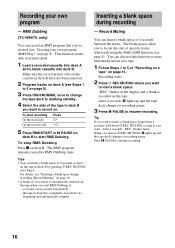
... the program source you want to record. 2 Press POWER, and press A fully to open the cassette holder, then load a cassette. 1) With the side you want to record facing you 1) On the TC-WE675, you start recording. The tape deck automatically adjusts the recording level (see page 20). To record with the Dolby NR (TC-WE675 only) If the FM reception...
... the program source you want to record. 2 Press POWER, and press A fully to open the cassette holder, then load a cassette. 1) With the side you want to record facing you 1) On the TC-WE675, you start recording. The tape deck automatically adjusts the recording level (see page 20). To record with the Dolby NR (TC-WE675 only) If the FM reception...
Operating Instructions (primary manual)
Page 11
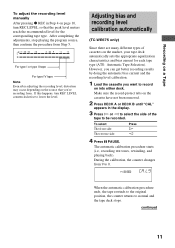
... H or h to select the side of cassettes on into either deck. To select The front side The reverse side Press H h 4 Press X PAUSE. Adjusting bias and recording level calibration automatically (TC-WE675 only) Since there are many different types of the tape to record on the market, your tape deck automatically sets the appropriate equalization characteristics and...
... H or h to select the side of cassettes on into either deck. To select The front side The reverse side Press H h 4 Press X PAUSE. Adjusting bias and recording level calibration automatically (TC-WE675 only) Since there are many different types of the tape to record on the market, your tape deck automatically sets the appropriate equalization characteristics and...
Operating Instructions (primary manual)
Page 12
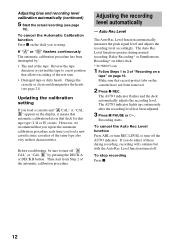
.... Updating the calibration setting If you load a cassette and "A CAL" or "CAL B" appears in the display, it means that record-protect tabs on the deck you do either deck. * TC-WE675 only 1 Follow Steps 1 to turn off "A CAL" or "CAL B" by pressing the DECK A or DECK B button. Adjusting bias and recording level calibration automatically (continued) 5 Start the actual...
.... Updating the calibration setting If you load a cassette and "A CAL" or "CAL B" appears in the display, it means that record-protect tabs on the deck you do either deck. * TC-WE675 only 1 Follow Steps 1 to turn off "A CAL" or "CAL B" by pressing the DECK A or DECK B button. Adjusting bias and recording level calibration automatically (continued) 5 Start the actual...
Operating Instructions (primary manual)
Page 14
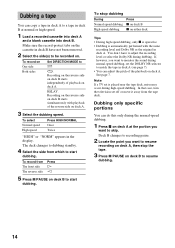
... x on deck B x on deck A. Recording on the reverse side on deck B starts independently of the reverse side on deck A. Recording on the reverse side on deck B starts simultaneously with the same recording level and Dolby NR as the original in deck A. To stop the tape. 3 Press X PAUSE on deck A at normal or high speed. 1 Load a recorded cassette into deck A and a blank cassette into deck B. If...
... x on deck B x on deck A. Recording on the reverse side on deck B starts independently of the reverse side on deck A. Recording on the reverse side on deck B starts simultaneously with the same recording level and Dolby NR as the original in deck A. To stop the tape. 3 Press X PAUSE on deck A at normal or high speed. 1 Load a recorded cassette into deck A and a blank cassette into deck B. If...
Operating Instructions (primary manual)
Page 15
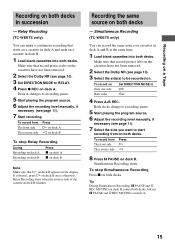
... on a cassette in deck A and ends on both decks. Make sure that starts on a cassette in deck B. 1 Load blank cassettes into both decks. Relay Recording (TC-WE675 only) You can record the same source on deck B once; Make sure that H on deck A. Simultaneous Recording starts. To stop Relay Recording During Recording on deck A Recording on deck B Press x on deck A x on deck B Note Make sure that record-protect tabs on the cassettes have...
... on a cassette in deck A and ends on both decks. Make sure that starts on a cassette in deck B. 1 Load blank cassettes into both decks. Relay Recording (TC-WE675 only) You can record the same source on deck B once; Make sure that H on deck A. Simultaneous Recording starts. To stop Relay Recording During Recording on deck A Recording on deck B Press x on deck A x on deck B Note Make sure that record-protect tabs on the cassettes have...
Operating Instructions (primary manual)
Page 16
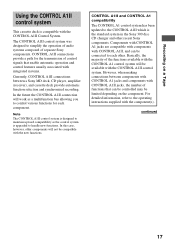
RMS Dubbing (TC-WE675 only) You can insert a blank space of 4 seconds or more on the tape in deck B you want . To start recording On the front side Press H On the reverse side h 5 Press RMS/START or X PAUSE on deck B to resume recording. Tips • You can record an RMS ...Press x on page 10. This function works only at normal speed. 1 Load a recorded cassette into deck A and a blank cassette into deck B. - The RMS program remains even after Step 4. the tape in the display and a blank is recorded on the tape. For details, see Steps 1 to 5 on page 8). 3 Press...
RMS Dubbing (TC-WE675 only) You can insert a blank space of 4 seconds or more on the tape in deck B you want . To start recording On the front side Press H On the reverse side h 5 Press RMS/START or X PAUSE on deck B to resume recording. Tips • You can record an RMS ...Press x on page 10. This function works only at normal speed. 1 Load a recorded cassette into deck A and a blank cassette into deck B. - The RMS program remains even after Step 4. the tape in the display and a blank is recorded on the tape. For details, see Steps 1 to 5 on page 8). 3 Press...
Operating Instructions (primary manual)
Page 17
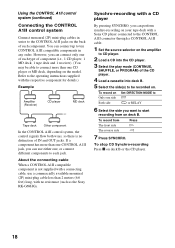
... can be limited depending on a Tape Using the CONTROL A1II control system This cassette deck is upgraded to handle new functions. However, when making connections between a Sony MD deck, CD player, amplifier (receiver), and cassette deck provide automatic function selection and synchronized recording. In the future the CONTROL A1II connection will work as the control system is...
... can be limited depending on a Tape Using the CONTROL A1II control system This cassette deck is upgraded to handle new functions. However, when making connections between a Sony MD deck, CD player, amplifier (receiver), and cassette deck provide automatic function selection and synchronized recording. In the future the CONTROL A1II connection will work as the control system is...
Operating Instructions (primary manual)
Page 18
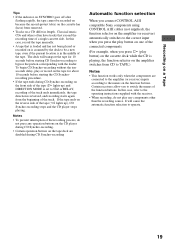
...a Sony CD player connected to the CONTROL A1II connector through a CONTROL A1II cable. 1 Set the source selector on the back of the CD player. 4 Load a cassette into deck B. 5 Select the side(s) to each type of IN and OUT jacks. To stop CD Synchro-recording Press x on your tape deck with... no distinction of component (i.e., 1 CD player, 1 MD deck, 1 tape deck and 1 receiver). (You may be recorded on the model. If a ...
...a Sony CD player connected to the CONTROL A1II connector through a CONTROL A1II cable. 1 Set the source selector on the back of the CD player. 4 Load a cassette into deck B. 5 Select the side(s) to each type of IN and OUT jacks. To stop CD Synchro-recording Press x on your tape deck with... no distinction of component (i.e., 1 CD player, 1 MD deck, 1 tape deck and 1 receiver). (You may be recorded on the model. If a ...
Operating Instructions (primary manual)
Page 19
... Tracks on the reverse side of the track. Notes • To prevent interruption of the recording process, do not play button) on the cassette deck while the CD is reversed, and recording starts again from CD to TAPE.) Notes • This function works only when the components ...are disabled during CD Synchro-recording Automatic function selection When you connect CONTROL A1II compatible Sony components using CONTROL A1II ...
... Tracks on the reverse side of the track. Notes • To prevent interruption of the recording process, do not play button) on the cassette deck while the CD is reversed, and recording starts again from CD to TAPE.) Notes • This function works only when the components ...are disabled during CD Synchro-recording Automatic function selection When you connect CONTROL A1II compatible Sony components using CONTROL A1II ...
Operating Instructions (primary manual)
Page 20
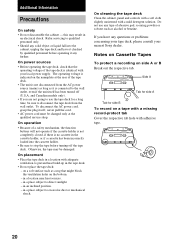
..., be damaged. on a tape with a missing record-protect tab Cover the respective tab hole with adequate ventilation to stop the tape before operating it any further. On placement • Place the tape deck in the cassette holder, or if a cassette has been incorrectly loaded into the cabinet, unplug the...outlet, even if the unit itself ; On cleaning the tape deck Clean the cabinet, panel and controls with a soft cloth slightly moistened with your nearest Sony dealer. this may be sure to disconnect the tape deck from the AC power source (mains) as long as alcohol or...
..., be damaged. on a tape with a missing record-protect tab Cover the respective tab hole with adequate ventilation to stop the tape before operating it any further. On placement • Place the tape deck in the cassette holder, or if a cassette has been incorrectly loaded into the cabinet, unplug the...outlet, even if the unit itself ; On cleaning the tape deck Clean the cabinet, panel and controls with a soft cloth slightly moistened with your nearest Sony dealer. this may be sure to disconnect the tape deck from the AC power source (mains) as long as alcohol or...
Operating Instructions (primary manual)
Page 21
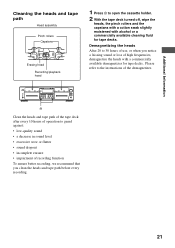
... 10 hours of operation to 30 hours of use, or when you clean the heads and tape path before every recording. 21 Please refer to open the cassette holder. 2 With the tape deck turned off, wipe the heads, the pinch rollers and the capstans with a cotton swab slightly moistened with a commercially available demagnetizer...
... 10 hours of operation to 30 hours of use, or when you clean the heads and tape path before every recording. 21 Please refer to open the cassette holder. 2 With the tape deck turned off, wipe the heads, the pinch rollers and the capstans with a cotton swab slightly moistened with a commercially available demagnetizer...
Operating Instructions (primary manual)
Page 22
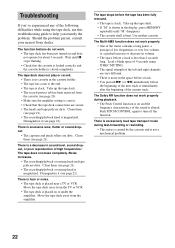
Should the problem persist, consult your nearest Sony dealer. Take up the tape slack. • If "M" is shown in sound level, sound dropout, or poor reproduction of high frequencies./ The tape does not erase completely./Noise increases. • The recording/playback or erasing head and tape path .... Demagnetize it (see page 21). Demagnetize it (see page 21). • The recording/playback or erasing head is slack. Use another cassette. The tape deck does not play or record. • There is no cassette in volume. • The space before the tape has been fully rewound. •...
Should the problem persist, consult your nearest Sony dealer. Take up the tape slack. • If "M" is shown in sound level, sound dropout, or poor reproduction of high frequencies./ The tape does not erase completely./Noise increases. • The recording/playback or erasing head and tape path .... Demagnetize it (see page 21). Demagnetize it (see page 21). • The recording/playback or erasing head is slack. Use another cassette. The tape deck does not play or record. • There is no cassette in volume. • The space before the tape has been fully rewound. •...
Operating Instructions (primary manual)
Page 23
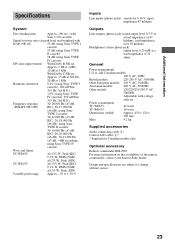
.../230-240 V AC, 50/60Hz Adjustable with Dolby NR off) 55 dB, using Sony TYPE I cassette 57 dB, using Sony TYPE II cassette 58 dB, using Sony TYPE IV cassette Wow and flutter TC-WE675: ±0.13% W. Peak (DIN) TC-WE475: ±0.15% W. Design and specifications are subject to change without notice. 23 Peak...177;3 dB, IEC), 20-18,000 Hz (±6 dB), using Sony TYPE II cassette 30-19,000 Hz (±3 dB, IEC), 20-20,000 Hz (±6 dB), 30-13,000 Hz (±3 dB, -4dB recording), using Sony TYPE IV cassette S/N ratio improvement With Dolby B NR on: Approx. 5 dB at...
.../230-240 V AC, 50/60Hz Adjustable with Dolby NR off) 55 dB, using Sony TYPE I cassette 57 dB, using Sony TYPE II cassette 58 dB, using Sony TYPE IV cassette Wow and flutter TC-WE675: ±0.13% W. Peak (DIN) TC-WE475: ±0.15% W. Design and specifications are subject to change without notice. 23 Peak...177;3 dB, IEC), 20-18,000 Hz (±6 dB), using Sony TYPE II cassette 30-19,000 Hz (±3 dB, IEC), 20-20,000 Hz (±6 dB), 30-13,000 Hz (±3 dB, -4dB recording), using Sony TYPE IV cassette S/N ratio improvement With Dolby B NR on: Approx. 5 dB at...


