
Dimensions Diagram
Page 1
... MANUFACTURE OF ENCLOSURES. SCD-1 RM-DS1 REMOTE CONTROL DESCRIPTION: Super Audio DIMENSIONS CD Player (WHD): 17" X 5 1/2" X 17 3/8" WEIGHT: 58 lbs 7 oz FRONT VIEW 17" POWER REQUIREMENTS:120V POWER AC CONSUMPTION: 36 Watts 1/2 " 2 " R 12" SIDE VIEW 17 3/8" 16 5/8" 4 5/8" 5 3/8 " 2 " 1/2 " 3/4 " 1 " 2 " 10 5/8 " 10 1/4 " BACK VIEW LINE OUT (ANALOG) R BALANCED L UNBALANCED R L BALANCED COMMAND OUT MODE ON OFF CD1 CD2 STANDARD CUSTOM TA-E/N1 DIGITAL OUT CD COAXIAL OPTICAL 2 " AC IN 1 " 6 1/2" 2 " 8 3/8" NOTE...
... MANUFACTURE OF ENCLOSURES. SCD-1 RM-DS1 REMOTE CONTROL DESCRIPTION: Super Audio DIMENSIONS CD Player (WHD): 17" X 5 1/2" X 17 3/8" WEIGHT: 58 lbs 7 oz FRONT VIEW 17" POWER REQUIREMENTS:120V POWER AC CONSUMPTION: 36 Watts 1/2 " 2 " R 12" SIDE VIEW 17 3/8" 16 5/8" 4 5/8" 5 3/8 " 2 " 1/2 " 3/4 " 1 " 2 " 10 5/8 " 10 1/4 " BACK VIEW LINE OUT (ANALOG) R BALANCED L UNBALANCED R L BALANCED COMMAND OUT MODE ON OFF CD1 CD2 STANDARD CUSTOM TA-E/N1 DIGITAL OUT CD COAXIAL OPTICAL 2 " AC IN 1 " 6 1/2" 2 " 8 3/8" NOTE...
Operating Instructions (primary manual)
Page 1
3-865-537-11(1) Super Audio CD Player Operating Instructions GB Mode d'emploi FR SCD-1 © 1999 by Sony Corporation
3-865-537-11(1) Super Audio CD Player Operating Instructions GB Mode d'emploi FR SCD-1 © 1999 by Sony Corporation
Operating Instructions (primary manual)
Page 2
... of important operating and maintenance (servicing) instructions in this manual could void your Sony dealer regarding this manual thoroughly and retain it for model SCD-1. This symbol is intended to alert the user to the presence of uninsulated "dangerous voltage" within the product's enclosure that any changes or modification not expressly approved in the literature accompanying the appliance. Owner's Record The model and serial numbers are...
... of important operating and maintenance (servicing) instructions in this manual could void your Sony dealer regarding this manual thoroughly and retain it for model SCD-1. This symbol is intended to alert the user to the presence of uninsulated "dangerous voltage" within the product's enclosure that any changes or modification not expressly approved in the literature accompanying the appliance. Owner's Record The model and serial numbers are...
Operating Instructions (primary manual)
Page 3
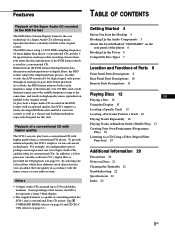
... Start the Hookup 4 Hooking Up the Audio Components 5 About the Switch Marked "STANDARD" on the rear panel of the player 6 Hooking Up the Power 6 Compatible Disc Types 7 Location and Functions of Parts 8 Front Panel Parts Descriptions 8 Rear Panel Parts Descriptions 10 Remote Parts Descriptions 11 Playing Discs 12 GB Playing a Disc 12 Using the Display 13 Locating a Specific Track 15 Locating a Particular Point in a Track 16 Playing Tracks Repeatedly 16 Playing Tracks in Random Order (Shuffle Play) 17 Creating Your Own...
... Start the Hookup 4 Hooking Up the Audio Components 5 About the Switch Marked "STANDARD" on the rear panel of the player 6 Hooking Up the Power 6 Compatible Disc Types 7 Location and Functions of Parts 8 Front Panel Parts Descriptions 8 Rear Panel Parts Descriptions 10 Remote Parts Descriptions 11 Playing Discs 12 GB Playing a Disc 12 Using the Display 13 Locating a Specific Track 15 Locating a Particular Point in a Track 16 Playing Tracks Repeatedly 16 Playing Tracks in Random Order (Shuffle Play) 17 Creating Your Own...
Operating Instructions (primary manual)
Page 4
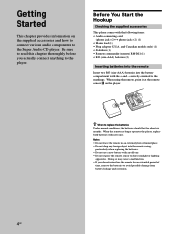
... last for an extended period of time, remove the batteries to the Super Audio CD player. Doing so may cause a malfunction. • If you actually connect anything to direct sunlight or lighting apparatus. Getting Started This chapter provides information on the player. z When to the markings. When the remote no longer operates the player, replace both batteries with the + and - Notes • Do not...
... last for an extended period of time, remove the batteries to the Super Audio CD player. Doing so may cause a malfunction. • If you actually connect anything to direct sunlight or lighting apparatus. Getting Started This chapter provides information on the player. z When to the markings. When the remote no longer operates the player, replace both batteries with the + and - Notes • Do not...
Operating Instructions (primary manual)
Page 5
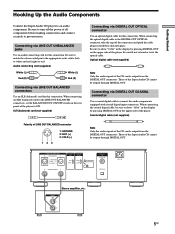
... appropriate jacks: white (left) to white and red (right) to connect the audio components equipped with coaxial digital input connectors. Audio connecting cord (supplied) White (L) White (L) Red (R) Red (R) Connecting via DIGITAL OUT OPTICAL connector Use an optical digital cable for this connection. When connecting an XLR (balanced) cord to the DIGITAL OUT OPTICAL connector, take the cap off the power of the Super Audio CD cannot be output from the DIGITAL OUT connectors. When connecting the optical digital cable to the LINE...
... appropriate jacks: white (left) to white and red (right) to connect the audio components equipped with coaxial digital input connectors. Audio connecting cord (supplied) White (L) White (L) Red (R) Red (R) Connecting via DIGITAL OUT OPTICAL connector Use an optical digital cable for this connection. When connecting an XLR (balanced) cord to the DIGITAL OUT OPTICAL connector, take the cap off the power of the Super Audio CD cannot be output from the DIGITAL OUT connectors. When connecting the optical digital cable to the LINE...
Operating Instructions (primary manual)
Page 6
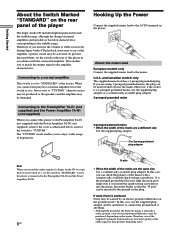
... the Switch Marked "STANDARD" on the rear panel of the player The Super Audio CD includes high frequencies beyond the audible range, although the design of normal amplifiers and speakers is normally a safety ground, a few electrical potential differences may be produced, depending on the mains. To prevent these problems, set the switch to the ground on the plug. Hooking Up the Power Connect the supplied mains...
... the Switch Marked "STANDARD" on the rear panel of the player The Super Audio CD includes high frequencies beyond the audible range, although the design of normal amplifiers and speakers is normally a safety ground, a few electrical potential differences may be produced, depending on the mains. To prevent these problems, set the switch to the ground on the plug. Hooking Up the Power Connect the supplied mains...

Operating Instructions (primary manual)
Page 7
... can play the following discs. Press SACD/CD repeatedly so that the SACD indicator on the upper side of disc to be no sound. • CD-ROM • DVD etc. Press SACD/CD repeatedly so that the CD indicator on the upper side of the player lights. *High density signal layer for the Super Audio CD HD (high density) layer Super Audio CD (dual layer disc) This disc consists of the player lights. Press SACD/CD repeatedly...
... can play the following discs. Press SACD/CD repeatedly so that the SACD indicator on the upper side of disc to be no sound. • CD-ROM • DVD etc. Press SACD/CD repeatedly so that the CD indicator on the upper side of the player lights. *High density signal layer for the Super Audio CD HD (high density) layer Super Audio CD (dual layer disc) This disc consists of the player lights. Press SACD/CD repeatedly...
Operating Instructions (primary manual)
Page 8
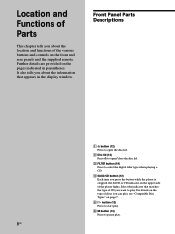
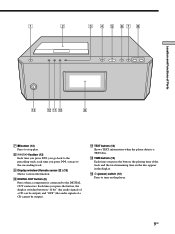
... SACD or CD indicator on page 7. 5 H button (12) Press to start play. 6 X button (13) Press to play. It also tells you about the information that matches the type of CD you about the location and functions of the various buttons and controls on the pages indicated in the display window. Further details are provided on the front and rear panels and the supplied remote...
... SACD or CD indicator on page 7. 5 H button (12) Press to start play. 6 X button (13) Press to play. It also tells you about the information that matches the type of CD you about the location and functions of the various buttons and controls on the pages indicated in the display window. Further details are provided on the front and rear panels and the supplied remote...
Operating Instructions (primary manual)
Page 9
... time on the player. 9GB qs TIME button (13) Each time you press the button, the display switches between "16 bit" (the audio signals of a CD can be output) and "OFF" (the audio signals of a CD cannot be output). qd ! (power) switch (12) Press to turn on the disc appear in the display. Location and Functions of Parts 7 x button (13) Press to stop play. 8 l/L button (13) Each time you press l, you go to the succeeding track. 9 Display window (Remote...
... time on the player. 9GB qs TIME button (13) Each time you press the button, the display switches between "16 bit" (the audio signals of a CD can be output) and "OFF" (the audio signals of a CD cannot be output). qd ! (power) switch (12) Press to turn on the disc appear in the display. Location and Functions of Parts 7 x button (13) Press to stop play. 8 l/L button (13) Each time you press l, you go to the succeeding track. 9 Display window (Remote...
Operating Instructions (primary manual)
Page 10
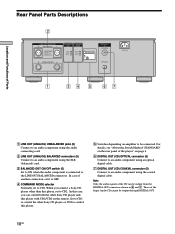
... jacks (5) Connect to an audio component using the audio connecting cord. 2 LINE OUT (ANALOG) BALANCED connectors (5) Connect to CD1. E1 / N1 DIGITAL OUT CD COAXIAL OPTICAL ~AC IN Location and Functions of another connection, set it to OFF. 4 COMMAND MODE selector Normally set to be output through DIGITAL OUT. 10GB In this case, you connect a Sony CD player other Sony CD player, or CD2 to control this player, set to an audio component using the coaxial digital cable. Those of the Super Audio CD cannot be connected...
... jacks (5) Connect to an audio component using the audio connecting cord. 2 LINE OUT (ANALOG) BALANCED connectors (5) Connect to CD1. E1 / N1 DIGITAL OUT CD COAXIAL OPTICAL ~AC IN Location and Functions of another connection, set it to OFF. 4 COMMAND MODE selector Normally set to be output through DIGITAL OUT. 10GB In this case, you connect a Sony CD player other Sony CD player, or CD2 to control this player, set to an audio component using the coaxial digital cable. Those of the Super Audio CD cannot be connected...
Operating Instructions (primary manual)
Page 11
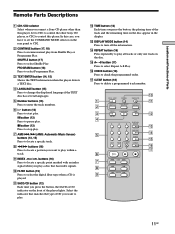
... a track. 9 INDEX >/. x button (13) Press to stop play. 7 AMS ./> (AMS: Automatic Music Sensor) buttons (13, 15) Press to locate a specific track. 8 m/M buttons (16) Press to locate a portion you want to play. qh CHECK button (18) Press to select the digital filter type when a CD is played. CD1• •CD2 FILTER SACD/CD PLAY MODE CONTINUE SHUFFLE PROGRAM TEXT ENTER LANGUAGE TIME DISPLAY 1 2 3 MODE 4 5 6 REPEAT 7 8 9 A B >10 10/0 CLEAR CHECK AMS INDEX 11GB Location and Functions...
... a track. 9 INDEX >/. x button (13) Press to stop play. 7 AMS ./> (AMS: Automatic Music Sensor) buttons (13, 15) Press to locate a specific track. 8 m/M buttons (16) Press to locate a portion you want to play. qh CHECK button (18) Press to select the digital filter type when a CD is played. CD1• •CD2 FILTER SACD/CD PLAY MODE CONTINUE SHUFFLE PROGRAM TEXT ENTER LANGUAGE TIME DISPLAY 1 2 3 MODE 4 5 6 REPEAT 7 8 9 A B >10 10/0 CLEAR CHECK AMS INDEX 11GB Location and Functions...
Operating Instructions (primary manual)
Page 12
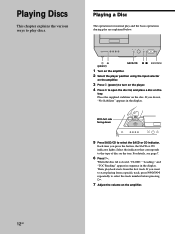
... side facing down 5 Press SACD/CD to play are explained below. TIME TEXT DIGITAL DUT FILTER SUPER AUTO CD CD MANUAL SELECTOR ! If you press the button, the SACD or CD indicator lights. A (power) SACD/CD X x l/L 1 Turn on the amplifier. 2 Select the player position using the input selector on the amplifier. 3 Press ! (power) to turn on the player. 4 Press A to select the track number before pressing H. 7 Adjust the volume on the tray. When the disc lid is closed, "CLOSE...
... side facing down 5 Press SACD/CD to play are explained below. TIME TEXT DIGITAL DUT FILTER SUPER AUTO CD CD MANUAL SELECTOR ! If you press the button, the SACD or CD indicator lights. A (power) SACD/CD X x l/L 1 Turn on the amplifier. 2 Select the player position using the input selector on the amplifier. 3 Press ! (power) to turn on the player. 4 Press A to select the track number before pressing H. 7 Adjust the volume on the tray. When the disc lid is closed, "CLOSE...
Operating Instructions (primary manual)
Page 13
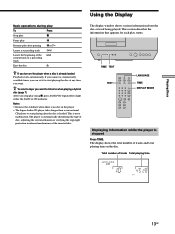
... you stop play status. The player is automatically identifying the type of disc, adjusting the servomechanism or verifying the copyright protection in the player. • The Super Audio CD player takes longer than a conventional CD player to start playing the disc at any time you turn on the disc. Playing Discs Using the Display Basic operations during play To Press Stop play x Pause play X Resume play after the disc is loaded. TIME TEXT DIGITAL DUT FILTER TIME TEXT TEXT SUPER AUTO CD CD MANUAL SELECTOR LANGUAGE TIME DISPLAY MODE Displaying...
... you stop play status. The player is automatically identifying the type of disc, adjusting the servomechanism or verifying the copyright protection in the player. • The Super Audio CD player takes longer than a conventional CD player to start playing the disc at any time you turn on the disc. Playing Discs Using the Display Basic operations during play To Press Stop play x Pause play X Resume play after the disc is loaded. TIME TEXT DIGITAL DUT FILTER TIME TEXT TEXT SUPER AUTO CD CD MANUAL SELECTOR LANGUAGE TIME DISPLAY MODE Displaying...
Operating Instructions (primary manual)
Page 16
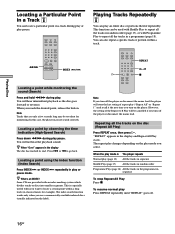
... repeat a specific track or portion within a long track (in classical music for monitoring. In this case, the player may be too short for example). You will hear intermittent playback as the disc goes forward or reverses. The index search function works only when you turn on the label). Note If you turn off the player or disconnect the mains lead. However, the setting of repeat play...
... repeat a specific track or portion within a long track (in classical music for monitoring. In this case, the player may be too short for example). You will hear intermittent playback as the disc goes forward or reverses. The index search function works only when you turn on the label). Note If you turn off the player or disconnect the mains lead. However, the setting of repeat play...
Operating Instructions (primary manual)
Page 19
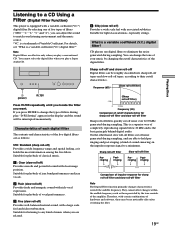
... provided by changing the cutoff characteristics of the amplifier. CD players use digital filters to their cutoff characteristics. Therefore, with rich vocal expression. On the other hand, slow roll-off filters cut off ) Provides smooth and powerful sound with clear image position. TIME TEXT DIGITAL DUT FILTER SUPER AUTO CD CD MANUAL SELECTOR ! (power) FILTER Press FILTER repeatedly until you locate the filter you play , "D-Fil Setting" appears...
... provided by changing the cutoff characteristics of the amplifier. CD players use digital filters to their cutoff characteristics. Therefore, with rich vocal expression. On the other hand, slow roll-off filters cut off ) Provides smooth and powerful sound with clear image position. TIME TEXT DIGITAL DUT FILTER SUPER AUTO CD CD MANUAL SELECTOR ! (power) FILTER Press FILTER repeatedly until you locate the filter you play , "D-Fil Setting" appears...
Operating Instructions (primary manual)
Page 20
... time, be damaged when a peak level portion is played. On avoiding deterioration of optical instruments with very low level inputs or no audio signals. On operation • If the player is brought directly from the mains as long as it any further. The use of sound quality • Do not touch the lens inside the player. On adjusting the volume • Do not turn...
... time, be damaged when a peak level portion is played. On avoiding deterioration of optical instruments with very low level inputs or no audio signals. On operation • If the player is brought directly from the mains as long as it any further. The use of sound quality • Do not touch the lens inside the player. On adjusting the volume • Do not turn...

Operating Instructions (primary manual)
Page 21
... not use a disc with a dry cloth. • Do not use a special shaped disc (e.g., star-shaped or heart-shaped etc.), the player may be damaged. Note The Super Audio CD player takes longer than a conventional CD player to direct sunlight or heat sources such as illustrated below. 21GB Do not touch the surface. • Do not stick paper or tape on top of disc, adjusting the...
... not use a disc with a dry cloth. • Do not use a special shaped disc (e.g., star-shaped or heart-shaped etc.), the player may be damaged. Note The Super Audio CD player takes longer than a conventional CD player to direct sunlight or heat sources such as illustrated below. 21GB Do not touch the surface. • Do not stick paper or tape on top of disc, adjusting the...
Operating Instructions (primary manual)
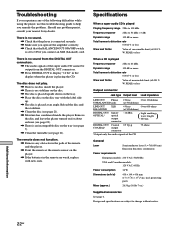
Page 22
....) Supplied accessories See page 4. There is no sound. , Check that the player is connected securely. , Make sure you connect an XLR (balanced) cord. Additional Information 22GB PEAK) or less When a CD is placed upside down on the tray. , Place the disc on the player. , If the batteries in the remote are subject to display "16 bit" in the path of the super audio CD cannot be output from...
....) Supplied accessories See page 4. There is no sound. , Check that the player is connected securely. , Make sure you connect an XLR (balanced) cord. Additional Information 22GB PEAK) or less When a CD is placed upside down on the tray. , Place the disc on the player. , If the batteries in the remote are subject to display "16 bit" in the path of the super audio CD cannot be output from...
Operating Instructions (primary manual)
Page 23
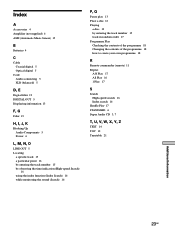
... (not supplied) 6 AMS (Automatic Music Sensor) 15 B Batteries 4 C Cable Coaxial digital 5 Optical digital 5 Cord Audio connecting 5 XLR (balanced) 5 D, E Digital filter 19 DIGITAL OUT 5 Displaying information 13 F, G Filter 19 H, I, J, K Hooking Up Audio Components 5 Power 6 L, M, N, O LINE OUT 5 Locating a specific track 15 a particular point 16 by entering the track number 15 by observing the time indication (High-speed Search) 16 using the index function (Index Search) 16 while monitoring the sound (Search) 16 P, Q Pause play 13 Place a disc 12 Playing a disc 12...
... (not supplied) 6 AMS (Automatic Music Sensor) 15 B Batteries 4 C Cable Coaxial digital 5 Optical digital 5 Cord Audio connecting 5 XLR (balanced) 5 D, E Digital filter 19 DIGITAL OUT 5 Displaying information 13 F, G Filter 19 H, I, J, K Hooking Up Audio Components 5 Power 6 L, M, N, O LINE OUT 5 Locating a specific track 15 a particular point 16 by entering the track number 15 by observing the time indication (High-speed Search) 16 using the index function (Index Search) 16 while monitoring the sound (Search) 16 P, Q Pause play 13 Place a disc 12 Playing a disc 12...


