User Manual
Page 4
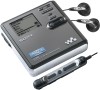
...SONY be liable for any financial damage, or loss of profits, including claims made by inappropriate waste handling of the connected device. - The capability of this product. The recycling of materials will help prevent potential negative consequences for the environment and human health, which is due to display...countries with separate collection systems) This symbol on the product or on its packaging indicates that this product shall not be displayed properly on the device. Applicable accessories: Remote control, Earphones 4 Notice for users On the supplied software • ...
...SONY be liable for any financial damage, or loss of profits, including claims made by inappropriate waste handling of the connected device. - The capability of this product. The recycling of materials will help prevent potential negative consequences for the environment and human health, which is due to display...countries with separate collection systems) This symbol on the product or on its packaging indicates that this product shall not be displayed properly on the device. Applicable accessories: Remote control, Earphones 4 Notice for users On the supplied software • ...

User Manual
Page 7
...entire disc (Erase 52 Dividing a track (Divide 54 Combining tracks (Combine 55 Formatting the disc (Format 56 Other operations 57 Changing the displayed menu items (Menu Mode 57 Protecting your hearing (AVLS 57 Turning off the beep sound 57 Preserving battery power (EL Light 58 Storing...Memory 58 Starting the playback quickly (Quick Mode 59 Selecting the disc mode (Disc Mode 60 Changing the operational direction of the display 60 Selecting the display language 61 Using the recorder with a computer 62 What you can do through connection with a computer 62 Connecting the recorder to...
...entire disc (Erase 52 Dividing a track (Divide 54 Combining tracks (Combine 55 Formatting the disc (Format 56 Other operations 57 Changing the displayed menu items (Menu Mode 57 Protecting your hearing (AVLS 57 Turning off the beep sound 57 Preserving battery power (EL Light 58 Storing...Memory 58 Starting the playback quickly (Quick Mode 59 Selecting the disc mode (Disc Mode 60 Changing the operational direction of the display 60 Selecting the display language 61 Using the recorder with a computer 62 What you can do through connection with a computer 62 Connecting the recorder to...
User Manual
Page 10
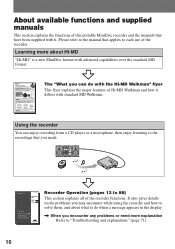
... "Hi-MD" is a new MiniDisc format with advanced capabilities over the standard MD format. Using the recorder You can do when a message appears in the display. , When you encounter any problems or need more about what to 88) This section explains all of the recorder functions. Please refer to the manual...
... "Hi-MD" is a new MiniDisc format with advanced capabilities over the standard MD format. Using the recorder You can do when a message appears in the display. , When you encounter any problems or need more about what to 88) This section explains all of the recorder functions. Please refer to the manual...

User Manual
Page 11
... to the recorder with a Hi-MD disc or a standard disc in Hi-MD mode inserted. • The displayed items in this reason, some explanations (and some illustrations) may differ from the actual items displayed by the software. • Explanations in the illustrations that you can also refer to online help if you...
... to the recorder with a Hi-MD disc or a standard disc in Hi-MD mode inserted. • The displayed items in this reason, some explanations (and some illustrations) may differ from the actual items displayed by the software. • Explanations in the illustrations that you can also refer to online help if you...

User Manual
Page 14
D Display window E OPEN switch F Jog dial (N (play)/ENT) G . (AMS, fast rewind), > (AMS, fast forward) button H Battery compartment I X (pause) button J VOL (volume) +1), - To prevent the buttons from ...
D Display window E OPEN switch F Jog dial (N (play)/ENT) G . (AMS, fast rewind), > (AMS, fast forward) button H Battery compartment I X (pause) button J VOL (volume) +1), - To prevent the buttons from ...

User Manual
Page 15
x: stop N: play X: pause m: fast rewind M: fast forward ., >: AMS : record/record pause B Selected operating condition display area Displays the operating mode, play mode, or selected menu item, etc. If the batteries are preceded by the following icons. : track ...Appears only for discs used in Hi-MD mode. F Time display area Displays the elapsed time, remaining time of each operating condition. D Track number and group number display area Displays the track number or group number. E Text information display area Displays titles, menu items, error messages, etc. C Battery indication ...
x: stop N: play X: pause m: fast rewind M: fast forward ., >: AMS : record/record pause B Selected operating condition display area Displays the operating mode, play mode, or selected menu item, etc. If the batteries are preceded by the following icons. : track ...Appears only for discs used in Hi-MD mode. F Time display area Displays the elapsed time, remaining time of each operating condition. D Track number and group number display area Displays the track number or group number. E Text information display area Displays titles, menu items, error messages, etc. C Battery indication ...

User Manual
Page 17
.... Getting started Charge the rechargeable battery before using. 1 Insert the rechargeable battery. 1 Slide OPEN to a wall outlet. 2 Press x • CANCEL/CHG. "Charging" appears in the display, and charging starts. continued 17
.... Getting started Charge the rechargeable battery before using. 1 Insert the rechargeable battery. 1 Slide OPEN to a wall outlet. 2 Press x • CANCEL/CHG. "Charging" appears in the display, and charging starts. continued 17

User Manual
Page 18
... the rechargeable battery become sufficiently charged. Inset the battery E end first. 3 Make connections. Rear of the rechargeable battery. Connect firmly To i 18 z • If the display disappears after a short time, the rechargeable battery is sufficiently charged. • If the rechargeable battery is completely drained at the start of charging, it will...
... the rechargeable battery become sufficiently charged. Inset the battery E end first. 3 Make connections. Rear of the rechargeable battery. Connect firmly To i 18 z • If the display disappears after a short time, the rechargeable battery is sufficiently charged. • If the rechargeable battery is completely drained at the start of charging, it will...

User Manual
Page 19
... and discharge the battery several times. When to charge the rechargeable battery or replace the dry battery You can check the battery condition on the display window of the arrow (.) on the recorder or the remote control to unlock the controls. 4 Unlock the control. Battery power decreasing m Weak ...in shorter battery life or cause a deterioration in the performance of the rechargeable battery may be restored. • It is used in the display and the power goes off. The battery level indicator is being used for the first time or after a long period of disuse. It ...
... and discharge the battery several times. When to charge the rechargeable battery or replace the dry battery You can check the battery condition on the display window of the arrow (.) on the recorder or the remote control to unlock the controls. 4 Unlock the control. Battery power decreasing m Weak ...in shorter battery life or cause a deterioration in the performance of the rechargeable battery may be restored. • It is used in the display and the power goes off. The battery level indicator is being used for the first time or after a long period of disuse. It ...

User Manual
Page 22
... "Hi-MD mode". If you use the supplied software to record in "MD mode", for example to allow the disc to be played on the display window of the recorder. Hi-MD MD , You cannot use this recorder to record in "MD mode" is not possible to the "Software Operation" section...
... "Hi-MD mode". If you use the supplied software to record in "MD mode", for example to allow the disc to be played on the display window of the recorder. Hi-MD MD , You cannot use this recorder to record in "MD mode" is not possible to the "Software Operation" section...

User Manual
Page 23
... Track marks are recorded together as a new track. 23 Press X again to record. PAUSE 2 Make sure that the x indication appears in the display window. REC(+N)/ T MARK Jog dial (N/ENT) 4 Play the source you insert a previously recorded disc, the recording starts after the existing contents. Press...; 4 Record a disc. 1 Select and pause the sound source to be counted as a group. Connected component 3 While the recorder is displayed. If you want to resume recording. PAUSE Connected component To Stop Pause Remove the disc Press Press x. thus the remainder of the track will...
... Track marks are recorded together as a new track. 23 Press X again to record. PAUSE 2 Make sure that the x indication appears in the display window. REC(+N)/ T MARK Jog dial (N/ENT) 4 Play the source you insert a previously recorded disc, the recording starts after the existing contents. Press...; 4 Record a disc. 1 Select and pause the sound source to be counted as a group. Connected component 3 While the recorder is displayed. If you want to resume recording. PAUSE Connected component To Stop Pause Remove the disc Press Press x. thus the remainder of the track will...
User Manual
Page 24
... becomes exhausted or the AC power adaptor is disconnected) during a recording or editing operation, or while "DATA SAVE" or "SYSTEM FILE WRITING" is displayed, then it will not affect the recording level. 24 Changing the volume level will not be possible to open the lid until power is estimated...to be recorded to the disc, or data on a 1GB Hi-MD disc, connect the AC power adaptor to make a new group whenever recording is displayed. When you do not want to the recorder, charge the rechargeable battery fully (battery level indication shows ), or use a new alkaline dry battery (...
... becomes exhausted or the AC power adaptor is disconnected) during a recording or editing operation, or while "DATA SAVE" or "SYSTEM FILE WRITING" is displayed, then it will not affect the recording level. 24 Changing the volume level will not be possible to open the lid until power is estimated...to be recorded to the disc, or data on a 1GB Hi-MD disc, connect the AC power adaptor to make a new group whenever recording is displayed. When you do not want to the recorder, charge the rechargeable battery fully (battery level indication shows ), or use a new alkaline dry battery (...

User Manual
Page 25
... you last stopped playing. control on the remote control. VOL +, - Press NX on the remote control. VOL +, - The volume will automatically turn off in the display. Turn the VOL +, - X x Jog dial (NENT) ., > 2 Press VOL + or - NX x ., > +, - Playing a disc right away! 1 Insert a recorded disc. 1 Slide OPEN to open the lid. 2 Insert a disc...
... you last stopped playing. control on the remote control. VOL +, - Press NX on the remote control. VOL +, - The volume will automatically turn off in the display. Turn the VOL +, - X x Jog dial (NENT) ., > 2 Press VOL + or - NX x ., > +, - Playing a disc right away! 1 Insert a recorded disc. 1 Slide OPEN to open the lid. 2 Insert a disc...

User Manual
Page 27
...items appear). The setting will be entered when you can set the menu items, do the following procedure. To set "Menu Mode" to "Changing the displayed menu items (Menu Mode)" (page 57) for recording, playback, editing, etc. To return the preceding setting Press x • CANCEL. To cancel the... operation while setting Press x • CANCEL for the first time after purchasing the recorder, "Menu Mode" appears in the display. If you are doing a menu operation for 2 seconds or more to enter the menu. 2 Turn the jog dial to select the item. 3 Press the...
...items appear). The setting will be entered when you can set the menu items, do the following procedure. To set "Menu Mode" to "Changing the displayed menu items (Menu Mode)" (page 57) for recording, playback, editing, etc. To return the preceding setting Press x • CANCEL. To cancel the... operation while setting Press x • CANCEL for the first time after purchasing the recorder, "Menu Mode" appears in the display. If you are doing a menu operation for 2 seconds or more to enter the menu. 2 Turn the jog dial to select the item. 3 Press the...

User Manual
Page 28
...time of tracks or groups. in Menu 1. page 31, page 39 Selects tracks by category, such as the recorder status, etc. Menu 1 Edit Display Play Mode Sound Menu 2 Title Input* Group Set* GroupRelease* Move* Erase Format* Lap Time 1 Remain Tr Property REC Remain All Remain MainPlayMode ... Formats the disc and restores it to "Advanced". For details, refer to a page 49 new group. Items listed under "Menu 2" are not displayed when "Menu Mode" is set to "Simple". Note Different indication may be set with normal sound quality. page 44 Customizes the sound quality. 28...
...time of tracks or groups. in Menu 1. page 31, page 39 Selects tracks by category, such as the recorder status, etc. Menu 1 Edit Display Play Mode Sound Menu 2 Title Input* Group Set* GroupRelease* Move* Erase Format* Lap Time 1 Remain Tr Property REC Remain All Remain MainPlayMode ... Formats the disc and restores it to "Advanced". For details, refer to a page 49 new group. Items listed under "Menu 2" are not displayed when "Menu Mode" is set to "Simple". Note Different indication may be set with normal sound quality. page 44 Customizes the sound quality. 28...

User Manual
Page 29
... turning the jog dial. page 60 Changes the operational direction on or off . page 61 29 page 38 Displays a list of a new group for each recording operation (Group Recording). page 58 Stores the recorder settings (Disc Memory). Selects the language used in a ... page 37 Simplifies operations during digital recording (Synchro-Recording). page 35 Sets the microphone recording level adjustment mode. page 57 Turns the display window on a disc used in the display. page 59 Selects MD mode or Hi-MD mode when a blank disc is inserted. Menu Mode AVLS* Beep* EL Light Disc ...
... turning the jog dial. page 60 Changes the operational direction on or off . page 61 29 page 38 Displays a list of a new group for each recording operation (Group Recording). page 58 Stores the recorder settings (Disc Memory). Selects the language used in a ... page 37 Simplifies operations during digital recording (Synchro-Recording). page 35 Sets the microphone recording level adjustment mode. page 57 Turns the display window on a disc used in the display. page 59 Selects MD mode or Hi-MD mode when a blank disc is inserted. Menu Mode AVLS* Beep* EL Light Disc ...
User Manual
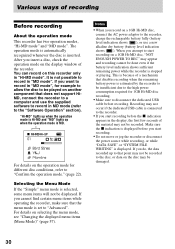
Page 30
...consumption required for 1GB Hi-MD disc recording. • Make sure to disconnect the dedicated USB cable before the x indication appears in the display, the first few seconds of the recorder. Recording may not be done even if the battery level indication shows sufficient remaining power while the...-MD mode". When you cannot find certain menu items while operating the recorder, make sure that disables recording when the remaining battery power is displayed. Notes • When you do, the data recorded up when the operation mode is selected, some menu items will not be damaged. ...
...consumption required for 1GB Hi-MD disc recording. • Make sure to disconnect the dedicated USB cable before the x indication appears in the display, the first few seconds of the recorder. Recording may not be done even if the battery level indication shows sufficient remaining power while the...-MD mode". When you cannot find certain menu items while operating the recorder, make sure that disables recording when the remaining battery power is displayed. Notes • When you do, the data recorded up when the operation mode is selected, some menu items will not be damaged. ...

User Manual
Page 31
... time C Disc name Remaining recording time and remaining free space (in Hi-MD mode only) continued 31 MENU Jog dial 1 Enter the menu and select "Display". 2 Turn the jog dial to enter the selection. Viewing various information You can check the remaining time, track number, etc. when recording or during stop...
... time C Disc name Remaining recording time and remaining free space (in Hi-MD mode only) continued 31 MENU Jog dial 1 Enter the menu and select "Display". 2 Turn the jog dial to enter the selection. Viewing various information You can check the remaining time, track number, etc. when recording or during stop...

User Manual
Page 32
...". 2) If the case of an MP3 track that supports VBR (Variable Bit Rate), the bit rate that appears here may not match the one displayed by the SonicStage software. 3) Appears for tracks that have time stamp information. 4) The title that is set to select certain indications or the indications...microphone to the MIC (PLUG IN POWER) jack. 2 Press the jog dial (N/ENT) while pressing REC(+N)/T MARK to the selected Main play mode is displayed varies according to start recording. "MIC Sens". z If you may not be able to "On". To select microphone sensitivity You can select the microphone ...
...". 2) If the case of an MP3 track that supports VBR (Variable Bit Rate), the bit rate that appears here may not match the one displayed by the SonicStage software. 3) Appears for tracks that have time stamp information. 4) The title that is set to select certain indications or the indications...microphone to the MIC (PLUG IN POWER) jack. 2 Press the jog dial (N/ENT) while pressing REC(+N)/T MARK to the selected Main play mode is displayed varies according to start recording. "MIC Sens". z If you may not be able to "On". To select microphone sensitivity You can select the microphone ...

User Manual
Page 34
... or radio (Analog Recording) This section explains how to enter the selection. on an 80-minute standard disc • Approx. 1 hour and 34 min. Recording Display Recording time mode Linear PCM PCM • Approx. 28 min. To LINE OUT jacks, etc. Selecting the recording mode Select each recording mode according to...
... or radio (Analog Recording) This section explains how to enter the selection. on an 80-minute standard disc • Approx. 1 hour and 34 min. Recording Display Recording time mode Linear PCM PCM • Approx. 28 min. To LINE OUT jacks, etc. Selecting the recording mode Select each recording mode according to...

