

Operating Instructions
Page 1
3-862-941-11 (1) Digital Still Camera Operating Instructions EN Mode d'emploi F Manual de instrucciones ES MVC-FD51 ©1998 by Sony Corporation
3-862-941-11 (1) Digital Still Camera Operating Instructions EN Mode d'emploi F Manual de instrucciones ES MVC-FD51 ©1998 by Sony Corporation
Operating Instructions
Page 4
... fields at the specific frequencies may be used. If the plug supplied with BS 1363 is a registered trademark of International Business Machines Corporation of this camera. • IBM PC/AT is fitted to Microsoft Corporation, registered in this equipment for your nearest...
... fields at the specific frequencies may be used. If the plug supplied with BS 1363 is a registered trademark of International Business Machines Corporation of this camera. • IBM PC/AT is fitted to Microsoft Corporation, registered in this equipment for your nearest...
Operating Instructions
Page 5
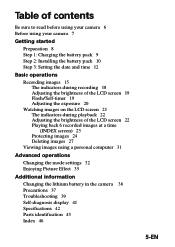
MVC-FD51(U/C-E) Table of contents Table of contents 5 Be sure to read before using your camera 6 Before using your camera 7 Getting started 8 Preparation 8 Step 1: Charging the battery pack 9 Step 2: Installing the battery pack 10 Step 3: Setting the date and time 12 Basic operations 15 Recording ... using a personal computer 31 Advanced operations 32 Changing the mode settings 32 Enjoying Picture Effect 35 Additional information 36 Changing the lithium battery in the camera 36 Precautions 37 Troubleshooting 39 Self-diagnosis display 41 Specifications 42 Parts identification 43 Index 46 5-EN
MVC-FD51(U/C-E) Table of contents Table of contents 5 Be sure to read before using your camera 6 Before using your camera 7 Getting started 8 Preparation 8 Step 1: Charging the battery pack 9 Step 2: Installing the battery pack 10 Step 3: Setting the date and time 12 Basic operations 15 Recording ... using a personal computer 31 Advanced operations 32 Changing the mode settings 32 Enjoying Picture Effect 35 Additional information 36 Changing the lithium battery in the camera 36 Precautions 37 Troubleshooting 39 Self-diagnosis display 41 Specifications 42 Parts identification 43 Index 46 5-EN
Operating Instructions
Page 6
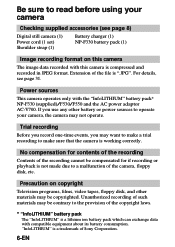
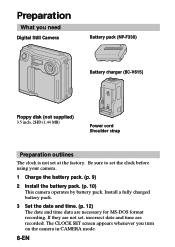
.... Unauthorized recording of such materials may be contrary to the provision of Sony Corporation. 6-EN If you may not operate. Trial recording Before you record one-time events, you use any other materials may be copyrighted. For details, see page 8) Digital still camera (1) Power cord (1 set) Shoulder strap (1) Battery charger (1) NP-F330 battery pack...
.... Unauthorized recording of such materials may be contrary to the provision of Sony Corporation. 6-EN If you may not operate. Trial recording Before you record one-time events, you use any other materials may be copyrighted. For details, see page 8) Digital still camera (1) Power cord (1 set) Shoulder strap (1) Battery charger (1) NP-F330 battery pack...
Operating Instructions
Page 7
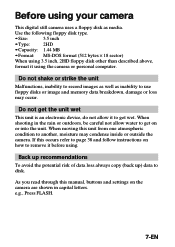
When moving this manual, buttons and settings on the camera are shown in the rain or outdoors, be careful not allow it before using. If this occurs refer to get the unit wet This unit ... MB • Format: MS-DOS format (512 bytes × 18 sector) When using 3.5 inch, 2HD floppy disk other than described above, format it using your camera This digital still camera uses a floppy disk as inability to disk.
When moving this manual, buttons and settings on the camera are shown in the rain or outdoors, be careful not allow it before using. If this occurs refer to get the unit wet This unit ... MB • Format: MS-DOS format (512 bytes × 18 sector) When using 3.5 inch, 2HD floppy disk other than described above, format it using your camera This digital still camera uses a floppy disk as inability to disk.
Operating Instructions
Page 8
... by battery pack. If they are necessary for MS-DOS format recording. The CLOCK SET screen appears whenever you need Digital Still Camera Battery pack (NP-F330) Battery charger (BC-V615) Floppy disk (not supplied) 3.5 inch, 2HD (1.44 MB) Power cord Shoulder strap Preparation outlines The clock is ...
... by battery pack. If they are necessary for MS-DOS format recording. The CLOCK SET screen appears whenever you need Digital Still Camera Battery pack (NP-F330) Battery charger (BC-V615) Floppy disk (not supplied) 3.5 inch, 2HD (1.44 MB) Power cord Shoulder strap Preparation outlines The clock is ...
Operating Instructions
Page 11
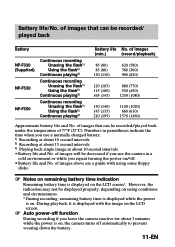
... on/off. • Battery life and No. However, the indication may not be decreased if you use the camera in parentheses indicate the time when you leave the camera inactive for about 10 second intervals • Battery life and No. Battery life/No. of images will be displayed... (195) 1100 (1020) 660 (610) 1570 (1460) Approximate battery life and No. of images above are a guide with the image on , the camera turns off function During recording if you use a normally charged battery. 1) Recording at about 10 second intervals 2) Recording at about 15 second intervals 3) Playing back...
... on/off. • Battery life and No. However, the indication may not be decreased if you use the camera in parentheses indicate the time when you leave the camera inactive for about 10 second intervals • Battery life and No. Battery life/No. of images will be displayed... (195) 1100 (1020) 660 (610) 1570 (1460) Approximate battery life and No. of images above are a guide with the image on , the camera turns off function During recording if you use a normally charged battery. 1) Recording at about 10 second intervals 2) Recording at about 15 second intervals 3) Playing back...
Operating Instructions
Page 12
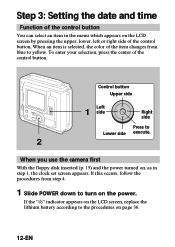
... page 36. 12-EN If the "I" indicator appears on the LCD screen, replace the lithium battery according to Lower side execute. 2 When you use the camera first With the floppy disk inserted (p. 15) and the power turned on the power. When an item is selected, the color of the item changes...
... page 36. 12-EN If the "I" indicator appears on the LCD screen, replace the lithium battery according to Lower side execute. 2 When you use the camera first With the floppy disk inserted (p. 15) and the power turned on the power. When an item is selected, the color of the item changes...
Operating Instructions
Page 15
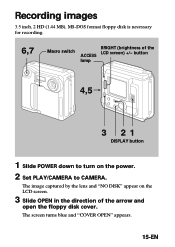
The image captured by the lens and "NO DISK" appear on the power. 2 Set PLAY/CAMERA to turn on the LCD screen. 3 Slide OPEN in the direction of the ACCESS LCD screen) +/- Recording images 3.5 inch, 2 HD (1.44 MB), MS-DOS format floppy disk is necessary for recording. 6,7 Macro switch BRIGHT (brightness of the arrow and open the floppy disk cover. The screen turns blue and "COVER OPEN" appears. 15-EN button lamp 4,5 3 21 DISPLAY button 1 Slide POWER down to CAMERA.
The image captured by the lens and "NO DISK" appear on the power. 2 Set PLAY/CAMERA to turn on the LCD screen. 3 Slide OPEN in the direction of the ACCESS LCD screen) +/- Recording images 3.5 inch, 2 HD (1.44 MB), MS-DOS format floppy disk is necessary for recording. 6,7 Macro switch BRIGHT (brightness of the arrow and open the floppy disk cover. The screen turns blue and "COVER OPEN" appears. 15-EN button lamp 4,5 3 21 DISPLAY button 1 Slide POWER down to CAMERA.
Operating Instructions
Page 20
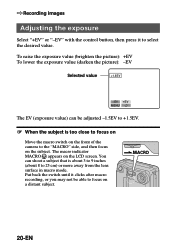
... +EV MENU The EV (exposure value) can shoot a subject that is too close to focus on Move the macro switch on the front of the camera to the "MACRO" side, and then focus on the subject. Put back the switch until it to focus on the LCD screen. You can be...
... +EV MENU The EV (exposure value) can shoot a subject that is too close to focus on Move the macro switch on the front of the camera to the "MACRO" side, and then focus on the subject. Put back the switch until it to focus on the LCD screen. You can be...
Operating Instructions
Page 21
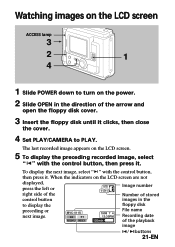
...next image. The last recorded image appears on the LCD screen. 5 To display the preceding recorded image, select " " with the control button, then press it. MVC-011S MENU INDEX STD 11/11 1998 7 4 12:30PM 120min Image number Number of stored images in the direction of the arrow and open the... the floppy disk until it . To display the next image, select " " with the control button, then press it clicks, then close the cover. 4 Set PLAY/CAMERA to PLAY. Watching images on the LCD screen ACCESS lamp 3 2 1 4 1 Slide POWER down to turn on the power. 2 Slide OPEN in the floppy disk ...
...next image. The last recorded image appears on the LCD screen. 5 To display the preceding recorded image, select " " with the control button, then press it. MVC-011S MENU INDEX STD 11/11 1998 7 4 12:30PM 120min Image number Number of stored images in the direction of the arrow and open the... the floppy disk until it . To display the next image, select " " with the control button, then press it clicks, then close the cover. 4 Set PLAY/CAMERA to PLAY. Watching images on the LCD screen ACCESS lamp 3 2 1 4 1 Slide POWER down to turn on the power. 2 Slide OPEN in the floppy disk ...
Operating Instructions
Page 31
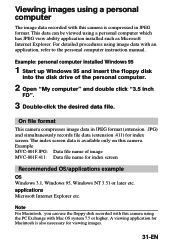
...Microsoft Internet Explorer. Example: personal computer installed Windows 95 1 Start up Windows 95 and insert the floppy disk into the disk drive of image MVC-001F.411: Data file name for index screen Recommended OS/applications example OS Windows 3.1, Windows 95, Windows NT 3.51 or later etc. ...The index screen data is available only on this camera using the PC Exchange with this camera. For detailed procedures using image data with this camera is also necessary for index screen. Example MVC-001F.JPG: Data file name of the personal computer. 2 Open "My computer" ...
...Microsoft Internet Explorer. Example: personal computer installed Windows 95 1 Start up Windows 95 and insert the floppy disk into the disk drive of image MVC-001F.411: Data file name for index screen Recommended OS/applications example OS Windows 3.1, Windows 95, Windows NT 3.51 or later etc. ...The index screen data is available only on this camera using the PC Exchange with this camera. For detailed procedures using image data with this camera is also necessary for index screen. Example MVC-001F.JPG: Data file name of the personal computer. 2 Open "My computer" ...
Operating Instructions
Page 32
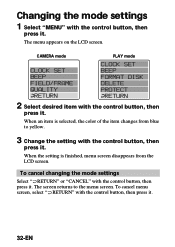
... settings Select " RETURN" or "CANCEL" with the control button, then press it . Changing the mode settings 1 Select "MENU" with the control button, then press it . CAMERA mode CLOCK SET BEEP FIELD/FRAME QUALITY RETURN PLAY mode CLOCK SET BEEP FORMAT DISK DELETE PROTECT RETURN 2 Select desired item with the control button...
... settings Select " RETURN" or "CANCEL" with the control button, then press it . Changing the mode settings 1 Select "MENU" with the control button, then press it . CAMERA mode CLOCK SET BEEP FIELD/FRAME QUALITY RETURN PLAY mode CLOCK SET BEEP FORMAT DISK DELETE PROTECT RETURN 2 Select desired item with the control button...
Operating Instructions
Page 33
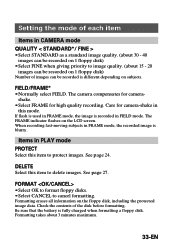
... is different depending on subjects. Check the contents of the disk before formatting. shake. • Select FRAME for camera-shake in this mode. See page 27. Setting the mode of each item Items in CAMERA mode QUALITY < STANDARD*/ FINE > • Select STANDARD as a standard image quality. (about 30 - 40 images can be.... Be sure that the battery is recorded in PLAY mode PROTECT Select this item to delete images. DELETE Select this item to cancel formatting. The camera compensates for...
... is different depending on subjects. Check the contents of the disk before formatting. shake. • Select FRAME for camera-shake in this mode. See page 27. Setting the mode of each item Items in CAMERA mode QUALITY < STANDARD*/ FINE > • Select STANDARD as a standard image quality. (about 30 - 40 images can be.... Be sure that the battery is recorded in PLAY mode PROTECT Select this item to delete images. DELETE Select this item to cancel formatting. The camera compensates for...
Operating Instructions
Page 34
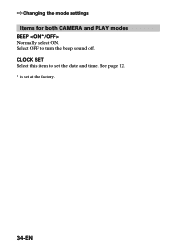
CLOCK SET Select this item to turn the beep sound off. ÷ Changing the mode settings Items for both CAMERA and PLAY modes BEEP Normally select ON. See page 12. * is set the date and time. Select OFF to set at the factory. 34-EN
CLOCK SET Select this item to turn the beep sound off. ÷ Changing the mode settings Items for both CAMERA and PLAY modes BEEP Normally select ON. See page 12. * is set the date and time. Select OFF to set at the factory. 34-EN
Operating Instructions
Page 35
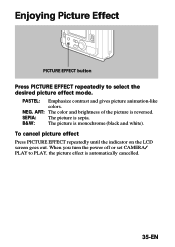
To cancel picture effect Press PICTURE EFFECT repeatedly until the indicator on the LCD screen goes out. ART: The color and brightness of the picture is monochrome (black and white). B&W: The picture is reversed. Enjoying Picture Effect PICTURE EFFECT button Press PICTURE EFFECT repeatedly to PLAY, the picture effect is sepia. SEPIA: The picture is automatically cancelled. 35-EN When you turn the power off or set CAMERA/ PLAY to select the desired picture effect mode. PASTEL: Emphasize contrast and gives picture animation-like colors. NEG.
To cancel picture effect Press PICTURE EFFECT repeatedly until the indicator on the LCD screen goes out. ART: The color and brightness of the picture is monochrome (black and white). B&W: The picture is reversed. Enjoying Picture Effect PICTURE EFFECT button Press PICTURE EFFECT repeatedly to PLAY, the picture effect is sepia. SEPIA: The picture is automatically cancelled. 35-EN When you turn the power off or set CAMERA/ PLAY to select the desired picture effect mode. PASTEL: Emphasize contrast and gives picture animation-like colors. NEG.
Operating Instructions
Page 36
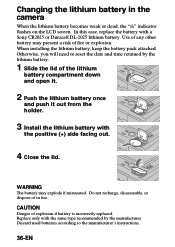
... battery compartment down and open it. 2 Push the lithium battery once and push it out from the holder. 3 Install the lithium battery with a Sony CR2025 or Duracell DL-2025 lithium battery. In this case, replace the battery with the positive (+) side facing out. 4 Close the lid. WARNING ...The battery may present a risk of in the camera When the lithium battery becomes weak or dead, the "I" indicator flashes on the LCD screen. When installing the lithium battery, keep the battery pack attached...
... battery compartment down and open it. 2 Push the lithium battery once and push it out from the holder. 3 Install the lithium battery with a Sony CR2025 or Duracell DL-2025 lithium battery. In this case, replace the battery with the positive (+) side facing out. 4 Close the lid. WARNING ...The battery may present a risk of in the camera When the lithium battery becomes weak or dead, the "I" indicator flashes on the LCD screen. When installing the lithium battery, keep the battery pack attached...
Operating Instructions
Page 37
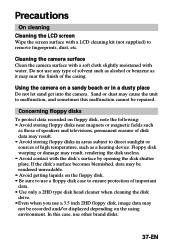
... permanent erasure of disk data may result. • Avoid storing floppy disks in a dusty place Do not let sand get into the camera. Using the camera on the using environment. Floppy disk warping or damage may mar the finish of the casing. Sand or dust may not be repaired. In...to direct sunlight or sources of high temperature, such as a heating device. Do not use other brand disks. 37-EN Cleaning the camera surface Clean the camera surface with a soft cloth slightly moistened with the disk's surface by opening the disk shutter plate. Precautions On cleaning Cleaning the LCD ...
... permanent erasure of disk data may result. • Avoid storing floppy disks in a dusty place Do not let sand get into the camera. Using the camera on the using environment. Floppy disk warping or damage may mar the finish of the casing. Sand or dust may not be repaired. In...to direct sunlight or sources of high temperature, such as a heating device. Do not use other brand disks. 37-EN Cleaning the camera surface Clean the camera surface with a soft cloth slightly moistened with the disk's surface by opening the disk shutter plate. Precautions On cleaning Cleaning the LCD ...
Operating Instructions
Page 38
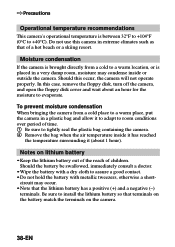
...occur. •Note that the lithium battery has a positive (+) and a negative (-) terminals. In this case, remove the floppy disk, turn off the camera, and open the floppy disk cover and wait about 1 hour). circuit may condense inside it has reached the temperature surrounding it to adapt to +40... battery match the terminals on lithium battery •Keep the lithium battery out of the reach of children. To prevent moisture condensation When bringing the camera from a cold to a warm location, or is between 32°F to +104°F (0°C to room conditions over period of a hot ...
...occur. •Note that the lithium battery has a positive (+) and a negative (-) terminals. In this case, remove the floppy disk, turn off the camera, and open the floppy disk cover and wait about 1 hour). circuit may condense inside it has reached the temperature surrounding it to adapt to +40... battery match the terminals on lithium battery •Keep the lithium battery out of the reach of children. To prevent moisture condensation When bringing the camera from a cold to a warm location, or is between 32°F to +104°F (0°C to room conditions over period of a hot ...
Operating Instructions
Page 39
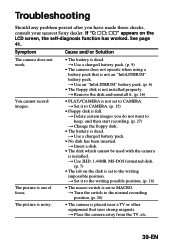
...not an "InfoLITHIUM" battery pack. n Insert a disk. • The disk which cannot be used with the camera is dead. n Delete certain images you have made those checks, consult your nearest Sony dealer. See page 41. The picture is dead. The picture is noisy. • The battery is out of ...focus. n Set it . (p. 16) • PLAY/CAMERA is set to MACRO. n Place the camera away from the TV, etc. 39-EN ...
...not an "InfoLITHIUM" battery pack. n Insert a disk. • The disk which cannot be used with the camera is dead. n Delete certain images you have made those checks, consult your nearest Sony dealer. See page 41. The picture is dead. The picture is noisy. • The battery is out of ...focus. n Set it . (p. 16) • PLAY/CAMERA is set to MACRO. n Place the camera away from the TV, etc. 39-EN ...


