Operating Instructions
Page 2
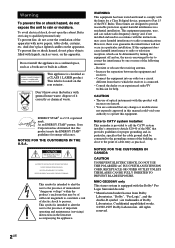
...CATV system installer's attention to Article 820-40 of the NEC that provides guidelines for a Class B digital device, pursuant to operate this manual could void your authority to Part 15 of the following measures: - are trademarks of cable entry as vases, on the apparatus. Don't...fire or shock hazard, do not open the cabinet. As an ENERGY STAR® partner, Sony Corporation has determined that any changes or modifications not expressly approved in a residential installation. MHC-GS300AV only This stereo system is intended to alert the user to the presence of uninsulated "dangerous...
...CATV system installer's attention to Article 820-40 of the NEC that provides guidelines for a Class B digital device, pursuant to operate this manual could void your authority to Part 15 of the following measures: - are trademarks of cable entry as vases, on the apparatus. Don't...fire or shock hazard, do not open the cabinet. As an ENERGY STAR® partner, Sony Corporation has determined that any changes or modifications not expressly approved in a residential installation. MHC-GS300AV only This stereo system is intended to alert the user to the presence of uninsulated "dangerous...

Operating Instructions
Page 3
...Disc Memo 16 Playing a disc with other sound source - Program Play ..... 15 Labeling a CD - CD Synchro Recording/Recording Manually/Program Edit 24 Timer-recording radio programs 25 Sound Adjustment Adjusting the sound - Table of Contents List of Button Locations and Reference... speaker 36 Connecting a DVD player 36 Troubleshooting Problems and remedies 37 Messages 39 Additional Information Precautions 40 Specifications 42 * MHC-GS300AV only 3US GROOVE/V-GROOVE 26 Selecting the sound effect 27 Selecting the surround effect 27 Enjoying Dolby Pro Logic Surround sound...
...Disc Memo 16 Playing a disc with other sound source - Program Play ..... 15 Labeling a CD - CD Synchro Recording/Recording Manually/Program Edit 24 Timer-recording radio programs 25 Sound Adjustment Adjusting the sound - Table of Contents List of Button Locations and Reference... speaker 36 Connecting a DVD player 36 Troubleshooting Problems and remedies 37 Messages 39 Additional Information Precautions 40 Specifications 42 * MHC-GS300AV only 3US GROOVE/V-GROOVE 26 Selecting the sound effect 27 Selecting the surround effect 27 Enjoying Dolby Pro Logic Surround sound...
Operating Instructions
Page 19
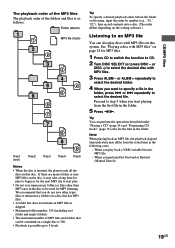
... MP3 file You can also play to begin or for the next MP3 file to 8 levels. We recommend that you perform Fast Forward or Rewind (Manual Search) 19US
... MP3 file You can also play to begin or for the next MP3 file to 8 levels. We recommend that you perform Fast Forward or Rewind (Manual Search) 19US
Operating Instructions
Page 20
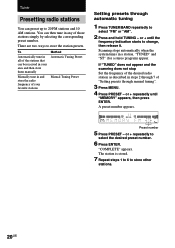
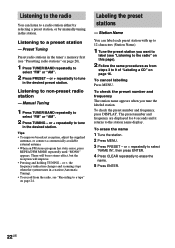
... tune in all of the stations that can then tune in steps 2 through 7 of your favorite stations Method Automatic Tuning Preset Manual Tuning Preset Setting presets through manual tuning". 3 Press MENU. 4 Press PRESET - If "TUNED" does not appear and the scanning does not stop Set the frequency...the desired preset number. 6 Press ENTER. or + repeatedly to store other stations. 20US You can be received in your area and then store them manually Manually tune in a station. There are two ways to 20 FM stations and 10 AM stations. "TUNED" and "ST" (for a stereo program) appear...
... tune in all of the stations that can then tune in steps 2 through 7 of your favorite stations Method Automatic Tuning Preset Manual Tuning Preset Setting presets through manual tuning". 3 Press MENU. 4 Press PRESET - If "TUNED" does not appear and the scanning does not stop Set the frequency...the desired preset number. 6 Press ENTER. or + repeatedly to store other stations. 20US You can be received in your area and then store them manually Manually tune in a station. There are two ways to 20 FM stations and 10 AM stations. "TUNED" and "ST" (for a stereo program) appear...
Operating Instructions
Page 21
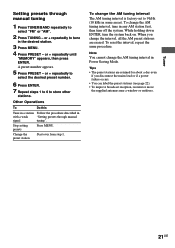
Tuner Setting presets through manual signal tuning". To change the interval, all the AM preset stations are retained for about a day even if you disconnect the mains lead or if a ... steps 1 to 6 to tune in some areas). Other Operations To Do this Tune in a station Follow the procedure described in with a weak "Setting presets through manual tuning 1 Press TUNER/BAND repeatedly to 9 kHz (10 kHz in the desired station. 3 Press MENU. 4 Press PRESET - or + repeatedly until "MEMORY" appears, then press ENTER...
Tuner Setting presets through manual signal tuning". To change the interval, all the AM preset stations are retained for about a day even if you disconnect the mains lead or if a ... steps 1 to 6 to tune in some areas). Other Operations To Do this Tune in a station Follow the procedure described in with a weak "Setting presets through manual tuning 1 Press TUNER/BAND repeatedly to 9 kHz (10 kHz in the desired station. 3 Press MENU. 4 Press PRESET - or + repeatedly until "MEMORY" appears, then press ENTER...
Operating Instructions
Page 22
Manual Tuning 1 Press TUNER/BAND repeatedly to erase the name. 5 Press ENTER. 22US Tips • To improve broadcast reception, adjust the supplied antennas, or connect a commercially ... scanning stops when the system tunes in a station (Automatic Tuning). • To record from steps 3 to a radio station either by selecting a preset station, or by manually tuning in the tuner's memory first (see "Recording to a tape" on page 24. Station Name You can listen to 9 of "Labeling a CD" on page 20...
Manual Tuning 1 Press TUNER/BAND repeatedly to erase the name. 5 Press ENTER. 22US Tips • To improve broadcast reception, adjust the supplied antennas, or connect a commercially ... scanning stops when the system tunes in a station (Automatic Tuning). • To record from steps 3 to a radio station either by selecting a preset station, or by manually tuning in the tuner's memory first (see "Recording to a tape" on page 24. Station Name You can listen to 9 of "Labeling a CD" on page 20...
Operating Instructions
Page 24
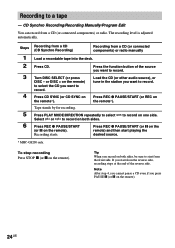
...PAUSE X (or X on the remote*). Tape stands by for recording. Recording starts. Select h or j to start from a CD (or connected components) or radio manually Load a recordable tape into the deck. To stop recording Press STOP x (or x on one side. Note After step 4, you cannot pause a CD even if ...you start playing the desired source. * MHC-GS200 only. Press CD SYNC (or CD SYNC on the remote). 24US Tip When you want to a tape - Press the function button of the reverse...
...PAUSE X (or X on the remote*). Tape stands by for recording. Recording starts. Select h or j to start from a CD (or connected components) or radio manually Load a recordable tape into the deck. To stop recording Press STOP x (or x on one side. Note After step 4, you cannot pause a CD even if ...you start playing the desired source. * MHC-GS200 only. Press CD SYNC (or CD SYNC on the remote). 24US Tip When you want to a tape - Press the function button of the reverse...
Operating Instructions
Page 31
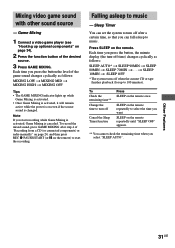
... that you select "SLEEP AUTO". Sleep Timer You can fall asleep to turn off after step 4 of "Recording from a CD (or connected components) or radio manually" on page 24, and then press REC z PAUSE/START (or X on even if the source sound is canceled. Press SLEEP on the remote repeatedly until...
... that you select "SLEEP AUTO". Sleep Timer You can fall asleep to turn off after step 4 of "Recording from a CD (or connected components) or radio manually" on page 24, and then press REC z PAUSE/START (or X on even if the source sound is canceled. Press SLEEP on the remote repeatedly until...
Operating Instructions
Page 35
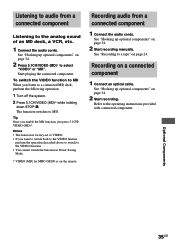
...funtion, perform the operation described above to switch to select "VIDEO" or "MD". See "Hooking up optional components" on page 34. 2 Start recording manually. See "Hooking up optional components" on page 34. 2 Press 5.1CH/VIDEO (MD)* to the VIDEO function. • You cannot switch the ...function in Power Saving Mode. * VIDEO (MD) for MHC-GS200 or on a connected component 1 Connect an optical cable. Recording audio from a connected component Listening to a tape" on page 34. 2 Start recording. ...
...funtion, perform the operation described above to switch to select "VIDEO" or "MD". See "Hooking up optional components" on page 34. 2 Start recording manually. See "Hooking up optional components" on page 34. 2 Press 5.1CH/VIDEO (MD)* to the VIDEO function. • You cannot switch the ...function in Power Saving Mode. * VIDEO (MD) for MHC-GS200 or on a connected component 1 Connect an optical cable. Recording audio from a connected component Listening to a tape" on page 34. 2 Start recording. ...
Marketing Specifications (MHCGS300AV)
Page 2
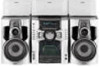
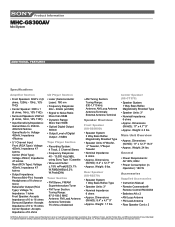
...Requirements: AC120V, 60Hz • Power Consumption (in part without written permission is prohibited. Dolby Digital is a registered trademark of Sony. Product Information MHC-GS300AV Mini System ADDITIONAL FEATURES Specifications Amplifier Section • Front Speakers: 60W x 2 (6 ohms, 120Hz - 10Hz, 10% ... Licensing Corporation. Weight: 1.7 lbs. Reproduction in whole or in Operation): 180 W Accessories Supplied Accessories • Instruction Manual • Remote Commander® Remote Control RM-SGS3 • Batteries AA x 2 • AM Loop Antenna •...
...Requirements: AC120V, 60Hz • Power Consumption (in part without written permission is prohibited. Dolby Digital is a registered trademark of Sony. Product Information MHC-GS300AV Mini System ADDITIONAL FEATURES Specifications Amplifier Section • Front Speakers: 60W x 2 (6 ohms, 120Hz - 10Hz, 10% ... Licensing Corporation. Weight: 1.7 lbs. Reproduction in whole or in Operation): 180 W Accessories Supplied Accessories • Instruction Manual • Remote Commander® Remote Control RM-SGS3 • Batteries AA x 2 • AM Loop Antenna •...

