
Operating Instructions
Page 1
Customers in the continental United States contact the Direct Response Center at : (416) 499-SONY (7669) LCD Projection TV HD-Monitor Operating Instructions KF-42WE610 KF-50WE610 KF-60WE610 2003 Sony Corporation If, after reading this instruction manual, you have additional questions related to the use of your Sony projection TV, please call one of the following numbers (English only). 4-097-546-13 (2) LCD Projection TV KF-42WE610/50WE610/60WE610 Printed in Canada contact the Customer Relations Center at : 1-800-222-SONY (7669) Customers in U.S.A.
Customers in the continental United States contact the Direct Response Center at : (416) 499-SONY (7669) LCD Projection TV HD-Monitor Operating Instructions KF-42WE610 KF-50WE610 KF-60WE610 2003 Sony Corporation If, after reading this instruction manual, you have additional questions related to the use of your Sony projection TV, please call one of the following numbers (English only). 4-097-546-13 (2) LCD Projection TV KF-42WE610/50WE610/60WE610 Printed in Canada contact the Customer Relations Center at : 1-800-222-SONY (7669) Customers in U.S.A.
Operating Instructions
Page 2
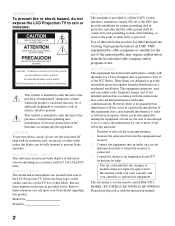
... shock to the presence of important operating and maintenance (servicing) instructions in the spaces provided below the Sony logo, on the sticker, and also on the TV box (white label). Use of this television receiver for other outlet unless the blades can radiate radio frequency...installation. Model No. MODEL: KF-42WE610, KF-50WE610, KF-60WE610 Please keep this notice with the limits for a Class B digital device pursuant to the point of cable entry as practical. Owner's Record The model and serial numbers are located at the rear of the LCD Projection TV, below . Record these ...
... shock to the presence of important operating and maintenance (servicing) instructions in the spaces provided below the Sony logo, on the sticker, and also on the TV box (white label). Use of this television receiver for other outlet unless the blades can radiate radio frequency...installation. Model No. MODEL: KF-42WE610, KF-50WE610, KF-60WE610 Please keep this notice with the limits for a Class B digital device pursuant to the point of cable entry as practical. Owner's Record The model and serial numbers are located at the rear of the LCD Projection TV, below . Record these ...

Operating Instructions
Page 3
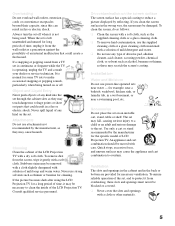
... location, or if the room temperature changes suddenly, the picture may be using the LCD Projection TV for several days, disconnect the power by BBE Sound, Inc. As an ENERGY STAR® Partner, Sony Corporation has determined that face the screen with opaque drapery. TruSurround, SRS and the (.... ❑ If any liquid or solid object should fall inside the cabinet, unplug the LCD Projection TV immediately and have it checked by qualified service personnel before turning on the LCD Projection TV. ❑ To obtain the best picture, do not block the ventilation openings. ❑ Do...
... location, or if the room temperature changes suddenly, the picture may be using the LCD Projection TV for several days, disconnect the power by BBE Sound, Inc. As an ENERGY STAR® Partner, Sony Corporation has determined that face the screen with opaque drapery. TruSurround, SRS and the (.... ❑ If any liquid or solid object should fall inside the cabinet, unplug the LCD Projection TV immediately and have it checked by qualified service personnel before turning on the LCD Projection TV. ❑ To obtain the best picture, do not block the ventilation openings. ❑ Do...
Operating Instructions
Page 5
... On contamination on or off. Installation Water and Moisture Do not use strong solvents such as a precaution against the possibility of the LCD Projection TV. To ensure reliable operation of the set, and to make occasional snapping or popping sounds, particularly when being used. If a snapping or...for example, near a bathtub, washbowl, kitchen sink, or laundry tub, in fire or electric shock. Cleaning Clean the cabinet of LCD Projection TV. Consult qualified service personnel. Never spill liquid of any type of time, unplug it gently with a solution of any kind into the set...
... On contamination on or off. Installation Water and Moisture Do not use strong solvents such as a precaution against the possibility of the LCD Projection TV. To ensure reliable operation of the set, and to make occasional snapping or popping sounds, particularly when being used. If a snapping or...for example, near a bathtub, washbowl, kitchen sink, or laundry tub, in fire or electric shock. Cleaning Clean the cabinet of LCD Projection TV. Consult qualified service personnel. Never spill liquid of any type of time, unplug it gently with a solution of any kind into the set...
Operating Instructions
Page 7
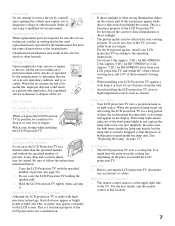
... it at least 1.8m (approx. 5.9ft.) for KF-42WE610, 2.0m (approx. 6.6ft.) for KF-50WE610 or 2.2m (approx. 7.2ft.) for a long period of the front panel blinks in a picture tube implosion. You might hear the noise from behind the screen. About the LCD Projection TV Although the LCD projection TV is made with the specified number of...
... it at least 1.8m (approx. 5.9ft.) for KF-42WE610, 2.0m (approx. 6.6ft.) for KF-50WE610 or 2.2m (approx. 7.2ft.) for a long period of the front panel blinks in a picture tube implosion. You might hear the noise from behind the screen. About the LCD Projection TV Although the LCD projection TV is made with the specified number of...
Operating Instructions
Page 8
...Sony LCD Projection TV Presenting the Sony LCD Projection TV 9 Using This Manual 10 Enjoying Your LCD Projection TV 11 Replacing the Lamp 13 Installing and Connecting the LCD Projection TV Contents 17 Inserting Batteries into the Remote Control ..........17 Carrying Your LCD Projection TV 18 To Prevent the LCD Projection TV from Falling Down 19 When Installing Your LCD Projection TV...Setting Up the LCD projection TV Automatically 43 Using the Features Using the Remote Control 44 Watching the TV 46 Watching Digital TV 48 Using Favorite Channels 49 Using Twin View 50 Using the Freeze ...
...Sony LCD Projection TV Presenting the Sony LCD Projection TV 9 Using This Manual 10 Enjoying Your LCD Projection TV 11 Replacing the Lamp 13 Installing and Connecting the LCD Projection TV Contents 17 Inserting Batteries into the Remote Control ..........17 Carrying Your LCD Projection TV 18 To Prevent the LCD Projection TV from Falling Down 19 When Installing Your LCD Projection TV...Setting Up the LCD projection TV Automatically 43 Using the Features Using the Remote Control 44 Watching the TV 46 Watching Digital TV 48 Using Favorite Channels 49 Using Twin View 50 Using the Freeze ...
Operating Instructions
Page 9
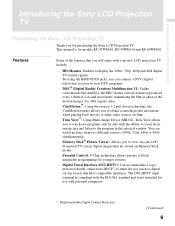
... sources (1080i, 720p, 480p or 480i) simultaneously. ❑ Memory Stick® Picture Viewer: Allows you for models KF-42WE610, KF-50WE610 and KF-60WE610. You can connect a DTV (digital television) receiver to view DTV programs. ❑ DRC® (Digital Reality...and is for purchasing the Sony LCD Projection TV. The DVI-HDTV input terminal is compliant with personal computers. * High-bandwidth Digital Content Protection (Continued) 9 Introducing the Sony LCD Projection TV Introducing the Sony LCD Projection TV Presenting the Sony LCD Projection TV Thank you to view on...
... sources (1080i, 720p, 480p or 480i) simultaneously. ❑ Memory Stick® Picture Viewer: Allows you for models KF-42WE610, KF-50WE610 and KF-60WE610. You can connect a DTV (digital television) receiver to view DTV programs. ❑ DRC® (Digital Reality...and is for purchasing the Sony LCD Projection TV. The DVI-HDTV input terminal is compliant with personal computers. * High-bandwidth Digital Content Protection (Continued) 9 Introducing the Sony LCD Projection TV Introducing the Sony LCD Projection TV Presenting the Sony LCD Projection TV Thank you to view on...
Operating Instructions
Page 10
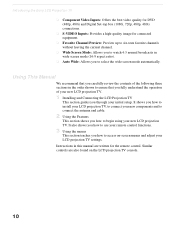
... understand the operation of the following three sections in this manual are also found on -screen menus and adjust your new LCD projection TV. It also shows you how to use your remote control functions. 3 Using the menus This section teaches you to access on the LCD... section guides you how to connect the antenna and cable. 2 Using the Features This section shows you through your initial setup. Introducing the Sony LCD Projection TV ❑ Component Video Inputs: Offers the best video quality for DVD (480p, 480i) and Digital Set-top box (1080i, 720p, 480p, 480i) connections. ❑...
... understand the operation of the following three sections in this manual are also found on -screen menus and adjust your new LCD projection TV. It also shows you how to use your remote control functions. 3 Using the menus This section teaches you to access on the LCD... section guides you how to connect the antenna and cable. 2 Using the Features This section shows you through your initial setup. Introducing the Sony LCD Projection TV ❑ Component Video Inputs: Offers the best video quality for DVD (480p, 480i) and Digital Set-top box (1080i, 720p, 480p, 480i) connections. ❑...
Operating Instructions
Page 11
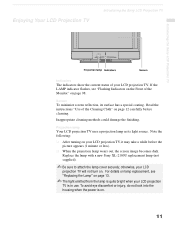
...Projection TV Introducing the Sony LCD Projection TV Introducing the Sony LCD Projection TV Projection lamp Indicators Screen Indicators The indicators show the current status of the Cleaning Cloth" on page 12 carefully before the picture appears (1 minute or less). ❑ When the projection lamp wears out, the screen image becomes dark. Projection lamp Your LCD projection TV uses a projection...of your LCD projection TV. For details on lamp replacement, see "Flashing Indicators on the Front of the Monitor" on . 11 Replace the lamp with a new Sony XL-2100U replacement...
...Projection TV Introducing the Sony LCD Projection TV Introducing the Sony LCD Projection TV Projection lamp Indicators Screen Indicators The indicators show the current status of the Cleaning Cloth" on page 12 carefully before the picture appears (1 minute or less). ❑ When the projection lamp wears out, the screen image becomes dark. Projection lamp Your LCD projection TV uses a projection...of your LCD projection TV. For details on lamp replacement, see "Flashing Indicators on the Front of the Monitor" on . 11 Replace the lamp with a new Sony XL-2100U replacement...
Operating Instructions
Page 12
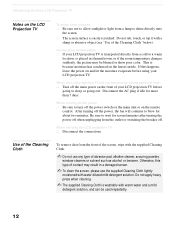
... The supplied Cleaning Cloth is washable with warm water and a mild detergent solution, and can be used repeatedly. 12 When the LCD projection TV will continue to blow for more than 7 days. Use of abrasive pad, alkaline cleaner, scouring powder, window cleaners or solvent such ...abrasive object (see "Use of your LCD projection TV before using your LCD projection TV is because moisture has condensed on the lenses inside. Disconnect the AC plug if idle for about two minutes. Introducing the Sony LCD Projection TV Notes on the LCD Projection TV To enjoy clear pictures ❑ Be ...
... The supplied Cleaning Cloth is washable with warm water and a mild detergent solution, and can be used repeatedly. 12 When the LCD projection TV will continue to blow for more than 7 days. Use of abrasive pad, alkaline cleaner, scouring powder, window cleaners or solvent such ...abrasive object (see "Use of your LCD projection TV before using your LCD projection TV is because moisture has condensed on the lenses inside. Disconnect the AC plug if idle for about two minutes. Introducing the Sony LCD Projection TV Notes on the LCD Projection TV To enjoy clear pictures ❑ Be ...
Operating Instructions
Page 13
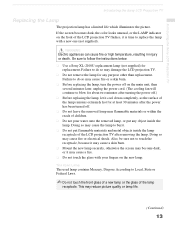
... a fire. ❑ Do not touch the glass with a new one (not supplied). Introducing the Sony LCD Projection TV Introducing the Sony LCD Projection TV Replacing the Lamp The projection lamp has a limited life which illuminates the picture. Failure to follow the instructions below. ❑ Use... a Sony XL-2100U replacement lamp (not supplied) for any object inside the lamp. Doing so may ...
... a fire. ❑ Do not touch the glass with a new one (not supplied). Introducing the Sony LCD Projection TV Introducing the Sony LCD Projection TV Replacing the Lamp The projection lamp has a limited life which illuminates the picture. Failure to follow the instructions below. ❑ Use... a Sony XL-2100U replacement lamp (not supplied) for any object inside the lamp. Doing so may ...
Operating Instructions
Page 14
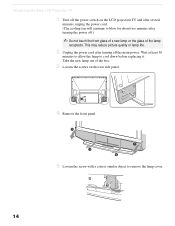
...off the main power. Wait at least 30 minutes to allow the lamp to cool down before replacing it. Introducing the Sony LCD Projection TV 1 Turn off the power switch on the LCD projection TV and after several minutes, unplug the power cord. (The cooling fan will continue to blow for about two minutes after... turning off .) ✍ Do not touch the front glass of a new lamp or the glass of the box. 3 Loosen the screws on the rear side panel. 4 ...
...off the main power. Wait at least 30 minutes to allow the lamp to cool down before replacing it. Introducing the Sony LCD Projection TV 1 Turn off the power switch on the LCD projection TV and after several minutes, unplug the power cord. (The cooling fan will continue to blow for about two minutes after... turning off .) ✍ Do not touch the front glass of a new lamp or the glass of the box. 3 Loosen the screws on the rear side panel. 4 ...
Operating Instructions
Page 15
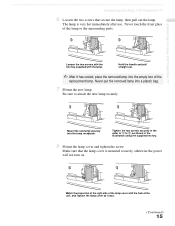
... lamp. Never put the removed lamp into the lamp receptacle. Mount the new lamp securely into a plastic bag. 7 Mount the new lamp. Match the projection of the right side of the lamp cover with the lamp. Be sure to 2, as it has cooled, place the removed lamp into the empty... key. 8 Mount the lamp cover and tighten the screw. Make sure that secure the lamp, then pull out the lamp. Introducing the Sony LCD Projection TV Introducing the Sony LCD Projection TV 6 Loosen the two screws that the lamp cover is very hot immediately after use. Never touch the front glass of 1 to attach the...
... lamp. Never put the removed lamp into the lamp receptacle. Mount the new lamp securely into a plastic bag. 7 Mount the new lamp. Match the projection of the right side of the lamp cover with the lamp. Be sure to 2, as it has cooled, place the removed lamp into the empty... key. 8 Mount the lamp cover and tighten the screw. Make sure that secure the lamp, then pull out the lamp. Introducing the Sony LCD Projection TV Introducing the Sony LCD Projection TV 6 Loosen the two screws that the lamp cover is very hot immediately after use. Never touch the front glass of 1 to attach the...
Operating Instructions
Page 16
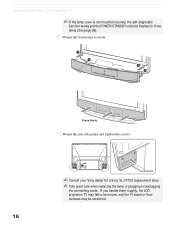
Introducing the Sony LCD Projection TV ✍ If the lamp cover is not mounted securely, the self-diagnostic function works and the POWER/STANDBY indicator flashes for a Sony XL-2100U replacement lamp. ✍ Take great care when replacing the lamp or plugging in/unplugging the connecting cords. Press firmly. 10 Mount the rear side panel and tighten the screws. ✍ Consult your Sony dealer for three times (See page 98). 9 Mount the front panel securely. If you handle them roughly, the LCD projection TV may fall or be moved, and the TV stand or floor surfaces may be scratched. 16
Introducing the Sony LCD Projection TV ✍ If the lamp cover is not mounted securely, the self-diagnostic function works and the POWER/STANDBY indicator flashes for a Sony XL-2100U replacement lamp. ✍ Take great care when replacing the lamp or plugging in/unplugging the connecting cords. Press firmly. 10 Mount the rear side panel and tighten the screws. ✍ Consult your Sony dealer for three times (See page 98). 9 Mount the front panel securely. If you handle them roughly, the LCD projection TV may fall or be moved, and the TV stand or floor surfaces may be scratched. 16
Operating Instructions
Page 17
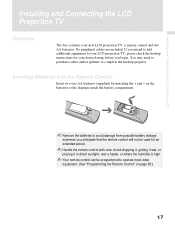
Installing and Connecting the LCD Projection TV Installing and Connecting the LCD Projection TV Contents The box contains your desired setup before you anticipate that the remote control will not be programmed to complete the hookup properly. Avoid... the Remote Control" on the batteries to the diagram inside the battery compartment. ✍ Remove the batteries to your LCD projection TV, please check the hookup instructions for your new LCD projection TV, a remote control and two AA batteries. on page 86.) 17 Inserting Batteries into the Remote Control Insert two size AA...
Installing and Connecting the LCD Projection TV Installing and Connecting the LCD Projection TV Contents The box contains your desired setup before you anticipate that the remote control will not be programmed to complete the hookup properly. Avoid... the Remote Control" on the batteries to the diagram inside the battery compartment. ✍ Remove the batteries to your LCD projection TV, please check the hookup instructions for your new LCD projection TV, a remote control and two AA batteries. on page 86.) 17 Inserting Batteries into the Remote Control Insert two size AA...
Operating Instructions
Page 18
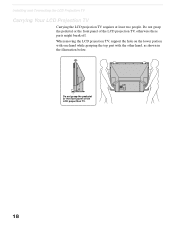
When moving the LCD projection TV, support the hole on the lower portion with one hand while grasping the top part with the other hand, as shown in the illustration below. Do not grasp the pedestal or the front panel of the LCD projecttion TV. 18 Installing and Connecting the LCD Projection TV Carrying Your LCD Projection TV Carrying the LCD projection TV requires at least two people. Do not grasp the pedestal or the front panel of the LCD projection TV, otherwise these parts might break off.
When moving the LCD projection TV, support the hole on the lower portion with one hand while grasping the top part with the other hand, as shown in the illustration below. Do not grasp the pedestal or the front panel of the LCD projecttion TV. 18 Installing and Connecting the LCD Projection TV Carrying Your LCD Projection TV Carrying the LCD projection TV requires at least two people. Do not grasp the pedestal or the front panel of the LCD projection TV, otherwise these parts might break off.
Operating Instructions
Page 19
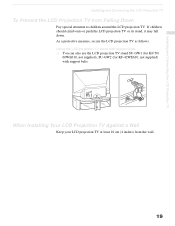
... with support belts ❑ You can also use the LCD projection TV stand SU-GW1 (for KF-50/ 60WE610, not supplied), SU-GW2 (for KF-42WE610, not supplied) with support belts. When Installing Your LCD Projection TV Against a Wall Keep your LCD projection TV at least 10 cm (4 inches) from Falling Down Pay special attention to children around the...
... with support belts ❑ You can also use the LCD projection TV stand SU-GW1 (for KF-50/ 60WE610, not supplied), SU-GW2 (for KF-42WE610, not supplied) with support belts. When Installing Your LCD Projection TV Against a Wall Keep your LCD projection TV at least 10 cm (4 inches) from Falling Down Pay special attention to children around the...
Operating Instructions
Page 20
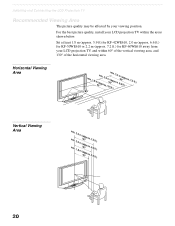
For the best picture quality, install your LCD projection TV within 60° of the vertical viewing area, and 130° of the horizontal viewing area. Horizontal Viewing Area min. 1.8 min. 2.0 m402(a"pprox. min. 2.2 .... (5a0p"prox. (4a02p"prox. 7.2 6.6 5.9 ft.) ft.) ft.) 30˚ 30˚ 20 Sit at least 1.8 m (approx. 5.9 ft) for KF-42WE610, 2.0 m (approx. 6.6 ft.) for KF-50WE610 or 2.2 m (approx. 7.2 ft.) for KF-60WE610 away from your viewing position. Installing and Connecting the LCD Projection TV Recommended Viewing Area The picture quality may be affected by your LCD...
For the best picture quality, install your LCD projection TV within 60° of the vertical viewing area, and 130° of the horizontal viewing area. Horizontal Viewing Area min. 1.8 min. 2.0 m402(a"pprox. min. 2.2 .... (5a0p"prox. (4a02p"prox. 7.2 6.6 5.9 ft.) ft.) ft.) 30˚ 30˚ 20 Sit at least 1.8 m (approx. 5.9 ft) for KF-42WE610, 2.0 m (approx. 6.6 ft.) for KF-50WE610 or 2.2 m (approx. 7.2 ft.) for KF-60WE610 away from your viewing position. Installing and Connecting the LCD Projection TV Recommended Viewing Area The picture quality may be affected by your LCD...

Operating Instructions
Page 21
Installing and Connecting the LCD Projection TV Installing and Connecting the LCD Projection TV LCD Projection TV Connectors LCD Projection TV Front and Rear Side Connectors How to open the front panel To open OPEN OPEN Push up. When lit, indicates that the Memory Stick is being read. (Do not remove the Memory Stick when the indicator is lit.) (Continued) 21 Item 1 MEMORY STICK 2 MEMORY STICK ACCESS LED Description Memory Stick insertion slot. For details, see "Inserting and Removing a Memory Stick" on page 57.
Installing and Connecting the LCD Projection TV Installing and Connecting the LCD Projection TV LCD Projection TV Connectors LCD Projection TV Front and Rear Side Connectors How to open the front panel To open OPEN OPEN Push up. When lit, indicates that the Memory Stick is being read. (Do not remove the Memory Stick when the indicator is lit.) (Continued) 21 Item 1 MEMORY STICK 2 MEMORY STICK ACCESS LED Description Memory Stick insertion slot. For details, see "Inserting and Removing a Memory Stick" on page 57.

Operating Instructions
Page 22
Installing and Connecting the LCD Projection TV Rear of LCD projection TV Front left side of LCD projection TV VIDEO 2 INPUT S VIDEO VIDEO L(MONO)-AUDIO-R 22
Installing and Connecting the LCD Projection TV Rear of LCD projection TV Front left side of LCD projection TV VIDEO 2 INPUT S VIDEO VIDEO L(MONO)-AUDIO-R 22


