
Operating Instructions
Page 6
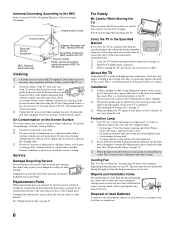
... s When the lamp eventually burns out, you place the TV in the rear cover area may cause a problem with a plugged AC power cord may hear the noise of lamp. s Do not ... of any accessories or cables. Never spill liquid of light (red, blue, or green) may expose you carry the TV in the Specified Manner If you to reflections from the...Projection lamp is made with a dry soft cloth. Replacement Parts When replacement parts are required, be affected by yourself since opening the cabinet may appear constantly on the front panel blinks in this unit. s Before carrying the TV...
... s When the lamp eventually burns out, you place the TV in the rear cover area may cause a problem with a plugged AC power cord may hear the noise of lamp. s Do not ... of any accessories or cables. Never spill liquid of light (red, blue, or green) may expose you carry the TV in the Specified Manner If you to reflections from the...Projection lamp is made with a dry soft cloth. Replacement Parts When replacement parts are required, be affected by yourself since opening the cabinet may appear constantly on the front panel blinks in this unit. s Before carrying the TV...

Operating Instructions
Page 10
...only a temporary condition. As with a new Sony XL-5200 replacement lamp (not supplied). ❑ After the lamp is on the screen can affect the picture quality. To avoid eye discomfort or injury, do not look into the light housing when the power is replaced, set the Lamp Replacement option in... dust off the power for a while or letting the TV run on your TV. ✍ The light emitted from the lamp is nearing end of time, there may take a while (1 minute or less) before the picture appears. ❑ When the projection lamp wears out, the screen goes dark. Projection Lamp To replace ...
...only a temporary condition. As with a new Sony XL-5200 replacement lamp (not supplied). ❑ After the lamp is on the screen can affect the picture quality. To avoid eye discomfort or injury, do not look into the light housing when the power is replaced, set the Lamp Replacement option in... dust off the power for a while or letting the TV run on your TV. ✍ The light emitted from the lamp is nearing end of time, there may take a while (1 minute or less) before the picture appears. ❑ When the projection lamp wears out, the screen goes dark. Projection Lamp To replace ...

Operating Instructions
Page 31
.... Blinks in red when the lamp for the light source has burned out. TV Controls To open the cover Basic Operations Basic Operations Be careful not to Skip in Label Video Inputs, then the input will remain lit even if the TV is not securely attached (see the contacting Sony information on . OPEN TIMER LAMP POWER POWER...
.... Blinks in red when the lamp for the light source has burned out. TV Controls To open the cover Basic Operations Basic Operations Be careful not to Skip in Label Video Inputs, then the input will remain lit even if the TV is not securely attached (see the contacting Sony information on . OPEN TIMER LAMP POWER POWER...
Operating Instructions
Page 58
...limitations on the TV. The LED blinks two times if there is set to restore Picture settings ❏ Select Reset setting option while in the Sound setting (see page 47). 58 A slight creaking noise occurs ❏ Advanced Iris applies a mechanical iris system. Release the POWER button then ... details. General Condition Explanation/Resolution How to reset the TV to High, the cooling fan runs faster and its sound becomes louder. POWER LED blinks in red ❏ Replace the lamp (see page 34). Repeat the steps on light up page 51 to ensure that the setting option is...
...limitations on the TV. The LED blinks two times if there is set to restore Picture settings ❏ Select Reset setting option while in the Sound setting (see page 47). 58 A slight creaking noise occurs ❏ Advanced Iris applies a mechanical iris system. Release the POWER button then ... details. General Condition Explanation/Resolution How to reset the TV to High, the cooling fan runs faster and its sound becomes louder. POWER LED blinks in red ❏ Replace the lamp (see page 34). Repeat the steps on light up page 51 to ensure that the setting option is...


