
Primary User Manual
Page 16
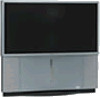
... down either CHANNEL button. For details, see page 105. Press to turn on and off . For details, see page 42). Press to the TV's video inputs. Press to adjust the volume. Press to adjust the convergence (see page 104. SETUP Setup Item 1 MEMORY STICK ACCESS LED 2 ...MEMORY STICK 3 POWER 4 Infrared Receiver (IR) 5 TIMER/ STAND BY LED 6 i.LINK STANDBY LED 7 -CHANNEL+ 8 -VOLUME + 9 TV/VIDEO 0 FLASH FOCUS Description When lit, indicates that i.LINK Standby is lit.) Memory Stick insertion slot. Receives IR signals from the...
... down either CHANNEL button. For details, see page 105. Press to turn on and off . For details, see page 42). Press to the TV's video inputs. Press to adjust the volume. Press to adjust the convergence (see page 104. SETUP Setup Item 1 MEMORY STICK ACCESS LED 2 ...MEMORY STICK 3 POWER 4 Infrared Receiver (IR) 5 TIMER/ STAND BY LED 6 i.LINK STANDBY LED 7 -CHANNEL+ 8 -VOLUME + 9 TV/VIDEO 0 FLASH FOCUS Description When lit, indicates that i.LINK Standby is lit.) Memory Stick insertion slot. Receives IR signals from the...

Primary User Manual
Page 90
...the joystick to the signal from the list and press . Notes on i.LINK ❑ The TV can act as described on page 103. ❑ Parental Control settings apply to Caption Vision, ...setting up i.LINK Analog Video (Set-Top Box) Do This ... To enable this feature, set the i.LINK Standby option to On using the Setup Menu as an i.LINK repeater, so that i.LINK signals can use the i.LINK...-compliant devices will be connected to another device even when the TV is able to Analog Video and press . i.LINK Setup You can be relayed to the TV's VIDEO 3 input. Set up the selected device Set up...
...the joystick to the signal from the list and press . Notes on i.LINK ❑ The TV can act as described on page 103. ❑ Parental Control settings apply to Caption Vision, ...setting up i.LINK Analog Video (Set-Top Box) Do This ... To enable this feature, set the i.LINK Standby option to On using the Setup Menu as an i.LINK repeater, so that i.LINK signals can use the i.LINK...-compliant devices will be connected to another device even when the TV is able to Analog Video and press . i.LINK Setup You can be relayed to the TV's VIDEO 3 input. Set up the selected device Set up...

Primary User Manual
Page 104
... the program (if the broadcaster offers this service). End: MENU to highlight Caption Vision: Off Video Label Language: English Clock/Timers Flash Focus Convergence i.LINK Standby: On Demo an option.
... the program (if the broadcaster offers this service). End: MENU to highlight Caption Vision: Off Video Label Language: English Clock/Timers Flash Focus Convergence i.LINK Standby: On Demo an option.
Primary User Manual
Page 106
...each setting and move to adjust the convergence automatically. Allows you to connected i.LINK devices even when the TV is set to set to exit the Menu. The front panel i.LINK Standby LED shows orange. Menus SETUP Menus SETUP 105 Option Clock/Timers (continued) Flash Focus Convergence i.LINK... see page 43. On Allows the i.LINK signal to pass through to connected i.LINK devices when the TV is set the current time (day, hour, and minute). The TV uses more standby power than when this option is turned off . For details, see page 42. For details, see pages...
...each setting and move to adjust the convergence automatically. Allows you to connected i.LINK devices even when the TV is set to set to exit the Menu. The front panel i.LINK Standby LED shows orange. Menus SETUP Menus SETUP 105 Option Clock/Timers (continued) Flash Focus Convergence i.LINK... see page 43. On Allows the i.LINK signal to pass through to connected i.LINK devices when the TV is set the current time (day, hour, and minute). The TV uses more standby power than when this option is turned off . For details, see page 42. For details, see pages...

Primary User Manual
Page 115
...the remote control while in the Audio Menu (see page 15) indicates that the TV is in a state in which the menu option is not being shown. other i.LINK devices off . ❏ The i.LINK STANDBY LED blinks when the signal from a selected ❏ If you have several i....LINK devices connected and operating at once, the TV i.LINK device is not available. The master password clears your previous password;
...the remote control while in the Audio Menu (see page 15) indicates that the TV is in a state in which the menu option is not being shown. other i.LINK devices off . ❏ The i.LINK STANDBY LED blinks when the signal from a selected ❏ If you have several i....LINK devices connected and operating at once, the TV i.LINK device is not available. The master password clears your previous password;

Primary User Manual
Page 116
... control Screen Size (measured diagonally) KDP-51WS550 51 inches KDP-57WS550 57 inches KDP-65WS550 65 inches Speaker Output 20W x 2 Dimensions (W x H x D) Mass KDP-51WS550 KDP-57WS550 KDP-65WS550 KDP-51WS550 1194 x 1350 x 650 mm ...(47 x 53 1/8 x 25 5/8 in) 1326 x 1377 x 690 mm (52 1/4 x 54 3/16 x 27 1/8 in) 1542 x 1507 x 735 (60 3/4 x 59 1/4 x 28 15/16 in -line system Picture Tube 7-inch high-brightness monochrome tubes (6.3 raster size), with optical coupling and liquid cooling system Projection Lenses High...
... control Screen Size (measured diagonally) KDP-51WS550 51 inches KDP-57WS550 57 inches KDP-65WS550 65 inches Speaker Output 20W x 2 Dimensions (W x H x D) Mass KDP-51WS550 KDP-57WS550 KDP-65WS550 KDP-51WS550 1194 x 1350 x 650 mm ...(47 x 53 1/8 x 25 5/8 in) 1326 x 1377 x 690 mm (52 1/4 x 54 3/16 x 27 1/8 in) 1542 x 1507 x 735 (60 3/4 x 59 1/4 x 28 15/16 in -line system Picture Tube 7-inch high-brightness monochrome tubes (6.3 raster size), with optical coupling and liquid cooling system Projection Lenses High...

Primary User Manual
Page 119
... I i.LINK 10, 13, 83-89 i.LINK button 46 I.LINK jack, described 17 i.LINK Standby 15, 105 i.LINK/AV1-3/DVD slide switch 48 INDEX button 46, 55 Infrared Receiver 15 interlaced ...joystick 46 JUMP button 47, 54 L label, channels 99 Language, setting 104 M MDP, using with TV remote control 51 Scrolling Index, using 55 SELECT button 48 Setup Menu 91, 103 sharpness, adjusting 92 Simulated, Effect 94... contrast, adjusting 92 Picture in Picture. Play button 48 POWER button 15 powering on/off, the TV 15 presetting channels 98 Pro (Video) mode 92 problems, troubleshooting 109-114 Program Guide 63 Program ...
... I i.LINK 10, 13, 83-89 i.LINK button 46 I.LINK jack, described 17 i.LINK Standby 15, 105 i.LINK/AV1-3/DVD slide switch 48 INDEX button 46, 55 Infrared Receiver 15 interlaced ...joystick 46 JUMP button 47, 54 L label, channels 99 Language, setting 104 M MDP, using with TV remote control 51 Scrolling Index, using 55 SELECT button 48 Setup Menu 91, 103 sharpness, adjusting 92 Simulated, Effect 94... contrast, adjusting 92 Picture in Picture. Play button 48 POWER button 15 powering on/off, the TV 15 presetting channels 98 Pro (Video) mode 92 problems, troubleshooting 109-114 Program Guide 63 Program ...


