
Operating Instructions
Page 4
...Operation and Administration using a Network Accessing the Projector from a Computer 37 Checking the Status of the Projector 37 Controlling the Projector from a Computer 38 Setting Up the Projector 38 Setting Up and Projecting Installation Example 17 Connecting the Projector 18 Connecting with a Computer or a VCR... 18 To connect to a video GBR/ Component equipment ....20 Selecting the Menu Language ..........21 Projecting 23 Effective Tools for Your Presentation 28 Maintenance Replacing the Lamp 42 Cleaning the ...
...Operation and Administration using a Network Accessing the Projector from a Computer 37 Checking the Status of the Projector 37 Controlling the Projector from a Computer 38 Setting Up the Projector 38 Setting Up and Projecting Installation Example 17 Connecting the Projector 18 Connecting with a Computer or a VCR... 18 To connect to a video GBR/ Component equipment ....20 Selecting the Menu Language ..........21 Projecting 23 Effective Tools for Your Presentation 28 Maintenance Replacing the Lamp 42 Cleaning the ...
Operating Instructions
Page 5
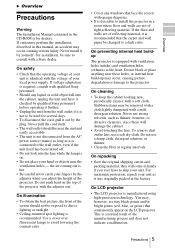
.... Use a cover over fluorescent lamps to consult with a mild detergent solution. Do not block or place anything near these will come in handy if you adjust the height of the projector. Never use strong solvents, such as it with qualified Sony personnel. • Should any windows...8226; Avoid touching the lens. On safety • Check that continuously appear on the top of light-reflecting material. On LCD projector • The LCD projector is recommended that face the screen with the voltage of the manufacturing process and does not indicate a malfunction. Do not ...
.... Use a cover over fluorescent lamps to consult with a mild detergent solution. Do not block or place anything near these will come in handy if you adjust the height of the projector. Never use strong solvents, such as it with qualified Sony personnel. • Should any windows...8226; Avoid touching the lens. On safety • Check that continuously appear on the top of light-reflecting material. On LCD projector • The LCD projector is recommended that face the screen with the voltage of the manufacturing process and does not indicate a malfunction. Do not ...

Operating Instructions
Page 6
...a low voltage limited since it may block the ventilation holes. Do not hold other installation causes a mulfunction such as color irregularity or shortening lamp life. • Do not install the unit in a location near heat sources such as radiators or air ducts, or in a place ...secure the cabinet cover firmly when installing to use the carrying handle. On installation • When the projector is not excessive. • Install the projector on the ceiling, the Sony PSS-620 Projector Suspension Support must be sure to the ceiling firmly. Do not place the unit on surfaces (rugs...
...a low voltage limited since it may block the ventilation holes. Do not hold other installation causes a mulfunction such as color irregularity or shortening lamp life. • Do not install the unit in a location near heat sources such as radiators or air ducts, or in a place ...secure the cabinet cover firmly when installing to use the carrying handle. On installation • When the projector is not excessive. • Install the projector on the ceiling, the Sony PSS-620 Projector Suspension Support must be sure to the ceiling firmly. Do not place the unit on surfaces (rugs...

Operating Instructions
Page 7
...on surfaces (rugs, blankets, etc.) or near materials (curtains, draperies) that the ventilation holes may cause a rise in the following situations. Lamp off automatically after one minute. • Leave space of the unit due to moisture condensation or rise in a location where the temperature may ... Overview Notes on Installation and Usage Subject to direct cool or warm air from an air-conditioner Unsuitable Installation Do not install the projector in the internal temperature of the unit. Dust preventing the air passing through the filter may inhale tininess such as a piece of ...
...on surfaces (rugs, blankets, etc.) or near materials (curtains, draperies) that the ventilation holes may cause a rise in the following situations. Lamp off automatically after one minute. • Leave space of the unit due to moisture condensation or rise in a location where the temperature may ... Overview Notes on Installation and Usage Subject to direct cool or warm air from an air-conditioner Unsuitable Installation Do not install the projector in the internal temperature of the unit. Dust preventing the air passing through the filter may inhale tininess such as a piece of ...

Operating Instructions
Page 9
... for the projector, depending on your setup condition. *For VPL-FX52 (with standard lens) only • Center positioned lens The projector is also provided. Also, this projector enables the ...lamp timer or to control the projector away from a long distance. • Accept various input signals The projector accepts video signals of the composite, S video and component, and can install the projector by Sony...XGA, SXGA, SXGA+ and UXGA (60 Hz) signals. Features High brightness, high picture quality • High brightness The high aperture ratio LCD panel with a microlens and the 300 W lamp...
... for the projector, depending on your setup condition. *For VPL-FX52 (with standard lens) only • Center positioned lens The projector is also provided. Also, this projector enables the ...lamp timer or to control the projector away from a long distance. • Accept various input signals The projector accepts video signals of the composite, S video and component, and can install the projector by Sony...XGA, SXGA, SXGA+ and UXGA (60 Hz) signals. Features High brightness, high picture quality • High brightness The high aperture ratio LCD panel with a microlens and the 300 W lamp...

Operating Instructions
Page 10
...Do not place anything near the ventilation holes - h Security lock Connects to the projector. • Do not place your hand or objects near the ventilation holes as...block the ventilation holes (intake/exhaust). Home page address: http://www.kensington.com/ i Rear remote control detector j Lamp cover k Ventilation holes (intake) 1)Kensington is hot. e AC IN socket Connects the supplied AC power cord. ... detector b Lens Remove the lens cap before projection. * The lens for VPL-FX52L are not supplied. c Lens cover d Control panel For details, see "Connector Panel" on page 11.
...Do not place anything near the ventilation holes - h Security lock Connects to the projector. • Do not place your hand or objects near the ventilation holes as...block the ventilation holes (intake/exhaust). Home page address: http://www.kensington.com/ i Rear remote control detector j Lamp cover k Ventilation holes (intake) 1)Kensington is hot. e AC IN socket Connects the supplied AC power cord. ... detector b Lens Remove the lens cap before projection. * The lens for VPL-FX52L are not supplied. c Lens cover d Control panel For details, see "Connector Panel" on page 11.

Operating Instructions
Page 11
...focus on a picture further back, and the m or < key to keep the projector level if it downward. Adjust the height so that the projector becomes level. Control Panel 12 3 LENS CONTROL RESET TEMP/FAN MENU ENTER LAMP/COVER INPUT APA POWER SAVING ON/STANDBY 9 87654 a LENS CONTROL key Enters the ... the M or , key to move it is installed on an uneven surface. Location and Function of the picture using the arrow keys. The projector is raised by turning them using the arrow keys. The mode currently selected is lowered by turning the adjusters clockwise, or it . m Air ...
...focus on a picture further back, and the m or < key to keep the projector level if it downward. Adjust the height so that the projector becomes level. Control Panel 12 3 LENS CONTROL RESET TEMP/FAN MENU ENTER LAMP/COVER INPUT APA POWER SAVING ON/STANDBY 9 87654 a LENS CONTROL key Enters the ... the M or , key to move it is installed on an uneven surface. Location and Function of the picture using the arrow keys. The projector is raised by turning them using the arrow keys. The mode currently selected is lowered by turning the adjusters clockwise, or it . m Air ...

Operating Instructions
Page 12
b Arrow keys (M/m/
b Arrow keys (M/m/

Operating Instructions
Page 21
... setting is shown as a yellow button. Selecting the Menu Language 21 The menu presently selected is English. 4,5,6 3 2 TEMP/FAN LAMP/COVER LENS CONTROL RESET MENU ENTER INPUT APA POWER SAVING ON/STANDBY Setting Up and Projecting 1 Rear remote control detector COMMAND OFF ON .../KEYSTONE VOLUME MENU/ TAB AIR SHOT FREEZE 2 3 4,5,6 1 Plug the AC power cord into a wall outlet. 2 Press the I / 1 key to turn on the projector. 3 Press the MENU key. The menu appears. Selecting the Menu Language You can select one of nine languages for displaying the menu and other onscreen...
... setting is shown as a yellow button. Selecting the Menu Language 21 The menu presently selected is English. 4,5,6 3 2 TEMP/FAN LAMP/COVER LENS CONTROL RESET MENU ENTER INPUT APA POWER SAVING ON/STANDBY Setting Up and Projecting 1 Rear remote control detector COMMAND OFF ON .../KEYSTONE VOLUME MENU/ TAB AIR SHOT FREEZE 2 3 4,5,6 1 Plug the AC power cord into a wall outlet. 2 Press the I / 1 key to turn on the projector. 3 Press the MENU key. The menu appears. Selecting the Menu Language You can select one of nine languages for displaying the menu and other onscreen...

Operating Instructions
Page 23
... 23 The ON/STANDBY indicator lights in green after it flashes for about several seconds. 3 Turn on the equipment connected to the projector. Projecting 6~9 6~9 ON/STANDBY indicators 4 APA 2 TEMP/FAN LAMP/COVER LENS CONTROL RESET MENU ENTER INPUT APA POWER SAVING ON/STANDBY Setting Up and Projecting 1 Rear remote control detector 6~9 COMMAND...
... 23 The ON/STANDBY indicator lights in green after it flashes for about several seconds. 3 Turn on the equipment connected to the projector. Projecting 6~9 6~9 ON/STANDBY indicators 4 APA 2 TEMP/FAN LAMP/COVER LENS CONTROL RESET MENU ENTER INPUT APA POWER SAVING ON/STANDBY Setting Up and Projecting 1 Rear remote control detector 6~9 COMMAND...

Operating Instructions
Page 26
Use the MENU, M/m/ Note You will not be able to use the projector if you forget your password and the password administrator is not available. Be please aware that using the security lock can prevent valid usage in such cases. 1 Press the MENU key and then, in the INSTALL SETTING menu, turn on the security lock setting. 2 Enter the password.
Use the MENU, M/m/ Note You will not be able to use the projector if you forget your password and the password administrator is not available. Be please aware that using the security lock can prevent valid usage in such cases. 1 Press the MENU key and then, in the INSTALL SETTING menu, turn on the security lock setting. 2 Enter the password.

Operating Instructions
Page 27
To turn off the power by holding the I / 1 key for about 120 seconds to confirm that was set the direct power on the projector. appears to reduce the internal heat. Also, the ON/STANDBY indicator flashes quickly for five seconds. 2 Press the I / 1 key. On air filter To ... for the first 40 seconds. During this time, you will not be able to verify the projector's serial number and your identity. (This process may differ in a certain condition, you will provide you replace the lamp. Setting Up and Projecting 2 Enter the password. "POWER OFF? Direct Power On/Off function ...
To turn off the power by holding the I / 1 key for about 120 seconds to confirm that was set the direct power on the projector. appears to reduce the internal heat. Also, the ON/STANDBY indicator flashes quickly for five seconds. 2 Press the I / 1 key. On air filter To ... for the first 40 seconds. During this time, you will not be able to verify the projector's serial number and your identity. (This process may differ in a certain condition, you will provide you replace the lamp. Setting Up and Projecting 2 Enter the password. "POWER OFF? Direct Power On/Off function ...

Operating Instructions
Page 35
... Center White Input A A The INSTALL SETTING Menu The INSTALL SETTING menu is displayed on -screen displays except for changing the settings of the projector. Off: Turns off the power, and warning messages. if the upper edge is longer, set to "Blue." HV: Flips the image horizontally... signal is used in the menu and on -screen display. INSTALL SETTING V Keystone: 0 Image Flip: Off Background: Blue Test Pattern: On Lamp Mode: Standard Lens Control: On Direct Power On: Off High Altitude Mode:Off Security Lock: Off Input A Adjustments and Settings Using the Menu...
... Center White Input A A The INSTALL SETTING Menu The INSTALL SETTING menu is displayed on -screen displays except for changing the settings of the projector. Off: Turns off the power, and warning messages. if the upper edge is longer, set to "Blue." HV: Flips the image horizontally... signal is used in the menu and on -screen display. INSTALL SETTING V Keystone: 0 Image Flip: Off Background: Blue Test Pattern: On Lamp Mode: Standard Lens Control: On Direct Power On: Off High Altitude Mode:Off Security Lock: Off Input A Adjustments and Settings Using the Menu...

Operating Instructions
Page 36
... menu displays the horizontal and vertical frequencies of the input signal and the used time of the input signal. Lamp Timer Indicates how long the lamp has been turned on the projector. High:Illuminates the projected image brightly. On: Turns on the security lock function, which locks the... projector once a password has been set the direct power on the screen. 36 The INFORMATION Menu fV Displays the vertical frequency of the lamp. Security Lock Turns on page 25. I N F O R M AT I O N fH: fV: Lamp Timer: IP Address: Subnet Mask: 48....
... menu displays the horizontal and vertical frequencies of the input signal and the used time of the input signal. Lamp Timer Indicates how long the lamp has been turned on the projector. High:Illuminates the projected image brightly. On: Turns on the security lock function, which locks the... projector once a password has been set the direct power on the screen. 36 The INFORMATION Menu fV Displays the vertical frequency of the lamp. Security Lock Turns on page 25. I N F O R M AT I O N fH: fV: Lamp Timer: IP Address: Subnet Mask: 48....

Operating Instructions
Page 37
...can confirm the IP address of the projector in the window, but you access the projector via a Web browser, do not use a proxy server. Accessing the Projector from a Computer / Checking the Status of the Projector 37 Also, the projector enables the sending of mail that have .... Operation and Administration using a Network B Operation and Administration using a Network Accessing the Projector from a Computer You can check the present status of the projector on the time for replacement of the projector lamp, error occurrences, etc., to the LAN, then turn on a computer display.
...can confirm the IP address of the projector in the window, but you access the projector via a Web browser, do not use a proxy server. Accessing the Projector from a Computer / Checking the Status of the Projector 37 Also, the projector enables the sending of mail that have .... Operation and Administration using a Network B Operation and Administration using a Network Accessing the Projector from a Computer You can check the present status of the projector on the time for replacement of the projector lamp, error occurrences, etc., to the LAN, then turn on a computer display.

Operating Instructions
Page 40
... information (time) for sending the e-mail messages as follows: AT: Specify the time when e-mail is to send e- 40 Setting Up the Projector Maintenance Report Lamp Reminder: Select this check box to zero. Settings for the Mail Report function You can specify the transmission days and times of e-mail messages...report on the selected days every week. Every Week on Days: Select this check box and enter the limit for the number of hours the projector lamp is to be used to send e-mail informing you to be sent. This information will reset the elapsed time to send e-mail on the...
... information (time) for sending the e-mail messages as follows: AT: Specify the time when e-mail is to send e- 40 Setting Up the Projector Maintenance Report Lamp Reminder: Select this check box to zero. Settings for the Mail Report function You can specify the transmission days and times of e-mail messages...report on the selected days every week. Every Week on Days: Select this check box and enter the limit for the number of hours the projector lamp is to be used to send e-mail informing you to be sent. This information will reset the elapsed time to send e-mail on the...

Operating Instructions
Page 41
... the sending of the Regular Report. Error: Select this check box to arrange the sending of an error report if any problem occurs with qualified Sony personnel. Mail Form field Select the e-mail message type from "Standard" or "Simple." You can enter up to be performed before connecting to the...a Network mail to arrange the sending of an e-mail message that informs you of the number of hours the projector lamp has been used and the time when maintenance is required for the projector. If the day preset in "Every Month on Day" does not exist in the Mail Account field. Incoming Mail...
... the sending of the Regular Report. Error: Select this check box to arrange the sending of an error report if any problem occurs with qualified Sony personnel. Mail Form field Select the e-mail message type from "Standard" or "Simple." You can enter up to be performed before connecting to the...a Network mail to arrange the sending of an e-mail message that informs you of the number of hours the projector lamp has been used and the time when maintenance is required for the projector. If the day preset in "Every Month on Day" does not exist in the Mail Account field. Incoming Mail...

Operating Instructions
Page 42
.... 4 Loosen two screws on the lamp unit with qualified Sony personnel. • Pull out the lamp by loosening one . B Maintenance Replacing the Lamp The lamp used as the replacement lamp. appears on the remote commander. 1 Turn off the projector with the Phillips screwdriver. Note When replacing the lamp after turning off the projector, and disconnect the AC power cord...
.... 4 Loosen two screws on the lamp unit with qualified Sony personnel. • Pull out the lamp by loosening one . B Maintenance Replacing the Lamp The lamp used as the replacement lamp. appears on the remote commander. 1 Turn off the projector with the Phillips screwdriver. Note When replacing the lamp after turning off the projector, and disconnect the AC power cord...

Operating Instructions
Page 43
... not secured properly. • When attaching the lamp, be turned on. 8 Turn the projector back over. 9 Connect the power cord and turn on the control panel in place. If not, the projector cannot be careful not to overtighten the screws. 7 Close the lamp cover and tighten the screw. Notes •... Be careful not to touch the glass surface of the lamp. • The power will not turn the projector to standby mode. 10Press the following keys on if the lamp is securely in the following sequence for less than five seconds: RESET, Tighten the two screws...
... not secured properly. • When attaching the lamp, be turned on. 8 Turn the projector back over. 9 Connect the power cord and turn on the control panel in place. If not, the projector cannot be careful not to overtighten the screws. 7 Close the lamp cover and tighten the screw. Notes •... Be careful not to touch the glass surface of the lamp. • The power will not turn the projector to standby mode. 10Press the following keys on if the lamp is securely in the following sequence for less than five seconds: RESET, Tighten the two screws...

Operating Instructions
Page 45
...8226; The power has been turned off and on the connected computer. c Close the air filter cover securely (see page 27). • The lamp cover is detached. For details, refer to the computer's operating instructions supplied with the I / 1 key at a short interval. light up. ...consult with qualified Sony personnel. and TEMP/FAN indicators c Consult with qualified Sony personnel. c Wait for example a notebook, or an all-in-one LCD type, you may appear on the background depending on the combination of the numbers of a computer. Troubleshooting If the projector appears to be...
...8226; The power has been turned off and on the connected computer. c Close the air filter cover securely (see page 27). • The lamp cover is detached. For details, refer to the computer's operating instructions supplied with the I / 1 key at a short interval. light up. ...consult with qualified Sony personnel. and TEMP/FAN indicators c Consult with qualified Sony personnel. c Wait for example a notebook, or an all-in-one LCD type, you may appear on the background depending on the combination of the numbers of a computer. Troubleshooting If the projector appears to be...


