Operating Instructions
Page 8
... camera 20 How to use the control button 20 Setting the date and time 21 Shooting still images Inserting and removing a "Memory Stick 23 Deciding the still image size and image quality 24 Basic still image shooting (using auto adjustment mode 26 Checking the last shot image...Deleting on the Index (3 images) screen 41 Formatting a "Memory Stick 43 Copying still images to your computer Copying still images to your computer ...44 1 Installing the USB driver 45 2 Preparing your camera 46 3 Connecting your camera to your computer 47 4 Copying images 48 When a removable disk icon is not...
... camera 20 How to use the control button 20 Setting the date and time 21 Shooting still images Inserting and removing a "Memory Stick 23 Deciding the still image size and image quality 24 Basic still image shooting (using auto adjustment mode 26 Checking the last shot image...Deleting on the Index (3 images) screen 41 Formatting a "Memory Stick 43 Copying still images to your computer Copying still images to your computer ...44 1 Installing the USB driver 45 2 Preparing your camera 46 3 Connecting your camera to your computer 47 4 Copying images 48 When a removable disk icon is not...
Operating Instructions
Page 44
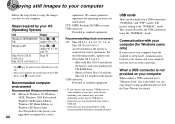
...to your computer. The factory setting is unnecessary. See the Sony Website for Windows users only) If you connect two or more USB ... your computer from the suspend or sleep mode, communication between your camera and your computer may not work, depending on your computer When neither...When a USB connector is not provided on the type of the USB driver, step 1 is the "NORMAL" mode. USB mode There are not... OS 8.6 installed at the same time. Copying still images to your computer Copying still images to your computer Follow the steps below to...shot to Mac OS 9.0 or 9.1. -
...to your computer. The factory setting is unnecessary. See the Sony Website for Windows users only) If you connect two or more USB ... your computer from the suspend or sleep mode, communication between your camera and your computer may not work, depending on your computer When neither...When a USB connector is not provided on the type of the USB driver, step 1 is the "NORMAL" mode. USB mode There are not... OS 8.6 installed at the same time. Copying still images to your computer Copying still images to your computer Follow the steps below to...shot to Mac OS 9.0 or 9.1. -

Operating Instructions
Page 45
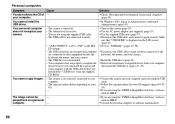
...log on as an example. Required operations may be different depending on your OS. • Shut down all other applications before installation of the driver. • When you of completion. 45 The opening window. When the installation is completed, the window informs you are using Windows Me ...as Administrators. 2 , Click "USB Driver" on the opening window appears. Do not connect your camera to your computer, and insert the supplied CD-ROM into the CD-ROM drive. 1 Installing the USB driver Opening window Click here Copying still images to your computer 1 , Turn on ...
...log on as an example. Required operations may be different depending on your OS. • Shut down all other applications before installation of the driver. • When you of completion. 45 The opening window. When the installation is completed, the window informs you are using Windows Me ...as Administrators. 2 , Click "USB Driver" on the opening window appears. Do not connect your camera to your computer, and insert the supplied CD-ROM into the CD-ROM drive. 1 Installing the USB driver Opening window Click here Copying still images to your computer 1 , Turn on ...

Operating Instructions
Page 49
...driver installation again using Microsoft Scanner and Camera Wizard, " then click "OK." The "System Property" window appears. 2 Confirm if other devices are displayed. 49 The "Scanner and Camera... Wizard" appears. • When following the steps on page 47, the copy wizard appears on the desktop of the devices above, follow the steps below to a folder on my computer using the supplied CD-ROM (page 45). 4 Copying images (for Windows XP users) 1 2 1 , Click "Copy pictures to delete them. 1 Click " Sony... DSC" or " Sony Handycam." 2 ...a " Sony DSC" or " Sony Handycam" with...
...driver installation again using Microsoft Scanner and Camera Wizard, " then click "OK." The "System Property" window appears. 2 Confirm if other devices are displayed. 49 The "Scanner and Camera... Wizard" appears. • When following the steps on page 47, the copy wizard appears on the desktop of the devices above, follow the steps below to a folder on my computer using the supplied CD-ROM (page 45). 4 Copying images (for Windows XP users) 1 2 1 , Click "Copy pictures to delete them. 1 Click " Sony... DSC" or " Sony Handycam." 2 ...a " Sony DSC" or " Sony Handycam" with...

Operating Instructions
Page 54
... "USB Driver" window appears. 4 Double-click the icon of the hard disk containing the OS to open the window. 5 Drag and drop the following two files from your OS. is shown, click "OK." 7 Restart your computer. 2 Preparing your camera For details, see page 46. 3 Connecting your camera to your camera appear. ...or the "Memory Stick" from the window opened in step 3 to the System Folder icon in the window opened in step 4. • Sony USB Driver • Sony USB Shim 54 6 When the message "Do you have turned your computer off. 4 Copying images 1 Double-click the newly recognized icon on...
... "USB Driver" window appears. 4 Double-click the icon of the hard disk containing the OS to open the window. 5 Drag and drop the following two files from your OS. is shown, click "OK." 7 Restart your computer. 2 Preparing your camera For details, see page 46. 3 Connecting your camera to your camera appear. ...or the "Memory Stick" from the window opened in step 3 to the System Folder icon in the window opened in step 4. • Sony USB Driver • Sony USB Shim 54 6 When the message "Do you have turned your computer off. 4 Copying images 1 Double-click the newly recognized icon on...

Operating Instructions
Page 80
... of the images recorded in the "Memory Stick" will be displayed on the computer. Preparations 1 Install the USB driver. 2 Insert the "Memory Stick" on the camera. 3 Connect the camera to the "My Documents" folder. The "MOML0001" folder opens. The "Image names and Copy destination" screen is... 80 When the copying is finished, the "Other Options" screen is displayed. All of your camera appear. • This section describes an example of images that you shot to remove the checkmark from the checkboxes of copying movies into the "My Documents" folder. The...
... of the images recorded in the "Memory Stick" will be displayed on the computer. Preparations 1 Install the USB driver. 2 Insert the "Memory Stick" on the camera. 3 Connect the camera to the "My Documents" folder. The "MOML0001" folder opens. The "Image names and Copy destination" screen is... 80 When the copying is finished, the "Other Options" screen is displayed. All of your camera appear. • This section describes an example of images that you shot to remove the checkmark from the checkboxes of copying movies into the "My Documents" folder. The...
Operating Instructions
Page 86
... Administrators (authorized Administrators) (page 45). p Connect the camera and your camera. The image cannot be - p Check "Recommended environment for Sony" software, click on the LCD screen (page 47). p Use the AC power adaptor (not supplied) (page 19). Make sure that your computer, then install the USB driver (pages 45, 49). p If you installed the...
... Administrators (authorized Administrators) (page 45). p Connect the camera and your camera. The image cannot be - p Check "Recommended environment for Sony" software, click on the LCD screen (page 47). p Use the AC power adaptor (not supplied) (page 19). Make sure that your computer, then install the USB driver (pages 45, 49). p If you installed the...

Operating Instructions
Page 102
...mm (4 1/4 × 2 3/8 × (W/H/D, protruding portions not included) Mass DSC-P71 284 g (10 oz) (camera, two batteries, "Memory Stick" and wrist strap included) DSC-P31 231 g (8 oz) (camera, two batteries, "Memory Stick" and wrist strap included) BC-CS1 Ni-MH battery charger Power requirements AC 100 to... (1) • Wrist strap • "Memory Stick" (8MB for DSC-P31, 16MB for DSC-P71) (1) • CD-ROM (USB driver: SPVD-008) (1) • CD-ROM (for Customer registration) (1) • Operation Instructions (1) Design and specifications are subject to change without notice. 102
...mm (4 1/4 × 2 3/8 × (W/H/D, protruding portions not included) Mass DSC-P71 284 g (10 oz) (camera, two batteries, "Memory Stick" and wrist strap included) DSC-P31 231 g (8 oz) (camera, two batteries, "Memory Stick" and wrist strap included) BC-CS1 Ni-MH battery charger Power requirements AC 100 to... (1) • Wrist strap • "Memory Stick" (8MB for DSC-P31, 16MB for DSC-P71) (1) • CD-ROM (USB driver: SPVD-008) (1) • CD-ROM (for Customer registration) (1) • Operation Instructions (1) Design and specifications are subject to change without notice. 102

Operating Instructions
Page 106
...98 C Charging Charging the batteries 14 Charging time 15 Control button 20 Copying images 48, 54 D Deleting images 39 DIVIDE 78 106 E Editing still images Print mark 72 Protect 69 Resize 71 E-MAIL 65 EV adjustment 56 Exposure EV adjustment 56 F File File names 51 Image file storage ... 52 I Image Copying images 48 File names 51 Image file storage destinations 51 Image quality 24 Image size 24, 25, 91 Index 36 Installation USB driver 45 J JPG 52 L LCD screen display DISPLAY/LCD ON/OFF 32 LCD brightness 98 M Memory Stick Formatting a "Memory Stick 43 Inserting a "Memory ...
...98 C Charging Charging the batteries 14 Charging time 15 Control button 20 Copying images 48, 54 D Deleting images 39 DIVIDE 78 106 E Editing still images Print mark 72 Protect 69 Resize 71 E-MAIL 65 EV adjustment 56 Exposure EV adjustment 56 F File File names 51 Image file storage ... 52 I Image Copying images 48 File names 51 Image file storage destinations 51 Image quality 24 Image size 24, 25, 91 Index 36 Installation USB driver 45 J JPG 52 L LCD screen display DISPLAY/LCD ON/OFF 32 LCD brightness 98 M Memory Stick Formatting a "Memory Stick 43 Inserting a "Memory ...

Operating Instructions
Page 107
...images 48, 54 Copying movies to your computer 80 USB cable 47 USB driver 45 Picture effect 60 Power An external power source 19 batteries 14 Inserting...in Multi Burst mode 64 Shooting with the date and time inserted ........ 32 Still image playback Index (9 images) screen 37 Quick Review 27 ROTATE 68 Slide show...single images 36 Viewing the images on your computer . 53, 54 Still image shooting AE/AF lock lamp 11 AF mode 26 EV adjustment...images that can be saved .... 91 The number of images that can be shot ...... 18 Using auto adjustment mode 26 Using the self-timer 29 WHITE BALANCE...
...images 48, 54 Copying movies to your computer 80 USB cable 47 USB driver 45 Picture effect 60 Power An external power source 19 batteries 14 Inserting...in Multi Burst mode 64 Shooting with the date and time inserted ........ 32 Still image playback Index (9 images) screen 37 Quick Review 27 ROTATE 68 Slide show...single images 36 Viewing the images on your computer . 53, 54 Still image shooting AE/AF lock lamp 11 AF mode 26 EV adjustment...images that can be saved .... 91 The number of images that can be shot ...... 18 Using auto adjustment mode 26 Using the self-timer 29 WHITE BALANCE...


