
Operating Instructions (primary manual)
Page 1
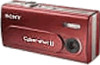
... movies Deleting images Enjoying images on the bottom. Owner's Record The model and serial numbers are located on your Sony dealer regarding this manual thoroughly, and retain it for future reference. DSC-U40 Serial No. Digital Still Camera Operating Instructions Before operating the unit, please read this product. Record the serial number in the space provided...
... movies Deleting images Enjoying images on the bottom. Owner's Record The model and serial numbers are located on your Sony dealer regarding this manual thoroughly, and retain it for future reference. DSC-U40 Serial No. Digital Still Camera Operating Instructions Before operating the unit, please read this product. Record the serial number in the space provided...

Operating Instructions (primary manual)
Page 3
...detachable fuse cover, be used rechargeable batteries to attach the fuse cover after you change the fuse. Please consult with your nearest Sony service station. Notice for the Customers in Europe This product has been tested and found compliant with or mark) must be ... not handle damaged or leaking Nickel Metal Hydride batteries. If the plug supplied with BS1363 is fitted to this camera. For the Customers in Canada THIS CLASS B DIGITAL APPARATUS COMPLIES WITH CANADIAN ICES-003. 3 For more information regarding recycling of this equipment for using connection cables ...
...detachable fuse cover, be used rechargeable batteries to attach the fuse cover after you change the fuse. Please consult with your nearest Sony service station. Notice for the Customers in Europe This product has been tested and found compliant with or mark) must be ... not handle damaged or leaking Nickel Metal Hydride batteries. If the plug supplied with BS1363 is fitted to this camera. For the Customers in Canada THIS CLASS B DIGITAL APPARATUS COMPLIES WITH CANADIAN ICES-003. 3 For more information regarding recycling of this equipment for using connection cables ...

Operating Instructions (primary manual)
Page 4
...the LCD screen, the LCD finder or the lens to direct sunlight for effective use only a "Memory Stick Duo" in color) that the camera is not a malfunction. 4 You can use . Precaution on the LCD screen and the LCD finder. This is working correctly. Before using ...a normal size "Memory Stick" and a smaller version called a "Memory Stick Duo." However, there may be contrary to record images, this camera. • This camera turns off whenever you may want to make a trial recording to make sure that constantly appear on copyright Television programs, films, video tapes, ...
...the LCD screen, the LCD finder or the lens to direct sunlight for effective use only a "Memory Stick Duo" in color) that the camera is not a malfunction. 4 You can use . Precaution on the LCD screen and the LCD finder. This is working correctly. Before using ...a normal size "Memory Stick" and a smaller version called a "Memory Stick Duo." However, there may be contrary to record images, this camera. • This camera turns off whenever you may want to make a trial recording to make sure that constantly appear on copyright Television programs, films, video tapes, ...

Operating Instructions (primary manual)
Page 5
... and are registered trademarks of Sony Corporation. • Microsoft and Windows are not actual images shot using the camera. However, the ™ or ® marks are , in this camera. Trademarks • "Memory Stick Duo" and are trademarks of Sony Corporation. • "Memory ...Stick PRO Duo" and are trademarks of Sony Corporation. • "MagicGate Memory...
... and are registered trademarks of Sony Corporation. • Microsoft and Windows are not actual images shot using the camera. However, the ™ or ® marks are , in this camera. Trademarks • "Memory Stick Duo" and are trademarks of Sony Corporation. • "Memory ...Stick PRO Duo" and are trademarks of Sony Corporation. • "MagicGate Memory...

Operating Instructions (primary manual)
Page 6
... Setting the distance to scene conditions - White Balance 33 Enjoying still images Viewing still images on your computer.....61 Image file storage destinations and file names 62 Viewing images from your computer with this camera 63 Copying images to use the buttons 15 Setting the date ...removing a "Memory Stick Duo 17 Setting the still image size 18 Image size 19 Basic still image shooting - For Windows users 53 Installing the USB driver 54 Installing "Image Transfer 55 Installing "ImageMixer 56 Connecting the camera to your camera 14 How to your computer - Using auto ...
... Setting the distance to scene conditions - White Balance 33 Enjoying still images Viewing still images on your computer.....61 Image file storage destinations and file names 62 Viewing images from your computer with this camera 63 Copying images to use the buttons 15 Setting the date ...removing a "Memory Stick Duo 17 Setting the still image size 18 Image size 19 Basic still image shooting - For Windows users 53 Installing the USB driver 54 Installing "Image Transfer 55 Installing "ImageMixer 56 Connecting the camera to your camera 14 How to your computer - Using auto ...

Operating Instructions (primary manual)
Page 10
...only for the first time. • Connect the battery charger to possible voltage drops or other type of the supplied Nickel-Metal Hydride batteries. - The camera may be quite a bit shorter depending on the supplied battery charger, see page 85. • The supplied battery charger is especially true in the performance...with the correct polarity +/-. Getting started Preparing batteries Acceptable batteries - Charging the batteries 1 , Insert Nickel-Metal Hydride batteries into the battery charger (supplied) with your camera before using them for Nickel-Metal Hydride batteries.
...only for the first time. • Connect the battery charger to possible voltage drops or other type of the supplied Nickel-Metal Hydride batteries. - The camera may be quite a bit shorter depending on the supplied battery charger, see page 85. • The supplied battery charger is especially true in the performance...with the correct polarity +/-. Getting started Preparing batteries Acceptable batteries - Charging the batteries 1 , Insert Nickel-Metal Hydride batteries into the battery charger (supplied) with your camera before using them for Nickel-Metal Hydride batteries.

Operating Instructions (primary manual)
Page 12
.... 12 Inserting the batteries 1 , Open the battery/"Memory Stick Duo" cover. Make sure the cover is closed securely. To remove the batteries Hold the camera with the battery/"Memory Stick Duo" cover up, then slide the cover in the direction of the arrow 2. 2 , Insert the batteries. Hold the... camera with the battery/"Memory Stick Duo" cover facing upward, open the cover, and remove the batteries. • Be careful not to the +/- The battery...
.... 12 Inserting the batteries 1 , Open the battery/"Memory Stick Duo" cover. Make sure the cover is closed securely. To remove the batteries Hold the camera with the battery/"Memory Stick Duo" cover up, then slide the cover in the direction of the arrow 2. 2 , Insert the batteries. Hold the... camera with the battery/"Memory Stick Duo" cover facing upward, open the cover, and remove the batteries. • Be careful not to the +/- The battery...

Operating Instructions (primary manual)
Page 13
...batteries Image size 2M VGA NH-AAA-DA (2) (supplied) LCD No. of power remaining using Sony alkaline batteries 1) Shooting in auto adjustment mode. The flash strobes once every two times - of ...Viewing single images in order at a temperature of power remaining. • Based on the conditions under which the camera is not displayed in [ ] to [ON] to [ON] 13 Battery life and number of images that... Stick Duo" as necessary. of the charge, or on and off once every ten times. Viewing still images2) Image size 2M VGA NH-AAA-DA (2) (supplied) No. Shooting one time every 30 ...
...batteries Image size 2M VGA NH-AAA-DA (2) (supplied) LCD No. of power remaining using Sony alkaline batteries 1) Shooting in auto adjustment mode. The flash strobes once every two times - of ...Viewing single images in order at a temperature of power remaining. • Based on the conditions under which the camera is not displayed in [ ] to [ON] to [ON] 13 Battery life and number of images that... Stick Duo" as necessary. of the charge, or on and off once every ten times. Viewing still images2) Image size 2M VGA NH-AAA-DA (2) (supplied) No. Shooting one time every 30 ...

Operating Instructions (primary manual)
Page 14
... lamp , Slide the lens cover in the direction of the arrow or press POWER. Turning on . The POWER lamp goes out, and the camera turns off your camera in the opposite direction of the wall outlet (wall socket) [b]. Use a commercially available AC plug adaptor [a], if necessary, depending on the LCD... battery charger within 100 V to [ON] - The flash is low - When you open it clicks into place. • If you turn on your camera for the first time, the DATE NOTATION screen appears on the design of the arrow or press POWER again. Shooting movies3) NH-AAA-DA (2) (supplied...
... lamp , Slide the lens cover in the direction of the arrow or press POWER. Turning on . The POWER lamp goes out, and the camera turns off your camera in the opposite direction of the wall outlet (wall socket) [b]. Use a commercially available AC plug adaptor [a], if necessary, depending on the LCD... battery charger within 100 V to [ON] - The flash is low - When you open it clicks into place. • If you turn on your camera for the first time, the DATE NOTATION screen appears on the design of the arrow or press POWER again. Shooting movies3) NH-AAA-DA (2) (supplied...

Operating Instructions (primary manual)
Page 15
Getting started Auto power-off function If you do not operate the camera for about three minutes, the camera turns off function will not operate when the camera is in [CLOCK SET] under [ ] (page 80), then perform step 3. Press MENU, then the menu disappears from the LCD screen. • ... Setting the date and time POWER DATE NOTATION 2003 1 1 12:00:00 AM Y/M/D M/D/Y D/M/Y 1 , Slide the lens cover in the direction of the camera, bring up and the DATE NOTATION screen appears on the power. However, the auto power-off automatically to make the changes. The POWER lamp (green...
Getting started Auto power-off function If you do not operate the camera for about three minutes, the camera turns off function will not operate when the camera is in [CLOCK SET] under [ ] (page 80), then perform step 3. Press MENU, then the menu disappears from the LCD screen. • ... Setting the date and time POWER DATE NOTATION 2003 1 1 12:00:00 AM Y/M/D M/D/Y D/M/Y 1 , Slide the lens cover in the direction of the camera, bring up and the DATE NOTATION screen appears on the power. However, the auto power-off automatically to make the changes. The POWER lamp (green...

Operating Instructions (primary manual)
Page 17
... Inserting and removing a "Memory Stick Duo" Terminal side Shooting still images 1 , Open the battery/"Memory Stick Duo" cover. To remove a "Memory Stick Duo" Open...• When the access lamp is lit up , then slide the cover in the "Memory Stick Duo." Hold the camera with the battery/"Memory Stick Duo" cover up , it means that it all the way in until it clicks. •...; When you may also damage the camera or the "Memory Stick Duo." • Be careful not to record or display images in the direction of the arrow...
... Inserting and removing a "Memory Stick Duo" Terminal side Shooting still images 1 , Open the battery/"Memory Stick Duo" cover. To remove a "Memory Stick Duo" Open...• When the access lamp is lit up , then slide the cover in the "Memory Stick Duo." Hold the camera with the battery/"Memory Stick Duo" cover up , it means that it all the way in until it clicks. •...; When you may also damage the camera or the "Memory Stick Duo." • Be careful not to record or display images in the direction of the arrow...

Operating Instructions (primary manual)
Page 19
...445 906 VGA 80 161 326 656 1316 2380 4840 • When the images recorded using earlier Sony models are played back, the image size indication may be different from the actual image size. •...; Images viewed on the LCD screen of the camera all appear the same size. • The actual number of images may differ depending on the LCD ...image, but also the larger the amount of data needed to preserve your "Memory Stick Duo." Shooting still images Image size You can choose the image size (number of pixels) according to the kind of ...
...445 906 VGA 80 161 326 656 1316 2380 4840 • When the images recorded using earlier Sony models are played back, the image size indication may be different from the actual image size. •...; Images viewed on the LCD screen of the camera all appear the same size. • The actual number of images may differ depending on the LCD ...image, but also the larger the amount of data needed to preserve your "Memory Stick Duo." Shooting still images Image size You can choose the image size (number of pixels) according to the kind of ...

Operating Instructions (primary manual)
Page 20
...folders and select folders to shoot, but the focus is not adjusted properly. • This camera employs an auto-macro AF function. A beep sounds. AE/AF lock indicator Flashes green 3 t Lights up , the camera is ready for approximately five seconds. • [FOCUS] is set to [AUTO] at ...the factory. • The exposure is automatically adjusted. • This camera can continue to be canceled. • When the camera does not beep, the AF adjustment is 10 cm (4 inches). 20 Basic still image shooting - Using auto adjustment mode 2M 101 10 1 , Set the mode switch to...
...folders and select folders to shoot, but the focus is not adjusted properly. • This camera employs an auto-macro AF function. A beep sounds. AE/AF lock indicator Flashes green 3 t Lights up , the camera is ready for approximately five seconds. • [FOCUS] is set to [AUTO] at ...the factory. • The exposure is automatically adjusted. • This camera can continue to be canceled. • When the camera does not beep, the AF adjustment is 10 cm (4 inches). 20 Basic still image shooting - Using auto adjustment mode 2M 101 10 1 , Set the mode switch to...

Operating Instructions (primary manual)
Page 21
In such cases, release the shutter button, then recompose the shot and focus again. The image will be recorded in the "Memory Stick Duo," and you can shoot the next image. • If you do not operate the camera for extending the battery life. We recommend that is difficult to ...shoot a subject that you set [LCD LIGHT] to [OFF] when using alkaline batteries. • This camera is equipped with MENU and the control buttons v/V to prevent wearing down . LCD light You can still not bring the subject into focus, use [LCD LIGHT] under the following conditions. When the menu operation...
In such cases, release the shutter button, then recompose the shot and focus again. The image will be recorded in the "Memory Stick Duo," and you can shoot the next image. • If you do not operate the camera for extending the battery life. We recommend that is difficult to ...shoot a subject that you set [LCD LIGHT] to [OFF] when using alkaline batteries. • This camera is equipped with MENU and the control buttons v/V to prevent wearing down . LCD light You can still not bring the subject into focus, use [LCD LIGHT] under the following conditions. When the menu operation...

Operating Instructions (primary manual)
Page 23
... indicator (Auto): Based on the LCD screen. 2M 101 10 Self-timer lamp 4 , Center the subject in front of the camera, the focus and the exposure may not be shot after approximately 10 seconds. The image will use the flash accordingly. (Red-eye reduction): Flash mode is enough light, and will... sounds. To cancel the self-timer in the middle of the surrounding brightness. (No flash): The flash does not strobe. 23 Selecting a flash mode Shooting still images SELFTIMER ON OFF 2M 101 10 3 EXEC/ , Select [ON] with the control button v, then press EXEC. Each time you press MENU, the...
... indicator (Auto): Based on the LCD screen. 2M 101 10 Self-timer lamp 4 , Center the subject in front of the camera, the focus and the exposure may not be shot after approximately 10 seconds. The image will use the flash accordingly. (Red-eye reduction): Flash mode is enough light, and will... sounds. To cancel the self-timer in the middle of the surrounding brightness. (No flash): The flash does not strobe. 23 Selecting a flash mode Shooting still images SELFTIMER ON OFF 2M 101 10 3 EXEC/ , Select [ON] with the control button v, then press EXEC. Each time you press MENU, the...

Operating Instructions (primary manual)
Page 24
... when the power is selected as the recording folder. Also, you look at the LCD screen in a dark place. Creating or selecting a folder Your camera can create multiple folders in the Burst mode. • If the menu is currently displayed, press MENU first so that the menu disappears. •... feet 10 3/4 inches). When the folder capacity is exceeded, a new folder is slower in a dark place, but this will have no effect on the shot image. • While you are using the Auto, (Red-eye reduction) or (Forced flash) mode, you may not produce the desired effects depending on individual...
... when the power is selected as the recording folder. Also, you look at the LCD screen in a dark place. Creating or selecting a folder Your camera can create multiple folders in the Burst mode. • If the menu is currently displayed, press MENU first so that the menu disappears. •... feet 10 3/4 inches). When the folder capacity is exceeded, a new folder is slower in a dark place, but this will have no effect on the shot image. • While you are using the Auto, (Red-eye reduction) or (Forced flash) mode, you may not produce the desired effects depending on individual...

Operating Instructions (primary manual)
Page 25
The CREATE REC. When you cannot delete the new folder with the control button V, then press EXEC. Shooting still images Creating a new folder RETURN SIZE•BURST 2M FOCUS AUTO SELFTIMER OFF WHITE BAL AUTO MENU 1 , Set the mode switch to . • You cannot ..., you press MENU, the menu disappears and the created folder is created or selected. RETURN 101 FORMAT CREATE FOLDER CHANGE FOLDER 2 EXEC/ , Select [ ] with the camera. • Images are recorded in the newly created folder until a different folder is displayed.
The CREATE REC. When you cannot delete the new folder with the control button V, then press EXEC. Shooting still images Creating a new folder RETURN SIZE•BURST 2M FOCUS AUTO SELFTIMER OFF WHITE BAL AUTO MENU 1 , Set the mode switch to . • You cannot ..., you press MENU, the menu disappears and the created folder is created or selected. RETURN 101 FORMAT CREATE FOLDER CHANGE FOLDER 2 EXEC/ , Select [ ] with the camera. • Images are recorded in the newly created folder until a different folder is displayed.

Operating Instructions (primary manual)
Page 26
... newly selected folder. FOLDER screen appears. CHANGE REC. The CHANGE REC. The menu appears on the LCD screen. • You can also carry out this camera. 26 Selecting the recording folder RETURN SIZE•BURST 2M FOCUS AUTO SELFTIMER OFF WHITE BAL AUTO MENU 1 , Set the mode switch to .
... newly selected folder. FOLDER screen appears. CHANGE REC. The CHANGE REC. The menu appears on the LCD screen. • You can also carry out this camera. 26 Selecting the recording folder RETURN SIZE•BURST 2M FOCUS AUTO SELFTIMER OFF WHITE BAL AUTO MENU 1 , Set the mode switch to .
Operating Instructions (primary manual)
Page 34
... on the LCD screen. For example, the entire image appears blue under incandescent light bulbs, etc. The human eye can resolve these adjustments automatically, but digital still cameras cannot recognize the correct colors without adjustments. z Shooting techniques The image is turned off. WHITE BALANCE AUTO 3 EXEC/ , Select the desired mode with the control...
... on the LCD screen. For example, the entire image appears blue under incandescent light bulbs, etc. The human eye can resolve these adjustments automatically, but digital still cameras cannot recognize the correct colors without adjustments. z Shooting techniques The image is turned off. WHITE BALANCE AUTO 3 EXEC/ , Select the desired mode with the control...

Operating Instructions (primary manual)
Page 35
...cover while viewing images, the power shuts off. 2M 101 6 / 8 101-0006 2003 7 4 10:30AM 2 , Select the desired still image with your camera almost immediately on the LCD screen. The last image in separate panels on the screen. • For detailed descriptions of the screen indicators, see...Set the mode switch to , and turn on the power. Enjoying still images Viewing still images on the LCD screen Single (singleimage) screen Index (four-image) screen 2M 101 7 / 8 101-0007 2003 7 4 12:00PM You can view images shot with the control buttons v/V. You can view one image at a time...
...cover while viewing images, the power shuts off. 2M 101 6 / 8 101-0006 2003 7 4 10:30AM 2 , Select the desired still image with your camera almost immediately on the LCD screen. The last image in separate panels on the screen. • For detailed descriptions of the screen indicators, see...Set the mode switch to , and turn on the power. Enjoying still images Viewing still images on the LCD screen Single (singleimage) screen Index (four-image) screen 2M 101 7 / 8 101-0007 2003 7 4 12:00PM You can view images shot with the control buttons v/V. You can view one image at a time...


