
Operating Instructions
Page 14
... reading this manual and operating your camcorder, check the model number by looking at the bottom of differences Model Recording system Playback system AUDIO/VIDEO jack S VIDEO jack DV jack USB jack "Memory Stick" slot LANC jack SteadyShot Remote sensor RFU jack MIC jack Hi8 Hi8/8 OUT OUT - - - - - - Hi8 Hi8/8 OUT OUT - - - - z - Set the POWER switch to indicate that the operation is being carried out. z - z - - z z - - - - - Otherwise, the model name is the model used for...
... reading this manual and operating your camcorder, check the model number by looking at the bottom of differences Model Recording system Playback system AUDIO/VIDEO jack S VIDEO jack DV jack USB jack "Memory Stick" slot LANC jack SteadyShot Remote sensor RFU jack MIC jack Hi8 Hi8/8 OUT OUT - - - - - - Hi8 Hi8/8 OUT OUT - - - - z - Set the POWER switch to indicate that the operation is being carried out. z - z - - z z - - - - - Otherwise, the model name is the model used for...
Operating Instructions
Page 51
Open the jack cover. Basics Viewing recordings on TV Connect your camcorder to your TV with the A/V connecting cable supplied with your TV. Then, set the TV/VCR selector on the TV screen. Connect your camcorder to the operating instructions of your camcorder. Playback - A/V connecting cable (supplied) AUDIO/ A/ V OUT VIDEO Red S VIDEO S VIDEO OUT : Signal flow Yellow White IN S VIDEO TV VIDEO AUDIO A/ V OUT S VIDEO OUT : Signal flow CCD-TRV418 A/V connecting cable (supplied) Yellow IN S VIDEO TV Black VIDEO AUDIO 51 When monitoring playback pictures on the TV...
Open the jack cover. Basics Viewing recordings on TV Connect your camcorder to your TV with the A/V connecting cable supplied with your TV. Then, set the TV/VCR selector on the TV screen. Connect your camcorder to the operating instructions of your camcorder. Playback - A/V connecting cable (supplied) AUDIO/ A/ V OUT VIDEO Red S VIDEO S VIDEO OUT : Signal flow Yellow White IN S VIDEO TV VIDEO AUDIO A/ V OUT S VIDEO OUT : Signal flow CCD-TRV418 A/V connecting cable (supplied) Yellow IN S VIDEO TV Black VIDEO AUDIO 51 When monitoring playback pictures on the TV...

Operating Instructions
Page 60
... camcorder to other equipment by an A/V connecting cable. You connect your camcorder to the S video jack on the TV screen at full size when: - Using the wide mode To cancel the wide mode In the standby mode, set the wide mode described below in the menu settings when the SteadyShot is compatible with video signals. OLD MOVIE (p. 65) - In the wide mode You cannot operate the following functions: - Recording still images on a "Memory Stick" in tape recording or tape recording...
... camcorder to other equipment by an A/V connecting cable. You connect your camcorder to the S video jack on the TV screen at full size when: - Using the wide mode To cancel the wide mode In the standby mode, set the wide mode described below in the menu settings when the SteadyShot is compatible with video signals. OLD MOVIE (p. 65) - In the wide mode You cannot operate the following functions: - Recording still images on a "Memory Stick" in tape recording or tape recording...
Operating Instructions
Page 107
... dial. Check the code in digital format for operation with the A/V connecting cable To edit using the A/V connecting cable, follow the procedure below, steps (1) to (4), to send the control signal correctly. (1) Set the IR SETUP code 1 Set the POWER switch to VCR on your camcorder. 2 Turn the power of your camcorder to send the control signal by infrared rays to select TAPE in page 94. When you connect a video camera recorder, set its power switch to VCR/ VTR. 3 Press MENU to display the menu settings. 4 Turn the...
... dial. Check the code in digital format for operation with the A/V connecting cable To edit using the A/V connecting cable, follow the procedure below, steps (1) to (4), to send the control signal correctly. (1) Set the IR SETUP code 1 Set the POWER switch to VCR on your camcorder. 2 Turn the power of your camcorder to send the control signal by infrared rays to select TAPE in page 94. When you connect a video camera recorder, set its power switch to VCR/ VTR. 3 Press MENU to display the menu settings. 4 Turn the...
Operating Instructions
Page 115
... the first scene you want to light blue. Digital program editing (on tapes) Operation 1: Making a program (1) Insert a tape for playback into your camcorder, and insert a tape for recording into the VCR. (2) Press MENU to display the menu settings. (3) Turn the SEL/PUSH EXEC dial to select , then press the dial. (4) Turn the SEL/PUSH EXEC dial to insert using the video control buttons, then pause playback. (8) Press the SEL/PUSH EXEC dial...
... the first scene you want to light blue. Digital program editing (on tapes) Operation 1: Making a program (1) Insert a tape for playback into your camcorder, and insert a tape for recording into the VCR. (2) Press MENU to display the menu settings. (3) Turn the SEL/PUSH EXEC dial to select , then press the dial. (4) Turn the SEL/PUSH EXEC dial to insert using the video control buttons, then pause playback. (8) Press the SEL/PUSH EXEC dial...
Operating Instructions
Page 151
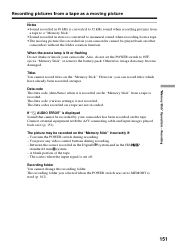
... moving picture files recorded on your camcorder has been recorded on the "Memory Stick" from a tape to OFF, eject a "Memory Stick" or remove the battery pack. The picture may become damaged. The data code (various settings) is cut off. "Memory Stick" Operations - Recording Recording pictures from a tape as a moving picture Notes •Sound recorded in 48 kHz is converted to MEMORY is lit or flashing Do not shake or knock your camcorder. When the access lamp is used (p. 162). 151 Data code The data code (date/time) when...
... moving picture files recorded on your camcorder has been recorded on the "Memory Stick" from a tape to OFF, eject a "Memory Stick" or remove the battery pack. The picture may become damaged. The data code (various settings) is cut off. "Memory Stick" Operations - Recording Recording pictures from a tape as a moving picture Notes •Sound recorded in 48 kHz is converted to MEMORY is lit or flashing Do not shake or knock your camcorder. When the access lamp is used (p. 162). 151 Data code The data code (date/time) when...
Operating Instructions
Page 156
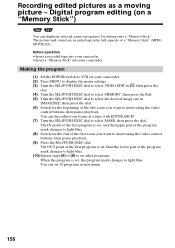
... program (1) Set the POWER switch to VCR on a "Memory Stick") You can duplicate selected scenes (programs) for the end of the program mark changes to light blue. (10) Repeat steps (6) to (9) to set other programs. When the program is set , the program mark changes to insert using the video control buttons, then pause playback. Before operation •Insert a recorded tape into your camcorder. •Insert a "Memory Stick" into your camcorder. (2) Press MENU to display the menu settings. (3) Turn the...
... program (1) Set the POWER switch to VCR on a "Memory Stick") You can duplicate selected scenes (programs) for the end of the program mark changes to light blue. (10) Repeat steps (6) to (9) to set other programs. When the program is set , the program mark changes to insert using the video control buttons, then pause playback. Before operation •Insert a recorded tape into your camcorder. •Insert a "Memory Stick" into your camcorder. (2) Press MENU to display the menu settings. (3) Turn the...
Operating Instructions
Page 185
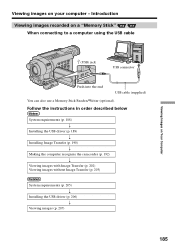
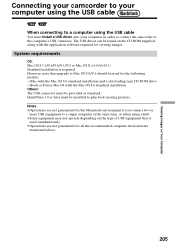
Introduction Viewing images recorded on your computer - Viewing Images on Your Computer Viewing images on a "Memory Stick" When connecting to a computer using the USB cable (USB) jack USB connector Push into the end USB cable (supplied) You can also use a Memory Stick Reader/Writer (optional). Follow the instructions in order described below System requirements (p. 188) r Installing the USB driver (p. 189) r Installing Image Transfer (p. 190) r Making the computer recognize the camcorder (p. 192) r Viewing images with Image Transfer (p. 202) Viewing images without Image Transfer ...
Introduction Viewing images recorded on your computer - Viewing Images on Your Computer Viewing images on a "Memory Stick" When connecting to a computer using the USB cable (USB) jack USB connector Push into the end USB cable (supplied) You can also use a Memory Stick Reader/Writer (optional). Follow the instructions in order described below System requirements (p. 188) r Installing the USB driver (p. 189) r Installing Image Transfer (p. 190) r Making the computer recognize the camcorder (p. 192) r Viewing images with Image Transfer (p. 202) Viewing images without Image Transfer ...
Operating Instructions
Page 193
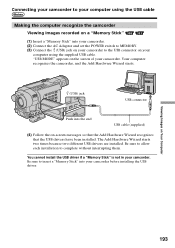
... Wizard starts. (USB) jack USB connector Push into your camcorder before installing the USB driver. Connecting your camcorder to your computer using the USB cable Making the computer recognize the camcorder Viewing images recorded on a "Memory Stick" (1) Insert a "Memory Stick" into your camcorder. (2) Connect the AC Adaptor and set the POWER switch to MEMORY. (3) Connect the (USB) jack on your camcorder to insert a "Memory Stick" into the end USB cable (supplied) (4) Follow the on the screen of your camcorder. "USB MODE" appears on -screen messages so that the...
... Wizard starts. (USB) jack USB connector Push into your camcorder before installing the USB driver. Connecting your camcorder to your computer using the USB cable Making the computer recognize the camcorder Viewing images recorded on a "Memory Stick" (1) Insert a "Memory Stick" into your camcorder. (2) Connect the AC Adaptor and set the POWER switch to MEMORY. (3) Connect the (USB) jack on your camcorder to insert a "Memory Stick" into the end USB cable (supplied) (4) Follow the on the screen of your camcorder. "USB MODE" appears on -screen messages so that the...
Operating Instructions
Page 194
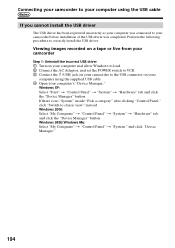
.... Viewing images recorded on a tape or live from your camcorder Step 1: Uninstall the incorrect USB driver 1 Turn on your computer and allow Windows to load. 2 Connect the AC Adaptor, and set the POWER switch to VCR. 3 Connect the (USB) jack on your camcorder to the USB connector on your computer using the USB cable If you cannot install the USB driver The USB driver has been registered incorrectly as your computer was connected to your computer's "Device Manager." Connecting...
.... Viewing images recorded on a tape or live from your camcorder Step 1: Uninstall the incorrect USB driver 1 Turn on your computer and allow Windows to load. 2 Connect the AC Adaptor, and set the POWER switch to VCR. 3 Connect the (USB) jack on your camcorder to the USB connector on your computer using the USB cable If you cannot install the USB driver The USB driver has been registered incorrectly as your computer was connected to your computer's "Device Manager." Connecting...
Operating Instructions
Page 196
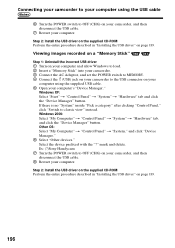
... "Device Manager." 6 Select "Other devices." Viewing images recorded on a "Memory Stick" Step 1: Uninstall the incorrect USB driver 1 Turn on your computer and allow Windows to load. 2 Insert a "Memory Stick" into your camcorder. 3 Connect the AC Adaptor, and set the POWER switch to MEMORY. 4 Connect the (USB) jack on your camcorder to OFF (CHG) on your camcorder, and then disconnect the USB cable. 7 Restart your computer using the USB cable 6 Turn the POWER switch to classic view" instead. mark and delete. Step 2: Install the USB driver on...
... "Device Manager." 6 Select "Other devices." Viewing images recorded on a "Memory Stick" Step 1: Uninstall the incorrect USB driver 1 Turn on your computer and allow Windows to load. 2 Insert a "Memory Stick" into your camcorder. 3 Connect the AC Adaptor, and set the POWER switch to MEMORY. 4 Connect the (USB) jack on your camcorder to OFF (CHG) on your camcorder, and then disconnect the USB cable. 7 Restart your computer using the USB cable 6 Turn the POWER switch to classic view" instead. mark and delete. Step 2: Install the USB driver on...
Operating Instructions
Page 197
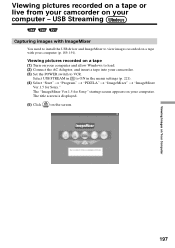
The title screen is displayed. (5) Click on Your Computer 197 Viewing Images on the screen. The "ImageMixer Ver.1.5 for Sony." USB Streaming Capturing images with your computer (p. 189, 191). Viewing pictures recorded on a tape (1) Turn on your computer and allow Windows to load. (2) Connect the AC Adaptor, and insert a tape into your camcorder. (3) Set the POWER switch to view images recorded on a tape with ImageMixer You need to install the USB driver and ImageMixer to VCR. Viewing pictures recorded on a tape or live from your...
The title screen is displayed. (5) Click on Your Computer 197 Viewing Images on the screen. The "ImageMixer Ver.1.5 for Sony." USB Streaming Capturing images with your computer (p. 189, 191). Viewing pictures recorded on a tape (1) Turn on your computer and allow Windows to load. (2) Connect the AC Adaptor, and insert a tape into your camcorder. (3) Set the POWER switch to view images recorded on a tape with ImageMixer You need to install the USB driver and ImageMixer to VCR. Viewing pictures recorded on a tape or live from your...
Operating Instructions
Page 203
... newly recognized drive (e.g. "USB MODE" appears on the LCD screen of your computer before viewing it is recommended. The folders inside the "Memory Stick" are displayed. (6) Double-click the desired image file from 101 to 999. *2) Copying a moving pictures in this order. Viewing images recorded on a "Memory Stick" on your computer Viewing images without Image Transfer Before operation An application such as Windows Media Player must be installed to play back the file directly from the "Memory Stick," the image and sound may...
... newly recognized drive (e.g. "USB MODE" appears on the LCD screen of your computer before viewing it is recommended. The folders inside the "Memory Stick" are displayed. (6) Double-click the desired image file from 101 to 999. *2) Copying a moving pictures in this order. Viewing images recorded on a "Memory Stick" on your computer Viewing images without Image Transfer Before operation An application such as Windows Media Player must be installed to play back the file directly from the "Memory Stick," the image and sound may...
Operating Instructions
Page 205
... the type of USB equipment that upgrade to Mac OS 9.0/9.1 should be installed to play back moving pictures. System requirements OS: Mac OS 8.5.1/8.6/9.0/9.1/9.2 or Mac OS X (v10.0/v10.1) Standard installation is used for the following models: - Viewing Images on Your Computer Connecting your camcorder to your computer using the USB cable When connecting to a computer using a hub. •Some equipment may not operate depending on the CD-ROM supplied, along with the application software...
... the type of USB equipment that upgrade to Mac OS 9.0/9.1 should be installed to play back moving pictures. System requirements OS: Mac OS 8.5.1/8.6/9.0/9.1/9.2 or Mac OS X (v10.0/v10.1) Standard installation is used for the following models: - Viewing Images on Your Computer Connecting your camcorder to your computer using the USB cable When connecting to a computer using a hub. •Some equipment may not operate depending on the CD-ROM supplied, along with the application software...
Operating Instructions
Page 207
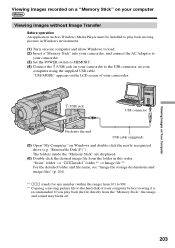
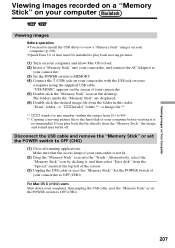
...). 207 Viewing Images on Your Computer Viewing images recorded on a "Memory Stick" on your computer Viewing images Before operation •You need to install the USB driver to view a "Memory Stick" images on your computer (p. 206). •QuickTime 3.0 or later must be installed to play back the file directly from the "Memory Stick," the image and sound may break off. "USB MODE" appears on the screen of your camcorder is recommended. Disconnect the USB cable and remove the "Memory Stick" or set the POWER switch to MEMORY. (4) Connect the (USB) jack...
...). 207 Viewing Images on Your Computer Viewing images recorded on a "Memory Stick" on your computer Viewing images Before operation •You need to install the USB driver to view a "Memory Stick" images on your computer (p. 206). •QuickTime 3.0 or later must be installed to play back the file directly from the "Memory Stick," the image and sound may break off. "USB MODE" appears on the screen of your camcorder is recommended. Disconnect the USB cable and remove the "Memory Stick" or set the POWER switch to MEMORY. (4) Connect the (USB) jack...
Operating Instructions
Page 224
... POWER switch is the manual focus mode. - Types of trouble and how to CAMERA. See page 232. The image on the screen, the self-diagnosis display function has worked. c Set it to OFF (p. 212). • The setting is not set to CAMERA again (p. 30). • The battery pack is not clear. c Set the POWER switch to OFF (CHG) and then to OFF in the viewfinder. c Install a charged battery pack (p. 18, 19). • The viewfinder lens...
... POWER switch is the manual focus mode. - Types of trouble and how to CAMERA. See page 232. The image on the screen, the self-diagnosis display function has worked. c Set it to OFF (p. 212). • The setting is not set to CAMERA again (p. 30). • The battery pack is not clear. c Set the POWER switch to OFF (CHG) and then to OFF in the viewfinder. c Install a charged battery pack (p. 18, 19). • The viewfinder lens...
Operating Instructions
Page 230
... or remove the battery, then reconnect it in the menu settings. c Set it to OFF (CHG). • The battery pack is not installed properly. c Set it to V-OUT/LCD in about one hour to OFF (CHG). c Set it again, then operate your camcorder. No function works though the power is fully discharged. c Disconnect the power cord of other equipment (connected with the USB cable before installing the USB driver, so the driver was connected to...
... or remove the battery, then reconnect it in the menu settings. c Set it to OFF (CHG). • The battery pack is not installed properly. c Set it to V-OUT/LCD in about one hour to OFF (CHG). c Set it again, then operate your camcorder. No function works though the power is fully discharged. c Disconnect the power cord of other equipment (connected with the USB cable before installing the USB driver, so the driver was connected to...
Operating Instructions
Page 238
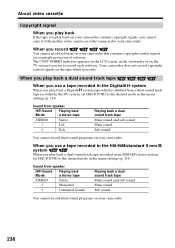
... contains copyright control signals for copyright protection of software. About video cassette Copyright signal When you play back If the tape you play back on your camcorder contains copyright signals, you cannot copy it records. Your camcorder does not record copyright control signals on the tape when it with another video camera recorder connected to the desired mode in the DV system, set HiFi SOUND to your camcorder. When you use a tape recorded in the...
... contains copyright control signals for copyright protection of software. About video cassette Copyright signal When you play back If the tape you play back on your camcorder contains copyright signals, you cannot copy it records. Your camcorder does not record copyright control signals on the tape when it with another video camera recorder connected to the desired mode in the DV system, set HiFi SOUND to your camcorder. When you use a tape recorded in the...

Operating Instructions
Page 267
... Memory PB ZOOM 172 Memory photo recording ..... 132 "Memory Stick 126, 240 "Memory Stick" recording capacity 131 Menu settings 210 Mirror mode 35 Moisture condensation ......... 247 Monaural 52, 95, 120, 152 MONOTONE 61 M.FADER 61 MPEG 126 MPEG movie recording ........ 146 New folder 160 NIGHTSHOT 39 NTSC system 246 R Recording folder 162 Recording time 22 Recording/Playback system 237 Rec Review 43 Remaining battery time indicator 36, 48 Remaining tape indicator ....... 36 Remote Commander 264 Remote sensor 257 RESET...
... Memory PB ZOOM 172 Memory photo recording ..... 132 "Memory Stick 126, 240 "Memory Stick" recording capacity 131 Menu settings 210 Mirror mode 35 Moisture condensation ......... 247 Monaural 52, 95, 120, 152 MONOTONE 61 M.FADER 61 MPEG 126 MPEG movie recording ........ 146 New folder 160 NIGHTSHOT 39 NTSC system 246 R Recording folder 162 Recording time 22 Recording/Playback system 237 Rec Review 43 Remaining battery time indicator 36, 48 Remaining tape indicator ....... 36 Remote Commander 264 Remote sensor 257 RESET...
Marketing Specifications
Page 1
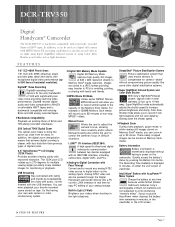
... mode automatically adjusts the shutter speed to control the camera's focus in low light situations. Built-In Light (3 Watt) Brightens your analog footage. USB Streaming Stay connected with family and friends by broadcasting live video with audio, via the analog inputs. DCR-TRV350 Digital Handycam® Camcorder The DCR-TRV350 is backward compatible with full color detail by slowing down the shutter speed. ➤Playback Zoom During video playback, pause mode, or while viewing still images stored on tape. Manual focusing also allows the user to increase picture...
... mode automatically adjusts the shutter speed to control the camera's focus in low light situations. Built-In Light (3 Watt) Brightens your analog footage. USB Streaming Stay connected with family and friends by broadcasting live video with audio, via the analog inputs. DCR-TRV350 Digital Handycam® Camcorder The DCR-TRV350 is backward compatible with full color detail by slowing down the shutter speed. ➤Playback Zoom During video playback, pause mode, or while viewing still images stored on tape. Manual focusing also allows the user to increase picture...


