Operating Guide
Page 1
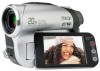
Digital Video Camera Recorder Operating Guide DCR-DVD92/DVD103/DVD203/ DVD403/DVD602/DVD653/DVD703/ DVD803 2-587-622-13 (1) Enjoying with your DVD Handycam 10 Getting Started 16 Easy Handycam 27 Recording/ Playback 32 Playback on DVD devices 44 Using the Recorded disc 50 Using the Setup items 52 Editing on DVD Handycam 72 Dubbing 78 Using a Computer 82 Troubleshooting 87 Additional Information 105 © 2005 Sony Corporation
Digital Video Camera Recorder Operating Guide DCR-DVD92/DVD103/DVD203/ DVD403/DVD602/DVD653/DVD703/ DVD803 2-587-622-13 (1) Enjoying with your DVD Handycam 10 Getting Started 16 Easy Handycam 27 Recording/ Playback 32 Playback on DVD devices 44 Using the Recorded disc 50 Using the Setup items 52 Editing on DVD Handycam 72 Dubbing 78 Using a Computer 82 Troubleshooting 87 Additional Information 105 © 2005 Sony Corporation
Operating Guide
Page 4
... copyright protected software on the LCD screen and the viewfinder. About the Carl Zeiss lens Your camcorder is not available under the current recording or playback conditions. • The LCD screen and the viewfinder are operational for illustrating the operating procedures. Notes on -screen displays in Germany, and Sony Corporation, and produces superior images. Take pictures of the pixels are manufactured using a digital still camera, and thus...
... copyright protected software on the LCD screen and the viewfinder. About the Carl Zeiss lens Your camcorder is not available under the current recording or playback conditions. • The LCD screen and the viewfinder are operational for illustrating the operating procedures. Notes on -screen displays in Germany, and Sony Corporation, and produces superior images. Take pictures of the pixels are manufactured using a digital still camera, and thus...
Operating Guide
Page 5
... disc clean, or the quality of the disc or your camcorder. If you may deteriorate. • Clean the disc with your camcorder. When the message [C:13:] appears on the LCD screen, open the disc cover and set the disc again. • Do not attach any adhesive material such as a sticker on the place you set the disc in your DVD Handycam. * Depending on the surface of recording /playback...
... disc clean, or the quality of the disc or your camcorder. If you may deteriorate. • Clean the disc with your camcorder. When the message [C:13:] appears on the LCD screen, open the disc cover and set the disc again. • Do not attach any adhesive material such as a sticker on the place you set the disc in your DVD Handycam. * Depending on the surface of recording /playback...
Operating Guide
Page 6
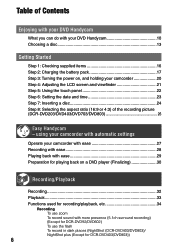
... the recording picture (DCR-DVD203/DVD403/DVD703/DVD803 26 Easy Handycam - using your camcorder with automatic settings Operate your camcorder with ease 27 Recording with ease 28 Playing back with ease 29 Preparation for playing back on , and holding your DVD Handycam 10 Choosing a disc 13 Getting Started Step 1: Checking supplied items 16 Step 2: Charging the battery pack 17 Step 3: Turning the power on a DVD player (Finalizing 30 Recording/Playback Recording 32 Playback 33 Functions used for recording/playback...
... the recording picture (DCR-DVD203/DVD403/DVD703/DVD803 26 Easy Handycam - using your camcorder with automatic settings Operate your camcorder with ease 27 Recording with ease 28 Playing back with ease 29 Preparation for playing back on , and holding your DVD Handycam 10 Choosing a disc 13 Getting Started Step 1: Checking supplied items 16 Step 2: Charging the battery pack 17 Step 3: Turning the power on a DVD player (Finalizing 30 Recording/Playback Recording 32 Playback 33 Functions used for recording/playback...
Operating Guide
Page 7
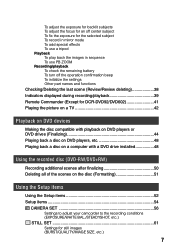
... use a tripod Playback To play back the images in sequence To use PB ZOOM Recording/playback To check the remaining battery To turn off the operation confirmation beep To initialize the settings Other part names and functions Checking/Deleting the last scene (Review/Review deleting 38 Indicators displayed during recording/playback 39 Remote Commander (Except for DCR-DVD92/DVD602 41 Playing the picture on a TV 42 Playback on DVD devices Making the disc compatible with playback on DVD players or DVD drives (Finalizing 44 Playing...
... use a tripod Playback To play back the images in sequence To use PB ZOOM Recording/playback To check the remaining battery To turn off the operation confirmation beep To initialize the settings Other part names and functions Checking/Deleting the last scene (Review/Review deleting 38 Indicators displayed during recording/playback 39 Remote Commander (Except for DCR-DVD92/DVD602 41 Playing the picture on a TV 42 Playback on DVD devices Making the disc compatible with playback on DVD players or DVD drives (Finalizing 44 Playing...
Operating Guide
Page 8
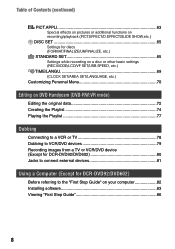
... on pictures or additional functions on recording/playback (PICT.EFFECT/D.EFFECT/SLIDE SHOW,etc.) DISC SET 65 Settings for discs (FORMAT/FINALIZE/UNFINALIZE, etc.) STANDARD SET 65 Settings while recording on a disc or other basic settings (REC MODE/LCD/VF SET/USB SPEED, etc.) TIME/LANGU 69 (CLOCK SET/AREA SET/LANGUAGE, etc.) Customizing Personal Menu 70 Editing on DVD Handycam (DVD-RW:VR mode) Editing the original data 72 Creating the Playlist 74 Playing the Playlist 77 Dubbing Connecting to a VCR or...
... on pictures or additional functions on recording/playback (PICT.EFFECT/D.EFFECT/SLIDE SHOW,etc.) DISC SET 65 Settings for discs (FORMAT/FINALIZE/UNFINALIZE, etc.) STANDARD SET 65 Settings while recording on a disc or other basic settings (REC MODE/LCD/VF SET/USB SPEED, etc.) TIME/LANGU 69 (CLOCK SET/AREA SET/LANGUAGE, etc.) Customizing Personal Menu 70 Editing on DVD Handycam (DVD-RW:VR mode) Editing the original data 72 Creating the Playlist 74 Playing the Playlist 77 Dubbing Connecting to a VCR or...
Operating Guide
Page 11
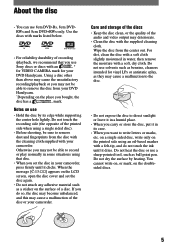
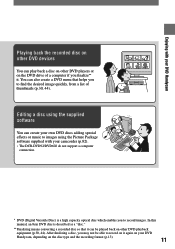
...). In this manual, an 8cm DVD disc is a high capacity optical disc which enables you to record images. You can also create a DVD menu that it can play back a disc on the disc type and the recording format (p.13). 11 Editing a disc using the supplied software You can create your own DVD discs adding special effects or music to images using the Picture Package software supplied with your DVD Handycam Playing back the recorded disc on other DVD devices You can...
...). In this manual, an 8cm DVD disc is a high capacity optical disc which enables you to record images. You can also create a DVD menu that it can play back a disc on the disc type and the recording format (p.13). 11 Editing a disc using the supplied software You can create your own DVD discs adding special effects or music to images using the Picture Package software supplied with your DVD Handycam Playing back the recorded disc on other DVD devices You can...
Operating Guide
Page 12
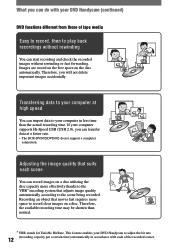
... high speed You can import data to the scene being recorded. Therefore, the available recording time may be shorten than the actual recording time. Adjusting the image quality that adjusts image quality automatically according to your computer at a faster rate. • The DCR-DVD92/DVD602 do not support a computer connection. Therefore, you will not delete important images accidentally. Transferring data to your computer in accordance with your DVD Handycam to record clear images on a disc. Recording...
... high speed You can import data to the scene being recorded. Therefore, the available recording time may be shorten than the actual recording time. Adjusting the image quality that adjusts image quality automatically according to your computer at a faster rate. • The DCR-DVD92/DVD602 do not support a computer connection. Therefore, you will not delete important images accidentally. Transferring data to your computer in accordance with your DVD Handycam to record clear images on a disc. Recording...
Operating Guide
Page 13
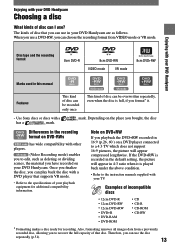
...; CD-ROM • CD-RW * Formatting makes a disc ready for additional compatibility information. When you use a DVD-RW, you can use the disc repeatedly (p.51). 13 Also, formatting removes all images data from VIDEO mode or VR mode. Depending on the place you to edit, such as follows. Examples of that you can play back the disc with other players. (Video Recording mode) enables you bought, the disc Differences in your DVD Handycam.
...; CD-ROM • CD-RW * Formatting makes a disc ready for additional compatibility information. When you use a DVD-RW, you can use the disc repeatedly (p.51). 13 Also, formatting removes all images data from VIDEO mode or VR mode. Depending on the place you to edit, such as follows. Examples of that you can play back the disc with other players. (Video Recording mode) enables you bought, the disc Differences in your DVD Handycam.
Operating Guide
Page 25
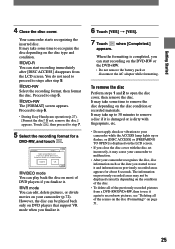
... Handycam operation (p.27), [Format the disc? FORMAT : VIDEO Can playback on the disc condition or recorded materials. It may take up to 30 minutes to remove a disc if it is damaged or is dirty with the disc set incorrectly, it again to open the disc cover, then remove the disc. Proceed to step 5. DVD+RW The [FORMAT] screen appears. Cannot edit in Camcorder VIDEO VR OK VIDEO mode You can play back the disc...
... Handycam operation (p.27), [Format the disc? FORMAT : VIDEO Can playback on the disc condition or recorded materials. It may take up to 30 minutes to remove a disc if it is damaged or is dirty with the disc set incorrectly, it again to open the disc cover, then remove the disc. Proceed to step 5. DVD+RW The [FORMAT] screen appears. Cannot edit in Camcorder VIDEO VR OK VIDEO mode You can play back the disc...
Operating Guide
Page 34
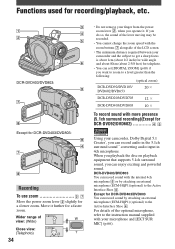
... powerful sound. Functions used for DCR-DVD92/DVD602 Using your camcorder, Dolby Digital 5.1 Creater*, you can record audio in the 5.1ch surround sound** converting audio input in 4ch microphone. Wider range of the LCD screen. • The minimum distance required between your microphone and [EXT SUR MIC] (p.66). If you do so, the sound of the lever moving may be recorded. • You cannot change the zoom speed with the zoom buttons alongside of view...
... powerful sound. Functions used for DCR-DVD92/DVD602 Using your camcorder, Dolby Digital 5.1 Creater*, you can record audio in the 5.1ch surround sound** converting audio input in 4ch microphone. Wider range of the LCD screen. • The minimum distance required between your microphone and [EXT SUR MIC] (p.66). If you do so, the sound of the lever moving may be recorded. • You cannot change the zoom speed with the zoom buttons alongside of view...
Operating Guide
Page 60
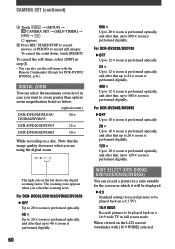
... bar shows the digital zooming factor. WIDE SELECT (DCR-DVD92/ DVD103/DVD602/DVD653) You can record a picture in full screen mode. When viewed on a disc. CAMERA SET (continued) Touch [SETUP] CAMERA SET [SELF-TIMER] [ON] . DIGITAL ZOOM You can also use the self-timer with [16:9 WIDE] selected. For DCR-DVD203/DVD703 OFF Up to 12 × zoom is performed optically. 24 × Up...
... bar shows the digital zooming factor. WIDE SELECT (DCR-DVD92/ DVD103/DVD602/DVD653) You can record a picture in full screen mode. When viewed on a disc. CAMERA SET (continued) Touch [SETUP] CAMERA SET [SELF-TIMER] [ON] . DIGITAL ZOOM You can also use the self-timer with [16:9 WIDE] selected. For DCR-DVD203/DVD703 OFF Up to 12 × zoom is performed optically. 24 × Up...
Operating Guide
Page 79
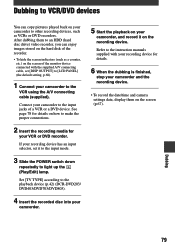
... the screen indicators (such as VCRs or DVD recorders. See page 78 for details on the screen (p.67). After dubbing them to an HDD (hard disc drive) video recorder, you can copy pictures played back on your camcorder to the input jacks of the monitor device connected with your recording device for your recording device has an input selector, set [DISP OUTPUT] to [LCD PANEL] (the default setting, p.68). 1 Connect your camcorder and the recording device. • To record the date/time and camera settings data, display them...
... the screen indicators (such as VCRs or DVD recorders. See page 78 for details on the screen (p.67). After dubbing them to an HDD (hard disc drive) video recorder, you can copy pictures played back on your camcorder to the input jacks of the monitor device connected with your recording device for your recording device has an input selector, set [DISP OUTPUT] to [LCD PANEL] (the default setting, p.68). 1 Connect your camcorder and the recording device. • To record the date/time and camera settings data, display them...
Operating Guide
Page 82
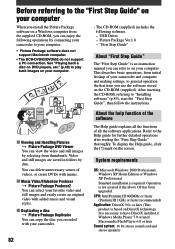
...-ROM (supplied). Video and still images are saved in folders by connecting your camcorder to your computer. • Picture Package software does not support Macintosh computer. • The DCR-DVD92/DVD602 do not support a PC connection. Refer to the Help guide for further detailed operations after reading the "First Step Guide" thoroughly. See "Playing back a disc on DVD players, etc." (p.48) to play back images on a Windows computer from thumbnails. About the help function...
...-ROM (supplied). Video and still images are saved in folders by connecting your camcorder to your computer. • Picture Package software does not support Macintosh computer. • The DCR-DVD92/DVD602 do not support a PC connection. Refer to the Help guide for further detailed operations after reading the "First Step Guide" thoroughly. See "Playing back a disc on DVD players, etc." (p.48) to play back images on a Windows computer from thumbnails. About the help function...
Operating Guide
Page 86
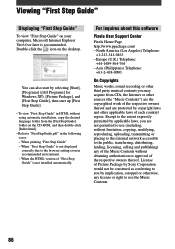
... browser setting even in HTML without using automatic installation, copy the desired language folder from CDs, the Internet or other sources (the "Music Contents") are the copyrighted work of each country/ region. When "First Step Guide" is not installed automatically. When the HTML version of the respective owners thereof. North America (Los Angeles) Telephone: +1-213-341-0163 - Viewing "First Step Guide" Displaying...
... browser setting even in HTML without using automatic installation, copy the desired language folder from CDs, the Internet or other sources (the "Music Contents") are the copyrighted work of each country/ region. When "First Step Guide" is not installed automatically. When the HTML version of the respective owners thereof. North America (Los Angeles) Telephone: +1-213-341-0163 - Viewing "First Step Guide" Displaying...
Operating Guide
Page 89
Cancel Easy Handycam operation (p.27). Close the LCD screen (p.21). 89 Troubleshooting You cannot turn the LCD backlight on/off using the DISP/BATT INFO. The picture in [DEMO MODE] (p.64). Touch the LCD screen or insert a disc to cancel [DEMO MODE]. This is not clear. • Extend the viewfinder (p.21). • Use the viewfinder lens adjustment lever to adjust the lens (p.21). The buttons do not work correctly or do not...
Cancel Easy Handycam operation (p.27). Close the LCD screen (p.21). 89 Troubleshooting You cannot turn the LCD backlight on/off using the DISP/BATT INFO. The picture in [DEMO MODE] (p.64). Touch the LCD screen or insert a disc to cancel [DEMO MODE]. This is not clear. • Extend the viewfinder (p.21). • Use the viewfinder lens adjustment lever to adjust the lens (p.21). The buttons do not work correctly or do not...
Operating Guide
Page 91
... power of your camcorder is extremely high. This is not a malfunction. 91 Troubleshooting Adjust the focus manually (p.58). [STEADYSHOT] does not function. • Set [STEADYSHOT] to ON (p.61). • [STEADYSHOT] may not work during Easy Handycam operation. This is not a malfunction. Cancel Easy Handycam operation (p.27). Turn off your camcorder and leave it for auto focus. There is too high. A vertical band appears when recording candlelight or electric light...
... power of your camcorder is extremely high. This is not a malfunction. 91 Troubleshooting Adjust the focus manually (p.58). [STEADYSHOT] does not function. • Set [STEADYSHOT] to ON (p.61). • [STEADYSHOT] may not work during Easy Handycam operation. This is not a malfunction. Cancel Easy Handycam operation (p.27). Turn off your camcorder and leave it for auto focus. There is too high. A vertical band appears when recording candlelight or electric light...
Operating Guide
Page 101
... on the LCD screen or in the remaining space. C:13: • The disc is not an "InfoLITHIUM" battery pack. Warning indicators and messages Self-diagnosis display/Warning indicators If indicators appear on it. If the problem persists even after you cannot service has occurred. Use a compatible disc with the supplied cleaning cloth. Remove the disc and insert it again, then operate your Sony dealer...
... on the LCD screen or in the remaining space. C:13: • The disc is not an "InfoLITHIUM" battery pack. Warning indicators and messages Self-diagnosis display/Warning indicators If indicators appear on it. If the problem persists even after you cannot service has occurred. Use a compatible disc with the supplied cleaning cloth. Remove the disc and insert it again, then operate your Sony dealer...

Operating Guide
Page 117
... DVD menu 45 D.EFFECT (Digital effect 63 E EASY button 27 Easy Handycam operation ... 27 Edit 72 EXPOSURE 57, 94 EXT SUR MIC 66 F FADER 63, 95 FILE NO. (File number) ...... 62 Finalize 44 First Step Guide 82, 86 Fixing the exposure 36 FLASH LEVEL 58, 91 FLASH MODE 58 FLASH SET 58 FOCUS 58 Format 51 FULL SPEED 67 H Help 82 I Icon ...... KEY (luminance key 63 M Maintenance 109 MICREF LEVEL 66 Mirror mode 36 Movie REC MODE (Recording mode...
... DVD menu 45 D.EFFECT (Digital effect 63 E EASY button 27 Easy Handycam operation ... 27 Edit 72 EXPOSURE 57, 94 EXT SUR MIC 66 F FADER 63, 95 FILE NO. (File number) ...... 62 Finalize 44 First Step Guide 82, 86 Fixing the exposure 36 FLASH LEVEL 58, 91 FLASH MODE 58 FLASH SET 58 FOCUS 58 Format 51 FULL SPEED 67 H Help 82 I Icon ...... KEY (luminance key 63 M Maintenance 109 MICREF LEVEL 66 Mirror mode 36 Movie REC MODE (Recording mode...
Operating Guide
Page 118
... color system 105 TV TYPE 42 See Personal Menu R Rechargeable battery pack See Battery Recording 28, 32 Recording time 18 REC lamp 37, 68 REC MODE 65 REC START/STOP 32 Remaining battery 37 Remote Commander 41 Remote sensor 37 RESET 37 Review 38 Review deleting 38 S Self-diagnosis display ........ 101 SELF-TIMER 59 SEPIA 64 Setup 52 CAMERA SET 56 DISC SET 65 PICT.APPLI 63 Setup items 54 STANDARD SET......... 65 STILL SET 61 TIME/LANGU 69 Using the Setup...
... color system 105 TV TYPE 42 See Personal Menu R Rechargeable battery pack See Battery Recording 28, 32 Recording time 18 REC lamp 37, 68 REC MODE 65 REC START/STOP 32 Remaining battery 37 Remote Commander 41 Remote sensor 37 RESET 37 Review 38 Review deleting 38 S Self-diagnosis display ........ 101 SELF-TIMER 59 SEPIA 64 Setup 52 CAMERA SET 56 DISC SET 65 PICT.APPLI 63 Setup items 54 STANDARD SET......... 65 STILL SET 61 TIME/LANGU 69 Using the Setup...


