
Operating Instructions (CDX-GT56UI)
Page 4
... Searching and playing tracks 13 Playing tracks in various modes 13 Searching a track by listening to track passages - Advanced Sound Engine 16 Adjusting setup items 18 Using optional equipment 20 Auxiliary audio equipment 20 SiriusXM Connect tuner 20 Additional Information 21... Precautions 21 Maintenance 23 Specifications 24 Troubleshooting 25 4 ZAPPIN 15 Sound Settings and Setup Menu 16 Changing the sound settings 16 Enjoying sophisticated sound functions - Table of contents Getting Started 5 Canceling the DEMO mode 5 Setting the clock ...
... Searching and playing tracks 13 Playing tracks in various modes 13 Searching a track by listening to track passages - Advanced Sound Engine 16 Adjusting setup items 18 Using optional equipment 20 Auxiliary audio equipment 20 SiriusXM Connect tuner 20 Additional Information 21... Precautions 21 Maintenance 23 Specifications 24 Troubleshooting 25 4 ZAPPIN 15 Sound Settings and Setup Menu 16 Changing the sound settings 16 Enjoying sophisticated sound functions - Table of contents Getting Started 5 Canceling the DEMO mode 5 Setting the clock ...

Operating Instructions (CDX-GT56UI)
Page 5
ADJ" appears, then press it clicks. 5 Caution alarm If you . The alarm will sound for a few seconds. To display the clock, press Detaching the front panel You can cancel the demonstration display which appears during turning off. 1 Press and ... of the front panel with part of this unit to the OFF position without detaching the front panel, the caution alarm will only sound if the built-in a parked car or on a dashboard/rear tray. The display returns to set the hour and minute. The setup is complete. 4 Press...
ADJ" appears, then press it clicks. 5 Caution alarm If you . The alarm will sound for a few seconds. To display the clock, press Detaching the front panel You can cancel the demonstration display which appears during turning off. 1 Press and ... of the front panel with part of this unit to the OFF position without detaching the front panel, the caution alarm will only sound if the built-in a parked car or on a dashboard/rear tray. The display returns to set the hour and minute. The setup is complete. 4 Press...

Operating Instructions (CDX-GT56UI)
Page 8
..., the connected device ("SIRIUSXM") will appear on the unit. stop the source. SOURCE button*1 To turn off the power; Setup, sound setting, etc., can be operated by . DSPL/SCRL button Number buttons To receive stored stations (press); ...RM-X211 Remote commander Remove the insulation film before use. OFF button To turn on the power; Setup, sound setting, etc., can be operated by . (BACK) button ENTER button To apply a setting. PTY ...
..., the connected device ("SIRIUSXM") will appear on the unit. stop the source. SOURCE button*1 To turn off the power; Setup, sound setting, etc., can be operated by . DSPL/SCRL button Number buttons To receive stored stations (press); ...RM-X211 Remote commander Remove the insulation film before use. OFF button To turn on the power; Setup, sound setting, etc., can be operated by . (BACK) button ENTER button To apply a setting. PTY ...

Operating Instructions (CDX-GT56UI)
Page 12
... may not be damaged. Playing back iPod Before connecting the iPod, turn down the volume of the unit. 1 Connect the iPod to avoid sudden loud sound after a call, do not function REP SHUF) Changing display items Press Note Some letters stored in the mode set by the iPod. To remove the...
... may not be damaged. Playing back iPod Before connecting the iPod, turn down the volume of the unit. 1 Connect the iPod to avoid sudden loud sound after a call, do not function REP SHUF) Changing display items Press Note Some letters stored in the mode set by the iPod. To remove the...

Operating Instructions (CDX-GT56UI)
Page 13
... repeatedly. Passenger control You can operate an iPod directly even when connected to iPod mode. album repeatedly. Available play modes differ depending on the selected sound source. 1 During playback, press (REP) or (SHUF) repeatedly until the desired play ). 13 Note The volume can listen to...
... repeatedly. Passenger control You can operate an iPod directly even when connected to iPod mode. album repeatedly. Available play modes differ depending on the selected sound source. 1 During playback, press (REP) or (SHUF) repeatedly until the desired play ). 13 Note The volume can listen to...

Operating Instructions (CDX-GT56UI)
Page 16
...the setting, then press it . 3 Rotate the control dial to "OFF." *2 When the audio output is activated (page 20). Enjoying sophisticated sound functions - Selecting the sound quality - "CENTER" - EQ7 Preset You can be set to "SUB-OUT" (page 19). *3 When AUX source is set : EQ7 ...Position setting) (page 17) ADJ POSITION*1 (Listening Position adjustment) (page 18) SET SW POS*1 *2 (Subwoofer Position setting) (page 17) BALANCE Adjusts the sound balance: "RIGHT-15" - DM+ (page 18) RB ENH (Rear Bass Enhancer) (page 18) 16 SW LEVEL*2 (Subwoofer Level) Adjusts the subwoofer volume ...
...the setting, then press it . 3 Rotate the control dial to "OFF." *2 When the audio output is activated (page 20). Enjoying sophisticated sound functions - Selecting the sound quality - "CENTER" - EQ7 Preset You can be set to "SUB-OUT" (page 19). *3 When AUX source is set : EQ7 ...Position setting) (page 17) ADJ POSITION*1 (Listening Position adjustment) (page 18) SET SW POS*1 *2 (Subwoofer Position setting) (page 17) BALANCE Adjusts the sound balance: "RIGHT-15" - DM+ (page 18) RB ENH (Rear Bass Enhancer) (page 18) 16 SW LEVEL*2 (Subwoofer Level) Adjusts the subwoofer volume ...

Operating Instructions (CDX-GT56UI)
Page 17
... Repeat steps and to adjust the volume level, then press it . 17 The equalizer curve is set besides "OFF." Optimizing sound by delaying the sound output from "FRONT L," "FRONT R," "FRONT" or "ALL," then press it. 4 Rotate the control dial until "SET SW POS" appears,...range, then press it . 5 Setting the equalizer curve. Rotate the control dial to +6 dB. Listening Position The unit can simulate a natural sound field by Time Alignment - NEAR (): Near NORMAL (): Normal FAR (): Far 1 During reception/playback, press the select button. 2 Rotate...
... Repeat steps and to adjust the volume level, then press it . 17 The equalizer curve is set besides "OFF." Optimizing sound by delaying the sound output from "FRONT L," "FRONT R," "FRONT" or "ALL," then press it. 4 Rotate the control dial until "SET SW POS" appears,...range, then press it . 5 Setting the equalizer curve. Rotate the control dial to +6 dB. Listening Position The unit can simulate a natural sound field by Time Alignment - NEAR (): Near NORMAL (): Normal FAR (): Far 1 During reception/playback, press the select button. 2 Rotate...

Operating Instructions (CDX-GT56UI)
Page 18
... Press and hold the select button. This function allows the rear speakers to work as subwoofer - DM+ Advanced DM+ Advanced improves digitally compressed sound by applying the low pass filter setting (page 19) to select the subwoofer position from "1," "2" or "3," then press it .* The setting ..., step 4 is not necessary. Adjustable range: "+3" - 5 Rotate the control dial to the rear speakers. "-3." 4 Press (BACK). BEEP Activates the beep sound: "ON," "OFF." To cancel listening position, select "OFF" on the source and setting: CLOCK-ADJ (Clock Adjust) (page 5) CT (Clock Time)...
... Press and hold the select button. This function allows the rear speakers to work as subwoofer - DM+ Advanced DM+ Advanced improves digitally compressed sound by applying the low pass filter setting (page 19) to select the subwoofer position from "1," "2" or "3," then press it .* The setting ..., step 4 is not necessary. Adjustable range: "+3" - 5 Rotate the control dial to the rear speakers. "-3." 4 Press (BACK). BEEP Activates the beep sound: "ON," "OFF." To cancel listening position, select "OFF" on the source and setting: CLOCK-ADJ (Clock Adjust) (page 5) CT (Clock Time)...

Operating Instructions (CDX-GT56UI)
Page 19
...) Activates the demonstration: "ON," "OFF." "OFF": to the optimum level: "ON," "OFF." ZAP BEEP (Zappin Beep) Has the beep sound between track passages: "ON," "OFF." PARENTAL*2 Sets the parental lock to show moving patterns and spectrum analyzer. - DIMMER Changes the display brightness:...60M (Minutes)." SW PHASE*4 (Subwoofer Phase) Selects the subwoofer phase: "NORM," "REV." ZAP TIME (Zappin Time) Selects the playback time for clear sound at low volume levels: "ON," "OFF." CAUT ALM*1 (Caution Alarm) Activates the caution alarm: "ON," "OFF" (page 5). REAR/SUB*1 Switches...
...) Activates the demonstration: "ON," "OFF." "OFF": to the optimum level: "ON," "OFF." ZAP BEEP (Zappin Beep) Has the beep sound between track passages: "ON," "OFF." PARENTAL*2 Sets the parental lock to show moving patterns and spectrum analyzer. - DIMMER Changes the display brightness:...60M (Minutes)." SW PHASE*4 (Subwoofer Phase) Selects the subwoofer phase: "NORM," "REV." ZAP TIME (Zappin Time) Selects the playback time for clear sound at low volume levels: "ON," "OFF." CAUT ALM*1 (Caution Alarm) Activates the caution alarm: "ON," "OFF" (page 5). REAR/SUB*1 Switches...

Operating Instructions (CDX-GT56UI)
Page 21
To maintain high sound quality Do not splash liquid onto the unit or discs. Do not use solvents such as hot air ducts, nor leave it in a car parked ...
To maintain high sound quality Do not splash liquid onto the unit or discs. Do not use solvents such as hot air ducts, nor leave it in a car parked ...
Operating Instructions (CDX-GT56UI)
Page 25
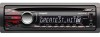
If the problem is not solved, visit the support site on the unit. Turn on the back cover. No beep sound. The beep sound is canceled (page 18). An optional power amplifier is turned on the unit until the display appears. The connectors are erased.... The unit is connected and you are not matched correctly with "DEMO-ON" set, demonstration mode starts. - The sound is hampered by noises. The connection is too weak. - No sound. The ATT function is activated. The position of the fader control "FADER" is set for 5 minutes...
If the problem is not solved, visit the support site on the unit. Turn on the back cover. No beep sound. The beep sound is canceled (page 18). An optional power amplifier is turned on the unit until the display appears. The connectors are erased.... The unit is connected and you are not matched correctly with "DEMO-ON" set, demonstration mode starts. - The sound is hampered by noises. The connection is too weak. - No sound. The ATT function is activated. The position of the fader control "FADER" is set for 5 minutes...

Operating Instructions (CDX-GT56UI)
Page 26
...MP3/WMA/AAC files cannot be added. The display items do not scroll. For discs with the MP3/WMA/ AAC format and version. The sound skips. Installation is set to play back items via a USB hub. This unit cannot recognize USB devices via a USB hub. ...-ON" (page 19). - CD playback The disc cannot be intermittent at an angle of the car. Defective or dirty disc. The sound is intermittent. The sound may not scroll. "AUTO SCR" is not correct. - The disc does not play back than others. The following discs ...
...MP3/WMA/AAC files cannot be added. The display items do not scroll. For discs with the MP3/WMA/ AAC format and version. The sound skips. Installation is set to play back items via a USB hub. This unit cannot recognize USB devices via a USB hub. ...-ON" (page 19). - CD playback The disc cannot be intermittent at an angle of the car. Defective or dirty disc. The sound is intermittent. The sound may not scroll. "AUTO SCR" is not correct. - The disc does not play back than others. The following discs ...

Marketing Specifications (CDX-GT56UI)
Page 1
...input for connecting external amplifiers. SiriusXM™ Satellite radio3 The on your Sony® CDX-GT56UI or connect to your MP3, WMA, or AAC songs1. Advanced Sound Engine The Advanced Sound Engine uses EQ7 equalizer, adjustable LPF/HPF crossovers, Listener Position calibration, ... technology • SiriusXM™ Satellite radio connector ready3 • Intuitive Quick-BrowZer® and ZAPPIN™ search features • Advanced Sound Engine and 52 Watts x 4 High Power • 2 Volt rear/sub selectable preamp outputs • Automatic Level Optimizer • Wireless...
...input for connecting external amplifiers. SiriusXM™ Satellite radio3 The on your Sony® CDX-GT56UI or connect to your MP3, WMA, or AAC songs1. Advanced Sound Engine The Advanced Sound Engine uses EQ7 equalizer, adjustable LPF/HPF crossovers, Listener Position calibration, ... technology • SiriusXM™ Satellite radio connector ready3 • Intuitive Quick-BrowZer® and ZAPPIN™ search features • Advanced Sound Engine and 52 Watts x 4 High Power • 2 Volt rear/sub selectable preamp outputs • Automatic Level Optimizer • Wireless...


