Operating Instructions
Page 4
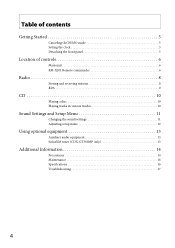
Table of contents Getting Started 5 Canceling the DEMO mode 5 Setting the clock 5 Detaching the front panel 5 Location of controls 6 Main unit 6 RM-X201 Remote commander 6 Radio 8 Storing and receiving stations 8 RDS 9 CD 10 Playing a disc 10 Playing tracks in various modes 10 Sound Settings and Setup Menu 11 Changing the sound settings 11 Adjusting setup items 12 Using optional equipment 13 Auxiliary audio equipment 13 SiriusXM tuner (CDX-GT360MP only 13 Additional Information 14 Precautions 14 Maintenance 16 Specifications 16 Troubleshooting 17 4
Table of contents Getting Started 5 Canceling the DEMO mode 5 Setting the clock 5 Detaching the front panel 5 Location of controls 6 Main unit 6 RM-X201 Remote commander 6 Radio 8 Storing and receiving stations 8 RDS 9 CD 10 Playing a disc 10 Playing tracks in various modes 10 Sound Settings and Setup Menu 11 Changing the sound settings 11 Adjusting setup items 12 Using optional equipment 13 Auxiliary audio equipment 13 SiriusXM tuner (CDX-GT360MP only 13 Additional Information 14 Precautions 14 Maintenance 16 Specifications 16 Troubleshooting 17 4
Operating Instructions
Page 5
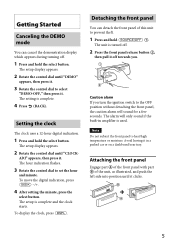
... Press and hold the select button. To move the digital indication, press 4 After setting the minute, press the select button. The setup is complete. 4 Press (BACK). Avoid leaving it . Setting the clock The clock uses a 12-hour digital indication. 1 Press and hold the select button. The ...setup display appears. 2 Rotate the control dial until "CLOCK- The setup display appears. 2 Rotate the control dial until "...
... Press and hold the select button. To move the digital indication, press 4 After setting the minute, press the select button. The setup is complete. 4 Press (BACK). Avoid leaving it . Setting the clock The clock uses a 12-hour digital indication. 1 Press and hold the select button. The ...setup display appears. 2 Rotate the control dial until "CLOCK- The setup display appears. 2 Rotate the control dial until "...
Operating Instructions
Page 9
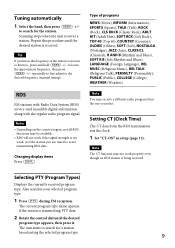
... until the desired program type appears, then press it. The unit starts to search for a station broadcasting the selected program type. 9 Setting CT (Clock Time) The CT data from the one you want to listen to, press and hold to locate the approximate frequency, then press repeatedly to... You may not work if the signal strength is being received. Note The CT function may receive a different radio program from the RDS transmission sets the clock. 1 Set "CT-ON" in setup (page 12). Scanning stops when the unit receives a station. Tip If you are tuned to the desired frequency...
... until the desired program type appears, then press it. The unit starts to search for a station broadcasting the selected program type. 9 Setting CT (Clock Time) The CT data from the one you want to listen to, press and hold to locate the approximate frequency, then press repeatedly to... You may not work if the signal strength is being received. Note The CT function may receive a different radio program from the RDS transmission sets the clock. 1 Set "CT-ON" in setup (page 12). Scanning stops when the unit receives a station. Tip If you are tuned to the desired frequency...
Operating Instructions
Page 12
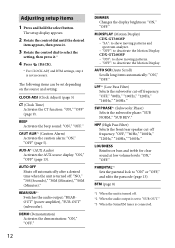
...LPF*2 (Low Pass Filter) Selects the subwoofer cut -off . *2 When the audio output is set depending on the source and setting: CLOCK-ADJ (Clock Adjust) (page 5) CT (Clock Time) Activates the CT function: "ON," "OFF" (page 9). PARENTAL*3 Sets the parental lock to deactivate the Motion Display. "OFF": to "ON" or "OFF," and.... The setup display appears. 2 Rotate the control dial until the desired item appears, then press it .* 4 Press (BACK). * For CLOCK-ADJ and BTM settings, step 4 is not necessary. LOUDNESS Reinforces bass and treble for clear sound at low volume levels: "ON," "OFF."
...LPF*2 (Low Pass Filter) Selects the subwoofer cut -off . *2 When the audio output is set depending on the source and setting: CLOCK-ADJ (Clock Adjust) (page 5) CT (Clock Time) Activates the CT function: "ON," "OFF" (page 9). PARENTAL*3 Sets the parental lock to deactivate the Motion Display. "OFF": to "ON" or "OFF," and.... The setup display appears. 2 Rotate the control dial until the desired item appears, then press it .* 4 Press (BACK). * For CLOCK-ADJ and BTM settings, step 4 is not necessary. LOUDNESS Reinforces bass and treble for clear sound at low volume levels: "ON," "OFF."
Marketing Specifications
Page 1
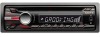
... to your digital MP3/WMA files from 20 Hz to 20 kHz with front aux input The easy-to-read single line LCD display shows clock, station ID and track data when playing back your car's sound system. CDX-GT260MP Enjoy listening to MP3/WMA files on the road with the... expand your eyes on CD or directly from your iPod® or Walkman® player plugged in equalizer and powerful 52x4 watt high power amplifier. Set the built in electronic HPF/LPF crossovers to compatible AM/FM stations. Front auxiliary input lets you locate buttons quickly during evening playback. Internal high...
... to your digital MP3/WMA files from 20 Hz to 20 kHz with front aux input The easy-to-read single line LCD display shows clock, station ID and track data when playing back your car's sound system. CDX-GT260MP Enjoy listening to MP3/WMA files on the road with the... expand your eyes on CD or directly from your iPod® or Walkman® player plugged in equalizer and powerful 52x4 watt high power amplifier. Set the built in electronic HPF/LPF crossovers to compatible AM/FM stations. Front auxiliary input lets you locate buttons quickly during evening playback. Internal high...


