
XV-Z10000 Operation Manual
Page 2
..." CLAUSE. U.S.A. Before recycling the packaging, please be of the parts, service and labor warranty applicable to your new SHARP Projector, using the projector, please read this information. U.S.A. The exclamation point within the product's enclosure that you will promptly receive any unauthorized changes...maintenance (servicing) instructions in reporting the loss or theft of your Projector, please record the Serial Number located on the bottom of "Supplied accessories" on page 14. Model No.: XV-Z10000 Serial No.: There are two important reasons for prompt warranty ...
..." CLAUSE. U.S.A. Before recycling the packaging, please be of the parts, service and labor warranty applicable to your new SHARP Projector, using the projector, please read this information. U.S.A. The exclamation point within the product's enclosure that you will promptly receive any unauthorized changes...maintenance (servicing) instructions in reporting the loss or theft of your Projector, please record the Serial Number located on the bottom of "Supplied accessories" on page 14. Model No.: XV-Z10000 Serial No.: There are two important reasons for prompt warranty ...

XV-Z10000 Operation Manual
Page 3
... considerations. ONLY Declaration of Conformity SHARP PROJECTOR, MODEL XV-Z10000 This device complies with the limits for a Class B digital device, pursuant to Part 15 of the FCC Rules. Responsible Party: SHARP ELECTRONICS CORPORATION Sharp Plaza, Mahwah, New Jersey 07430 TEL: 1-800-BE-SHARP (1-800-237-4277) U.S.A. During...However, there is no guarantee that to which can radiate radio frequency energy and, if not installed and used in this projector continues to run for help. Ensure the cooling fan has stopped before disconnecting the power cord. Operation is subject to the...
... considerations. ONLY Declaration of Conformity SHARP PROJECTOR, MODEL XV-Z10000 This device complies with the limits for a Class B digital device, pursuant to Part 15 of the FCC Rules. Responsible Party: SHARP ELECTRONICS CORPORATION Sharp Plaza, Mahwah, New Jersey 07430 TEL: 1-800-BE-SHARP (1-800-237-4277) U.S.A. During...However, there is no guarantee that to which can radiate radio frequency energy and, if not installed and used in this projector continues to run for help. Ensure the cooling fan has stopped before disconnecting the power cord. Operation is subject to the...
XV-Z10000 Operation Manual
Page 4
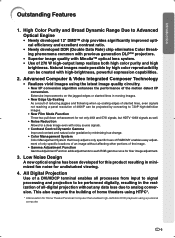
... provides significantly improved optical efficiency and excellent contrast ratio. • Newly developed DDR (Double Data Rate) chip eliminates Color Breaking phenomena common with previous generation DLP™ projectors. • Superior image quality with high-brightness, powerful expression capabilities. 2.
... provides significantly improved optical efficiency and excellent contrast ratio. • Newly developed DDR (Double Data Rate) chip eliminates Color Breaking phenomena common with previous generation DLP™ projectors. • Superior image quality with high-brightness, powerful expression capabilities. 2.

XV-Z10000 Operation Manual
Page 5
... 26 Using the Lens Shift 27 Selecting the HIGH CONTRAST/ HIGH BRIGHTNESS MODE 27 Setting up your projector 8 How to Access the PDF Operation Manuals of SharpVision Manager 9 Part Names 10 Projector (Front and Top View 10 Projector (Rear View 11 Part Names 12 Remote Control (Front View 12 Remote Control (Top View 12...
... 26 Using the Lens Shift 27 Selecting the HIGH CONTRAST/ HIGH BRIGHTNESS MODE 27 Setting up your projector 8 How to Access the PDF Operation Manuals of SharpVision Manager 9 Part Names 10 Projector (Front and Top View 10 Projector (Rear View 11 Part Names 12 Remote Control (Front View 12 Remote Control (Top View 12...
XV-Z10000 Operation Manual
Page 9
.... The sound of lamp rupture, contact your nearest Authorized SharpVision Service Center or Dealer for instructions on page 76. As long as this projector be within ±5 degrees. Rest your eyes. I The storage temperature for the projector is regularly cleaned, use in damage. I When connecting ... or room light. Refer to the normal operating condition. See "Replacing the Lamp" on how to the projector, make the connections AFTER turning off . ity, SHARP recommends that this can create damage due to the rise in internal temperature, as not to hit or damage...
.... The sound of lamp rupture, contact your nearest Authorized SharpVision Service Center or Dealer for instructions on page 76. As long as this projector be within ±5 degrees. Rest your eyes. I The storage temperature for the projector is regularly cleaned, use in damage. I When connecting ... or room light. Refer to the normal operating condition. See "Replacing the Lamp" on how to the projector, make the connections AFTER turning off . ity, SHARP recommends that this can create damage due to the rise in internal temperature, as not to hit or damage...

XV-Z10000 Operation Manual
Page 10
...Access the PDF Operation Manuals of the folder) that you want to view. 5 Double click the "SVM2" pdf file to access the SharpVision Manager manual. Note • If the desired pdf file cannot be opened by double clicking the mouse, start Acrobat Reader first, then specify.... 2 Double click the "CD-ROM" icon. 3 Double click the "MANUALS" folder. 4 Double click the language (name of SharpVision Manager PDF operation manuals for the "SharpVision Manager" theater projector software provided are included in the CD-ROM in the CD-ROM drive. 2 Double click the "My Computer" icon. 3 Double...
...Access the PDF Operation Manuals of the folder) that you want to view. 5 Double click the "SVM2" pdf file to access the SharpVision Manager manual. Note • If the desired pdf file cannot be opened by double clicking the mouse, start Acrobat Reader first, then specify.... 2 Double click the "CD-ROM" icon. 3 Double click the "MANUALS" folder. 4 Double click the language (name of SharpVision Manager PDF operation manuals for the "SharpVision Manager" theater projector software provided are included in the CD-ROM in the CD-ROM drive. 2 Double click the "My Computer" icon. 3 Double...

XV-Z10000 Operation Manual
Page 11
Then release the buttons to lock it in place. • Press on the two buttons of the projector) When the power is turned on or off. 74 Temperature warning indicator When the internal temperature rises, this operation manual where the topic is in ... For displaying adjustment and setting screens. 58 RESIZE button For switching the screen size (NORMAL, STRETCH, etc.) 32 INPUT button For switching input mode 1, 2, 3, 4 or 5. Projector (Front and Top View) Adjustment buttons 32 For selecting menu items. ENTER button 32 For setting items selected or adjusted on the lens. Lens shift...
Then release the buttons to lock it in place. • Press on the two buttons of the projector) When the power is turned on or off. 74 Temperature warning indicator When the internal temperature rises, this operation manual where the topic is in ... For displaying adjustment and setting screens. 58 RESIZE button For switching the screen size (NORMAL, STRETCH, etc.) 32 INPUT button For switching input mode 1, 2, 3, 4 or 5. Projector (Front and Top View) Adjustment buttons 32 For selecting menu items. ENTER button 32 For setting items selected or adjusted on the lens. Lens shift...

XV-Z10000 Operation Manual
Page 12
.... Intake vent 73 Kensington Security Standard connector Exhaust vent 73 73 Intake vent Remote control 13 sensor Using the Kensington Lock This projector has a Kensington Security Standard connector for instructions on how to use with a Kensington MicroSaver Security System. Refer to the information... for use it to hide the connecting cables. PUSH! 2 2 2 1 1 1 Attach the clips after removing the rubber cap. -11 Introduction Projector (Rear View) INPUT 1 terminals 18 Terminals for DVI digital, computer RGB, and COMPONENT signals. AC socket 16 17 INPUT 3 terminal Terminal for component...
.... Intake vent 73 Kensington Security Standard connector Exhaust vent 73 73 Intake vent Remote control 13 sensor Using the Kensington Lock This projector has a Kensington Security Standard connector for instructions on how to use with a Kensington MicroSaver Security System. Refer to the information... for use it to hide the connecting cables. PUSH! 2 2 2 1 1 1 Attach the clips after removing the rubber cap. -11 Introduction Projector (Rear View) INPUT 1 terminals 18 Terminals for DVI digital, computer RGB, and COMPONENT signals. AC socket 16 17 INPUT 3 terminal Terminal for component...

XV-Z10000 Operation Manual
Page 13
..., STRETCH, etc.) 47 PICTURE SETTING button For selecting the picture memory setting. UNDO button 37 For undoing an operation or returning to the projector. Backlight button For lighting each button, press this button. Remote Control (Top View) Remote control signal transmitters 13 -12 24 WIRED R/C ...JACK For controlling the projector by connecting the remote control to the default settings. AUTO SYNC button 55 For automatically adjusting images when connected to the respective input ...
..., STRETCH, etc.) 47 PICTURE SETTING button For selecting the picture memory setting. UNDO button 37 For undoing an operation or returning to the projector. Backlight button For lighting each button, press this button. Remote Control (Top View) Remote control signal transmitters 13 -12 24 WIRED R/C ...JACK For controlling the projector by connecting the remote control to the default settings. AUTO SYNC button 55 For automatically adjusting images when connected to the respective input ...

XV-Z10000 Operation Manual
Page 14
... the polarities correctly match the and marks inside the battery compartment. • Batteries of different types have run out, as possible with this projector may cause them using the remote control: • Be sure not to drop, expose to moisture or high temperature. • The remote... lamp. 45˚ 30˚ Remote control Inserting the Batteries The batteries (two "AA" size) are kept. Under that circumstance, move the projector away from leaked batteries is harmful to your skin, therefore be reflected off a screen for a long time. -13 Using the Remote Control Introduction...
... the polarities correctly match the and marks inside the battery compartment. • Batteries of different types have run out, as possible with this projector may cause them using the remote control: • Be sure not to drop, expose to moisture or high temperature. • The remote... lamp. 45˚ 30˚ Remote control Inserting the Batteries The batteries (two "AA" size) are kept. Under that circumstance, move the projector away from leaked batteries is harmful to your skin, therefore be reflected off a screen for a long time. -13 Using the Remote Control Introduction...

XV-Z10000 Operation Manual
Page 17
... before making all connections, turn on after all the connections are made. • Be sure to read the operation manuals of the projector. After making connections. When connecting a computer, be sure that it is the umbrella term used to describe the new digital television system...(See page 22.) I An RS-232C cable (AN-C10RS) (sold separately) (See page 23.) Connecting the Power Cord Plug in the United States. This projector can be connected to: Video equipment: I A VCR, Laser disc player or other devices. Supplied accessory Power cord -16 A computer using: I A DVD ...
... before making all connections, turn on after all the connections are made. • Be sure to read the operation manuals of the projector. After making connections. When connecting a computer, be sure that it is the umbrella term used to describe the new digital television system...(See page 22.) I An RS-232C cable (AN-C10RS) (sold separately) (See page 23.) Connecting the Power Cord Plug in the United States. This projector can be connected to: Video equipment: I A VCR, Laser disc player or other devices. Supplied accessory Power cord -16 A computer using: I A DVD ...

XV-Z10000 Operation Manual
Page 18
...which the picture is separated into color and luminance signals to connect the INPUT 3 terminal on the projector and the S-video output terminal on the video equipment. Connect the projector to INPUT 3 and INPUT 4 input terminals. To S-video output terminal To video output terminal ...be connected to the video equipment using an S-video cable or a composite video cable (both commercially available). Connections and Setup Connecting the Projector to Other Devices Connecting to Video Equipment Connecting to Video Equipment Using an S-video or a Composite Video Cable Using an S-video or...
...which the picture is separated into color and luminance signals to connect the INPUT 3 terminal on the projector and the S-video output terminal on the video equipment. Connect the projector to INPUT 3 and INPUT 4 input terminals. To S-video output terminal To video output terminal ...be connected to the video equipment using an S-video cable or a composite video cable (both commercially available). Connections and Setup Connecting the Projector to Other Devices Connecting to Video Equipment Connecting to Video Equipment Using an S-video or a Composite Video Cable Using an S-video or...

XV-Z10000 Operation Manual
Page 19
...connecting to the INPUT 1 or 2 terminal, component video equipment such as DVD players and DTV* decoders. Note • When connecting the projector to the video equipment in this way, select "Component" for "Signal Type" in the "Options" menu, or select the Component mode ...Commercially available) To analog component output terminal DVD player or DTV* decoder Component cable (commercially available) Note • When connecting the projector to this time. Projector DVD player or DTV decoder Y PB PR Y CB CR Connecting to RGB Video Equipment Using a 5RCA RGB Cable (INPUT 1 ...
...connecting to the INPUT 1 or 2 terminal, component video equipment such as DVD players and DTV* decoders. Note • When connecting the projector to the video equipment in this way, select "Component" for "Signal Type" in the "Options" menu, or select the Component mode ...Commercially available) To analog component output terminal DVD player or DTV* decoder Component cable (commercially available) Note • When connecting the projector to this time. Projector DVD player or DTV decoder Y PB PR Y CB CR Connecting to RGB Video Equipment Using a 5RCA RGB Cable (INPUT 1 ...

XV-Z10000 Operation Manual
Page 20
Note • The component jack for a DVD and so forth may be indicated with Y, CB or CR. Connect the projector to the video equipment using a 3 RCA to 15-pin D-Sub cable using the DVI to 15-pin D-Sub adaptor when connecting to 15-pin D-Sub ... to 15-pin D-sub cable Type: AN-C3CP (9'10" (3.0 m)) DVI to describe the new digital television system in the manner shown below at this time. Projector DVD player or DTV decoder Y PB PR Y CB CR 3 RCA to 15-pin D-sub cable (sold separately) *DTV is the umbrella term used to 15...
Note • The component jack for a DVD and so forth may be indicated with Y, CB or CR. Connect the projector to the video equipment using a 3 RCA to 15-pin D-Sub cable using the DVI to 15-pin D-Sub adaptor when connecting to 15-pin D-Sub ... to 15-pin D-sub cable Type: AN-C3CP (9'10" (3.0 m)) DVI to describe the new digital television system in the manner shown below at this time. Projector DVD player or DTV decoder Y PB PR Y CB CR 3 RCA to 15-pin D-sub cable (sold separately) *DTV is the umbrella term used to 15...

XV-Z10000 Operation Manual
Page 21
See page 64. Optional accessory *DTV is the umbrella term used to the video equipment using the DVI cable. DVI cable (sold separately) Connect the projector to describe the new digital television system in the United States. Note • Select the input signal type of the video equipment. DVI cable Type:...
See page 64. Optional accessory *DTV is the umbrella term used to the video equipment using the DVI cable. DVI cable (sold separately) Connect the projector to describe the new digital television system in the United States. Note • Select the input signal type of the video equipment. DVI cable Type:...

XV-Z10000 Operation Manual
Page 22
Con- Refer to the external output. mote control. tact your nearest Authorized SharpVision Service Center or Dealer. • Depending on the re- less the signal output setting of computer signals com- Use with the projector. puter is switched to the computer operation manual for a list of the ... with com- puter in this way, select "RGB" for use with some of the functions not to work. • When connecting the projector to 15-pin D-sub adaptor and the RGB cable. • Secure the connectors by pressing on the computer you are us- See page 64...
Con- Refer to the external output. mote control. tact your nearest Authorized SharpVision Service Center or Dealer. • Depending on the re- less the signal output setting of computer signals com- Use with the projector. puter is switched to the computer operation manual for a list of the ... with com- puter in this way, select "RGB" for use with some of the functions not to work. • When connecting the projector to 15-pin D-sub adaptor and the RGB cable. • Secure the connectors by pressing on the computer you are us- See page 64...

XV-Z10000 Operation Manual
Page 23
...Connect the thumbscrew cable making sure that it fits correctly into the terminal. The projector and a VESA DDC compatible computer will communicate their setting requirements, allowing for quick and easy setup. I This projector is compatible with a VESA DDC compatible computer. -22 Ferrite core "Plug and..." function I Before using the DVI cable. See page 64. Then, firmly secure the connectors by tightening the screws on the projector first and the connected computer last. Optional accessory DVI cable Type:AN-C3DV (9'10'' (3.0m)) To DVI Digital output terminal Desktop...
...Connect the thumbscrew cable making sure that it fits correctly into the terminal. The projector and a VESA DDC compatible computer will communicate their setting requirements, allowing for quick and easy setup. I This projector is compatible with a VESA DDC compatible computer. -22 Ferrite core "Plug and..." function I Before using the DVI cable. See page 64. Then, firmly secure the connectors by tightening the screws on the projector first and the connected computer last. Optional accessory DVI cable Type:AN-C3DV (9'10'' (3.0m)) To DVI Digital output terminal Desktop...

XV-Z10000 Operation Manual
Page 24
...the operation manual of the computer for details. • See page 79 for details. Connect the projector to control the projector and check the status of an RS232C cable. Connections and Setup Controlling the Projector by a Computer Controlling the Projecor Using an RS232C Cable When the RS-232C terminal on . ...See page 80 for connection of the projector. Refer to a computer with an RS-232C cable (null modem, cross type, sold separately) -23 Optional RS-232C cable cable Type: AN-C10RS (...
...the operation manual of the computer for details. • See page 79 for details. Connect the projector to control the projector and check the status of an RS232C cable. Connections and Setup Controlling the Projector by a Computer Controlling the Projecor Using an RS232C Cable When the RS-232C terminal on . ...See page 80 for connection of the projector. Refer to a computer with an RS-232C cable (null modem, cross type, sold separately) -23 Optional RS-232C cable cable Type: AN-C10RS (...

XV-Z10000 Operation Manual
Page 25
... Other Devices Using as a Wired Remote Control Connecting the Remote Control to the Projector When the remote control cannot be used due to the range or positioning of the remote control to the WIRED REMOTE control input terminal. ...WIRED REMOTE control input terminal To WIRED R/C JACK ø3.5 mm minijack cable (commercially available or available as Sharp service part QCNW4870CEZZ) from the WIRED R/C JACK on the top of the projector (rear projection, etc.), connect a ø3.5 mm minijack cable (commercially available or available as...
... Other Devices Using as a Wired Remote Control Connecting the Remote Control to the Projector When the remote control cannot be used due to the range or positioning of the remote control to the WIRED REMOTE control input terminal. ...WIRED REMOTE control input terminal To WIRED R/C JACK ø3.5 mm minijack cable (commercially available or available as Sharp service part QCNW4870CEZZ) from the WIRED R/C JACK on the top of the projector (rear projection, etc.), connect a ø3.5 mm minijack cable (commercially available or available as...

XV-Z10000 Operation Manual
Page 26
...; If the screen is at an angle, the adjustment feet can be used to adjust the angle of the projector can be made higher by adjusting the projector when it is adjustable up to the desired angle. 2 Remove your finger caught in a location lower than the screen. 1 Press the foot releases... (keystoned), depending on the keystone correction. Setup Using the Adjustment Feet The height of the image. Note • The projector is in the area between the adjustment foot and the projector. See page 36 for details on the relative positions of the image can be careful not to get your hands...
...; If the screen is at an angle, the adjustment feet can be used to adjust the angle of the projector can be made higher by adjusting the projector when it is adjustable up to the desired angle. 2 Remove your finger caught in a location lower than the screen. 1 Press the foot releases... (keystoned), depending on the keystone correction. Setup Using the Adjustment Feet The height of the image. Note • The projector is in the area between the adjustment foot and the projector. See page 36 for details on the relative positions of the image can be careful not to get your hands...


