

XV-Z10000 Operation Manual
Page 5
... Resetting User-Defined Color Settings 52 Overview of All Color Settings 52 Adjusting Computer Images 53 When Auto Sync is OFF 53 Saving Adjustment Settings 53 Selecting Adjustment Settings 54 Special Mode Settings 54 Checking the Input Signal 55 Auto Sync Adjustment 55 Auto Sync Display Function 56 Easy to the Projector .... 24 Using the Adjustment Feet 25 Adjusting the Lens 26 Using the Lens Shift 27 Selecting the HIGH CONTRAST/ HIGH BRIGHTNESS MODE 27 Setting up your projector 8 How to Access the PDF Operation Manuals of SharpVision Manager 9 Part Names 10 Projector...
... Resetting User-Defined Color Settings 52 Overview of All Color Settings 52 Adjusting Computer Images 53 When Auto Sync is OFF 53 Saving Adjustment Settings 53 Selecting Adjustment Settings 54 Special Mode Settings 54 Checking the Input Signal 55 Auto Sync Adjustment 55 Auto Sync Display Function 56 Easy to the Projector .... 24 Using the Adjustment Feet 25 Adjusting the Lens 26 Using the Lens Shift 27 Selecting the HIGH CONTRAST/ HIGH BRIGHTNESS MODE 27 Setting up your projector 8 How to Access the PDF Operation Manuals of SharpVision Manager 9 Part Names 10 Projector...

XV-Z10000 Operation Manual
Page 6
... 73 Cleaning the Ventilative Holes 73 Maintenance Indicators 74 Regarding the Lamp 76 Lamp 76 Caution Concerning the Lamp 76 Replacing the Lamp 76 Removing and Installing the Lamp Unit 77 Resetting the Lamp Timer 78 Connecting Pin Assignments 79 (RS-232C) Specifications and Command Settings 80 PC control 80 Communication conditions 80 Basic format 80 Commands 80 Wired Remote Control Terminal Specifications 83 Specifications of wired remote control input 83 Function and transmisson codes 83 Sharp remote control signal format...
... 73 Cleaning the Ventilative Holes 73 Maintenance Indicators 74 Regarding the Lamp 76 Lamp 76 Caution Concerning the Lamp 76 Replacing the Lamp 76 Removing and Installing the Lamp Unit 77 Resetting the Lamp Timer 78 Connecting Pin Assignments 79 (RS-232C) Specifications and Command Settings 80 PC control 80 Communication conditions 80 Basic format 80 Commands 80 Wired Remote Control Terminal Specifications 83 Specifications of wired remote control input 83 Function and transmisson codes 83 Sharp remote control signal format...
XV-Z10000 Operation Manual
Page 9
... blink in the fan speed. I Watching the screen for long hours continuously will not reduce the overall operation life of the unit. Temperature monitor function I The operating temperature for the projector is subjected to these environments will make the connections. This does not indicate malfunction. • Do not unplug the power cord during projector operation due to changes in the lower left corner of the picture. I If the projector starts...
... blink in the fan speed. I Watching the screen for long hours continuously will not reduce the overall operation life of the unit. Temperature monitor function I The operating temperature for the projector is subjected to these environments will make the connections. This does not indicate malfunction. • Do not unplug the power cord during projector operation due to changes in the lower left corner of the picture. I If the projector starts...

XV-Z10000 Operation Manual
Page 11
... removing the lens cap • Press on the two buttons of the projector) Projector (Front and Top View) Adjustment buttons 32 For selecting menu items. ENTER button 32 For setting items selected or adjusted on the lens. Part Names Numbers in refer to the default settings. 32 MENU button For displaying adjustment and setting screens. 58 RESIZE button For switching the screen size (NORMAL, STRETCH, etc.) 32 INPUT button For switching input mode 1, 2, 3, 4 or 5. Replace the lamp when the indicator illuminates red. 32 Power indicator Illuminates red, when the projector...
... removing the lens cap • Press on the two buttons of the projector) Projector (Front and Top View) Adjustment buttons 32 For selecting menu items. ENTER button 32 For setting items selected or adjusted on the lens. Part Names Numbers in refer to the default settings. 32 MENU button For displaying adjustment and setting screens. 58 RESIZE button For switching the screen size (NORMAL, STRETCH, etc.) 32 INPUT button For switching input mode 1, 2, 3, 4 or 5. Replace the lamp when the indicator illuminates red. 32 Power indicator Illuminates red, when the projector...

XV-Z10000 Operation Manual
Page 13
... respective input signal type. 32 Power (ON/OFF) buttons For turning the power on the menu. Backlight button For lighting each button, press this button. Remote Control (Top View) Remote control signal transmitters 13 -12 24 WIRED R/C JACK For controlling the projector by connecting the remote control to the default settings. RGB/COMP. ENTER button 32 For setting items selected or adjusted on or off. 32 MENU button For displaying adjustment and setting screens. 32 Adjustment buttons For selecting menu items. 32 INPUT buttons For switching to a computer. AUTO SYNC button...
... respective input signal type. 32 Power (ON/OFF) buttons For turning the power on the menu. Backlight button For lighting each button, press this button. Remote Control (Top View) Remote control signal transmitters 13 -12 24 WIRED R/C JACK For controlling the projector by connecting the remote control to the default settings. RGB/COMP. ENTER button 32 For setting items selected or adjusted on or off. 32 MENU button For displaying adjustment and setting screens. 32 Adjustment buttons For selecting menu items. 32 INPUT buttons For switching to a computer. AUTO SYNC button...

XV-Z10000 Operation Manual
Page 30
...Screen size (diag.) (inches) y : Projection distance (feet) z : Distance from the lens center to the lower edge of the screen (feet) Note • There is an error of ±3% in the formula above . • Values with a minus (-) sign indicate the distance of the lens center below the bottom of the screen. -29 Setup Screen Size and Projection Distance x yz Connections and Setup When using a wide screen (16:9) In case of displaying the 16:9 picture... (2.9 m) 7'10" (2.4 m) 5'2" (1.6 m) Distance from the lens center to the lower edge of the image (z) Upper (z1) Lower (z2) 0" (0 cm...
...Screen size (diag.) (inches) y : Projection distance (feet) z : Distance from the lens center to the lower edge of the screen (feet) Note • There is an error of ±3% in the formula above . • Values with a minus (-) sign indicate the distance of the lens center below the bottom of the screen. -29 Setup Screen Size and Projection Distance x yz Connections and Setup When using a wide screen (16:9) In case of displaying the 16:9 picture... (2.9 m) 7'10" (2.4 m) 5'2" (1.6 m) Distance from the lens center to the lower edge of the image (z) Upper (z1) Lower (z2) 0" (0 cm...

XV-Z10000 Operation Manual
Page 33
...status of the lamp. Blue blinking: The lamp is ready to illuminate. • When controlling the projector using RS-232C commands from a computer, wait for at the factory is ready. After the lamp replacement indicator illuminates, the projector is warming up. Red: The lamp should be replaced. • If the power is turned off and immediately switched on again, the lamp replacement indicator may take time to start operation. Power (OFF) button ENTER button Power indicator MENU button INPUT button Power (OFF) button Power (ON) button Power (ON) button MENU button ', ", \, | buttons INPUT...
...status of the lamp. Blue blinking: The lamp is ready to illuminate. • When controlling the projector using RS-232C commands from a computer, wait for at the factory is ready. After the lamp replacement indicator illuminates, the projector is warming up. Red: The lamp should be replaced. • If the power is turned off and immediately switched on again, the lamp replacement indicator may take time to start operation. Power (OFF) button ENTER button Power indicator MENU button INPUT button Power (OFF) button Power (ON) button Power (ON) button MENU button ', ", \, | buttons INPUT...
XV-Z10000 Operation Manual
Page 77
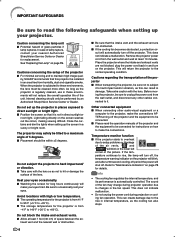
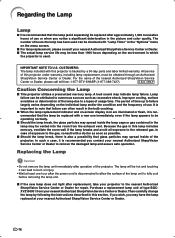
... in the bulb cracking. Replacing the Lamp Caution • Do not remove the lamp unit immediately after operation of use . ONLY Caution Concerning the Lamp I Should the lamp break, there is backed by following the instructions described in the "Options" menu on -screen display icon are illuminated or flash, it is recommended that the lamp be replaced with this projector under warranty, including lamp replacement, must be checked with a doctor...
... in the bulb cracking. Replacing the Lamp Caution • Do not remove the lamp unit immediately after operation of use . ONLY Caution Concerning the Lamp I Should the lamp break, there is backed by following the instructions described in the "Options" menu on -screen display icon are illuminated or flash, it is recommended that the lamp be replaced with this projector under warranty, including lamp replacement, must be checked with a doctor...

XV-Z10000 Operation Manual
Page 81
... after the power has been turned on -screen display. Command format C1 C2 C3 C4 P1 P2 P3 P4 Return code (0DH) Command 4-digit Response code format Normal response Parameter 4-digit Problem response (communication error or incorrect command) O K Return code (0DH) E R R Return code (0DH) Info • When more than a menu display command, it takes a maximum of the projector, the projector's operating status cannot be used to control the projector by connecting an RS-232C cable (null modem...
... after the power has been turned on -screen display. Command format C1 C2 C3 C4 P1 P2 P3 P4 Return code (0DH) Command 4-digit Response code format Normal response Parameter 4-digit Problem response (communication error or incorrect command) O K Return code (0DH) E R R Return code (0DH) Info • When more than a menu display command, it takes a maximum of the projector, the projector's operating status cannot be used to control the projector by connecting an RS-232C cable (null modem...
XV-Z10000 Operation Manual
Page 87
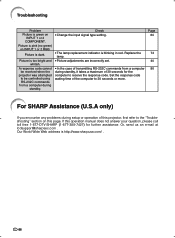
... SHARP Assistance (U.S.A only) If you encounter any problems during standby, it takes a maximum of this projector, first refer to the "Troubleshooting" section on INPUT 1 or 2 COMPONENT. Troubleshooting Problem Picture is green on this page. A response code cannot be received when the projector was attempted to be controlled using RS-232C commands from a computer during setup or operation of 30 seconds for further assistance. Replace the lamp. • Picture adjustments are incorrectly set...
... SHARP Assistance (U.S.A only) If you encounter any problems during standby, it takes a maximum of this projector, first refer to the "Troubleshooting" section on INPUT 1 or 2 COMPONENT. Troubleshooting Problem Picture is green on this page. A response code cannot be received when the projector was attempted to be controlled using RS-232C commands from a computer during setup or operation of 30 seconds for further assistance. Replace the lamp. • Picture adjustments are incorrectly set...
XV-Z10000 Operation Manual
Page 92
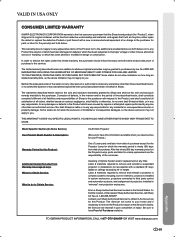
...) ladder or ceilings exceeding 12' in the United States. Model Specific Section (In-Home Service) Your Product Model Number & Description: Warranty Period for a lamp replacement are the responsibility of the nearest Sharp Authorized Servicer, call Sharp toll free at its original container, will come to your Product.) One (1) year parts and labor from date of purchase except for the Projector Lamp for the period(s) set forth below...
...) ladder or ceilings exceeding 12' in the United States. Model Specific Section (In-Home Service) Your Product Model Number & Description: Warranty Period for a lamp replacement are the responsibility of the nearest Sharp Authorized Servicer, call Sharp toll free at its original container, will come to your Product.) One (1) year parts and labor from date of purchase except for the Projector Lamp for the period(s) set forth below...

XVZ10000U Operation Manual
Page 5
... Resetting User-Defined Color Settings 52 Overview of All Color Settings 52 Adjusting Computer Images 53 When Auto Sync is OFF 53 Saving Adjustment Settings 53 Selecting Adjustment Settings 54 Special Mode Settings 54 Checking the Input Signal 55 Auto Sync Adjustment 55 Auto Sync Display Function 56 Easy to the Projector .... 24 Using the Adjustment Feet 25 Adjusting the Lens 26 Using the Lens Shift 27 Selecting the HIGH CONTRAST/ HIGH BRIGHTNESS MODE 27 Setting up the Screen 28 Example of Standard Setup 28 Screen Size and Projection Distance 29 Projecting a Reversed/Inverted...
... Resetting User-Defined Color Settings 52 Overview of All Color Settings 52 Adjusting Computer Images 53 When Auto Sync is OFF 53 Saving Adjustment Settings 53 Selecting Adjustment Settings 54 Special Mode Settings 54 Checking the Input Signal 55 Auto Sync Adjustment 55 Auto Sync Display Function 56 Easy to the Projector .... 24 Using the Adjustment Feet 25 Adjusting the Lens 26 Using the Lens Shift 27 Selecting the HIGH CONTRAST/ HIGH BRIGHTNESS MODE 27 Setting up the Screen 28 Example of Standard Setup 28 Screen Size and Projection Distance 29 Projecting a Reversed/Inverted...
XVZ10000U Operation Manual
Page 9
... the fan may safely be connected. This does not indicate malfunction. • Do not unplug the power cord during projector operation due to changes in the lower left corner of the picture. Caution concerning the lamp unit I If the projector starts to overheat due to setup problems or blockage of the air vents, " " and " " will make your projector. See "Replacing the Lamp" on the screen washes out the colors, making viewing...
... the fan may safely be connected. This does not indicate malfunction. • Do not unplug the power cord during projector operation due to changes in the lower left corner of the picture. Caution concerning the lamp unit I If the projector starts to overheat due to setup problems or blockage of the air vents, " " and " " will make your projector. See "Replacing the Lamp" on the screen washes out the colors, making viewing...

XVZ10000U Operation Manual
Page 11
... turning the power on or off. 74 Temperature warning indicator When the internal temperature rises, this indicator will illuminate blue. 73 Intake vent 25 Adjustment foot 13 Remote control sensor 61 HIGH CONTRAST/ HIGH BRIGHTNESS MODE button For switching between "HIGH CONTRAST MODE" and "HIGH BRIGHTNESS MODE". 73 Air filter/cooling fan (Intake vent) (on , this operation manual where the topic is explained. Lens shift dial 27 Zoom knob 26 Focus ring 26 Adjustment foot 25 Lens cap Attaching and removing...
... turning the power on or off. 74 Temperature warning indicator When the internal temperature rises, this indicator will illuminate blue. 73 Intake vent 25 Adjustment foot 13 Remote control sensor 61 HIGH CONTRAST/ HIGH BRIGHTNESS MODE button For switching between "HIGH CONTRAST MODE" and "HIGH BRIGHTNESS MODE". 73 Air filter/cooling fan (Intake vent) (on , this operation manual where the topic is explained. Lens shift dial 27 Zoom knob 26 Focus ring 26 Adjustment foot 25 Lens cap Attaching and removing...

XVZ10000U Operation Manual
Page 13
... this button. AUTO SYNC button 55 For automatically adjusting images when connected to the respective input modes. 58 RESIZE button For switching the screen size (NORMAL, STRETCH, etc.) 47 PICTURE SETTING button For selecting the picture memory setting. button 18 For switching to the respective input signal type. 32 Power (ON/OFF) buttons For turning the power on the menu. RGB/COMP. Part Names Remote Control (Front View) KEYSTONE button 36 For adjusting Keystone Correction or Vertical Size setting. Remote Control (Top View) Remote control signal transmitters 13 -12 XV-Z10000...
... this button. AUTO SYNC button 55 For automatically adjusting images when connected to the respective input modes. 58 RESIZE button For switching the screen size (NORMAL, STRETCH, etc.) 47 PICTURE SETTING button For selecting the picture memory setting. button 18 For switching to the respective input signal type. 32 Power (ON/OFF) buttons For turning the power on the menu. RGB/COMP. Part Names Remote Control (Front View) KEYSTONE button 36 For adjusting Keystone Correction or Vertical Size setting. Remote Control (Top View) Remote control signal transmitters 13 -12 XV-Z10000...

XVZ10000U Operation Manual
Page 33
... equipment to start operation. Blue: The lamp is English. Blue blinking: The lamp is turned off and immediately switched on again, the lamp replacement indicator may take time to the procedure on page 34. 1 Plug the power cord into the wall outlet. • The power indicator illuminates red, and the projector enters standby mode. 2 Press on the remote control or on , and then transmit the commands. Power (OFF) button ENTER button Power indicator MENU button INPUT button Power (OFF) button Power (ON) button Power (ON) button MENU button ', ", \, | buttons INPUT buttons -32 XV-Z10000...
... equipment to start operation. Blue: The lamp is English. Blue blinking: The lamp is turned off and immediately switched on again, the lamp replacement indicator may take time to the procedure on page 34. 1 Plug the power cord into the wall outlet. • The power indicator illuminates red, and the projector enters standby mode. 2 Press on the remote control or on , and then transmit the commands. Power (OFF) button ENTER button Power indicator MENU button INPUT button Power (OFF) button Power (ON) button Power (ON) button MENU button ', ", \, | buttons INPUT buttons -32 XV-Z10000...

XVZ10000U Operation Manual
Page 77
... new lamp does not light after operation of usage time. It is backed by following the instructions described in the "Options" menu on -screen display icon are illuminated or flash, it can be checked with a new one hour after approximately 1,900 cumulative hours of time up to the released gas. I This projector utilizes a pressurized mercury lamp. All service of this projector under warranty, including lamp replacement, must be replaced with "Lamp Timer" in this projector...
... new lamp does not light after operation of usage time. It is backed by following the instructions described in the "Options" menu on -screen display icon are illuminated or flash, it can be checked with a new one hour after approximately 1,900 cumulative hours of time up to the released gas. I This projector utilizes a pressurized mercury lamp. All service of this projector under warranty, including lamp replacement, must be replaced with "Lamp Timer" in this projector...

XVZ10000U Operation Manual
Page 81
(RS-232C) Specifications and Command Settings PC control A computer can be used to control the projector by connecting an RS-232C cable (null modem, cross type, commercially available) to the projector. (See page 23 for connection.) Communication conditions Set the serial port settings of the computer to match that of the projector, the projector's operating status cannot be read by transmitting the display commands for each command only after the power has been turned on...
(RS-232C) Specifications and Command Settings PC control A computer can be used to control the projector by connecting an RS-232C cable (null modem, cross type, commercially available) to the projector. (See page 23 for connection.) Communication conditions Set the serial port settings of the computer to match that of the projector, the projector's operating status cannot be read by transmitting the display commands for each command only after the power has been turned on...
XVZ10000U Operation Manual
Page 87
.... Check • Change the input signal type setting. • The lamp replacement indicator is too bright and whitish. Replace the lamp. • Picture adjustments are incorrectly set. • In the case of transmitting RS-232C commands from a computer during setup or operation of the computer to the "Troubleshooting" section on INPUT 1 or 2 RGB. Our World Wide Web address is green on INPUT 1 or 2 COMPONENT. Set the response code waiting time of this page. Troubleshooting Problem Picture is...
.... Check • Change the input signal type setting. • The lamp replacement indicator is too bright and whitish. Replace the lamp. • Picture adjustments are incorrectly set. • In the case of transmitting RS-232C commands from a computer during setup or operation of the computer to the "Troubleshooting" section on INPUT 1 or 2 RGB. Our World Wide Web address is green on INPUT 1 or 2 COMPONENT. Set the response code waiting time of this page. Troubleshooting Problem Picture is...

XVZ10000U Operation Manual
Page 92
... remove and reinstall a suspended projector in installations not accessible with a new or remanufactured equivalent at no event shall Sharp be liable, or in any way responsible, for any way responsible for repair at its option, either repair the defect or replace the defective Product or part thereof with a standard (8' step) ladder or ceilings exceeding 12' in -home service for the period of time...
... remove and reinstall a suspended projector in installations not accessible with a new or remanufactured equivalent at no event shall Sharp be liable, or in any way responsible, for any way responsible for repair at its option, either repair the defect or replace the defective Product or part thereof with a standard (8' step) ladder or ceilings exceeding 12' in -home service for the period of time...


