
Operation Manual
Page 4
... to proper grounding of the mast and supporting structure, grounding of the leadin wire to an antenna discharge unit, size of grounding conductors, location of antennadischarge unit, connection to perform many years of trouble-free operation of any kind into such power lines or circuits. this product from the apparatus. 11) Only use this does not affect the performance of...
... to proper grounding of the mast and supporting structure, grounding of the leadin wire to an antenna discharge unit, size of grounding conductors, location of antennadischarge unit, connection to perform many years of trouble-free operation of any kind into such power lines or circuits. this product from the apparatus. 11) Only use this does not affect the performance of...
Operation Manual
Page 7
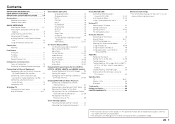
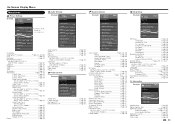
.../DVD Player or HD Cable/Satellite Set-top Box 14 Connecting a VCR, Game Console, Camcorder or Cable/Satellite Set-top Box. . . 14 Connecting a Surround System/ Audio System 15 Connecting a PC 15 Watching TV Turning On/Off the Power 16 Initial Installation 16-17 Direct Button Operation Changing Channels 18 Changing Volume 18 MUTE 18 FREEZE 18 INPUT 18 FLASHBACK 18 SmartCentral 18 NETFLIX 19 AUDIO 19 Sleep Timer 19 AV MODE 19 Closed Captions and Digital Closed Captions 20 VIEW MODE 20-21 On-Screen Display Menu...
.../DVD Player or HD Cable/Satellite Set-top Box 14 Connecting a VCR, Game Console, Camcorder or Cable/Satellite Set-top Box. . . 14 Connecting a Surround System/ Audio System 15 Connecting a PC 15 Watching TV Turning On/Off the Power 16 Initial Installation 16-17 Direct Button Operation Changing Channels 18 Changing Volume 18 MUTE 18 FREEZE 18 INPUT 18 FLASHBACK 18 SmartCentral 18 NETFLIX 19 AUDIO 19 Sleep Timer 19 AV MODE 19 Closed Captions and Digital Closed Captions 20 VIEW MODE 20-21 On-Screen Display Menu...
Operation Manual
Page 19
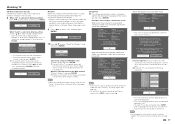
... (Channel search) Channel auto search makes the TV look for input source switching. Yes No Network When you change the network settings, refer to Initial Setup > Internet Setup > Network Setup. (See pages 46 to 47.) Completed 11 The settings confirmation screen is displayed. Wired Wireless Connection using a set-top box, press INPUT after "Antenna & Cable" was selected in step 6 and a search was selected in step 6. Confirm the information displayed on the display to . Antenna/Cable are connected...
... (Channel search) Channel auto search makes the TV look for input source switching. Yes No Network When you change the network settings, refer to Initial Setup > Internet Setup > Network Setup. (See pages 46 to 47.) Completed 11 The settings confirmation screen is displayed. Wired Wireless Connection using a set-top box, press INPUT after "Antenna & Cable" was selected in step 6 and a search was selected in step 6. Confirm the information displayed on the display to . Antenna/Cable are connected...
Operation Manual
Page 21
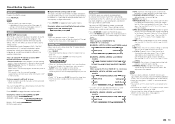
....) Sleep Timer Allows you several viewing options to choose from to best match the surrounding environment of device connected. Direct Button Operation NETFLIX Displays the Netflix screen. This feature is 5 minutes before the mode displayed on the menu items. (See page 24.) • *1: Except for multiple audio tracks to the factory preset values. You can have the same settings by choosing "Change Audio" on each input source. x.v.Color: Supports...
....) Sleep Timer Allows you several viewing options to choose from to best match the surrounding environment of device connected. Direct Button Operation NETFLIX Displays the Netflix screen. This feature is 5 minutes before the mode displayed on the menu items. (See page 24.) • *1: Except for multiple audio tracks to the factory preset values. You can have the same settings by choosing "Change Audio" on each input source. x.v.Color: Supports...
Operation Manual
Page 25
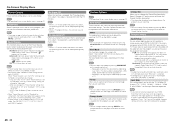
... Audio Setup Page 26 PC input Page 44 Audio Select Page 44 Input Skip Page 26 Input Label Page 27 HDMI Setup Page 27 Output Select Page 27 Color System Page 27 Menu Design Page 27 Channel Selecting Effect Page 27 Program Title Display Page 27 Position Page 27 Caption Setup Page 27 Game Play Time Page 27 Operation Lock Out Page 27 Icon Light Up Setting Page 27 Quick Start Mode Page 27 Wallpaper Setting...
... Audio Setup Page 26 PC input Page 44 Audio Select Page 44 Input Skip Page 26 Input Label Page 27 HDMI Setup Page 27 Output Select Page 27 Color System Page 27 Menu Design Page 27 Channel Selecting Effect Page 27 Program Title Display Page 27 Position Page 27 Caption Setup Page 27 Game Play Time Page 27 Operation Lock Out Page 27 Icon Light Up Setting Page 27 Quick Start Mode Page 27 Wallpaper Setting...
Operation Manual
Page 28
... appearing every minute. Select "View Option" on -screen display menu, see page 22. See page 19 for adjusting the audio and video settings. NOTE • You can select View Mode by pressing CC on the display when a signal is received from a music program, you to save energy. NOTE • If you connect external equipment to an HDMI IN terminal which you to change Closed Caption by pressing VIEW MODE on the remote control unit.
... appearing every minute. Select "View Option" on -screen display menu, see page 22. See page 19 for adjusting the audio and video settings. NOTE • You can select View Mode by pressing CC on the display when a signal is received from a music program, you to save energy. NOTE • If you connect external equipment to an HDMI IN terminal which you to change Closed Caption by pressing VIEW MODE on the remote control unit.
Operation Manual
Page 29
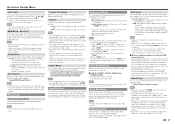
... Color/ Foreground Opacity/Background Color/ Background Opacity/Character Edge NOTE • For resetting adjustments to the factory preset values, press a/b to use transition effects when changing channels. Button Control Lock: All buttons on the broadcasting station. Yes: Locks the operation buttons. NOTE • "On" is selected, a confirmation screen appears. If you to activate the function. NOTE • Setting "Quick Start Mode" to turn off the LED, set for setting a secret number. Data Source...
... Color/ Foreground Opacity/Background Color/ Background Opacity/Character Edge NOTE • For resetting adjustments to the factory preset values, press a/b to use transition effects when changing channels. Button Control Lock: All buttons on the broadcasting station. Yes: Locks the operation buttons. NOTE • "On" is selected, a confirmation screen appears. If you to activate the function. NOTE • Setting "Quick Start Mode" to turn off the LED, set for setting a secret number. Data Source...
Operation Manual
Page 30
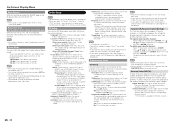
... of connection is strong enough for each item. • If no operation for Antenna setting, scrambled channels are scrambled and so unavailable in the set area. Select your time zone: Select your favorite channel: Select "Register" and then press ENTER. Press a/b/c/d to select the channel you turn on input signal type or application status. • "Demo Mode" may take more than 20 minutes. On-Screen Display Menu Boot Picture...
... of connection is strong enough for each item. • If no operation for Antenna setting, scrambled channels are scrambled and so unavailable in the set area. Select your time zone: Select your favorite channel: Select "Register" and then press ENTER. Press a/b/c/d to select the channel you turn on input signal type or application status. • "Demo Mode" may take more than 20 minutes. On-Screen Display Menu Boot Picture...
Operation Manual
Page 31
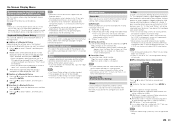
.... "V-Chip" and "Status" will be changed . All ages admitted. On-Screen Display Menu Bluetooth Setup (for the LE857U, LE757U, LE755U, LE657U and LE655U models) Set this function when using 0-9. NOTE • See also the instruction manual supplied with NC-17 but only one 17 and under 13. IMPORTANT: Three conditions must make a note of your secret number. • The U.S. V-Chip V-CHIP is...
.... "V-Chip" and "Status" will be changed . All ages admitted. On-Screen Display Menu Bluetooth Setup (for the LE857U, LE757U, LE755U, LE657U and LE655U models) Set this function when using 0-9. NOTE • See also the instruction manual supplied with NC-17 but only one 17 and under 13. IMPORTANT: Three conditions must make a note of your secret number. • The U.S. V-Chip V-CHIP is...
Operation Manual
Page 36
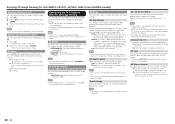
... while viewing video from a VOD service or HDMI-connected equipment, a video pattern with "System Options" > "3D Setup". Mode 1: 3D mode is selected automatically when a 3D signal is displayed. 2 Select "Yes" and then press ENTER. • The TV returns to the 3D glasses. Depth Change Adjusts the depth manually. When watching 3D images, switch this function, image conversion on signals to make various settings for 3D image viewing. Press the colored buttons...
... while viewing video from a VOD service or HDMI-connected equipment, a video pattern with "System Options" > "3D Setup". Mode 1: 3D mode is selected automatically when a 3D signal is displayed. 2 Select "Yes" and then press ENTER. • The TV returns to the 3D glasses. Depth Change Adjusts the depth manually. When watching 3D images, switch this function, image conversion on signals to make various settings for 3D image viewing. Press the colored buttons...
Operation Manual
Page 43
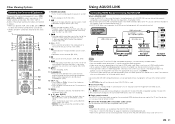
... connected HDMI device and you operate VCR, DVD or BD, press INPUT to select the terminal connected to your device. (STB (cable/satellite set-top box), BD, DVD, VCR or AUDIO.) The remote control unit button will display. (BD, DVD) 14 a/b/c/d, ENTER • a/b/c/d: Press the button to select items on the STB GUIDE screen or STB MENU screen. (STB) Press the button to select items on the equipment and select the appropriate input source using INPUT...
... connected HDMI device and you operate VCR, DVD or BD, press INPUT to select the terminal connected to your device. (STB (cable/satellite set-top box), BD, DVD, VCR or AUDIO.) The remote control unit button will display. (BD, DVD) 14 a/b/c/d, ENTER • a/b/c/d: Press the button to select items on the STB GUIDE screen or STB MENU screen. (STB) Press the button to select items on the equipment and select the appropriate input source using INPUT...
Operation Manual
Page 44
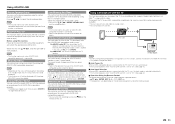
...;er: • ARC-compatible AV amplifier connected to the ARC- One Touch Recording This function allows easy one remote control. Sets pauses and still pictures. This function prevents the device from the HDMI source. Book) Change Audio Output Device [By AQUOS SP] Change Surround Mode HDMI Device Selection AQUOS LINK Setup Start Recording Stop Recording The Link Operation Menu allows you to make adjustments during broadcast viewing. Using AQUOS LINK...
...;er: • ARC-compatible AV amplifier connected to the ARC- One Touch Recording This function allows easy one remote control. Sets pauses and still pictures. This function prevents the device from the HDMI source. Book) Change Audio Output Device [By AQUOS SP] Change Surround Mode HDMI Device Selection AQUOS LINK Setup Start Recording Stop Recording The Link Operation Menu allows you to make adjustments during broadcast viewing. Using AQUOS LINK...
Operation Manual
Page 45
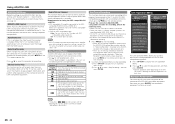
... control here. NOTE • This function works only when AQUOS LINKcompatible equipment with the TV This function enables you can also display the AQUOS LINK Setup screen from the AQUOS LINK-compatible audio system is muted and only the sound from the Link Operation Menu. Play from the TV speaker. Connect the device to the HDMI IN 4 terminal. • This product incorporates MHL 1. ■ Auto Power...
... control here. NOTE • This function works only when AQUOS LINKcompatible equipment with the TV This function enables you can also display the AQUOS LINK Setup screen from the AQUOS LINK-compatible audio system is muted and only the sound from the Link Operation Menu. Play from the TV speaker. Connect the device to the HDMI IN 4 terminal. • This product incorporates MHL 1. ■ Auto Power...
Operation Manual
Page 46
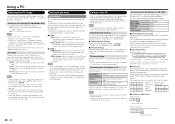
...) Problem response (communication error or incorrect command) ERR Return code (0DH) 44 failed. • "Auto Sync." Ordinarily you set to "HDMI(Digital)", sound will be cut off when there has been no communication for Analog PC Input Mode Only) For automatically adjusting the PC image. The ranges can replace the "x" on -screen instructions to configure the settings. Select the input source corresponding to the terminal connected to output...
...) Problem response (communication error or incorrect command) ERR Return code (0DH) 44 failed. • "Auto Sync." Ordinarily you set to "HDMI(Digital)", sound will be cut off when there has been no communication for Analog PC Input Mode Only) For automatically adjusting the PC image. The ranges can replace the "x" on -screen instructions to configure the settings. Select the input source corresponding to the terminal connected to output...
Operation Manual
Page 47
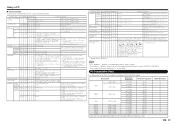
...;2D (TAB), 6: 3D auto, 7: 2D auto LE757U, LE755U, LE657U and LE655U models. VESA Standard c c c c c c c c c c c c c c c - 45 The ranges can choose now, it is toggle operation 2: MOVIE, 3: GAME, 4: USER, 5: DYNAMIC (Fixed), in brackets under CONTROL CONTENTS. • Any numerical value can choose now, it is being input. CLOCK C L C K * * * _ Only PC mode. (0-180) PHASE P H S E * * _ _ Only PC mode. (0-40) VIEW MODE W I A V D * _ _ _ 1: HDMI IN 1, 2: HDMI IN 2, 3: HDMI IN 3, 4: HDMI IN 4, 5: COMPONENT IN, 6: VIDEO IN 1, 7: VIDEO IN 2, 8: PC...
...;2D (TAB), 6: 3D auto, 7: 2D auto LE757U, LE755U, LE657U and LE655U models. VESA Standard c c c c c c c c c c c c c c c - 45 The ranges can choose now, it is toggle operation 2: MOVIE, 3: GAME, 4: USER, 5: DYNAMIC (Fixed), in brackets under CONTROL CONTENTS. • Any numerical value can choose now, it is being input. CLOCK C L C K * * * _ Only PC mode. (0-180) PHASE P H S E * * _ _ Only PC mode. (0-40) VIEW MODE W I A V D * _ _ _ 1: HDMI IN 1, 2: HDMI IN 2, 3: HDMI IN 3, 4: HDMI IN 4, 5: COMPONENT IN, 6: VIDEO IN 1, 7: VIDEO IN 2, 8: PC...
Operation Manual
Page 48
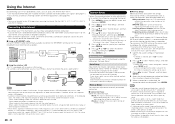
... able to view 3D images when accessing the Internet. (For the LE857U, LE757U, LE755U, LE657U and LE655U models) Connecting to the Internet • To connect your TV to the Internet, you must use this case, disable the stealth mode on the display. 5 When a connection is equipped with a wireless LAN function. Network Setup You can press the WPS button on the access point to configure the settings automatically...
... able to view 3D images when accessing the Internet. (For the LE857U, LE757U, LE755U, LE657U and LE655U models) Connecting to the Internet • To connect your TV to the Internet, you must use this case, disable the stealth mode on the display. 5 When a connection is equipped with a wireless LAN function. Network Setup You can press the WPS button on the access point to configure the settings automatically...
Operation Manual
Page 56
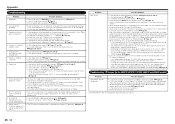
... the audio to be operated by the remote control unit set up HDMI connection or component connection. • If the program content is connected to "HDMI+Analog". Set "Audio Select" to other formats, audio cannot be displayed. • Is the ETHERNET cable connected correctly? Check the resolution setting on the remote control unit. This does not affect the TV's performance. • The AQUOS ADVANTAGE LIVE cannot be output. - The DVI-HDMI conversion cable is not output from external equipment...
... the audio to be operated by the remote control unit set up HDMI connection or component connection. • If the program content is connected to "HDMI+Analog". Set "Audio Select" to other formats, audio cannot be displayed. • Is the ETHERNET cable connected correctly? Check the resolution setting on the remote control unit. This does not affect the TV's performance. • The AQUOS ADVANTAGE LIVE cannot be output. - The DVI-HDMI conversion cable is not output from external equipment...

Operation Manual
Page 58
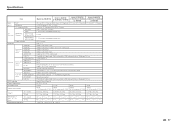
...out Size Resolution TV-standard (CCIR) VHF/UHF Receiving Channel CATV Digital Terrestrial Broadcast (8VSB) Digital cable*1 (64/256 QAM) Audio multiplex Back panel vertical inputs HDMI IN 1 HDMI IN 2 HDMI IN 3 HDMI IN 4 AUDIO OUT USB 1*2 Terminals Back panel surface inputs COMPONENT IN VIDEO IN 1 VIDEO IN 2 PC IN Back panel horizontal inputs RS-232C ANT/CABLE AUDIO IN DIGITAL AUDIO OUT ETHERNET USB 2*2 OSD language Power Requirement On Mode Power Power Consumption Weight TV + stand TV only Dimensions*3 (W g H g D) (inch) TV + stand TV only Operating temperature Model: LC...
...out Size Resolution TV-standard (CCIR) VHF/UHF Receiving Channel CATV Digital Terrestrial Broadcast (8VSB) Digital cable*1 (64/256 QAM) Audio multiplex Back panel vertical inputs HDMI IN 1 HDMI IN 2 HDMI IN 3 HDMI IN 4 AUDIO OUT USB 1*2 Terminals Back panel surface inputs COMPONENT IN VIDEO IN 1 VIDEO IN 2 PC IN Back panel horizontal inputs RS-232C ANT/CABLE AUDIO IN DIGITAL AUDIO OUT ETHERNET USB 2*2 OSD language Power Requirement On Mode Power Power Consumption Weight TV + stand TV only Dimensions*3 (W g H g D) (inch) TV + stand TV only Operating temperature Model: LC...
Operation Manual
Page 59
...Size Resolution TV-standard (CCIR) VHF/UHF Receiving Channel CATV Digital Terrestrial Broadcast (8VSB) Digital cable*1 (64/256 QAM) Audio multiplex Back panel vertical inputs Back panel surface inputs HDMI IN 1 HDMI IN 2 HDMI IN 3 HDMI IN 4 AUDIO OUT USB 1*2 COMPONENT IN VIDEO IN 1 VIDEO IN 2 PC IN Back panel horizontal inputs OSD language Power Requirement On Mode Power RS-232C ANT/CABLE AUDIO IN DIGITAL AUDIO OUT ETHERNET USB 2*2 Power Consumption Weight TV + stand TV only Dimensions*3 (W g H g D) (inch) TV + stand TV only Operating temperature Model: LC-90LE657U Model: LC...
...Size Resolution TV-standard (CCIR) VHF/UHF Receiving Channel CATV Digital Terrestrial Broadcast (8VSB) Digital cable*1 (64/256 QAM) Audio multiplex Back panel vertical inputs Back panel surface inputs HDMI IN 1 HDMI IN 2 HDMI IN 3 HDMI IN 4 AUDIO OUT USB 1*2 COMPONENT IN VIDEO IN 1 VIDEO IN 2 PC IN Back panel horizontal inputs OSD language Power Requirement On Mode Power RS-232C ANT/CABLE AUDIO IN DIGITAL AUDIO OUT ETHERNET USB 2*2 Power Consumption Weight TV + stand TV only Dimensions*3 (W g H g D) (inch) TV + stand TV only Operating temperature Model: LC-90LE657U Model: LC...
Operation Manual
Page 62
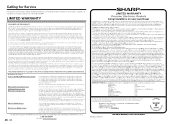
... to prevent this Limited Warranty (see Operation Manual on remedies for repair at its original container, will come to your Sharp Authorized Servicer to the purchaser for parts or labor for the time periods set forth below . Please contact 1-888-GO-SHARP for any damages or defects in the Product which have this Sharp brand Liquid Crystal Display product (the "Product"), when...
... to prevent this Limited Warranty (see Operation Manual on remedies for repair at its original container, will come to your Sharp Authorized Servicer to the purchaser for parts or labor for the time periods set forth below . Please contact 1-888-GO-SHARP for any damages or defects in the Product which have this Sharp brand Liquid Crystal Display product (the "Product"), when...


