Samsung UN55D8000YF Research

View Results Below
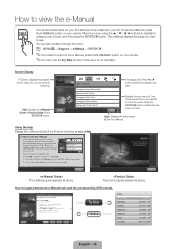
Free Samsung UN55D8000YF manuals!
Problems with Samsung UN55D8000YF?
Ask a Question
Free Samsung UN55D8000YF manuals!
Problems with Samsung UN55D8000YF?
Ask a Question
Related Manual Pages


Related Videos

Samsung DLP/ LED UN55D8000YF Comparison
Duration: 10:54
Total Views: 3,294
Duration: 10:54
Total Views: 3,294
Similar Questions

Manual Please. How To Set Up Directv On This?
just got this tv and dont know how to hook it up to directv and my blue-ray.
just got this tv and dont know how to hook it up to directv and my blue-ray.
(Posted by whittlegirls 6 years ago)


How Do I Remove The Base So I Can Mount The Tv On The Wall
(Posted by scottraugh 8 years ago)


Is There A Pc Monitor Driver For The Un55d8000yk. I Use It As A Monitor For Pc?
Running Windows 7, 64 Bit
Running Windows 7, 64 Bit
(Posted by ldoyle002 11 years ago)