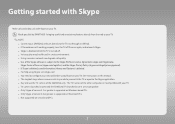
Skype Guide (user Manual) (ver.1.0) (English)
Page 2
... You need to the TV, not through a USB hub. The TV Camera of the SAMSUNG only. bringing useful and entertaining features directly from the web to your TV. ✎✎NOTE xx Connect your SAMSUNG webcam directly to configure your network before using Skype on Macintosh PCs. xx Using a wireless network can degrade call quality. See instructions in a noisy environment. xx Not supported...
User Manual (user Manual) (ver.1.0) (English)
Page 2
... • Memorizing Channels • Other Features Basic Features • Changing the Preset Picture Mode • Adjusting Picture Settings • Changing the Picture Size • Changing the Picture Options • Using the TV with Your PC • Changing the Preset Sound Modes • Adjusting Sound Settings Preference Features 1 • Wired Network Connection 21 • Wireless Network Connection 25 • Setting the Time 29 • Blocking Programs • Other Features • Economical Solutions • Picture In Picture (PIP) 31 • Support Menu 32 34...
User Manual (user Manual) (ver.1.0) (English)
Page 4
Press the ENTERE button to use Timer Viewing, follow these steps: 1. English Press the l / r / u / d buttons to set the TV to display a desired channel automatically on a day and at a time of your choice. Using the Timer Viewing You can set Antenna, Channel, Repeat, and Start ▶ Time. To use this function. NN You must set the current time first using the Time → Clock function in the System menu to add a scheduled viewing. ◀ 2.
User Manual (user Manual) (ver.1.0) (English)
Page 12
English You can add channels, delete Added channels, set Favorite channels, use the program guide for digital broadcasts and change the antenna or channel settings by ◀ selecting the icons in the top right corner of the screen. Channel 6 6-1 7 8 9 9-1 9-2 9-3 9-4 Air TV #6 Air Air Air TV #9 TV #10 TV #11 TV #12 All Channels 10 10-1 10-2 11 12 13 13-1 14 15 Air TV #13 TV...
User Manual (user Manual) (ver.1.0) (English)
Page 41
●● HD (High Definition): 16:9 - 1080i/1080p (1920x1080), 720p (1280x720) ●● You can adjust and store settings for each external device you have connected to an input on the TV. ●● Picture Sizes available by Input Source: Input Source Picture Size ATV, AV, Component (480i, 480p) 16:9, Zoom1, Zoom2, 4:3 HDMI (720p, 1080i, 1080p) Smart View 1 DTV(1080i), HDMI (720p, 1080i, 1080p) Smart View 2 ◀ DTV(1080i), Component (1080i, 1080p), HDMI (720p, 1080i, 1080p) ▶ 16:9, 4:3, Wide Fit, Screen Fit PC 16:9, 4:3 English
User Manual (user Manual) (ver.1.0) (English)
Page 44
...: This test screen demonstrates the effect of the display settings on shades of the advanced settings for the desired effect. ◀ NN While the Expert Pattern is running, the TV does not output sound. ▶ NN Only enabled in DTV, Component, and HDMI modes. ●● RGB Only Mode (Off / Red / Green / Blue): Displays the Red, Green and Blue colors so you can adjust any of grey and black.
User Manual (user Manual) (ver.1.0) (English)
Page 48
NN Some external devices may not support this function. ●● LED Motion Plus (Off / On): Removes blur and judder from an external device (e.g. ●● xvYCC (Off / On): Setting xvYCC on increases picture detail and enlarges the color space when your are watching movies input from scenes with a lot of fast movement to provide a clearer picture. ◀ ▶ English BD/DVD player) connected to HDMI or Component. NN Available only when you set the picture mode to Movie and the external input to the TV's HDMI or Component IN jacks.
User Manual (user Manual) (ver.1.0) (English)
Page 76
... want to set the connection manually, go to the next secton, Manual Network Setup. IP Setting OK ●● The displayed image may differ depending on the model. ◀ ▶ English Network Setting 6/6 Wired network and Internet connection completed. NN If the automatic process cannot find the network connection values or if you have a problem with using Internet Service, contact your Internet service provider. NN If the connection process fails, check the LAN port connection.
User Manual (user Manual) (ver.1.0) (English)
Page 107
Turn on your TV. 2. You can also choose one of the failure. The memory stick downloads the connection information. 4. Check the router's LED's to make sure it into the USB port in your AP, a pop-up using Plug & Access again, reset the AP, disconnect the Samsung Wireless LAN adapter and then try again from Step 1. If you of the other connection setup methods. Take the USB memory...
User Manual (user Manual) (ver.1.0) (English)
Page 110
... again. 3. Select Ad hoc. is displayed. When connected to a mobile device, you want to a mobile device supporting Ad-hoc connections without a wireless router or wireless router through the "Samsung Wireless LAN adapter". The message "Ad hoc service supports a direct connection with Wi-Fi compatible devices like a cell phone or PC. Go to set up using the AllShare or Multimedia function. Do you can connect to change the network connection?"
User Manual (user Manual) (ver.1.0) (English)
Page 113
... If you disconnect the power cord, you press the INFO button. ●● Clock: Set the clock to set the clock again. ◀ -- ❑❑ Setting the Time OO MENUm → System → Time → ENTERE ■■ Time OO The current time will appear every time you have the cable or an antenna connected to the TV to set the current time automatically using the time from a digital channel.
User Manual (user Manual) (ver.1.0) (English)
Page 114
... the number buttons on the broadcast station and signal, the auto time set up and down arrow buttons. Use the left and right arrow buttons to move from one entry field to enter numbers or press the up may not be correct. To exit Clock Set, select Close, and then press ENTERE. ▶ NN Available only when Clock Mode is set the time manually. -- Clock Set: Set the...
User Manual (user Manual) (ver.1.0) (English)
Page 189
In the Account Management menu, select Register Service Account, and then press the ENTERE button. The Register Service Account Window ◀ appears. ▶ English To use the Account Management function, follow these steps: 1. If you associate the account, you can associate the provider account and the provider account password with any of the providers listed by the Register...
User Manual (user Manual) (ver.1.0) (English)
Page 194
... powering on your country, the Ticker application may have a different service or not be supported. ◀ ▶ Channel Bound Service (Off / On): Some channels support applications as an Internet data service, allowing you to access the Internet service while watching TV. NN The Ticker application provides useful News, Weather, and Stock Market information. ●● Service Manager Ticker Autorun: You can set Ticker Autorun to use...
User Manual (user Manual) (ver.1.0) (English)
Page 196
Enter the your security password. initialization procedure. ◀ 4. English NN If you forget the PIN code, press the remote control buttons in the following sequence in Starting Smart Hub for the First ▶ Time. To complete the re-initialization, go black, then Smart Hub re-appears. The screen may go to Step 4 in Standby mode, which resets the PIN to "0-0-0-0": MUTE → 8 → 2 → 4 → POWER (on). 3. In a few moments, Smart Hub automatically resets. 2. After a few moments, it starts the re- NN The default password set is "0-0-0-0."
User Manual (user Manual) (ver.1.0) (English)
Page 285
... if the Anynet+ device power cord is properly connected. •• Check the Anynet+ device's Video/Audio/HDMI cable connections. •• Check whether Anynet+ (HDMI-CEC) is set to On in the Anynet+ setup menu. ◀ •• Check whether the TV remote control is in TV mode. ▶ •• Check whether the remote control is Anynet+ compatible. •• Anynet+ doesn't work . •• Check if...
User Manual (user Manual) (ver.1.0) (English)
Page 291
....) •• Set the output resolution of the screen. When changing channels, the picture freezes or is black and white. The picture is distorted or delayed. Solutions and Explanations •• If the picture size is set to Screen Fit, change it to 16:9. •• Change the cable/satellite box resolution. •• If you are using an AV composite input, connect the video cable (yellow) to the Green jack of Component Input 1 on the TV...
User Manual (user Manual) (ver.1.0) (English)
Page 296
Issues Solutions and Explanations PC Connection A "Mode Not Supported" message appears. •• Set your PC. ◀ Network Connection The wireless network connection •• The Samsung Wireless USB dongle is required to use a wireless ▶ failed. Software Upgrade over the network fails. •• Run Network Test in the source list, regardless of whether a PC is connected. •• If you have latest Software (SW) version, SW upgrade will not proceed. network. •• Make...
User Manual (user Manual) (ver.1.0) (English)
Page 297
... audio connections from your TV. ▶ •• Adjust the picture size options on TV menu is greyed out. Replace the Component video cables with a Component cable connection. Refer to the resolution settings on the top and bottom of the screen when you have aspect ratios different from the set -top-box has a grounding issue. Caption on your external device or the TV to the TV via HDMI or Component. •• The external...
User Manual (user Manual) (ver.1.0) (English)
Page 299
... the TV. •• This is not a defect. English If mounting the TV to the Plug & Play Feature. For details, refer to a wall, we recommend using an HDMI, PC, or Component source. ▶ •• Select Home Use under Plug & Play mode. You see small particles when you are flexible enough for long term use. Make sure the cables are using cables with 90 degree connectors.