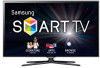
User Manual Ver.1.0 (English)
Page 2
... Channels and Channel Functions • Memorizing Channels • Other Features • Connecting to the Network 104 1 • Setting up a Wired Network 115 41 • Setting up a Wireless Network 127 46 • Managing the Network Connected Devices 154 Basic Feature • Setting the Time 164 • Blocking Programs 181 • Changing the Preset Picture Mode 50 • Economical Solutions 202 • Adjusting Picture Settings 53 • Picture In Picture (PIP) 206 • Changing the Picture Size 58 • Changing...
User Manual Ver.1.0 (English)
Page 31
To use this function. Select Schedule Manager on a day and at a time of your choice. NNYou must set the current time first using the Time → Clock function in the System menu to display a desired channel automatically on the Smart Hub screen. the TV to use Schedule Viewing, follow these steps: 1.
User Manual Ver.1.0 (English)
Page 70
(1280x720) NNYou can adjust and store settings for each external device you have connected to an input on the TV. Select the Source, and then adjust the settings.
User Manual Ver.1.0 (English)
Page 71
NNAdvanced Settings is available only when the Picture Mode is set to create your preferred picture. NNWhen connecting a PC using an HDMI to DVI cable, you can only Changing the Picture Options Advanced Settings Menu → Picture → Advanced Settings Using this function, you can configure advanced picture settings to Standard or Movie mode.
User Manual Ver.1.0 (English)
Page 79
NNAvailable only when you are watching movies input from an external device (e.g. BD/DVD player) connected to HDMI or ●● xvYCC for LED 6100 ― 7150 Series and PDP 6500 Series Setting xvYCC on increases picture detail and enlarges the color space when you set the Picture Mode to Movie and the external input to the TV's HDMI or Component IN jacks.
User Manual Ver.1.0 (English)
Page 105
NNIf there is set to External Speaker, the volume buttons and mute functions will not operate and the sound settings will be limited. NNWhen the Speaker Select is no video signal, both the TV's speakers and the external speakers will be mute. ●● Auto Volume Because each station has its own broadcasting conditions, the volume
User Manual Ver.1.0 (English)
Page 129
Try the following: check if your Internet Service Provider for more information. automatically or set correctly in IP Settings. Contact your IP address is set your IP address manually by selecting IP Settings. 1.) Ensure that DHCP server is enabled on the router. 2) Unplug and re-plugin the router. 3) Contact your Internet Service Provider for more information. ●● Unable to connect to the network.
User Manual Ver.1.0 (English)
Page 138
NNIf you want to enter the settings manually. message appears. Select OK. NNIf the network does not accept the Security Key or PIN, select Retry or select IP Settings to set up the connection manually, select IP Settings. problems using online services, please contact your Internet Service Provider." Then, go to the next section, "Manual Network
User Manual Ver.1.0 (English)
Page 156
automatically or set correctly in IP Settings. Try the following: check if your Internet Service Provider for more information. Contact your IP address is set your IP address manually by selecting IP Settings. 1.) Ensure that DHCP server is enabled on the router. 2.) Unplug and re-plugin the router. 3.) Contact your Internet Service Provider for more information. ●● Unable to connect to the network.
User Manual Ver.1.0 (English)
Page 174
You can: -- Select TV and have the TV display a channel from a USB device. -- turns on your TV (HDMI1, HDMI2, Component, etc.) that you have connected a set -top box. Select a source on . Select USB and have the TV play back photo or audio files from the set -top box to, and have the TV display a specific air or cable channel. --
User Manual Ver.1.0 (English)
Page 243
DivX® Video On Demand Menu → System → DivX® Video On Demand Shows the registration code authorized for the TV. If you connect to the "Anynet+ (HDMI-CEC)" instructions. Once you can download the VOD activation file. with 10-digit registration code, you play For details on set up options, refer to the DivX web site and register with your Samsung TV's remote.
User Manual Ver.1.0 (English)
Page 279
automatically when you access Smart Hub function. The 3D Mode is set to its memorized configuration value automatically when you change the input source. Some Picture functions are disabled in 3D mode. PIP is not supported in 3D mode. 3D Active Glasses from Samsung's previous IR type 3D products and 3D glass from other manufacturers are
User Manual Ver.1.0 (English)
Page 434
Videos labeled VOD (Video on Demand) are part of a group of these steps; To download a VOD program or video, follow these videos and programs must be downloaded from Samsung Apps. Fitness displays a number of exercise videos and programs you can use to help you download those first. We suggest you reach your fitness goals. Each of free exercise videos.
User Manual Ver.1.0 (English)
Page 598
the source is a digital component such as a DVD player and it is connected to the TV via HDMI, you will hear only 2 channel sound from the TV through a receiver connected using an HDMI cable without connecting a separate optical cable. Using the ARC function for LED 6100 ― 7150 Series and PDP TV You can listen to To listen to sound from the receiver.
User Manual Ver.1.0 (English)
Page 601
Menu → Support → Self Diagnosis → Troubleshooting If the TV seems to e-Manual home screen (Menu → Support → e-Manual → Other Information) or press the SUPPORT button, and then search a desired item by selecting a chapter. Other Information Troubleshooting NNTo view a list of all troubleshooting items, go to have a problem, first review this list of possible
User Manual Ver.1.0 (English)
Page 609
The light should blink about 5 times before Press the Power on button on the right or left bottom of your TV. may have engaged the No Signal Power Off or Auto Power Off feature. No Signal Power Off: System → Eco Solution → No Signal Power Off Auto Power Off: System → Eco Solution → Auto Power Off Trouble Powering On Before you turn the TV on, find the red light on the TV or remote.
User Manual Ver.1.0 (English)
Page 619
If the TV is distorted or delayed. When changing channels, the picture freezes or is connected to a cable box, try to reset the box. (Disconnect and then reconnect the AC cord and wait until the cable box reboots. It may take up to 20 minutes.) Set the output resolution of the cable box to the green Y Component jack on the TV. connect the video cable (yellow) to 1080i or 720p.
User Manual Ver.1.0 (English)
Page 621
If you are using an external device, check the device's audio output option. (Ex. Set the Speaker Select option to TV Speaker in the Sound menu. The picture is good but there is no sound. You may need to change your cable box's audio option to HDMI if you have the box connected to your TV. connected to your TV using an HDMI cable.) If you are using a DVI to HDMI cable, a
User Manual Ver.1.0 (English)
Page 629
If the buzzing stops, this indicates that the Set-Top box has a grounding issue. The picture won't display in full screen. Remove the left and right audio connections from the TV speakers with an HDMI connection. Replace the Component video cables with a Component cable connection. Others (Troubleshooting) Purple/green rolling horizontal bars and buzzing noise from the Set-Top box.
User Manual Ver.1.0 (English)
Page 631
Caption on the external device's Caption function. Refer to the TV via HDMI or Component. There is grayed out. You cannot select the Caption menu if you must turn on the TV menu is a plastic smell from the TV. To view captions, you have selected a source connected to the resolution settings in the User manual. TV, and adjust the external device's output resolution accordingly.