
Manual
Page 1
To receive more complete service, please register your product at www.samsung.com/register Model___________ Serial No E-MANUAL imagine the possibilities Thank you for purchasing this Samsung product.
To receive more complete service, please register your product at www.samsung.com/register Model___________ Serial No E-MANUAL imagine the possibilities Thank you for purchasing this Samsung product.
Manual
Page 2
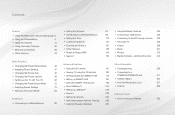
...through a Receiver 92 • Using the Media Contents 234 99 • Connecting a USB Device 235 118 • Connecting to view the e-Manual 332 229 231 Additional Function 275 Other Information 161 • Troubleshooting 289 162 • Connecting to a 178 COMMON INTERFACE slot 317 190 &#...8226; Teletext Feature 322 193 • Anti-theft Kensington Lock 327 214 • Licence 329 216 222 e-Manual Guide 227 • How to the PC through network 236 127 • Recorded TV 245 131 • Videos 256 138 • ...
...through a Receiver 92 • Using the Media Contents 234 99 • Connecting a USB Device 235 118 • Connecting to view the e-Manual 332 229 231 Additional Function 275 Other Information 161 • Troubleshooting 289 162 • Connecting to a 178 COMMON INTERFACE slot 317 190 &#...8226; Teletext Feature 322 193 • Anti-theft Kensington Lock 327 214 • Licence 329 216 222 e-Manual Guide 227 • How to the PC through network 236 127 • Recorded TV 245 131 • Videos 256 138 • ...
Manual
Page 7
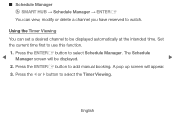
... function. 1. Set the current time first to select the Timer Viewing. Press the ENTERE button to select Schedule Manager. Press the ENTERE button to add manual booking. A pop up screen will be displayed automatically at the intended time.
... function. 1. Set the current time first to select the Timer Viewing. Press the ENTERE button to select Schedule Manager. Press the ENTERE button to add manual booking. A pop up screen will be displayed automatically at the intended time.

Manual
Page 8
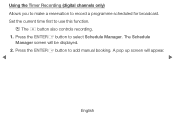
If you select Manual, you can set the start time you want . NN The c mark indicates the date is selected. ◀ ●● Date: you can set the desired ..., Channel, Repeat or Start Time. ●● Antenna: Select the desired antenna source. ●● Channel: Select the desired channel. ●● Repeat: Select Once, Manual, Sat~Sun, Mon~Fri or Everyday to set the day you want .
If you select Manual, you can set the start time you want . NN The c mark indicates the date is selected. ◀ ●● Date: you can set the desired ..., Channel, Repeat or Start Time. ●● Antenna: Select the desired antenna source. ●● Channel: Select the desired channel. ●● Repeat: Select Once, Manual, Sat~Sun, Mon~Fri or Everyday to set the day you want .
Manual
Page 10
The Schedule Manager screen will appear. ◀ ▶ English OO The ∏ button also controls recording. 1. Press the ENTERE button to select Schedule Manager. Press the ENTERE button to add manual booking. A pop up screen will be displayed. 2. Using the Timer Recording (digital channels only) Allows you to make a reservation to use this function. Set the current time first to record a programme scheduled for broadcast.
The Schedule Manager screen will appear. ◀ ▶ English OO The ∏ button also controls recording. 1. Press the ENTERE button to select Schedule Manager. Press the ENTERE button to add manual booking. A pop up screen will be displayed. 2. Using the Timer Recording (digital channels only) Allows you to make a reservation to use this function. Set the current time first to record a programme scheduled for broadcast.

Manual
Page 11
NN We recommend using a USB HDD with at least 5,400 rpm, but a USB HDD of RAID type is not compatible. 4. English NN USB memory stick is not supported. 3. Press the l or r button to Recorded TV in the e-Manual. NN A USB storage device cannot record until it completes the Device Performance Test. Press the l / r / u / d buttons to set the Antenna, Channel, Repeat, Date, Start / End Time. ◀ ▶ NN If you want to play a recorded programme, refer to select the Timer Recording.
NN We recommend using a USB HDD with at least 5,400 rpm, but a USB HDD of RAID type is not compatible. 4. English NN USB memory stick is not supported. 3. Press the l or r button to Recorded TV in the e-Manual. NN A USB storage device cannot record until it completes the Device Performance Test. Press the l / r / u / d buttons to set the Antenna, Channel, Repeat, Date, Start / End Time. ◀ ▶ NN If you want to play a recorded programme, refer to select the Timer Recording.

Manual
Page 29
... When Antenna Source is set up the Network, Network ID, Frequency, Modulation, and Symbol Rate manually by press the button on the remote ◀ control. ▶ Network (Auto / Manual): Selects the Network ID setting mode among Auto or Manual. NN If you select Quick, you can set to Air or Cable: ●●...
... When Antenna Source is set up the Network, Network ID, Frequency, Modulation, and Symbol Rate manually by press the button on the remote ◀ control. ▶ Network (Auto / Manual): Selects the Network ID setting mode among Auto or Manual. NN If you select Quick, you can set to Air or Cable: ●●...

Manual
Page 30
Frequency: Displays the frequency for the channel. (differs in each country) Modulation: Displays available modulation values. Network ID: When Network is Manual, you can set up Network ID using the numeric buttons. Symbol Rate: Displays available symbol rates. ◀ ▶ English
Frequency: Displays the frequency for the channel. (differs in each country) Modulation: Displays available modulation values. Network ID: When Network is Manual, you can set up Network ID using the numeric buttons. Symbol Rate: Displays available symbol rates. ◀ ▶ English

Manual
Page 32
■■ Manual Tuning Scans for a digital channel. ◀ 1. NN This function may not be supported depending on the region. Press the u / d / l / r button to Air or Cable: ●● Digital Channel Tuning: Scans for a channel manually and stores in the TV. When Antenna Source is locked using the Channel Lock function, the PIN input window appears. NN If a channel is set to select New. ▶ NN When selecting Antenna → Air: Channel, Frequency, Bandwidth NN When selecting Antenna → Cable: Frequency, Modulation, Symbol Rate English
■■ Manual Tuning Scans for a digital channel. ◀ 1. NN This function may not be supported depending on the region. Press the u / d / l / r button to Air or Cable: ●● Digital Channel Tuning: Scans for a channel manually and stores in the TV. When Antenna Source is locked using the Channel Lock function, the PIN input window appears. NN If a channel is set to select New. ▶ NN When selecting Antenna → Air: Channel, Frequency, Bandwidth NN When selecting Antenna → Cable: Frequency, Modulation, Symbol Rate English

Manual
Page 45
... the image is clear. NN Fine tuned channels that have to fine tune the channel, as this is weak or distorted, fine tune the channel manually. English
... the image is clear. NN Fine tuned channels that have to fine tune the channel, as this is weak or distorted, fine tune the channel manually. English

Manual
Page 65
... Plus (Off / Clear / Standard / Smooth / Custom / Demo) for the image it is Demo, you can set up the Blur Reduction, Judder ◀ Reduction or Reset manually. ▶ NN If Motion Plus is displaying by using Motion Plus function.
... Plus (Off / Clear / Standard / Smooth / Custom / Demo) for the image it is Demo, you can set up the Blur Reduction, Judder ◀ Reduction or Reset manually. ▶ NN If Motion Plus is displaying by using Motion Plus function.

Manual
Page 91
..., you can use Static IP addresses. If your network requires a Static IP address, you must enter the IP address, subnet mask, gateway, and DNS values manually on your computer. NN You can also get the IP address, subnet mask, gateway, and DNS values, ▶ contact your network requires a Static IP address... Provider (ISP). Modems and routers that support DHCP automatically provide the IP address, subnet mask, gateway, and DNS values your TV needs to enter them manually. ADSL modems that supports Dynamic Host Configuration Protocol (DHCP).
..., you can use Static IP addresses. If your network requires a Static IP address, you must enter the IP address, subnet mask, gateway, and DNS values manually on your computer. NN You can also get the IP address, subnet mask, gateway, and DNS values, ▶ contact your network requires a Static IP address... Provider (ISP). Modems and routers that support DHCP automatically provide the IP address, subnet mask, gateway, and DNS values your TV needs to enter them manually. ADSL modems that supports Dynamic Host Configuration Protocol (DHCP).

Manual
Page 95
... you have a problem with using Internet Service, contact your Internet service provider. Network Setting Wiress network and Internet connection completed. NN If it to Manual. Retry IP Setting OK ●● The displayed image may differ depending on the model. ◀ ▶ English Refer to following "How... to set up manually". SEC_LinkShare MAC Address IP Address Subnet Mask Gareway DNS Server 00:12:fb:2b:56:4d 192.168.11.4 255.255.255.0 192.168....
... you have a problem with using Internet Service, contact your Internet service provider. Network Setting Wiress network and Internet connection completed. NN If it to Manual. Retry IP Setting OK ●● The displayed image may differ depending on the model. ◀ ▶ English Refer to following "How... to set up manually". SEC_LinkShare MAC Address IP Address Subnet Mask Gareway DNS Server 00:12:fb:2b:56:4d 192.168.11.4 255.255.255.0 192.168....

Manual
Page 96
On the dialog that appears, click Status. ▶ 3. English The Network connection values are displayed. Right click the Network icon on most Windows computers, follow these steps: 1. In the pop-up menu that appears, click the Support tab. 4. On the Support Tab, click the Details button. ■■ Network Settings (Manual) Use the Manual Network Setup when connecting your TV to a network that requires a Static IP address. Getting the Network Connection Values To get the Network connection values on the bottom right of the screen. ◀ 2.
On the dialog that appears, click Status. ▶ 3. English The Network connection values are displayed. Right click the Network icon on most Windows computers, follow these steps: 1. In the pop-up menu that appears, click the Support tab. 4. On the Support Tab, click the Details button. ■■ Network Settings (Manual) Use the Manual Network Setup when connecting your TV to a network that requires a Static IP address. Getting the Network Connection Values To get the Network connection values on the bottom right of the screen. ◀ 2.

Manual
Page 97
Press the d button on your TV's cable network connection manually, follow these steps: 1. IP Mode IP Address Subnet Mask Gateway DNS Mode DNS Server IP Settings OK Manual 0 . 0 . 0 . 0 0 . 0 . 0 . 0 0 . 0 . 0 . 0 Auto 0 . 0 . 0 . 0 ▶ ● The displayed image may differ depending on network test screen. 3. Set IP Mode to set up automatically" procedure. 2. How to set up manually To set up your remote to go to the ◀ IP Address. English Select the IP Setting on the model. Follow Steps 1 through 2 in the "How to Manual. 4.
Press the d button on your TV's cable network connection manually, follow these steps: 1. IP Mode IP Address Subnet Mask Gateway DNS Mode DNS Server IP Settings OK Manual 0 . 0 . 0 . 0 0 . 0 . 0 . 0 0 . 0 . 0 . 0 Auto 0 . 0 . 0 . 0 ▶ ● The displayed image may differ depending on network test screen. 3. Set IP Mode to set up automatically" procedure. 2. How to set up manually To set up your remote to go to the ◀ IP Address. English Select the IP Setting on the model. Follow Steps 1 through 2 in the "How to Manual. 4.

Manual
Page 102
Ad Hoc -- WPS(PBC) -- Auto Setup (Using the Auto Network Search function) -- Manual Setup -- One Foot Connection ◀ -- ●● Connection Methods: You can setup the wireless network connection on six ways. -- SWL(Samsung Wireless Link) ▶ English
Ad Hoc -- WPS(PBC) -- Auto Setup (Using the Auto Network Search function) -- Manual Setup -- One Foot Connection ◀ -- ●● Connection Methods: You can setup the wireless network connection on six ways. -- SWL(Samsung Wireless Link) ▶ English
Manual
Page 106
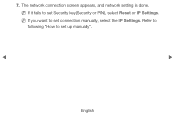
7. Refer to following "How to set connection manually, select the IP Settings. The network connection screen appears, and network setting is done. NN If you want to set Security key(Security or PIN), select Reset or IP Settings. NN If it fails to set up manually". ◀ ▶ English
7. Refer to following "How to set connection manually, select the IP Settings. The network connection screen appears, and network setting is done. NN If you want to set Security key(Security or PIN), select Reset or IP Settings. NN If it fails to set up manually". ◀ ▶ English

Manual
Page 108
Select the IP Settings on ▶ the first entry field. Set IP Mode to set up automatically" procedure. DNS Mode Auto 3. DNS Server 0 . 0 . 0 . 0 OK ◀ 4. Press the d button on your TV's cable network connection IP Settings manually, follow these steps: IP Mode Manual 1. English the model. How to set up manually To set up your remote to go to ● The displayed image may differ depending on network test screen. IP Address Subnet Mask Gateway 0 . 0 . 0 . 0 0 . 0 . 0 . 0 0 . 0 . 0 . 0 2. Follow Steps 1 through 7 in the "How to Manual.
Select the IP Settings on ▶ the first entry field. Set IP Mode to set up automatically" procedure. DNS Mode Auto 3. DNS Server 0 . 0 . 0 . 0 OK ◀ 4. Press the d button on your TV's cable network connection IP Settings manually, follow these steps: IP Mode Manual 1. English the model. How to set up manually To set up your remote to go to ● The displayed image may differ depending on network test screen. IP Address Subnet Mask Gateway 0 . 0 . 0 . 0 0 . 0 . 0 . 0 0 . 0 . 0 . 0 2. Follow Steps 1 through 7 in the "How to Manual.
Manual
Page 118
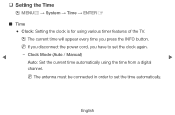
English NN The antenna must be connected in order to set the time automatically. Clock Mode (Auto / Manual) ▶ Auto: Set the current time automatically using various timer features of the TV. NN If you disconnect the power cord, you press the INFO button. ❑❑ Setting the Time OO MENUm → System → Time → ENTERE ■■ Time ●● Clock: Setting the clock is for using the time from a digital channel. OO The current time will appear every time you have to set the clock again. ◀ --
English NN The antenna must be connected in order to set the time automatically. Clock Mode (Auto / Manual) ▶ Auto: Set the current time automatically using various timer features of the TV. NN If you disconnect the power cord, you press the INFO button. ❑❑ Setting the Time OO MENUm → System → Time → ENTERE ■■ Time ●● Clock: Setting the clock is for using the time from a digital channel. OO The current time will appear every time you have to set the clock again. ◀ --
Manual
Page 119
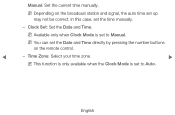
Clock Set: Set the Date and Time. NN You can set the time manually. -- English In this case, set the Date and Time directly by pressing the number buttons on the broadcast station and signal, the auto time set to Auto. NN Available only when Clock Mode is set to Manual. Manual: Set the current time manually. Time Zone: Select your time zone. ▶ NN This function is only available when the Clock Mode is set up may not be correct. NN Depending on the remote control. ◀ --
Clock Set: Set the Date and Time. NN You can set the time manually. -- English In this case, set the Date and Time directly by pressing the number buttons on the broadcast station and signal, the auto time set to Auto. NN Available only when Clock Mode is set to Manual. Manual: Set the current time manually. Time Zone: Select your time zone. ▶ NN This function is only available when the Clock Mode is set up may not be correct. NN Depending on the remote control. ◀ --

