SCL610 Tapes - Samsung
SCL610 Tapes

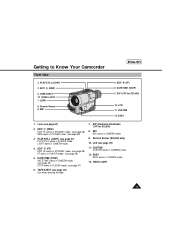
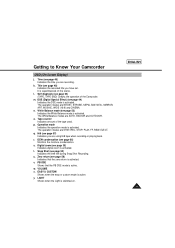
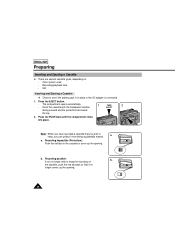
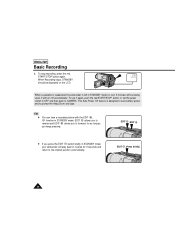
Related Manual Pages


Similar Questions

Old Tapes Not Playing In Samsung Scl700
I have old tapes which i recorded from my Canon camera, now when im trying to play them using Samsun...
I have old tapes which i recorded from my Canon camera, now when im trying to play them using Samsun...
(Posted by zeeshannaqi 6 years ago)

Everytime I Hit The Rewind Button Its Ejects The Tape
We are trying to get it to rewind but it keeps ejecting the tape
We are trying to get it to rewind but it keeps ejecting the tape
(Posted by bbgarcia73 9 years ago)

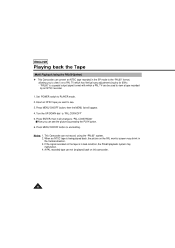
How Do You Play Back Tape In The Camera ?
I justr bought a used samsung scl610 8 mm camcorder with nio instruction book. How do you playback t...
I justr bought a used samsung scl610 8 mm camcorder with nio instruction book. How do you playback t...
(Posted by jimgorenc 12 years ago)

How Do I Transfer My Tape To My Pc?
how do I transfer my tape to my pc?
how do I transfer my tape to my pc?
(Posted by adroware 13 years ago)