User Manual
Page 4
... Text Using Word Mode ...48 Entering Upper and Lower Case ...49 Entering Symbols ...49 Entering Numbers ...50 Entering Text Using VoiceMode ...50 Section 6: Understanding Your Contacts ...52 Opening Contacts Menu ...52 Adding a Contact ...54 Adding Pauses ...56 Contact Groups ...56 Finding a Contacts Entry ...60 Editing an Existing Contact Entry ...60 Deleting a Contact Entry ...60 1
... Text Using Word Mode ...48 Entering Upper and Lower Case ...49 Entering Symbols ...49 Entering Numbers ...50 Entering Text Using VoiceMode ...50 Section 6: Understanding Your Contacts ...52 Opening Contacts Menu ...52 Adding a Contact ...54 Adding Pauses ...56 Contact Groups ...56 Finding a Contacts Entry ...60 Editing an Existing Contact Entry ...60 Deleting a Contact Entry ...60 1
User Manual
Page 5
Speed Dialing ...60 My Name Card ...62 Finding My Phone Number ...63 Emergency Contacts ...63 Section 7: Messaging ...66 Types of Messages ...66 Retrieving New Messages ...67 Creating and Sending Text Messages ...67 Creating and Sending Picture Messages ...69 Creating ...
Speed Dialing ...60 My Name Card ...62 Finding My Phone Number ...63 Emergency Contacts ...63 Section 7: Messaging ...66 Types of Messages ...66 Retrieving New Messages ...67 Creating and Sending Text Messages ...67 Creating and Sending Picture Messages ...69 Creating ...
User Manual
Page 7
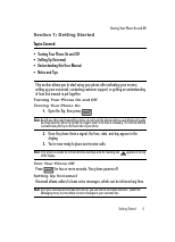
... receive calls. Getting Started 4 Note: If the phone is necessary. The internal antenna is located along the top on the back side of your voicemail, contacting customer support, or getting an understanding of how this User Manual • Notes and Tips This section allows you to leave voice messages, which can...
... receive calls. Getting Started 4 Note: If the phone is necessary. The internal antenna is located along the top on the back side of your voicemail, contacting customer support, or getting an understanding of how this User Manual • Notes and Tips This section allows you to leave voice messages, which can...
User Manual
Page 15
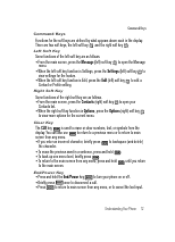
... to cancel the last input. Right Soft Key Some functions of the left soft key are as follows. • From the main screen, press the Contacts (right) soft key to open the Message menu. • When the left soft key function is Settings, press the Settings (left) soft key to view... main screen from any menu, or to the main screen. End/Power Key • Press and hold the End/Power key END to turn your Contacts list. • When the right soft key function is Options, press the Options (right) soft key to view more options for the feature. • When...
... to cancel the last input. Right Soft Key Some functions of the left soft key are as follows. • From the main screen, press the Contacts (right) soft key to open the Message menu. • When the left soft key function is Settings, press the Settings (left) soft key to view... main screen from any menu, or to the main screen. End/Power Key • Press and hold the End/Power key END to turn your Contacts list. • When the right soft key function is Options, press the Options (right) soft key to view more options for the feature. • When...

User Manual
Page 17
... indicate a stronger signal. Understanding Your Phone 14 Understanding the Display Screen Understanding the Display Screen The top line of the display show Message, Menu and Contacts listings. More bars indicate a stronger signal. D Signal Strength: Appears when your phone is on , all RF functions for icons that indicate network status, battery power...
... indicate a stronger signal. Understanding Your Phone 14 Understanding the Display Screen Understanding the Display Screen The top line of the display show Message, Menu and Contacts listings. More bars indicate a stronger signal. D Signal Strength: Appears when your phone is on , all RF functions for icons that indicate network status, battery power...

User Manual
Page 21
Understanding Your Phone 18 Lift the battery cover up with those on the battery into the phone housing. The gold contacts on the top of the arrow printed on the phone. Press the battery cover release latch. 2. Battery Install the Battery 1. Insert the top end of the battery in the direction of the battery should match up and slide it forward. 3.
Understanding Your Phone 18 Lift the battery cover up with those on the battery into the phone housing. The gold contacts on the top of the arrow printed on the phone. Press the battery cover release latch. 2. Battery Install the Battery 1. Insert the top end of the battery in the direction of the battery should match up and slide it forward. 3.
User Manual
Page 27
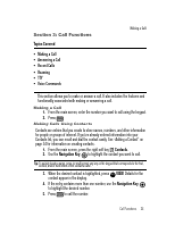
...create to store names, numbers, and other information for people or groups of the contact's name. 3. From the main screen, press the right soft key 2. Making a Call 1. Making Calls Using Contacts Contacts are entries that corresponds to the first, second, and/or third letters of interest.... Use the Navigation Key OK Contacts. Press SEND to call . If you've already entered information into your Contacts list, you can recall and dial the contact easily. Making a Call Section 3: Call Functions Topics Covered • Making a Call ...
...create to store names, numbers, and other information for people or groups of the contact's name. 3. From the main screen, press the right soft key 2. Making a Call 1. Making Calls Using Contacts Contacts are entries that corresponds to the first, second, and/or third letters of interest.... Use the Navigation Key OK Contacts. Press SEND to call . If you've already entered information into your Contacts list, you can recall and dial the contact easily. Making a Call Section 3: Call Functions Topics Covered • Making a Call ...
User Manual
Page 28
...; Notepad: Open the Notepad. • Voice Record: Record the conversation as a voice memo in the display. • Messaging: Display the Messaging menu. • Contact List: Open the Contact list to the main screen. 1. Note: If the call is useful in a call may require consent from the display and the phone eventually returns...
...; Notepad: Open the Notepad. • Voice Record: Record the conversation as a voice memo in the display. • Messaging: Display the Messaging menu. • Contact List: Open the Contact list to the main screen. 1. Note: If the call is useful in a call may require consent from the display and the phone eventually returns...
User Manual
Page 29
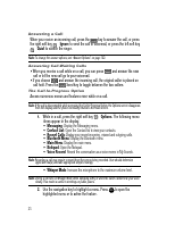
...mute the call timers for your phone Viewing Call Information Recent Calls retains information such as the appropriate icon to unmute the call from your Contacts list Details: Displays details about the caller if entered in your phone. • All: Displays all missed, received, and outgoing calls ...unlocks the entry to highlight the desired number. 3. Press again to indicate Mobile 1, Mobile 2, Home, Work, or Fax if the caller is in your Contacts list. • Number: Displays the telephone number. • Time: The time of the call. • Date: The date of the call. •...
...mute the call timers for your phone Viewing Call Information Recent Calls retains information such as the appropriate icon to unmute the call from your Contacts list Details: Displays details about the caller if entered in your phone. • All: Displays all missed, received, and outgoing calls ...unlocks the entry to highlight the desired number. 3. Press again to indicate Mobile 1, Mobile 2, Home, Work, or Fax if the caller is in your Contacts list. • Number: Displays the telephone number. • Time: The time of the call. • Date: The date of the call. •...

User Manual
Page 30
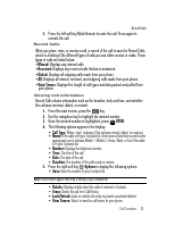
... call Indicates a Received call . then press SEND to call the highlighted number. Press OK . Use the navigation keys to highlight an option. SEND Creating Contacts Using Call History 1. Press SEND SEND then use the Navigation Key OK until the desired number is highlighted. Options. Add New... Contact is highlighted. Save is highlighted. From the main screen, press 2. Use the Navigation Key then use the Navigation Key OK until the desired...
... call Indicates a Received call . then press SEND to call the highlighted number. Press OK . Use the navigation keys to highlight an option. SEND Creating Contacts Using Call History 1. Press SEND SEND then use the Navigation Key OK until the desired number is highlighted. Options. Add New... Contact is highlighted. Save is highlighted. From the main screen, press 2. Use the Navigation Key then use the Navigation Key OK until the desired...
User Manual
Page 31
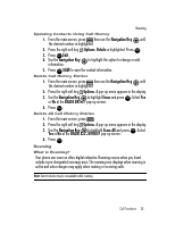
... roaming. Press OK SAVE to highlight Erase All and press OK . Press the right soft key 3. Press OK . OK to save the contact information. From the main screen, press 2. Options. SEND . Press the right soft key 3. Options. Press the right soft key 3. Select...ALL ENTRIES? Roaming occurs when you travel outside a pre-designated coverage area. The roaming icon displays when roaming is highlighted. Roaming Updating Contacts Using Call History 1. From the main screen, press 2. Options. Select Yes or No at the ERASE ENTRY? Details is Roaming? ...
... roaming. Press OK SAVE to highlight Erase All and press OK . Press the right soft key 3. Press OK . OK to save the contact information. From the main screen, press 2. Options. SEND . Press the right soft key 3. Options. Press the right soft key 3. Select...ALL ENTRIES? Roaming occurs when you travel outside a pre-designated coverage area. The roaming icon displays when roaming is highlighted. Roaming Updating Contacts Using Call History 1. From the main screen, press 2. Options. Select Yes or No at the ERASE ENTRY? Details is Roaming? ...

User Manual
Page 32
... Navigation Key to highlight the setting you 'll need to Call Settings menu. Roaming Options The following roaming options are available: • Home Only - Note: Contact Verizon Wireless for normal operation only in the display stating "ENABLING TTY WILL DISABLE HEADSET AUDIO. Before you can use your Roaming option, follow these...
... Navigation Key to highlight the setting you 'll need to Call Settings menu. Roaming Options The following roaming options are available: • Home Only - Note: Contact Verizon Wireless for normal operation only in the display stating "ENABLING TTY WILL DISABLE HEADSET AUDIO. Before you can use your Roaming option, follow these...
User Manual
Page 33
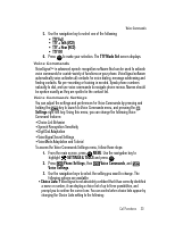
...TTY Off 6. Use the navigation keys to select the setting you want to make your phone. VoiceSignal software automatically voice activates all contacts for Voice Commands by changing the Choice Lists setting to confirm the correct one of up to three possibilities, and prompt you ... . No pre-recording or training is not absolutely confident that can adjust the settings and preferences for voice dialing, message addressing and finding contacts. Press SETTINGS & TOOLS and press OK . The • Choice Lists: If VoiceSignal is needed. Voice Commands 5. From the main...
...TTY Off 6. Use the navigation keys to select the setting you want to make your phone. VoiceSignal software automatically voice activates all contacts for Voice Commands by changing the Choice Lists setting to confirm the correct one of up to three possibilities, and prompt you ... . No pre-recording or training is not absolutely confident that can adjust the settings and preferences for voice dialing, message addressing and finding contacts. Press SETTINGS & TOOLS and press OK . The • Choice Lists: If VoiceSignal is needed. Voice Commands 5. From the main...
User Manual
Page 36
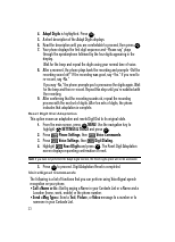
... the recording and prompts "Did the recording sound ok?" If the recording was good, say " plays through the speakerphone followed by saying a Name in your Contacts List or a Name and a Location (home, work, mobile) or the phone number. • Send : Send a Text, Picture, or Video message to ... need to highlight 2. 4. Press OK . 5. If you say "No." After ten sets of voice. 8. Note: If you can perform using your Contacts List. 33 Highlight SETTINGS & TOOLS and press OK . From the main screen, press OK MENU. Adapt Digits is completed. Use the navigation key to ...
... the recording and prompts "Did the recording sound ok?" If the recording was good, say " plays through the speakerphone followed by saying a Name in your Contacts List or a Name and a Location (home, work, mobile) or the phone number. • Send : Send a Text, Picture, or Video message to ... need to highlight 2. 4. Press OK . 5. If you say "No." After ten sets of voice. 8. Note: If you can perform using your Contacts List. 33 Highlight SETTINGS & TOOLS and press OK . From the main screen, press OK MENU. Adapt Digits is completed. Use the navigation key to ...
User Manual
Page 37
... have entries stored in your Verizon Wireless account. • Help Guide: Provide helpful information on your device. • Check : Provides details of the contact that you only say "Call," then "Please say "Cancel" to exit VoiceSignal, or, "Repeat" to dial. 6. If you said is not sure..., Voicemail, Messages, missed calls, time, battery level, signal strength, and volume level. • My Account: Provides detail information about your Contacts list. To use VoiceSignal. You're asked to confirm or reject the number when prompted. See page 54 for any name in your phone ...
... have entries stored in your Verizon Wireless account. • Help Guide: Provide helpful information on your device. • Check : Provides details of the contact that you only say "Call," then "Please say "Cancel" to exit VoiceSignal, or, "Repeat" to dial. 6. If you said is not sure..., Voicemail, Messages, missed calls, time, battery level, signal strength, and volume level. • My Account: Provides detail information about your Contacts list. To use VoiceSignal. You're asked to confirm or reject the number when prompted. See page 54 for any name in your phone ...

User Manual
Page 38
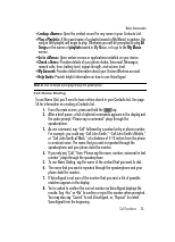
...command, say "Call" followed by simply speaking the digits into the phone. For best results, speak the sequence of possible matches appears in the contact list. You're asked to say are repeated through the speakerphone and your phone dials the number. 4. Note: For dialing 911 or other ... dials the number. 6. No training is necessary, and Digit Dial is repeated through the speakerphone. 5. Tip: VoiceSignal voice-activates the entire contact list according to confirm or reject the number when prompted. The digits that you said is programmed to make it is not sure of the...
...command, say "Call" followed by simply speaking the digits into the phone. For best results, speak the sequence of possible matches appears in the contact list. You're asked to say are repeated through the speakerphone and your phone dials the number. 4. Note: For dialing 911 or other ... dials the number. 6. No training is necessary, and Digit Dial is repeated through the speakerphone. 5. Tip: VoiceSignal voice-activates the entire contact list according to confirm or reject the number when prompted. The digits that you said is programmed to make it is not sure of the...

User Manual
Page 39
...of commands appears in the display and the audio prompt "Please say a command" plays through the speakerphone. 3. A list of message and digits or a Contact name into the phone: • Text • Picture • Video 1. Name Lookup To perform a name lookup, you'll need to the message type... the display and the audio prompt "Please say the name of 3-12 inches from the microphone. If you said is displayed in your Contacts list. 1. The CREATE MESSAGE screen appropriate to have some entries in your message. The number that you said into the microphone, clearly and...
...of commands appears in the display and the audio prompt "Please say a command" plays through the speakerphone. 3. A list of message and digits or a Contact name into the phone: • Text • Picture • Video 1. Name Lookup To perform a name lookup, you'll need to the message type... the display and the audio prompt "Please say the name of 3-12 inches from the microphone. If you said is displayed in your Contacts list. 1. The CREATE MESSAGE screen appropriate to have some entries in your message. The number that you said into the microphone, clearly and...

User Manual
Page 40
... spoken opens. 37 From the main screen, press and hold the key. 2. Say "Go To" at a distance of "Please choose" plays through the speakerphone. 3. The contact name appears in your phone, or you 've entered for that you can open Get It Now, Messaging..., Contacts, Recent Calls, and Settings & Tools on your Contacts list, first name followed by last name. 6. Say the name exactly as it is displayed in the display with other information that contact. A list of the displayed options: • Get It Now •...
... spoken opens. 37 From the main screen, press and hold the key. 2. Say "Go To" at a distance of "Please choose" plays through the speakerphone. 3. The contact name appears in your phone, or you 've entered for that you can open Get It Now, Messaging..., Contacts, Recent Calls, and Settings & Tools on your Contacts list, first name followed by last name. 6. Say the name exactly as it is displayed in the display with other information that contact. A list of the displayed options: • Get It Now •...
User Manual
Page 42
... to arrive at the desired feature. 3. Menu Navigation Access menus using menu numbers. The first of all the available menus associated with your phone. The CONTACTS menu is often called a "shortcut." It also includes an outline of several menus appear to a menu or sub-menu, press OK MENU, then enter the... appearing in the display. 2. Press the number of the menu, sub-menu, and so on page 40, for looking up the menu shortcut number. 1. The CONTACTS menu is highlighted. Press OK , then press Business.
... to arrive at the desired feature. 3. Menu Navigation Access menus using menu numbers. The first of all the available menus associated with your phone. The CONTACTS menu is often called a "shortcut." It also includes an outline of several menus appear to a menu or sub-menu, press OK MENU, then enter the... appearing in the display. 2. Press the number of the menu, sub-menu, and so on page 40, for looking up the menu shortcut number. 1. The CONTACTS menu is highlighted. Press OK , then press Business.

User Manual
Page 45
Menu Outline 1: TXT Message 2: Picture Message 3: Video Message 4: Sketch Message 5: Postcard 2: Inbox 3: Sent 4: Drafts 5: Voicemail 6: Mobile IM 1: Get New Applications 7: Email 8: Chat CONTACTS 1: New Contact 2: Contact List 3: Groups 1: No Group 2: Business 3: Colleague 4: Family 5: Friends 4: Speed Dials 5: In Case of Emergency 6: My Name Card RECENT CALLS 1: Missed 2: Received 3: Dialed 4: All 5: View Timers SETTINGS & TOOLS 1: My Account Menu Navigation 42
Menu Outline 1: TXT Message 2: Picture Message 3: Video Message 4: Sketch Message 5: Postcard 2: Inbox 3: Sent 4: Drafts 5: Voicemail 6: Mobile IM 1: Get New Applications 7: Email 8: Chat CONTACTS 1: New Contact 2: Contact List 3: Groups 1: No Group 2: Business 3: Colleague 4: Family 5: Friends 4: Speed Dials 5: In Case of Emergency 6: My Name Card RECENT CALLS 1: Missed 2: Received 3: Dialed 4: All 5: View Timers SETTINGS & TOOLS 1: My Account Menu Navigation 42


