User Manual
Page 4
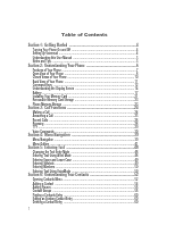
... ...7 Open View of Your Phone ...8 Closed Views of Your Phone ...10 Back View of Your Phone ...11 Command Keys ...12 Understanding the Display Screen ...14 Battery ...17 Installing Your Memory Card ...21 Removable Memory Card Storage ...23 Phone Memory Storage ...23 Section 3: Call Functions ...24 Making a Call ...24 Answering a Call ...25...
... ...7 Open View of Your Phone ...8 Closed Views of Your Phone ...10 Back View of Your Phone ...11 Command Keys ...12 Understanding the Display Screen ...14 Battery ...17 Installing Your Memory Card ...21 Removable Memory Card Storage ...23 Phone Memory Storage ...23 Section 3: Call Functions ...24 Making a Call ...24 Answering a Call ...25...
User Manual
Page 6
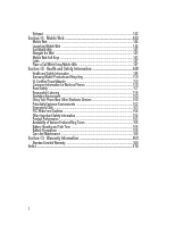
...147 Place a Call While Using Mobile Web ...147 Section 12: Health and Safety Information ...148 Health and Safety Information ...148 Samsung Mobile Products and Recycling ...150 UL Certified Travel Adapter ...150 Consumer Information on Wireless Phones ...150 Road Safety ...157 Responsible ... Other Important Safety Information ...164 Product Performance ...165 Availability of Various Features/Ring Tones ...166 Battery Standby and Talk Time ...166 Battery Precautions ...166 Care and Maintenance ...168 Section 13: Warranty Information ...169 Standard Limited Warranty ...169 Index ...174 ...
...147 Place a Call While Using Mobile Web ...147 Section 12: Health and Safety Information ...148 Health and Safety Information ...148 Samsung Mobile Products and Recycling ...150 UL Certified Travel Adapter ...150 Consumer Information on Wireless Phones ...150 Road Safety ...157 Responsible ... Other Important Safety Information ...164 Product Performance ...165 Availability of Various Features/Ring Tones ...166 Battery Standby and Talk Time ...166 Battery Precautions ...166 Care and Maintenance ...168 Section 13: Warranty Information ...169 Standard Limited Warranty ...169 Index ...174 ...
User Manual
Page 9
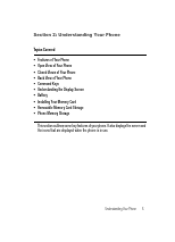
Understanding Your Phone 6 Section 2: Understanding Your Phone Topics Covered • Features of Your Phone • Open View of Your Phone • Closed Views of Your Phone • Back View of Your Phone • Command Keys • Understanding the Display Screen • Battery • Installing Your Memory Card • Removable Memory Card Storage • Phone Memory Storage This section outlines some key features of your phone. It also displays the screen and the icons that are displayed when the phone is in use.
Understanding Your Phone 6 Section 2: Understanding Your Phone Topics Covered • Features of Your Phone • Open View of Your Phone • Closed Views of Your Phone • Back View of Your Phone • Command Keys • Understanding the Display Screen • Battery • Installing Your Memory Card • Removable Memory Card Storage • Phone Memory Storage This section outlines some key features of your phone. It also displays the screen and the icons that are displayed when the phone is in use.
User Manual
Page 12
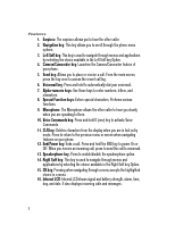
... screen when navigating features on your phone. 12. OK key: Pressing when navigating through the phone menu options. 3. Internal LCD: Internal LCD shows signal and battery strength, alarm, time, day, and date. Navigation key: This key allows you to hear the other caller to hear you clearly when you are speaking...
... screen when navigating features on your phone. 12. OK key: Pressing when navigating through the phone menu options. 3. Internal LCD: Internal LCD shows signal and battery strength, alarm, time, day, and date. Navigation key: This key allows you to hear the other caller to hear you clearly when you are speaking...
User Manual
Page 13
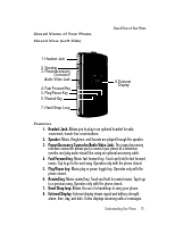
Touch and hold to rewind music. Operates only with the phone closed. 7. Operates only with the phone closed . 6. External Display: External display shows signal and battery strength, alarm, time, day, and date. Understanding Your Phone 10 Power/Accessory Connector/ Audio Video Jack 4. Hand Strap Loop 8. Power/Accessory Connector/Audio Video Jack: ...
Touch and hold to rewind music. Operates only with the phone closed. 7. Operates only with the phone closed . 6. External Display: External display shows signal and battery strength, alarm, time, day, and date. Understanding Your Phone 10 Power/Accessory Connector/ Audio Video Jack 4. Hand Strap Loop 8. Power/Accessory Connector/Audio Video Jack: ...

User Manual
Page 17
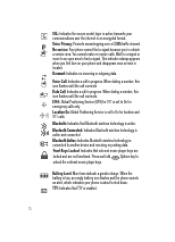
... strength. More bars indicate a stronger signal. 1X Signal Strength: Indicates your phone is outside your phone to Verizon Wireless for icons that indicate network status, battery power, signal strength, and so on. Please refer to place or receive calls. Roaming: Your phone is using the CDMA 1X protocol. When on and...
... strength. More bars indicate a stronger signal. 1X Signal Strength: Indicates your phone is outside your phone to Verizon Wireless for icons that indicate network status, battery power, signal strength, and so on. Please refer to place or receive calls. Roaming: Your phone is using the CDMA 1X protocol. When on and...
User Manual
Page 18
...find a signal. When dialing a number, this icon flashes until the call connects Data Call: Indicates a call connects. When the battery is low, an empty battery icon flashes and the phone sounds an alert, which indicates your communications over a CDMA traffic channel. This indicator always appears when you... external music player keys are locked and are not functional. Bluetooth Connected: Indicates Bluetooth wireless technology is connected to Battery Level: More bars indicate a greater charge. Front Keys Locked: Indicates that Bluetooth wireless technology is enabled. 15
...find a signal. When dialing a number, this icon flashes until the call connects Data Call: Indicates a call connects. When the battery is low, an empty battery icon flashes and the phone sounds an alert, which indicates your communications over a CDMA traffic channel. This indicator always appears when you... external music player keys are locked and are not functional. Bluetooth Connected: Indicates Bluetooth wireless technology is connected to Battery Level: More bars indicate a greater charge. Front Keys Locked: Indicates that Bluetooth wireless technology is enabled. 15
User Manual
Page 20
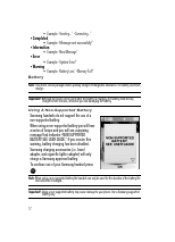
... damaging the battery. Important!: Using a non-supported battery may cause damage to your Samsung handset press OK . If you will only charge a Samsung approved battery. Important!: Although the phone can only be used while the battery is charging, the battery must be recharged. To continue use of your phone. • Example: "Sending..." Using A Non-Supported Battery Samsung handsets do...
... damaging the battery. Important!: Using a non-supported battery may cause damage to your Samsung handset press OK . If you will only charge a Samsung approved battery. Important!: Although the phone can only be used while the battery is charging, the battery must be recharged. To continue use of your phone. • Example: "Sending..." Using A Non-Supported Battery Samsung handsets do...

User Manual
Page 21
Lift the battery cover up with those on the battery into the phone housing. Understanding Your Phone 18 The gold contacts on the top of the arrow printed on the phone. Press the battery cover release latch. 2. Insert the top end of the battery in the direction of the battery should match up and slide it forward. 3. Battery Install the Battery 1.
Lift the battery cover up with those on the battery into the phone housing. Understanding Your Phone 18 The gold contacts on the top of the arrow printed on the phone. Press the battery cover release latch. 2. Insert the top end of the battery in the direction of the battery should match up and slide it forward. 3. Battery Install the Battery 1.

User Manual
Page 22
Lift the battery cover up and slide it snaps into place. Remove the Battery 1. Press the battery cover release latch. 2. Push the top end of the battery down until it forward. 19 4.
Lift the battery cover up and slide it snaps into place. Remove the Battery 1. Press the battery cover release latch. 2. Push the top end of the battery down until it forward. 19 4.

User Manual
Page 23
...is a convenient, light-weight charger that rapidly charges your warranty. Note: You must use Samsung-approved charging devices and batteries. Using other accessories may cause damage. Note: For connection to maximize battery life. Plug the large end of the wrong adapter could damage your phone and void ...your phone from the phone. Use of the travel charger is powered by a rechargeable standard Li-ion battery. Battery 3. Only use an adaptor of charge time. Samsung accessories are designed to an electrical supply not located in the U.S., you must fully charge the...
...is a convenient, light-weight charger that rapidly charges your warranty. Note: You must use Samsung-approved charging devices and batteries. Using other accessories may cause damage. Note: For connection to maximize battery life. Plug the large end of the wrong adapter could damage your phone and void ...your phone from the phone. Use of the travel charger is powered by a rechargeable standard Li-ion battery. Battery 3. Only use an adaptor of charge time. Samsung accessories are designed to an electrical supply not located in the U.S., you must fully charge the...

User Manual
Page 24
...the charger/ accessory connector left side of the of the display indicates battery power level. If you continue to operate, a blinking empty battery icon appears and a tone sounds. See your phone while charging, however, the battery charges faster if the phone is turned off. Two to three minutes... before the battery becomes too low to operate the phone without charging, it shuts down. Lift the battery cover up and slide it must be purchased as an accessory. 2. Battery Indicator The battery indicator in the upper-right corner of the phone....
...the charger/ accessory connector left side of the of the display indicates battery power level. If you continue to operate, a blinking empty battery icon appears and a tone sounds. See your phone while charging, however, the battery charges faster if the phone is turned off. Two to three minutes... before the battery becomes too low to operate the phone without charging, it shuts down. Lift the battery cover up and slide it must be purchased as an accessory. 2. Battery Indicator The battery indicator in the upper-right corner of the phone....

User Manual
Page 25
... both FAT16 and FAT32. 32MB cards can only be inserted below the two memory card slot tabs. Card Memory. Options. Insert memory card under the battery cover. 2. Formatting Your microSD™ Card Using Your PC For best playback of 64MB and larger. Insert the memory card into the microSD card slot...
... both FAT16 and FAT32. 32MB cards can only be inserted below the two memory card slot tabs. Card Memory. Options. Insert memory card under the battery cover. 2. Formatting Your microSD™ Card Using Your PC For best playback of 64MB and larger. Insert the memory card into the microSD card slot...
User Manual
Page 37
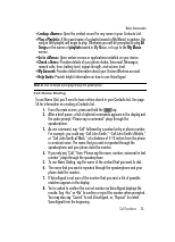
... will begin to : Open certain menus or applications installed on your device. • Check : Provides details of your phone status, Voicemail, Messages, missed calls, time, battery level, signal strength, and volume level. • My Account: Provides detail information about your Verizon Wireless account. • Help Guide: Provide helpful information on creating...
... will begin to : Open certain menus or applications installed on your device. • Check : Provides details of your phone status, Voicemail, Messages, missed calls, time, battery level, signal strength, and volume level. • My Account: Provides detail information about your Verizon Wireless account. • Help Guide: Provide helpful information on creating...
User Manual
Page 41
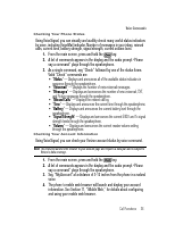
...details about configuring and using your account information. Displays and announces all of the available status indicators in sequence through the speakerphone. • "Battery" - Displays and announces the current time through the speakerphone. • "Voicemail" - Note: This features launches the browser to your account...status indicators by voice, including VoiceMail indicator, Number of messages in your inbox, missed calls, current time, battery strength, signal strength, current volume level. 1. From the main screen, press and hold the key. 2. Displays and announces the ...
...details about configuring and using your account information. Displays and announces all of the available status indicators in sequence through the speakerphone. • "Battery" - Displays and announces the current time through the speakerphone. • "Voicemail" - Note: This features launches the browser to your account...status indicators by voice, including VoiceMail indicator, Number of messages in your inbox, missed calls, current time, battery strength, signal strength, current volume level. 1. From the main screen, press and hold the key. 2. Displays and announces the ...

User Manual
Page 50
4: One Touch Dial 5: Voice Privacy 6: Data Settings 7: DTMF Tones 8: USB Auto Detection 9: Memory 1: Save Options 1: Pictures 2: Videos 3: Sounds 2: Phone Memory 1: Phone Memory Usage 2: My Pictures 3: My Videos 4: My Ringtones 5: My Music 6: My Sounds 3: Card Memory* 1: Card Memory Usage 2: My Pictures 3: My Videos 4: My Music 5: My Sounds 0: Phone Info 1: My Number 2: SW/HW Version 3: Icon Glossary *A microSD™ card must be insert in the microSD™ card slot located under the battery cover, between the camera lens and the battery. 47
4: One Touch Dial 5: Voice Privacy 6: Data Settings 7: DTMF Tones 8: USB Auto Detection 9: Memory 1: Save Options 1: Pictures 2: Videos 3: Sounds 2: Phone Memory 1: Phone Memory Usage 2: My Pictures 3: My Videos 4: My Ringtones 5: My Music 6: My Sounds 3: Card Memory* 1: Card Memory Usage 2: My Pictures 3: My Videos 4: My Music 5: My Sounds 0: Phone Info 1: My Number 2: SW/HW Version 3: Icon Glossary *A microSD™ card must be insert in the microSD™ card slot located under the battery cover, between the camera lens and the battery. 47

User Manual
Page 90
To save battery life or in the upper half of "0000" to send a passkey of the display. 7. Use the Navigation Key OK to highlight a Bluetooth device. Bluetooth Menu. 3. A ...
To save battery life or in the upper half of "0000" to send a passkey of the display. 7. Use the Navigation Key OK to highlight a Bluetooth device. Bluetooth Menu. 3. A ...

User Manual
Page 94
... to remain on as long as desired. 91 OK 5. Display Settings. Backlight Set the backlight for the display or keypad to remain on for your battery faster. 1. Press OK to 7 seconds, 15 seconds, 30 seconds, Always On, or Always Off. - Press 3. Press Settings & Tools and press OK . Always On: The keypad...
... to remain on as long as desired. 91 OK 5. Display Settings. Backlight Set the backlight for the display or keypad to remain on for your battery faster. 1. Press OK to 7 seconds, 15 seconds, 30 seconds, Always On, or Always Off. - Press 3. Press Settings & Tools and press OK . Always On: The keypad...

User Manual
Page 123
... opened, press the right or left to show hand icon indicating camera must be motionless to turn auto focus On or Off. (Auto focus increases battery consumption.) Self Timer: Off, 3 Sec., 5 Sec., 10 Sec. Resolution: (2048X1536), (1600X1200), (1280X960), (1024X768), (800X600), (640X480), (320X240), and Picture ID (160X120) Multi Shot: Series Shot, Divided...
... opened, press the right or left to show hand icon indicating camera must be motionless to turn auto focus On or Off. (Auto focus increases battery consumption.) Self Timer: Off, 3 Sec., 5 Sec., 10 Sec. Resolution: (2048X1536), (1600X1200), (1280X960), (1024X768), (800X600), (640X480), (320X240), and Picture ID (160X120) Multi Shot: Series Shot, Divided...

User Manual
Page 125
... select a shutter sound. - Flash: Off, On, Auto, Only This Shot AF Auto Focus: Allows you to turn auto focus On or Off. (Auto focus increases battery consumption.) Self Timer: Off, 3 Sec., 5 Sec., 10 Sec. OK 6. left or right 8. or 9. Note: When taking pictures in Flip Open Mode, pressing and holding the...
... select a shutter sound. - Flash: Off, On, Auto, Only This Shot AF Auto Focus: Allows you to turn auto focus On or Off. (Auto focus increases battery consumption.) Self Timer: Off, 3 Sec., 5 Sec., 10 Sec. OK 6. left or right 8. or 9. Note: When taking pictures in Flip Open Mode, pressing and holding the...


