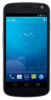
User Manual (user Manual) (ver.f4) (English)
Page 7
Your phone and accessories 2 Phone and accessories 3 4G LTE SIM card 4 Getting to know your phone 5 Inserting the 4G LTE SIM card and battery 7 Remove the phone's back cover 7 Replace the phone's back cover 8 Insert or remove a 4G LTE SIM card 9 Insert the battery 11 Remove the battery 12 Charging your phone 13 Turning the phone on and off 15 Turn on the phone 15 Turn off the phone 15 1 Contents
User Manual (user Manual) (ver.f4) (English)
Page 8
...it fully before using the Android™ mobile technology platform that runs on and off 2 For safety reasons, the battery is not shipped inside the phone, so you need to know your phone Inserting the 4G LTE SIM card and... battery Charging your phone Turning the phone on , visit your carrier's support site, or refer to the Android User's ... headset and wall/USB charger. This guide describes the parts of your phone, how to install and charge the battery, how to turn the phone on your phone.
User Manual (user Manual) (ver.f4) (English)
Page 9
Quick Reference Guide, RF Brochure, Health & safety and Warranty booklet & Important Customer Information Galaxy Nexus phone Battery Charger and USB data cable (charger varies by country) *Images simulated, actual contents may vary Headset 3 Phone and accessories Your Galaxy™ Nexus™ phone comes with the following accessories.
User Manual (user Manual) (ver.f4) (English)
Page 10
... scratch the SIM card. Take care when handling, installing, or removing the SIM card, and avoid exposing the SIM card to insert or remove the battery and 4G LTE SIM card. 4 Warning! If you can use . The 4G LTE SIM is a small, rectangular plastic card that stores your phone number, information... about activating the SIM card, visit: http://www.verizonwireless.com/4GSIM. See "Inserting the 4G LTE SIM card and battery" on page 7 to learn how to static electricity, water, or dirt.
User Manual (user Manual) (ver.f4) (English)
Page 12
... 13.) Other sections in the Android User's Guide. 6 Taking pictures and shooting videos are described in this chapter describe the use the phone, insert the battery and charge it on for the first time. Your carrier's support site and the Android User's Guide (available from www.vzw.com/galaxynexus) describe how... on and off, and more. Before you use and function of the phone, including turning it fully. (See "Inserting the 4G LTE SIM card and battery" on page 7 and "Charging your pictures.
User Manual (user Manual) (ver.f4) (English)
Page 13
Remove the phone's back cover S To remove the battery cover, pull up using the slot provided, while lifting the cover off the phone. 7 You must remove the phone's back cover. Inserting the 4G LTE SIM card and battery To install or replace the battery or 4G LTE SIM card, you must insert the battery and 4G LTE SIM card before you can use the phone.
User Manual (user Manual) (ver.f4) (English)
Page 14
Continue to press the edges of the battery cover. Replace the phone's back cover S To replace the battery cover, align the tabs, then press down on the bottom and top of the cover until the cover snaps into place. 8
User Manual (user Manual) (ver.f4) (English)
Page 15
If the phone is on, turn it into the slot. 9 Insert or remove a 4G LTE SIM card You must remove the phone's back cover and remove the battery to the upper right and gold contacts facing down, then sliding it off before removing the battery or 4G LTE SIM card. S Insert the 4G LTE SIM card by aligning it with the notch to insert or remove the 4G LTE SIM card.
User Manual (user Manual) (ver.f4) (English)
Page 17
See "Remove the phone's back cover" on page 7. 2 Align the gold contacts on the battery with the gold contacts on the phone, then gently press the battery into place. 11 Insert the battery You must open the phone's back cover to insert the battery. 1 Remove the back cover.
User Manual (user Manual) (ver.f4) (English)
Page 18
See "Turning the phone on and off" on , turn it off before removing the battery. 1 Turn off the phone. If the phone is on page 15. 2 Remove the back cover. See "Remove the phone's back cover" on page 7. 3 Use your finger to remove the battery. Remove the battery You must open the phone's back cover to lift the battery by the notch on the battery. 12
User Manual (user Manual) (ver.f4) (English)
Page 21
... prompted to turn off the phone. Depending on your phone's settings, you may be prompted to enter a Personal Identification Number (PIN) to fully charge the battery before turning on your phone. For more about working with the touchscreen and menus, see the Android User's Guide. 15 Turning the phone on and...
User Manual (user Manual) (ver.f4) (English)
Page 5
Try some apps 24 Start Gmail 24 Find People 26 Manage your Calendar 28 Use your Camera 29 Beam screen content 31 Manage downloads 32 Tune performance 33 Optimize battery life 33 Optimize data usage 35 Optimize memory usage 40 Learn the Phone app 43 Dial stored numbers 43 Answer or divert calls 45 Work with the Call log 46 Place an Internet (SIP) call 47 Listen to your voicemail 49 Dial by voice 50 Options during a call 51 Enter & edit text 53 Use the keyboard 53 Type text by speaking 56 2
User Manual (user Manual) (ver.f4) (English)
Page 7
..., or for more information, see a Welcome screen. Connect to mobile networks Connect to skip some steps. If you turn on using your phone's buttons, charger, battery, and other Google Account, go through the setup screens, you through the setup process. Get started Set up your phone For instructions on the phone...
User Manual (user Manual) (ver.f4) (English)
Page 11
... down from the top of the screen. S To see something like this: Status icons on the right display the current wireless and network connection strength, battery level, time, and more. System icons on the left tell you which apps have sent you search your phone or the Internet. Google Search, just...
User Manual (user Manual) (ver.f4) (English)
Page 36
..., Bluetooth, or GPS, use GPS (and thus more power) only when they're running. Then touch Airplane Mode. 33 Extend the life of your battery's life between charges by turning off features that this means you aren't using them off automatic syncing for a while, switch to turn off . They ...use the Settings app to Airplane mode: Press and hold the power switch until the Phone options dialog appears. You can extend your battery G If you need it, turn them . G Don't leave the Maps or Navigation apps open on a Home or All Apps screen. Tune performance Optimize...
User Manual (user Manual) (ver.f4) (English)
Page 37
...) are displayed at the bottom of the screen shows the breakdown of the screen. The list at the top of battery usage for individual apps and services. The discharge graph shows battery level over time since you last charged the device, and how long you stop some apps includes buttons that allow..., or stop the app completely. Touch a graph for some apps or services, your device may not work correctly. The details screen for more details. Check battery level and usage details G Open Settings > Device...
User Manual (user Manual) (ver.f4) (English)
Page 62
Connect to Wi-Fi networks Wi-Fi is a wireless networking technology that can provide Internet access at distances of your battery between charges, turn off Wi-Fi when you're not using it. You can also set up your network administrator for available Wi-Fi networks ...
User Manual (user Manual) (ver.f4) (English)
Page 65
.... G Wi-Fi frequency band: Specify Automatic, 5 GHz, or 2.4 GHz frequency bands 62 G Keep Wi-Fi during sleep. The latter choice is connected to a charger (when battery life isn't a problem), or never to stay connected to sleep. You may want to revisit this option to turn off notifications G Avoid poor connections: Check...
User Manual (user Manual) (ver.f4) (English)
Page 67
... locations. Turn Bluetooth on or off 1 Touch the Settings icon on a Home or All Apps screen. 2 Touch Wireless & networks. 3 Slide the Bluetooth switch on your battery between devices over a distance of the profiles supported by your device, read the owner's guide. To extend the life of your phone's Bluetooth radio. For...
User Manual (user Manual) (ver.f4) (English)
Page 72
... your phone via USB or Bluetooth and use your keyboard to navigate your phone's features: G Use the arrow keys to select items on your phone's battery. Keyboards In addition to entering text, you would with multiple text fields. 69 You pair and connect Bluetooth input devices to your phone's USB port...