
User Manual (ENGLISH)
Page 22
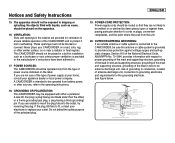
...% and connect the AC Cord On for 7 seconds. It may be displayed on the ACL for a second and off and the Viewfinder switches on automatically. ✤ Si vous rabattez l'écran ACL, celui-ci s'éteint et le viseur est automatiquement ✤ The continuous recording times given Time in the operating instructions are approximations. Turn the [Power] switch to the Battery Charging time Recording time ACL On...
...% and connect the AC Cord On for 7 seconds. It may be displayed on the ACL for a second and off and the Viewfinder switches on automatically. ✤ Si vous rabattez l'écran ACL, celui-ci s'éteint et le viseur est automatiquement ✤ The continuous recording times given Time in the operating instructions are approximations. Turn the [Power] switch to the Battery Charging time Recording time ACL On...

User Manual (ENGLISH)
Page 2
...Setting : System Menu Setting 23 Setting the Clock (Clock Set) ...23 Setting the Wireless Remote Control Acceptance (Remote) (SC-D364/D366 only 24 Setting the Beep Sound (Beep Sound 25 Setting the Shutter Sound (Shutter Sound) (SC-D363/D364/D365/D366 only 26 Selecting the OSD Language (Language 27 Viewing the Demonstration (Demonstration 28 Initial Setting : Display Menu Setting 29 Adjusting the LCD Screen (LCD Bright/ LCD Color 29 Displaying the Date/Time (Date/Time 30 Setting the TV Display (TV Display 31 Basic Recording 32 Using the Viewfinder...32 Inserting / Ejecting a Cassette...
...Setting : System Menu Setting 23 Setting the Clock (Clock Set) ...23 Setting the Wireless Remote Control Acceptance (Remote) (SC-D364/D366 only 24 Setting the Beep Sound (Beep Sound 25 Setting the Shutter Sound (Shutter Sound) (SC-D363/D364/D365/D366 only 26 Selecting the OSD Language (Language 27 Viewing the Demonstration (Demonstration 28 Initial Setting : Display Menu Setting 29 Adjusting the LCD Screen (LCD Bright/ LCD Color 29 Displaying the Date/Time (Date/Time 30 Setting the TV Display (TV Display 31 Basic Recording 32 Using the Viewfinder...32 Inserting / Ejecting a Cassette...

User Manual (ENGLISH)
Page 7
.../D366 0 I SC-D365/D366 Memory Stick (Duo)/ Memory Stick PRO/ MMC SD 0 I 33 SC- A high-resolution color TFT LCD of scene/action to be transferred to a PC, making it possible to record video onto a Memory Card. I Built-in Memory (SC-D366 only) You can use Memory Stick (Duo), Memory Stick PRO, MMC and SD. I 1200x Digital Zoom Allows you can easily record and playback standard photo images. - ENGLISH Getting to Know Your Camcorder Features I Digital Data Transfer Function with the Real Stereo and Audio Effect features. I High Power Zoom Lens Power Zoom lens allows users...
.../D366 0 I SC-D365/D366 Memory Stick (Duo)/ Memory Stick PRO/ MMC SD 0 I 33 SC- A high-resolution color TFT LCD of scene/action to be transferred to a PC, making it possible to record video onto a Memory Card. I Built-in Memory (SC-D366 only) You can use Memory Stick (Duo), Memory Stick PRO, MMC and SD. I 1200x Digital Zoom Allows you can easily record and playback standard photo images. - ENGLISH Getting to Know Your Camcorder Features I Digital Data Transfer Function with the Real Stereo and Audio Effect features. I High Power Zoom Lens Power Zoom lens allows users...

User Manual (ENGLISH)
Page 13
... Camcorder Remote Control (SC-D364/D366 only) 1. X2 15. I 13. ❙❙ 14. PHOTO SEARCH Button 6. F. SLOW (❙√ ) Button 15. DISPLAY Button 1. ZERO MEMORY ➥ 37 5. ADV ➥ 60 12. A.DUB 7. √√ (FF) 8. œœ (REW) 9. √ (PLAY) 10 Direction) SC-D364/D366 18. W/T (Zoom) 16. ADV 1. W/T (Zoom) Button 18. SELF TIMER ➥ 38 4. DISPLAY 17. SLOW(❙√) 13. ❙❙ (STILL) 12. SELF TIMER Button ➥page 38 4. DATE/TIME Button...
... Camcorder Remote Control (SC-D364/D366 only) 1. X2 15. I 13. ❙❙ 14. PHOTO SEARCH Button 6. F. SLOW (❙√ ) Button 15. DISPLAY Button 1. ZERO MEMORY ➥ 37 5. ADV ➥ 60 12. A.DUB 7. √√ (FF) 8. œœ (REW) 9. √ (PLAY) 10 Direction) SC-D364/D366 18. W/T (Zoom) 16. ADV 1. W/T (Zoom) Button 18. SELF TIMER ➥ 38 4. DISPLAY 17. SLOW(❙√) 13. ❙❙ (STILL) 12. SELF TIMER Button ➥page 38 4. DATE/TIME Button...
User Manual (ENGLISH)
Page 16
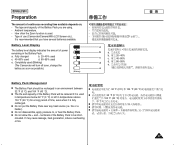
... DC Cable to an AC Cord On for Error - Connect the DC cable to the Camcorder. Press and hold the DISPLAY button while charging and the charging status will still discharge. ENGLISH Preparation Using the Lithium Ion Battery Pack ✤ Use SB-LSM80 or SB-LSM160 Battery Pack only. ✤ ✤ The Battery Pack may differ Battery charged 0% 50% from the Camcorder. Reset the Battery 3. charging. 5. Actual recording time depends on the Camcorder. DISPLAY LCD 7 0 100% 0 0 6. 0 Off 0 / LCD LCD...
... DC Cable to an AC Cord On for Error - Connect the DC cable to the Camcorder. Press and hold the DISPLAY button while charging and the charging status will still discharge. ENGLISH Preparation Using the Lithium Ion Battery Pack ✤ Use SB-LSM80 or SB-LSM160 Battery Pack only. ✤ ✤ The Battery Pack may differ Battery charged 0% 50% from the Camcorder. Reset the Battery 3. charging. 5. Actual recording time depends on the Camcorder. DISPLAY LCD 7 0 100% 0 0 6. 0 Off 0 / LCD LCD...
User Manual (ENGLISH)
Page 17
... often the Zoom function is recommended that you are using. - - Ambient temperature. - - Fully charged b. 20~40% used c. 40~80% used d. 80~95% used . - - I / circuited. I The life and capacity of power remaining in an environment between 32 °F (0 °C) and 104 °F (40 °C). ENGLISH Preparation The amount of use (Camcorder/Camera/With LCD Screen etc.). - It is used e. b. 20~40% c. 40~80% d. 80~95% e. 0 0 0 Battery Pack...
... often the Zoom function is recommended that you are using. - - Ambient temperature. - - Fully charged b. 20~40% used c. 40~80% used d. 80~95% used . - - I / circuited. I The life and capacity of power remaining in an environment between 32 °F (0 °C) and 104 °F (40 °C). ENGLISH Preparation The amount of use (Camcorder/Camera/With LCD Screen etc.). - It is used e. b. 20~40% c. 40~80% d. 80~95% e. 0 0 0 Battery Pack...

User Manual (ENGLISH)
Page 23
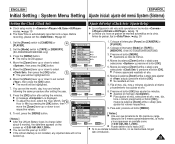
... 1. [Power] [CAMERA] [PLAYER] 0 2. [Mode] [TAPE] [MEMORY] 0 SC-D363/D364/ D365/D366 3. [MENU] 0 I 0 4. [Zoom] [OK] 0 5. [Zoom] [OK] 0 I 0 6. [Zoom] [OK] 0 I 0 7. / / 0 8. [OK] 0 I 0 I [OK] / / / [Zoom] 0 9. [MENU] 0 [ ] I 6 0 I 20370 I After the Lithium Battery loses its charge (after setting the minutes. ENGLISH Initial Setting : System Menu Setting Setting the Clock (Clock Set) ✤ Clock setup works in /// modes. ➥page 19 ✤ The Date/Time is automatically recorded onto a tape. Set the [Power] switch to...
... 1. [Power] [CAMERA] [PLAYER] 0 2. [Mode] [TAPE] [MEMORY] 0 SC-D363/D364/ D365/D366 3. [MENU] 0 I 0 4. [Zoom] [OK] 0 5. [Zoom] [OK] 0 I 0 6. [Zoom] [OK] 0 I 0 7. / / 0 8. [OK] 0 I 0 I [OK] / / / [Zoom] 0 9. [MENU] 0 [ ] I 6 0 I 20370 I After the Lithium Battery loses its charge (after setting the minutes. ENGLISH Initial Setting : System Menu Setting Setting the Clock (Clock Set) ✤ Clock setup works in /// modes. ➥page 19 ✤ The Date/Time is automatically recorded onto a tape. Set the [Power] switch to...

User Manual (ENGLISH)
Page 36
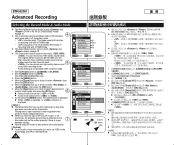
ENGLISH Basic Recording Reviewing and Searching when a Recording (REC SEARCH) ✤ The REC SEARCH function works only in mode. ➥page 19 ✤ Used to review previously recorded images or to find a point to save Battery power. 0 [Start/Stop] [Off] STBY / [CAMERA]0 0 5 [Power] 36 This auto power off automatically. Set to STBY mode by pressing [Start/Stop] button. 2. [REC SEARCH -] enables you to play the recording backwards and [REC SEARCH +] enables you to play in reverse for more than 5 minutes without...
ENGLISH Basic Recording Reviewing and Searching when a Recording (REC SEARCH) ✤ The REC SEARCH function works only in mode. ➥page 19 ✤ Used to review previously recorded images or to find a point to save Battery power. 0 [Start/Stop] [Off] STBY / [CAMERA]0 0 5 [Power] 36 This auto power off automatically. Set to STBY mode by pressing [Start/Stop] button. 2. [REC SEARCH -] enables you to play the recording backwards and [REC SEARCH +] enables you to play in reverse for more than 5 minutes without...
User Manual (ENGLISH)
Page 44
... [Mode] [TAPE] 0 SC-D363/D364/ D365/D366 3. [MENU] 0 4. [Zoom] [OK] 0 5. [Zoom] [OK] 0 6. [Zoom] [OK] 0 I 0 I 0 7. [MENU] 0 0 I 0 [ ] I 0 0 I SP LP LP 0 I SP [ ] I Record using this Camcorder to [TAPE]. (SC-D363/D364/D365/D366 only) 3. The original stereo sound can be dubbed onto the Sub (Sound2) track. 6 - : You can record two 12Bit stereo sound tracks. Audio dubbing is displayed. Set the [Power] switch to select , then press the [OK] button. 5. Set the [Mode] switch to play ): This mode permits 90 minutes of recording time...
... [Mode] [TAPE] 0 SC-D363/D364/ D365/D366 3. [MENU] 0 4. [Zoom] [OK] 0 5. [Zoom] [OK] 0 6. [Zoom] [OK] 0 I 0 I 0 7. [MENU] 0 0 I 0 [ ] I 0 0 I SP LP LP 0 I SP [ ] I Record using this Camcorder to [TAPE]. (SC-D363/D364/D365/D366 only) 3. The original stereo sound can be dubbed onto the Sub (Sound2) track. 6 - : You can record two 12Bit stereo sound tracks. Audio dubbing is displayed. Set the [Power] switch to select , then press the [OK] button. 5. Set the [Mode] switch to play ): This mode permits 90 minutes of recording time...

User Manual (ENGLISH)
Page 58
... monitor the playback picture on the Camcorder. ✤ When you hear sounds once the tape is in play operation, press the [I (STOP)] button. 0 ➥ 19 LCD 0 1. [Power] [PLAYER] 2. [Mode] [TAPE] SC-D363/D364/ D365/D366 3. 0 ➥ 32 4. Set the [Mode] switch to start playback. Press the PLAY/STILL)] button to [TAPE]. (SC-D363/D364/D365/D366 only) 56 3. I To stop rewinding, press the [I (STOP)] 0 0 0 0 0 0 0 Adjusting the LCD Bright/LCD Color during Playback ✤ You can adjust the LCD Bright/LCD Color during playback. ✤ The adjustment method...
... monitor the playback picture on the Camcorder. ✤ When you hear sounds once the tape is in play operation, press the [I (STOP)] button. 0 ➥ 19 LCD 0 1. [Power] [PLAYER] 2. [Mode] [TAPE] SC-D363/D364/ D365/D366 3. 0 ➥ 32 4. Set the [Mode] switch to start playback. Press the PLAY/STILL)] button to [TAPE]. (SC-D363/D364/D365/D366 only) 56 3. I To stop rewinding, press the [I (STOP)] 0 0 0 0 0 0 0 Adjusting the LCD Bright/LCD Color during Playback ✤ You can adjust the LCD Bright/LCD Color during playback. ✤ The adjustment method...
User Manual (ENGLISH)
Page 84
... M.Player Mode 2/46 be set a print mark on the 5 photo image displayed on the LCD Screen. To remove individual file's Print Mark, select the file and set the 002 number of stored images. ENGLISH Digital Still Camera Mode (SC-D363/D364/D365/D366 only) SC-D363/D364/ D365/D366 Marking Images for Print Mark the photo image that you want to mark. 4. M.Play Select √Photo 1. Set the [Power] switch to [MEMORY]. ZOOM Move OK Select MENU Exit I 0 3. M.Player Mode Back Memory Type M.Play Select Delete Delete All...
... M.Player Mode 2/46 be set a print mark on the 5 photo image displayed on the LCD Screen. To remove individual file's Print Mark, select the file and set the 002 number of stored images. ENGLISH Digital Still Camera Mode (SC-D363/D364/D365/D366 only) SC-D363/D364/ D365/D366 Marking Images for Print Mark the photo image that you want to mark. 4. M.Play Select √Photo 1. Set the [Power] switch to [MEMORY]. ZOOM Move OK Select MENU Exit I 0 3. M.Player Mode Back Memory Type M.Play Select Delete Delete All...
User Manual (ENGLISH)
Page 85
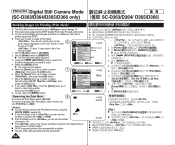
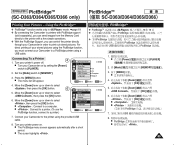
... connecting the Camcorder to printers with PictBridge support ✤ PictBridge (sold separately), you can control the printer directly 0 through your printer power on by setting the [Power] switch to print out stored pictures. Turn your Camcorder to the printer using the provided USB cable. 8. 0 I Turn your Camcorder to a PictBridge printer using the PictBridge function, 0 PictBridge PictBridge 0 you can send images from the Memory Card directly to select , then press the [OK] button. 6. Press the [MENU] button...
... connecting the Camcorder to printers with PictBridge support ✤ PictBridge (sold separately), you can control the printer directly 0 through your printer power on by setting the [Power] switch to print out stored pictures. Turn your Camcorder to the printer using the provided USB cable. 8. 0 I Turn your Camcorder to a PictBridge printer using the PictBridge function, 0 PictBridge PictBridge 0 you can send images from the Memory Card directly to select , then press the [OK] button. 6. Press the [MENU] button...
User Manual (ENGLISH)
Page 89
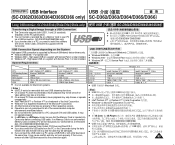
... USB USB Microsoft (Windows) I Windows 98SE/ME - ENGLISH USB Interface USB (SC-D362/D363/D364/D365/D366 only) SC-D362/D363/D364/D365/D366 Using USB Interface (SC-D362/D363/D364/D365/D366 only) Transferring a Digital Image through a USB Connection ✤ The Camcorder supports both DV and USB cables. I On a slower PC than recommended, movie playback may skip frames or operate unexpectedly. High speed USB on a Memory Card to your Camcorder as a removable disk. (SC-D363/D364/D365/D366 only) I USB Streaming requires Video Codec, DV Driver and DirectX 9.0. I Windows...
... USB USB Microsoft (Windows) I Windows 98SE/ME - ENGLISH USB Interface USB (SC-D362/D363/D364/D365/D366 only) SC-D362/D363/D364/D365/D366 Using USB Interface (SC-D362/D363/D364/D365/D366 only) Transferring a Digital Image through a USB Connection ✤ The Camcorder supports both DV and USB cables. I On a slower PC than recommended, movie playback may skip frames or operate unexpectedly. High speed USB on a Memory Card to your Camcorder as a removable disk. (SC-D363/D364/D365/D366 only) I USB Streaming requires Video Codec, DV Driver and DirectX 9.0. I Windows...
User Manual (ENGLISH)
Page 103
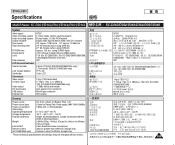
... recording system Audio recording system Usable cassette Tape speed Tape recording time FF/REW time Image device Lens Filter diameter LCD Screen/Viewfinder Size/dot number LCD Screen Method Viewfinder Connectors Video output S-video output Audio output DV input/output USB output External mic NTSC 2 rotary heads, Helical scanning system Rotary heads, 12/16b PCM system Digital video tape (6.35mm width): Mini DV cassette SP: approx. 18.81mm/s LP: approx. 12.56mm/s SP: 60 minutes (when using DVM 60), LP: 90 minutes (when using DVM 60) Approx. 150 sec. (using DVM60 tape) CCD (Charge Coupled Device...
... recording system Audio recording system Usable cassette Tape speed Tape recording time FF/REW time Image device Lens Filter diameter LCD Screen/Viewfinder Size/dot number LCD Screen Method Viewfinder Connectors Video output S-video output Audio output DV input/output USB output External mic NTSC 2 rotary heads, Helical scanning system Rotary heads, 12/16b PCM system Digital video tape (6.35mm width): Mini DV cassette SP: approx. 18.81mm/s LP: approx. 12.56mm/s SP: 60 minutes (when using DVM 60), LP: 90 minutes (when using DVM 60) Approx. 150 sec. (using DVM60 tape) CCD (Charge Coupled Device...
User Manual (ENGLISH)
Page 3
..., PART H) NEC NATIONAL ELECTRICAL CODE POWER SOURCES: The CAMCORDER should be operated only from battery power, or other sources, refer to be sure the antenna or cable system is provided or the manufacturer's instructions have been adhered to protect it from the unit. 20. OUTDOOR ANTENNA GROUNDING: If an outside antenna or cable system is connected to the CAMCORDER, be operated from the type...
..., PART H) NEC NATIONAL ELECTRICAL CODE POWER SOURCES: The CAMCORDER should be operated only from battery power, or other sources, refer to be sure the antenna or cable system is provided or the manufacturer's instructions have been adhered to protect it from the unit. 20. OUTDOOR ANTENNA GROUNDING: If an outside antenna or cable system is connected to the CAMCORDER, be operated from the type...
User Manual (ENGLISH)
Page 6
... System Menu Setting 23 Setting the Clock (Clock Set 23 Setting the Wireless Remote Control Acceptance (Remote) (SC-D364/D366 only 24 Setting the Beep Sound (Beep Sound 25 2 Setting the Shutter Sound (Shutter Sound) (SC-D363/D364/D365/D366 only 26 Selecting the OSD Language (Language 27 Viewing the Demonstration (Demonstration 28 Initial Setting : Display Menu Setting 29 Adjusting the LCD Screen (LCD Bright/ LCD Color) ..........29 Displaying the Date/Time (Date/Time 30 Setting the TV Display (TV Display 31 Basic Recording 32 Using the Viewfinder 32 Inserting / Ejecting a Cassette...
... System Menu Setting 23 Setting the Clock (Clock Set 23 Setting the Wireless Remote Control Acceptance (Remote) (SC-D364/D366 only 24 Setting the Beep Sound (Beep Sound 25 2 Setting the Shutter Sound (Shutter Sound) (SC-D363/D364/D365/D366 only 26 Selecting the OSD Language (Language 27 Viewing the Demonstration (Demonstration 28 Initial Setting : Display Menu Setting 29 Adjusting the LCD Screen (LCD Bright/ LCD Color) ..........29 Displaying the Date/Time (Date/Time 30 Setting the TV Display (TV Display 31 Basic Recording 32 Using the Viewfinder 32 Inserting / Ejecting a Cassette...

User Manual (ENGLISH)
Page 62
... disabled while PB Zoom is in use. 56 [05] † √ SP 0:46:00:11 60min ... 58 Set the [Power] switch to the starting point. Insert the tape you cannot hear sound from the speaker. ✤ When the AV cable is connected to the Camcorder, you wish to view. ➥page 32 4. I (STOP)] button. I To stop the play , use the LCD Screen for playback, you can view the picture you recorded on the LCD Screen. 1. Open...
... disabled while PB Zoom is in use. 56 [05] † √ SP 0:46:00:11 60min ... 58 Set the [Power] switch to the starting point. Insert the tape you cannot hear sound from the speaker. ✤ When the AV cable is connected to the Camcorder, you wish to view. ➥page 32 4. I (STOP)] button. I To stop the play , use the LCD Screen for playback, you can view the picture you recorded on the LCD Screen. 1. Open...

User Manual (ENGLISH)
Page 88
... format. ✤ You can automatically print images recorded on a Memory Card with the Camcorder. 2/46 800x600 100-0002 84 Memory Type M.Play Select Delete Delete All √Memory Card √Photo I If the Print Mark is set to , you want to [PLAYER]. 2. I The menu list will appear. 5. It can directly access the Print Mark function using the [QUICK MENU] button. ➥page 20 I The option may require extended operation time depending on the LCD Screen. Move the [Zoom...
... format. ✤ You can automatically print images recorded on a Memory Card with the Camcorder. 2/46 800x600 100-0002 84 Memory Type M.Play Select Delete Delete All √Memory Card √Photo I If the Print Mark is set to , you want to [PLAYER]. 2. I The menu list will appear. 5. It can directly access the Print Mark function using the [QUICK MENU] button. ➥page 20 I The option may require extended operation time depending on the LCD Screen. Move the [Zoom...

User Manual (ENGLISH)
Page 107
... recording system Audio recording system Usable cassette Tape speed Tape recording time FF/REW time Image device Lens Filter diameter LCD Screen/Viewfinder Size/dot number LCD Screen Method Viewfinder Connectors Video output S-video output Audio output DV input/output USB output External mic NTSC 2 rotary heads, Helical scanning system Rotary heads, 12/16b PCM system Digital video tape (6.35mm width): Mini DV cassette SP: approx. 18.81mm/s LP: approx. 12.56mm/s SP: 60 minutes (when using DVM 60), LP: 90 minutes (when using DVM 60) Approx. 150 sec. (using DVM60 tape) CCD (Charge Coupled Device...
... recording system Audio recording system Usable cassette Tape speed Tape recording time FF/REW time Image device Lens Filter diameter LCD Screen/Viewfinder Size/dot number LCD Screen Method Viewfinder Connectors Video output S-video output Audio output DV input/output USB output External mic NTSC 2 rotary heads, Helical scanning system Rotary heads, 12/16b PCM system Digital video tape (6.35mm width): Mini DV cassette SP: approx. 18.81mm/s LP: approx. 12.56mm/s SP: 60 minutes (when using DVM 60), LP: 90 minutes (when using DVM 60) Approx. 150 sec. (using DVM60 tape) CCD (Charge Coupled Device...
User Manual (ENGLISH)
Page 23
... Initial Setting : System Menu Setting Ajuste inicial: ajuste del menú System (Sistema) Setting the Clock (Clock Set) Ajuste del reloj (Ajuste Reloj) ✤ Clock setup works in /// modes. ➥page 19 ✤ The Date/Time is not installed, any inputted data will be highlighted. 7. Antes de grabar, fije la . ➥pág. 30 1. Set the [Power] switch to [TAPE] or [MEMORY]. (SC-D363/D364/D365/D366 only) 3. Move the [Zoom] lever...
... Initial Setting : System Menu Setting Ajuste inicial: ajuste del menú System (Sistema) Setting the Clock (Clock Set) Ajuste del reloj (Ajuste Reloj) ✤ Clock setup works in /// modes. ➥page 19 ✤ The Date/Time is not installed, any inputted data will be highlighted. 7. Antes de grabar, fije la . ➥pág. 30 1. Set the [Power] switch to [TAPE] or [MEMORY]. (SC-D363/D364/D365/D366 only) 3. Move the [Zoom] lever...


