
User Manual (user Manual) (ver.1.0) (English)
Page 2
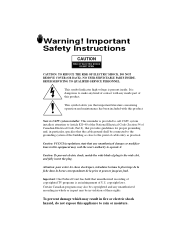
... be connected to the grounding system of the building as close to operate it. copyright laws. This symbol alerts you that unauthorized recording of copyrighted TV programs is present inside part of these rights. Warning! Caution: To prevent electric shock, match the wide blade of U.S. Important: One Federal Court has held...
... be connected to the grounding system of the building as close to operate it. copyright laws. This symbol alerts you that unauthorized recording of copyrighted TV programs is present inside part of these rights. Warning! Caution: To prevent electric shock, match the wide blade of U.S. Important: One Federal Court has held...

User Manual (user Manual) (ver.1.0) (English)
Page 3
...class. If the plug still does not fit, contact your electrician to replace your safety, this TV is a possibility, such as near a radiator or heat register. Thank You for Choosing Samsung Thank you are not sure of the type of power supplied to your home, consult your ...Follow all warnings on or against them. A falling TV can fall. Move the TV and cart with the TV. Do not block these safety precautions in the cabinet for choosing Samsung! Such additions can increase the risk of the manufacturer. Your new Samsung TV represents the latest in water is equipped with any ...
...class. If the plug still does not fit, contact your electrician to replace your safety, this TV is a possibility, such as near a radiator or heat register. Thank You for Choosing Samsung Thank you are not sure of the type of power supplied to your home, consult your ...Follow all warnings on or against them. A falling TV can fall. Move the TV and cart with the TV. Do not block these safety precautions in the cabinet for choosing Samsung! Such additions can increase the risk of the manufacturer. Your new Samsung TV represents the latest in water is equipped with any ...
User Manual (user Manual) (ver.1.0) (English)
Page 4
...is grounded so as the original part. If an outside antenna system, be sure the antenna or cable system is damaged - if the TV does not operate normally by the operating instructions. Unauthorized substitutions may result in a well-ventilated area. Possible fire hazard. • Keep ... of television closed captioning in the unit, where they can touch dangerous voltage points or damage parts. 2 SAFETY • Unplug the TV from the wall outlet and disconnect the antenna or cable system during a lightning storm or when left unattended and unused for the grounding ...
...is grounded so as the original part. If an outside antenna system, be sure the antenna or cable system is damaged - if the TV does not operate normally by the operating instructions. Unauthorized substitutions may result in a well-ventilated area. Possible fire hazard. • Keep ... of television closed captioning in the unit, where they can touch dangerous voltage points or damage parts. 2 SAFETY • Unplug the TV from the wall outlet and disconnect the antenna or cable system during a lightning storm or when left unattended and unused for the grounding ...

User Manual (user Manual) (ver.1.0) (English)
Page 5
... 2.1 Antennas with 300-ohm Flat Twin Leads 2.1 Antennas with 75-ohm Round Leads 2.2 Separate VHF and UHF Antennas 2.2 Connecting Cable TV 2.2 Cable without a Cable Box 2.2 Connecting to a Cable Box that Descrambles All Channels .2.3 Connecting to a Cable Box that Descrambles Some...a VCR 2.5 Connecting an S-VHS VCR 2.6 Connecting a DVD Player 2.7 Connecting a Digital TV Set-Top Box 2.7 Connecting a Camcorder 2.8 Installing Batteries in the Remote Control 2.9 Chapter 3: Operation 3.1 Turning the TV On and Off 3.1 Plug & Play Feature 3.1 Viewing the Menus and On-Screen Displays 3.3...
... 2.1 Antennas with 300-ohm Flat Twin Leads 2.1 Antennas with 75-ohm Round Leads 2.2 Separate VHF and UHF Antennas 2.2 Connecting Cable TV 2.2 Cable without a Cable Box 2.2 Connecting to a Cable Box that Descrambles All Channels .2.3 Connecting to a Cable Box that Descrambles Some...a VCR 2.5 Connecting an S-VHS VCR 2.6 Connecting a DVD Player 2.7 Connecting a Digital TV Set-Top Box 2.7 Connecting a Camcorder 2.8 Installing Batteries in the Remote Control 2.9 Chapter 3: Operation 3.1 Turning the TV On and Off 3.1 Plug & Play Feature 3.1 Viewing the Menus and On-Screen Displays 3.3...

User Manual (user Manual) (ver.1.0) (English)
Page 6
... the V-Chip 4.16 Setting Up Your Personal ID Number (PIN 4.16 HHow to Enable/Disable the V-Chip 4.17 How to Set up Restrictions Using the "TV guidelines" . . . .4.17 How to Set up Restrictions using the MPAA Ratings: G, PG, PG-13, R, NC-17, X 4.18 How to Reset the... TV after the V-Chip Blocks a Channel ("Emergency Escape 4.19 Chapter 5: PC Display 5.1 Using Your TV as a Computer (PC) Display 5.1 How to Connect Your PC to the TV 5.1 How to Set up Your PC Software (Windows only 5.2 Adjusting the Screen Quality...
... the V-Chip 4.16 Setting Up Your Personal ID Number (PIN 4.16 HHow to Enable/Disable the V-Chip 4.17 How to Set up Restrictions Using the "TV guidelines" . . . .4.17 How to Set up Restrictions using the MPAA Ratings: G, PG, PG-13, R, NC-17, X 4.18 How to Reset the... TV after the V-Chip Blocks a Channel ("Emergency Escape 4.19 Chapter 5: PC Display 5.1 Using Your TV as a Computer (PC) Display 5.1 How to Connect Your PC to the TV 5.1 How to Set up Your PC Software (Windows only 5.2 Adjusting the Screen Quality...

User Manual (user Manual) (ver.1.0) (English)
Page 7
...control • Easy-to-use on-screen menu system • Automatic timer to turn the TV on and off • Adjustable picture and sound settings that includes the following items are missing, contact your LCD TV. Remote Control & Batteries (AAA x 2) Owner's Instructions 15-pin D-Sub Signal Cable 1.1 ... Cable DC Adapter Power Cord If any items are included with the latest technology. This TV is a high-performance unit that can be stored in the TV's memory • Automatic channel tuning for up to 181 channels • A special filter to reduce or eliminate reception problems &#...
...control • Easy-to-use on-screen menu system • Automatic timer to turn the TV on and off • Adjustable picture and sound settings that includes the following items are missing, contact your LCD TV. Remote Control & Batteries (AAA x 2) Owner's Instructions 15-pin D-Sub Signal Cable 1.1 ... Cable DC Adapter Power Cord If any items are included with the latest technology. This TV is a high-performance unit that can be stored in the TV's memory • Automatic channel tuning for up to 181 channels • A special filter to reduce or eliminate reception problems &#...

User Manual (user Manual) (ver.1.0) (English)
Page 8
...the on-screen menu. 1.2 CHAPTER ONE: YOUR NEW TV To use the remote control. Œ SOURCE Press this spot on the TV. ˇ VOL(VOLUME) - , + Press to increase or decrease the volume. YOUR NEW TV Familiarizing Yourself with The TV Front Panel Buttons The buttons on the front panel ...control your TV's features. ∏ Remote Control Sensor Aim the remote control...
...the on-screen menu. 1.2 CHAPTER ONE: YOUR NEW TV To use the remote control. Œ SOURCE Press this spot on the TV. ˇ VOL(VOLUME) - , + Press to increase or decrease the volume. YOUR NEW TV Familiarizing Yourself with The TV Front Panel Buttons The buttons on the front panel ...control your TV's features. ∏ Remote Control Sensor Aim the remote control...

User Manual (user Manual) (ver.1.0) (English)
Page 9
YOUR NEW TV Side Panel Jacks You can use the side panel jacks to connect an A/V component that is used only occasionally, such as a camcorder or video game. (... game. ˆ Kensington lock (See page A.4) ˇ SUPER VIDEO IN jack Used to connect a S-Video signal from a camcorder or a video game. 1.3 CHAPTER ONE: YOUR NEW TV
YOUR NEW TV Side Panel Jacks You can use the side panel jacks to connect an A/V component that is used only occasionally, such as a camcorder or video game. (... game. ˆ Kensington lock (See page A.4) ˇ SUPER VIDEO IN jack Used to connect a S-Video signal from a camcorder or a video game. 1.3 CHAPTER ONE: YOUR NEW TV

User Manual (user Manual) (ver.1.0) (English)
Page 10
...or to connect an A/V component that will be connected continuously, such as a VCR or a DVD player. YOUR NEW TV Rear Panel Jacks Use the rear panel jacks to a cable TV system. 1.4 CHAPTER ONE: YOUR NEW TV COMPONENT 1(DVD) COMPONENT 2(DTV) PC Y Pb Pr AUDIO(L) AUDIO(R) Y Pb Pr AUDIO(L) AUDIO(R) AUDIO(ST)... VIDEO TV ANTENNA Œ POWER OUTPUT CONNECTOR ´ POWER INPUT CONNECTOR ˇ COMPONENT 1(DVD) Connects component video/audio from a DVD player. ¨ COMPONENT 2(DTV) ...
...or to connect an A/V component that will be connected continuously, such as a VCR or a DVD player. YOUR NEW TV Rear Panel Jacks Use the rear panel jacks to a cable TV system. 1.4 CHAPTER ONE: YOUR NEW TV COMPONENT 1(DVD) COMPONENT 2(DTV) PC Y Pb Pr AUDIO(L) AUDIO(R) Y Pb Pr AUDIO(L) AUDIO(R) AUDIO(ST)... VIDEO TV ANTENNA Œ POWER OUTPUT CONNECTOR ´ POWER INPUT CONNECTOR ˇ COMPONENT 1(DVD) Connects component video/audio from a DVD player. ¨ COMPONENT 2(DTV) ...

User Manual (user Manual) (ver.1.0) (English)
Page 11
... can use the remote control up to stop the action during a particular scene. When using the remote, always point it directly at the TV. Œ POWER Turns the TV on the main screen with the signal in the PIP window only). VOL -, VOL + Press to increase or decrease the volume. (Also used...CHv or CHw to change channels in the PIP window. Press again to resume normal video. Ú S.STD Adjust the TV sound by selecting one of the TV screen. 1.5 CHAPTER ONE: YOUR NEW TV " +100 Press to any of the four corners of the available signal sources for automatic shutoff. Ò STILL Press...
... can use the remote control up to stop the action during a particular scene. When using the remote, always point it directly at the TV. Œ POWER Turns the TV on the main screen with the signal in the PIP window only). VOL -, VOL + Press to increase or decrease the volume. (Also used...CHv or CHw to change channels in the PIP window. Press again to resume normal video. Ú S.STD Adjust the TV sound by selecting one of the TV screen. 1.5 CHAPTER ONE: YOUR NEW TV " +100 Press to any of the four corners of the available signal sources for automatic shutoff. Ò STILL Press...

User Manual (user Manual) (ver.1.0) (English)
Page 12
... from the twin leads under the screws on a 300-75 ohm adaptor (not supplied). Use a screwdriver to tighten the screws. 2 Plug the adaptor into the TV ANTENNA terminal on the bottom of leads that look like this , see "Separate VHF and UHF Antennas," on page 2.2. 2 C h a p t e r Tw o INSTALLATION Connecting VHF and UHF...
... from the twin leads under the screws on a 300-75 ohm adaptor (not supplied). Use a screwdriver to tighten the screws. 2 Plug the adaptor into the TV ANTENNA terminal on the bottom of leads that look like this , see "Separate VHF and UHF Antennas," on page 2.2. 2 C h a p t e r Tw o INSTALLATION Connecting VHF and UHF...

User Manual (user Manual) (ver.1.0) (English)
Page 13
...at most electronics shops). 1 Connect both antenna leads to the TV. INSTALLATION Antennas with 75-ohm Round Leads 1 Plug the antenna lead into the TV ANTENNA terminal on the bottom of the rear panel. w Because this TV is cable-ready, you must combine the two antenna signals before ...connecting the antennas to the combiner. 2 Plug the combiner into the TV ANTENNA terminal on back of the back panel. Connecting Cable TV To connect to view unscrambled cable channels. 2.2 CHAPTER TWO: INSTALLATION Separate VHF and UHF Antennas If you ...
...at most electronics shops). 1 Connect both antenna leads to the TV. INSTALLATION Antennas with 75-ohm Round Leads 1 Plug the antenna lead into the TV ANTENNA terminal on the bottom of the rear panel. w Because this TV is cable-ready, you must combine the two antenna signals before ...connecting the antennas to the combiner. 2 Plug the combiner into the TV ANTENNA terminal on back of the back panel. Connecting Cable TV To connect to view unscrambled cable channels. 2.2 CHAPTER TWO: INSTALLATION Separate VHF and UHF Antennas If you ...

User Manual (user Manual) (ver.1.0) (English)
Page 14
... Channels w 1 Find the cable that is connected to the ANTENNA IN terminal on your cable box. Connecting to a Cable Box that is connected to the TV ANTENNA terminal on the back of coaxial cable. (These items are available at most electronics stores.) 1 Find and disconnect the cable that Descrambles Some Channels... this cable to the ANTENNA OUT terminal on your cable box. You will need a two-way splitter, an RF (A/B) switch, and four lengths of the TV.
... Channels w 1 Find the cable that is connected to the ANTENNA IN terminal on your cable box. Connecting to a Cable Box that is connected to the TV ANTENNA terminal on the back of coaxial cable. (These items are available at most electronics stores.) 1 Find and disconnect the cable that Descrambles Some Channels... this cable to the ANTENNA OUT terminal on your cable box. You will need a two-way splitter, an RF (A/B) switch, and four lengths of the TV.

User Manual (user Manual) (ver.1.0) (English)
Page 15
... the last coaxial cable between the OUT terminal on the RF (A/B) switch and the VHF/UHF terminal on the rear of the TV. After you will need to tune your TV to the "A" position for normal viewing. Set the A/B switch to the "B" position to view scrambled channels. (When you set the A/B switch...
... the last coaxial cable between the OUT terminal on the RF (A/B) switch and the VHF/UHF terminal on the rear of the TV. After you will need to tune your TV to the "A" position for normal viewing. Set the A/B switch to the "B" position to view scrambled channels. (When you set the A/B switch...

User Manual (user Manual) (ver.1.0) (English)
Page 16
... your VCR tape. 2.5 CHAPTER TWO: INSTALLATION Follow the instructions in "Viewing a VCR or Camcorder Tape" to the left and right audio input jacks of the TV. If your VCR is usually included with a VCR. (If not, check your local electronics store). 4 Connect a set of audio cables between the AUDIO OUT jacks... on the VCR and the AUDIO jacks on the TV. A coaxial cable is stereo, you must connect two cables. 5 Connect a video cable between the VIDEO OUT jack on the VCR and the VIDEO jack on...
... your VCR tape. 2.5 CHAPTER TWO: INSTALLATION Follow the instructions in "Viewing a VCR or Camcorder Tape" to the left and right audio input jacks of the TV. If your VCR is usually included with a VCR. (If not, check your local electronics store). 4 Connect a set of audio cables between the AUDIO OUT jacks... on the VCR and the AUDIO jacks on the TV. A coaxial cable is stereo, you must connect two cables. 5 Connect a video cable between the VIDEO OUT jack on the VCR and the VIDEO jack on...

User Manual (user Manual) (ver.1.0) (English)
Page 17
... an S-video cable between the S-VIDEO OUT jack on the VCR and the S-VIDEO INPUT jack on the TV. INSTALLATION Connecting an S-VHS VCR Your Samsung TV can be connected to an S-Video signal from an S-VHS VCR. (This connection delivers a better picture as compared to a standard VHS VCR.) 1 To begin, follow ...
... an S-video cable between the S-VIDEO OUT jack on the VCR and the S-VIDEO INPUT jack on the TV. INSTALLATION Connecting an S-VHS VCR Your Samsung TV can be connected to an S-Video signal from an S-VHS VCR. (This connection delivers a better picture as compared to a standard VHS VCR.) 1 To begin, follow ...

User Manual (user Manual) (ver.1.0) (English)
Page 18
...DVD player owner's manual. INSTALLATION Connecting a DVD Player The rear panel jacks on your TV make it easy to connect a DVD player to your TV. 1 Connect a set of audio cables between the L, R COMPONENT2 AUDIO INPUT jacks on the TV and the AUDIO OUT jacks on the Set-Top Box. 2 Connect a video cable ...between the COMPONENT1 (Y, Pb, Pr) jacks on the TV and the Y, Pb, Pr jacks on the Set-Top Box. Connecting a Digital TV Set-Top Box The connections for a typical set-top box are shown below. 1 Connect a set of audio cables between...
...DVD player owner's manual. INSTALLATION Connecting a DVD Player The rear panel jacks on your TV make it easy to connect a DVD player to your TV. 1 Connect a set of audio cables between the L, R COMPONENT2 AUDIO INPUT jacks on the TV and the AUDIO OUT jacks on the Set-Top Box. 2 Connect a video cable ...between the COMPONENT1 (Y, Pb, Pr) jacks on the TV and the Y, Pb, Pr jacks on the Set-Top Box. Connecting a Digital TV Set-Top Box The connections for a typical set-top box are shown below. 1 Connect a set of audio cables between...

User Manual (user Manual) (ver.1.0) (English)
Page 19
...back of the camcorder. 2 Connect an audio cable between the AUDIO OUTPUT jack on the camcorder and the AUDIO terminals on the side of the TV. 3 Connect a video cable between the VIDEO OUTPUT jack on the camcorder and the VIDEO terminal on the camcorder. They are usually included with ... see "Viewing a VCR or Camcorder Tape" on page 3.14). 1 Locate the A/V output jacks on the side of the TV. They allow you need to your TV. INSTALLATION Connecting a Camcorder The side panel jacks on your TV make it easy to connect a camcorder to connect a set of two cables. 2.8 CHAPTER TWO: INSTALLATION
...back of the camcorder. 2 Connect an audio cable between the AUDIO OUTPUT jack on the camcorder and the AUDIO terminals on the side of the TV. 3 Connect a video cable between the VIDEO OUTPUT jack on the camcorder and the VIDEO terminal on the camcorder. They are usually included with ... see "Viewing a VCR or Camcorder Tape" on page 3.14). 1 Locate the A/V output jacks on the side of the TV. They allow you need to your TV. INSTALLATION Connecting a Camcorder The side panel jacks on your TV make it easy to connect a camcorder to connect a set of two cables. 2.8 CHAPTER TWO: INSTALLATION

User Manual (user Manual) (ver.1.0) (English)
Page 20
w 2 Install two AAA size batteries. w Remove the batteries and store them in the Remote Control 1 Slide the cover out completely. The remote control can be using the remote control for about one year.) 2.9 CHAPTER TWO: INSTALLATION INSTALLATION Installing Batteries in a cool, dry place if you won't be used up to match the "+" and "-" ends of the batteries with the diagram inside the compartment. 3 Replace the cover. Make sure to about 23 feet from the TV. (Assuming typical TV usage, the batteries last for a long time.
w 2 Install two AAA size batteries. w Remove the batteries and store them in the Remote Control 1 Slide the cover out completely. The remote control can be using the remote control for about one year.) 2.9 CHAPTER TWO: INSTALLATION INSTALLATION Installing Batteries in a cool, dry place if you won't be used up to match the "+" and "-" ends of the batteries with the diagram inside the compartment. 3 Replace the cover. Make sure to about 23 feet from the TV. (Assuming typical TV usage, the batteries last for a long time.

User Manual (user Manual) (ver.1.0) (English)
Page 21
am Off Sleep Off Prefered Channel Ant 3 OnTime Volume 10 Move Select Menu 3.1 CHAPTER THREE: TV OPERATION Press the MENU button to the hour or minute. am On Time -- : -- Plug & Play Feature When the TV is automatically displayed. The message "Plug & Play" is automatically displayed. 2 Press the VOL+ or VOLbutton to "Setting the... also use the Power button on the remote control. It flickers for a little while, then the "Language" menu is displayed. Chapter Three OPERATION Turning the TV On and Off Press the POWER button.
am Off Sleep Off Prefered Channel Ant 3 OnTime Volume 10 Move Select Menu 3.1 CHAPTER THREE: TV OPERATION Press the MENU button to the hour or minute. am On Time -- : -- Plug & Play Feature When the TV is automatically displayed. The message "Plug & Play" is automatically displayed. 2 Press the VOL+ or VOLbutton to "Setting the... also use the Power button on the remote control. It flickers for a little while, then the "Language" menu is displayed. Chapter Three OPERATION Turning the TV On and Off Press the POWER button.


