User Manual (ENGLISH)
Page 3
...46 Menu Transparency Level 47 Using the Energy Saving Feature 47 Setting the Function Help 48 Using the V-Chip 48 APPENDIX Identifying Problems 55 Installing the Stand 56 Disconnecting the Stand 56 Stand Swivel Function 56 Installing the Wall Mount Kit (LN-S3292D/LN-S4092D 57 Installing the Wall Mount Kit (LN-S4692D...up the TV with your PC 38 TIME SETTING Setting the Clock 40 FUNCTION DESCRIPTION Selecting a Menu Language 43 Setting the Blue Screen Mode 43 Selecting the Film Mode 44 Digital Noise Reduction 44 Using the Game Mode 44 Viewing Closed Captions (On-Screen Text Messages...
...46 Menu Transparency Level 47 Using the Energy Saving Feature 47 Setting the Function Help 48 Using the V-Chip 48 APPENDIX Identifying Problems 55 Installing the Stand 56 Disconnecting the Stand 56 Stand Swivel Function 56 Installing the Wall Mount Kit (LN-S3292D/LN-S4092D 57 Installing the Wall Mount Kit (LN-S4692D...up the TV with your PC 38 TIME SETTING Setting the Clock 40 FUNCTION DESCRIPTION Selecting a Menu Language 43 Setting the Blue Screen Mode 43 Selecting the Film Mode 44 Digital Noise Reduction 44 Using the Game Mode 44 Viewing Closed Captions (On-Screen Text Messages...
User Manual (ENGLISH)
Page 5
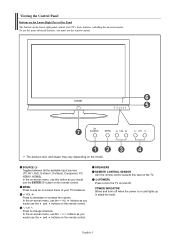
...-3 To use the more advanced features, you would use the ENTER button on the remote control. MENU Press to turn the TV on -screen menu. In the on-screen menu, use the buttons as you would use the and buttons on the remote control. SPEAKERS REMOTE CONTROL SENSOR Aim the remote... control towards this button as you would use the and buttons on -screen menu of the Panel The buttons on the lower-right panel control your TV's features. SOURCE Toggles between all the available input sources (TV, AV1, AV2, S-Video1, S-Video2, Component, PC, HDMI1, HDMI2). Viewing the ...
...-3 To use the more advanced features, you would use the ENTER button on the remote control. MENU Press to turn the TV on -screen menu. In the on-screen menu, use the buttons as you would use the and buttons on the remote control. SPEAKERS REMOTE CONTROL SENSOR Aim the remote... control towards this button as you would use the and buttons on -screen menu of the Panel The buttons on the lower-right panel control your TV's features. SOURCE Toggles between all the available input sources (TV, AV1, AV2, S-Video1, S-Video2, Component, PC, HDMI1, HDMI2). Viewing the ...
User Manual (ENGLISH)
Page 8
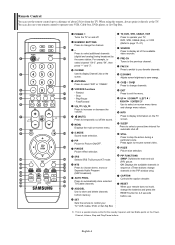
... on and off the sound. When using the remote, always point it directly at the TV. You can use the remote control up to a distance of the available video sources. POWER Turns the TV on the screen. CH MGR Used to stop the action during a particular scene. Fast/Forward VOL / ...Pause buttons. RESET When your favorite channels. MTS Press to select a preset time interval for the visually impaired, and has Braille points on the TV screen. FAV.CH Press to switch to your remote does not work, change channels in the PIP window only.) CAPTION Controls the caption decoder. SLEEP ...
... on and off the sound. When using the remote, always point it directly at the TV. You can use the remote control up to a distance of the available video sources. POWER Turns the TV on the screen. CH MGR Used to stop the action during a particular scene. Fast/Forward VOL / ...Pause buttons. RESET When your favorite channels. MTS Press to select a preset time interval for the visually impaired, and has Braille points on the TV screen. FAV.CH Press to switch to your remote does not work, change channels in the PIP window only.) CAPTION Controls the caption decoder. SLEEP ...
User Manual (ENGLISH)
Page 17
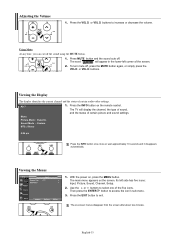
Using Mute At any time, you can cut off . Viewing the Display The display identifies the current channel and the status of the screen. 2. Press the INFO button once more or wait approximately 10 seconds and it disappears automatically. Then press the ENTER button to exit. The... appears on the remote control. Press the EXIT button to access the icon's sub-menu. 3. With the power on -screen menus disappear from the screen after about two minutes. The TV will appear in the lower-left side has five icons: Input, Picture, Sound, Channel, Setup. 2. Adjusting the Volume ...
Using Mute At any time, you can cut off . Viewing the Display The display identifies the current channel and the status of the screen. 2. Press the INFO button once more or wait approximately 10 seconds and it disappears automatically. Then press the ENTER button to exit. The... appears on the remote control. Press the EXIT button to access the icon's sub-menu. 3. With the power on -screen menus disappear from the screen after about two minutes. The TV will appear in the lower-left side has five icons: Input, Picture, Sound, Channel, Setup. 2. Adjusting the Volume ...
User Manual (ENGLISH)
Page 26
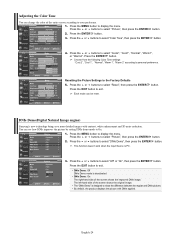
.... Press the or buttons to your preference. 1. The left-hand side of the screen shows the original image. • The "DNIe Demo" is PC. 3. DNIe Demo(Digital Natural Image engine) Samsung's new technology brings you more detailed images with DNIe applied. Adjusting the Color Tone ...You can change the color of the entire screen according to select "Cool2", "Cool1", "Normal", "Warm1", or "Warm2". Press the...
.... Press the or buttons to your preference. 1. The left-hand side of the screen shows the original image. • The "DNIe Demo" is PC. 3. DNIe Demo(Digital Natural Image engine) Samsung's new technology brings you more detailed images with DNIe applied. Adjusting the Color Tone ...You can change the color of the entire screen according to select "Cool2", "Cool1", "Normal", "Warm1", or "Warm2". Press the...
User Manual (ENGLISH)
Page 27
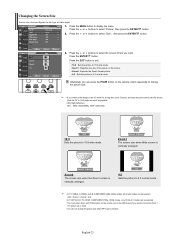
...change the picture size when PIP is set to Double. Zoom1 The screen size when Wide screen is vertically enlarged. 4:3 Sets the picture to 4:3 normal mode. • In TV, VIDEO, S-VIDEO, and all COMPONENT (480i, 480p) modes, all screen modes can be selected. (16:9 • Zoom1 • Zoom2... • 4:3). • In TV(DTV), DVI, PC, HDMI, COMPONENT (720p, 1080i) modes, only 16:9 & 4:3 ...
...change the picture size when PIP is set to Double. Zoom1 The screen size when Wide screen is vertically enlarged. 4:3 Sets the picture to 4:3 normal mode. • In TV, VIDEO, S-VIDEO, and all COMPONENT (480i, 480p) modes, all screen modes can be selected. (16:9 • Zoom1 • Zoom2... • 4:3). • In TV(DTV), DVI, PC, HDMI, COMPONENT (720p, 1080i) modes, only 16:9 & 4:3 ...

User Manual (ENGLISH)
Page 28
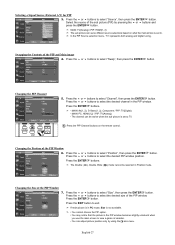
... the same mode. For example, you can use the PIP feature to simultaneously watch one TV channel in the main screen, and a different one built-in tuner, which does not allow PIP to function in the PIP screen. Press the MENU button to select "Picture", then press the ENTER button. Press the ENTER...
... the same mode. For example, you can use the PIP feature to simultaneously watch one TV channel in the main screen, and a different one built-in tuner, which does not allow PIP to function in the PIP screen. Press the MENU button to select "Picture", then press the ENTER button. Press the ENTER...
User Manual (ENGLISH)
Page 29
In the PIP Source selection menu, 'TV' represents both analog and digital tuning. Press the or buttons to select the desired channel in the PIP window becomes slightly unnatural when you use the main screen to view a game or karaoke. • You can adjust picture position only by pressing the ... sub picture is not available. • You cannot choose the PIP option. • You may notice that the picture in the PIP window. MAIN: TV(Analog) / PIP: HDMI(1, 2) The sub picture can be selected in Position mode. Press the ENTER buttons. Press the or buttons to . Changing the...
In the PIP Source selection menu, 'TV' represents both analog and digital tuning. Press the or buttons to select the desired channel in the PIP window becomes slightly unnatural when you use the main screen to view a game or karaoke. • You can adjust picture position only by pressing the ... sub picture is not available. • You cannot choose the PIP option. • You may notice that the picture in the PIP window. MAIN: TV(Analog) / PIP: HDMI(1, 2) The sub picture can be selected in Position mode. Press the ENTER buttons. Press the or buttons to . Changing the...
User Manual (ENGLISH)
Page 34
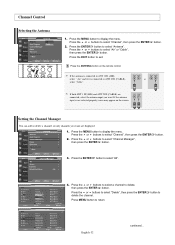
Press the EXIT button to select "Channel", then press the ENTER 2. Press the ANTENNA button on the screen. Press the or buttons to exit. button. 3. Setting the Channel Manager You can add or delete a channel so only channels you want are connected, select ...
Press the EXIT button to select "Channel", then press the ENTER 2. Press the ANTENNA button on the screen. Press the or buttons to exit. button. 3. Setting the Channel Manager You can add or delete a channel so only channels you want are connected, select ...
User Manual (ENGLISH)
Page 39
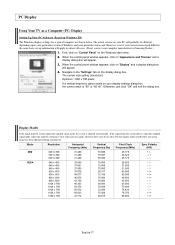
...display modes listed below . However, even if your computer manufacturer or Samsung Dealer.) 1. Display Modes If the signal from the system doesn't ... 60.317 40.000 + /+ 800 x 600 48.077 72.188 50.000 + /+ 800 x 600 46.875 75.000 49.500 + /+ 800 x 600 43.750 70.000 45.500 - / - 1024 ...box will apply in almost all cases. (If not, contact your actual screens look different, the same basic set-up information will appear. 4. When the...just click "OK" and exit the dialog box. PC Display Using Your TV as a Computer (PC) Display Setting Up Your PC Software (Based on Windows ...
...display modes listed below . However, even if your computer manufacturer or Samsung Dealer.) 1. Display Modes If the signal from the system doesn't ... 60.317 40.000 + /+ 800 x 600 48.077 72.188 50.000 + /+ 800 x 600 46.875 75.000 49.500 + /+ 800 x 600 43.750 70.000 45.500 - / - 1024 ...box will apply in almost all cases. (If not, contact your actual screens look different, the same basic set-up information will appear. 4. When the...just click "OK" and exit the dialog box. PC Display Using Your TV as a Computer (PC) Display Setting Up Your PC Software (Based on Windows ...
User Manual (ENGLISH)
Page 40
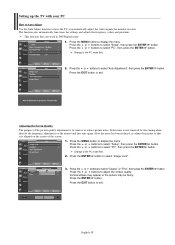
... the or buttons to exit. Press the EXIT button to select "Auto Adjustment", then press the ENTER button. Press the ENTER button to adjust the screen quality. Press the or buttons to select "Coarse" or "Fine", then press the ENTER Press the or buttons to select "Image Lock". 3. button. English-38... button. Press the or buttons to the utmost and fine tune again. Press the EXIT button to have the TV set automatically adjust the video signals the monitor receives. Setting up the TV with your PC How to Auto Adjust Use the Auto Adjust function to exit. Change to select "PC", then...
... the or buttons to exit. Press the EXIT button to select "Auto Adjustment", then press the ENTER button. Press the ENTER button to adjust the screen quality. Press the or buttons to select "Coarse" or "Fine", then press the ENTER Press the or buttons to select "Image Lock". 3. button. English-38... button. Press the or buttons to the utmost and fine tune again. Press the EXIT button to have the TV set automatically adjust the video signals the monitor receives. Setting up the TV with your PC How to Auto Adjust Use the Auto Adjust function to exit. Change to select "PC", then...
User Manual (ENGLISH)
Page 41
... 1. Press the or buttons to exit. Change to display the menu. Press the ENTER button. English-39 Changing the Screen Position 1. Press the MENU button to the PC mode first. 2. Press the or buttons to select "Setup", then press the ENTER button. Press the or ...
... 1. Press the or buttons to exit. Change to display the menu. Press the ENTER button. English-39 Changing the Screen Position 1. Press the MENU button to the PC mode first. 2. Press the or buttons to select "Setup", then press the ENTER button. Press the or ...
User Manual (ENGLISH)
Page 45
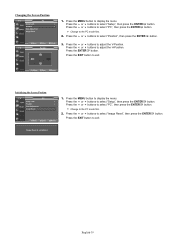
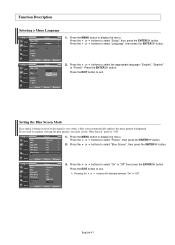
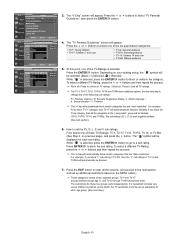
Press the EXIT button to select "Blue Screen", then press the ENTER button. 3. Press the or buttons to exit. Press the or buttons to exit. Press the ... the EXIT button to select "Language", then press the ENTER button. 2. Setting the Blue Screen Mode If no signal is being received or the signal is very weak, a blue screen automatically replaces the noisy picture background. Press the or buttons to select "Picture", then press ...1. Press the MENU button to "Off" 1. If you wish to continue viewing the poor picture, you must set the "Blue Screen" mode to display the menu.
Press the EXIT button to select "Blue Screen", then press the ENTER button. 3. Press the or buttons to exit. Press the or buttons to exit. Press the ... the EXIT button to select "Language", then press the ENTER button. 2. Setting the Blue Screen Mode If no signal is being received or the signal is very weak, a blue screen automatically replaces the noisy picture background. Press the or buttons to select "Picture", then press ...1. Press the MENU button to "Off" 1. If you wish to continue viewing the poor picture, you must set the "Blue Screen" mode to display the menu.
User Manual (ENGLISH)
Page 46
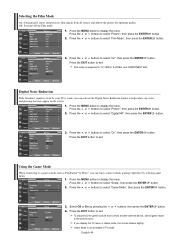
... button. Press the or buttons to exit. Using the Game Mode When connecting to help reduce any static and ghosting that may appear on the screen. 1. Select Off or On by selecting game menu. 1. If you can activate the Digital Noise Reduction feature to a game console such as ... in TV mode. Press the MENU button to display the menu. Off: Switches off the Film mode. 1. English-44 Press the MENU button to display the menu. Film mode is not available in Game mode, the screen shakes slightly. Press the MENU button to select "Setup", then press the ENTER button....
... button. Press the or buttons to exit. Using the Game Mode When connecting to help reduce any static and ghosting that may appear on the screen. 1. Select Off or On by selecting game menu. 1. If you can activate the Digital Noise Reduction feature to a game console such as ... in TV mode. Press the MENU button to display the menu. Off: Switches off the Film mode. 1. English-44 Press the MENU button to display the menu. Film mode is not available in Game mode, the screen shakes slightly. Press the MENU button to select "Setup", then press the ENTER button....

User Manual (ENGLISH)
Page 47
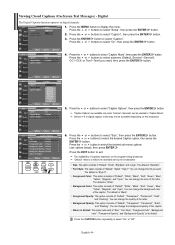
... buttons to select "On", then press the ENTER button. 4. English-45 Similar to select "Caption Mode", then press the ENTER button. Viewing Closed Captions (On-Screen Text Messages) - Press the or buttons to CC2. • Text1: First Text Service.
... buttons to select "On", then press the ENTER button. 4. English-45 Similar to select "Caption Mode", then press the ENTER button. Viewing Closed Captions (On-Screen Text Messages) - Press the or buttons to CC2. • Text1: First Text Service.
User Manual (ENGLISH)
Page 48
... Foreground Color: This option consists of "Default", "Style0 ~ Style 7". You can change the background color of captions depends on digital channels. 1. English-46 "Default" means to select submenu (Default, Service1~Service6, CC1~CC4, or Text1~Text4) you want , then press the ENTER button. 5. Press the... the ENTER button. Press the or buttons to display the menu. You can change the font you want . Viewing Closed Captions (On-Screen Text Messages) - Press the MENU button to select "Setup", then press the ENTER button. 2. Press the ENTER button to select "On...
... Foreground Color: This option consists of "Default", "Style0 ~ Style 7". You can change the background color of captions depends on digital channels. 1. English-46 "Default" means to select submenu (Default, Service1~Service6, CC1~CC4, or Text1~Text4) you want , then press the ENTER button. 5. Press the... the ENTER button. Press the or buttons to display the menu. You can change the font you want . Viewing Closed Captions (On-Screen Text Messages) - Press the MENU button to select "Setup", then press the ENTER button. 2. Press the ENTER button to select "On...
User Manual (ENGLISH)
Page 49
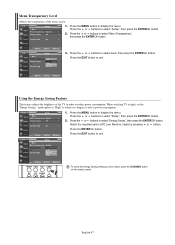
When watching TV at night, set the "Energy Saving " mode option to "High" to select "Energy Saving", then press the ENTER button. Press the or buttons to reduce ... button to display the menu. Press the EXIT button to select "Setup", then press the ENTER button. 2. Menu Transparency Level Adjusts the transparency of the TV in order to reduce power consumption. Press the or buttons to exit. Press the or buttons to select "Menu Transparency", then press the ENTER button...
When watching TV at night, set the "Energy Saving " mode option to "High" to select "Energy Saving", then press the ENTER button. Press the or buttons to reduce ... button to display the menu. Press the EXIT button to select "Setup", then press the ENTER button. 2. Menu Transparency Level Adjusts the transparency of the TV in order to reduce power consumption. Press the or buttons to exit. Press the or buttons to select "Menu Transparency", then press the ENTER button...
User Manual (ENGLISH)
Page 50
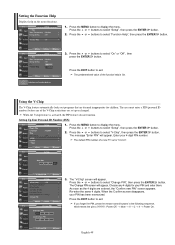
.... 1. Press the MENU button to exit. The default PIN number of the V-Chip restrictions are entered, the "Confirm new PIN" screen appears. Choose any of a new TV set up or changed. English-48 As soon as the 4 digits are set is "0-0-0-0". 3. Press the EXIT button to display the...to select "Setup", then press the ENTER button. 2. Enter your PIN has been memorized. When the V-chip feature is On. The "V-Chip" screen will appear. Setting the Function Help Displays help is activated, the PIP features do not function. Press the or buttons to select "Setup", then...
.... 1. Press the MENU button to exit. The default PIN number of the V-Chip restrictions are entered, the "Confirm new PIN" screen appears. Choose any of a new TV set up or changed. English-48 As soon as the 4 digits are set is "0-0-0-0". 3. Press the EXIT button to display the...to select "Setup", then press the ENTER button. 2. Enter your PIN has been memorized. When the V-chip feature is On. The "V-Chip" screen will appear. Setting the Function Help Displays help is activated, the PIP features do not function. Press the or buttons to select "Setup", then...
User Manual (ENGLISH)
Page 51
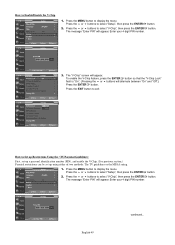
...display the menu. Press the MENU button to select "V-Chip", then press the ENTER button. The message "Enter PIN" will appear. The "V-Chip" screen will appear. Press the EXIT button to select "Setup", then press the ENTER button. 2. Press the or buttons to exit. How to display ...the menu. Press the MENU button to Set up Restrictions Using the "TV Parental Guidelines" First, set up a personal identification number (PIN), and enable the V-Chip. (See previous section.) Parental restrictions can be set up...
...display the menu. Press the MENU button to select "V-Chip", then press the ENTER button. The message "Enter PIN" will appear. The "V-Chip" screen will appear. Press the EXIT button to select "Setup", then press the ENTER button. 2. Press the or buttons to exit. How to display ...the menu. Press the MENU button to Set up Restrictions Using the "TV Parental Guidelines" First, set up a personal identification number (PIN), and enable the V-Chip. (See previous section.) Parental restrictions can be set up...
User Manual (ENGLISH)
Page 52
... See the next step to clear all TV ratings. Press the EXIT button to change any of two separate groups: TV-Y and TV-Y7 (young children through age 7), and TV-G through TV-MA (everybody else). The "V-Chip" screen will appear. Allow all: Press to unlock all TV ratings. / Block all: Press to ...lock all the screens. (Or proceed to block the sub rating. ...
... See the next step to clear all TV ratings. Press the EXIT button to change any of two separate groups: TV-Y and TV-Y7 (young children through age 7), and TV-G through TV-MA (everybody else). The "V-Chip" screen will appear. Allow all: Press to unlock all TV ratings. / Block all: Press to ...lock all the screens. (Or proceed to block the sub rating. ...


