

Owners Instructions
Page 1
ENG REMOTE CONTROL ON-SCREEN MENUS TELETEXT FUNCTION COLOUR ELECT TELEVISION Owner's Instructions Before operating the unit, please read this manual thoroughly, and retain it for future reference.
ENG REMOTE CONTROL ON-SCREEN MENUS TELETEXT FUNCTION COLOUR ELECT TELEVISION Owner's Instructions Before operating the unit, please read this manual thoroughly, and retain it for future reference.

Owners Instructions
Page 2
... aerial. During a storm conditions (especially when there is broken, do not try to extreme humidity conditions (less than 10% and more than 75%). If the remote control is a warning sign alerting you of time, remove the batteries and store it can cause uneven aging of important instructions accompanying the product. THIS DEVICE...
... aerial. During a storm conditions (especially when there is broken, do not try to extreme humidity conditions (less than 10% and more than 75%). If the remote control is a warning sign alerting you of time, remove the batteries and store it can cause uneven aging of important instructions accompanying the product. THIS DEVICE...
Owners Instructions
Page 3
Contents x PREPARING YOUR TELEVISION ENG s Safety Instructions 2 s Caution ... 2 s Front Control Panel 4 s Connection Panels 4 s Infrared Remote Control 5 s Inserting the Batteries in the Remote Control 6 s Connecting the Aerial (or Cable Television Network 6 s Switching Your Television On and Off 7 s Placing Your Television in Standby mode 7 s Plug and Play Feature 8 s Viewing the ...
Contents x PREPARING YOUR TELEVISION ENG s Safety Instructions 2 s Caution ... 2 s Front Control Panel 4 s Connection Panels 4 s Infrared Remote Control 5 s Inserting the Batteries in the Remote Control 6 s Connecting the Aerial (or Cable Television Network 6 s Switching Your Television On and Off 7 s Placing Your Television in Standby mode 7 s Plug and Play Feature 8 s Viewing the ...

Owners Instructions
Page 4
Front Control Panel ENG ➣ Buttons and markings are subject to change. MENU DISPLAY CHANNEL SELECTION STAND BY/TIMER INDICATOR VOLUME ADJUSTMENT REMOTE CONTROL SENSOR POWER Connection Panels Front of TV Rear of TV HEADPHONE JACK RCA AUDIO/VIDEO INPUT CONNECTORS SCART AUDIO/VIDEO INPUT/OUTPUT CONNECTORS 75 Ω COAXIAL CONNECTOR FOR AERIAL/CABLE NETWORK 4
Front Control Panel ENG ➣ Buttons and markings are subject to change. MENU DISPLAY CHANNEL SELECTION STAND BY/TIMER INDICATOR VOLUME ADJUSTMENT REMOTE CONTROL SENSOR POWER Connection Panels Front of TV Rear of TV HEADPHONE JACK RCA AUDIO/VIDEO INPUT CONNECTORS SCART AUDIO/VIDEO INPUT/OUTPUT CONNECTORS 75 Ω COAXIAL CONNECTOR FOR AERIAL/CABLE NETWORK 4

Owners Instructions
Page 5
...-PAGE PICTURE STANDARD SOUND STANDARD PICTURE SIZE/TELETEXT SIZE NEXT CHANNEL/ TELETEXT NEXT PAGE VOLUME INCREASE MENU DISPLAY/ PROGRAMME SELECTION BY NAME ➣ Operation of remote control may be affected by bright artificial light near to change. Infrared Remote Control ➣ Buttons and markings are subject to the TV set. 5
...-PAGE PICTURE STANDARD SOUND STANDARD PICTURE SIZE/TELETEXT SIZE NEXT CHANNEL/ TELETEXT NEXT PAGE VOLUME INCREASE MENU DISPLAY/ PROGRAMME SELECTION BY NAME ➣ Operation of remote control may be affected by bright artificial light near to change. Infrared Remote Control ➣ Buttons and markings are subject to the TV set. 5

Owners Instructions
Page 6
...channels correctly, a signal must insert or replace the batteries in the remote control when you : x Purchase the television. Rear of TV Cable Television Network 6 on the remote control x - x Find that the remote control is no longer operating correctly. 1 Remove the cover of the remote control by pressing the symbol ( PRESS ) and pulling the cover in ...arrow. 2 Insert batteries, taking care to the 75Ω coaxial socket on the rear of the television. Inserting the Batteries in the Remote Control ENG PRESS You must be received by pushing it in the direction of the arrow.
...channels correctly, a signal must insert or replace the batteries in the remote control when you : x Purchase the television. Rear of TV Cable Television Network 6 on the remote control x - x Find that the remote control is no longer operating correctly. 1 Remove the cover of the remote control by pressing the symbol ( PRESS ) and pulling the cover in ...arrow. 2 Insert batteries, taking care to the 75Ω coaxial socket on the rear of the television. Inserting the Batteries in the Remote Control ENG PRESS You must be received by pushing it in the direction of the arrow.

Owners Instructions
Page 7
...turned off and the Standby indicator on the front of the television lights up on the front panel. 3 Press the POWER button on the remote control to switch the television on the front of time (when you were watching last is placed automatically in the United Kingdom, refer to reduce... . 2 To switch the screen back on, simply press the POWER button again on the remote control. ➣ Do not leave your television off completely. 7 Result: The programme that you are away on the remote control. The television is re- In this television in Standby mode when you should switch it on...
...turned off and the Standby indicator on the front of the television lights up on the front panel. 3 Press the POWER button on the remote control to switch the television on the front of time (when you were watching last is placed automatically in the United Kingdom, refer to reduce... . 2 To switch the screen back on, simply press the POWER button again on the remote control. ➣ Do not leave your television off completely. 7 Result: The programme that you are away on the remote control. The television is re- In this television in Standby mode when you should switch it on...

Owners Instructions
Page 8
... the television is displayed. 8 It flickers for a little while and then the "Language" menu is connected to "Setting and Displaying the Current Time" on the remote control. button. Result: The "Time" menu is displayed. button. 3 Select the "Plug & Play" by pressing the v or w button, and then press the + or - Ant. And then...
... the television is displayed. 8 It flickers for a little while and then the "Language" menu is connected to "Setting and Displaying the Current Time" on the remote control. button. Result: The "Time" menu is displayed. button. 3 Select the "Plug & Play" by pressing the v or w button, and then press the + or - Ant. And then...

Owners Instructions
Page 9
... turn. 4 When you can view the inbuilt demonstration. 1 Press the MENU button. 2 Press the v or w button to stop the demonstration, press any button on the remote control. Viewing the Demonstration ENG To become familiar with the various menus provided by your television, you wish to select the "Function" and press the + or...
... turn. 4 When you can view the inbuilt demonstration. 1 Press the MENU button. 2 Press the v or w button to stop the demonstration, press any button on the remote control. Viewing the Demonstration ENG To become familiar with the various menus provided by your television, you wish to select the "Function" and press the + or...

Owners Instructions
Page 18
...Result: The "Picture" menu is displayed. 2 Press the + or - To select the required picture effect, simply press the P.STD (Picture standard) button on the remote control. The following picture effects are available in the order given: x Custom, Standard, Sports, Natural, Mild. 1 Press the MENU button. Result: The following picture effects...Changing the Picture Standard ENG Mode Adjust Digital NR Picture Custom : Off Mode Adjust Digital NR Picture Custom : Off You can use your remote control to select the type of picture which best corresponds to your viewing requirements.
...Result: The "Picture" menu is displayed. 2 Press the + or - To select the required picture effect, simply press the P.STD (Picture standard) button on the remote control. The following picture effects are available in the order given: x Custom, Standard, Sports, Natural, Mild. 1 Press the MENU button. Result: The following picture effects...Changing the Picture Standard ENG Mode Adjust Digital NR Picture Custom : Off Mode Adjust Digital NR Picture Custom : Off You can use your remote control to select the type of picture which best corresponds to your viewing requirements.

Owners Instructions
Page 21
To select the required sound effect, simply press the S.STD (Sound standard) button on the remote control. button. 3 Press the + or - You can select the type of special sound effect to be used when watching a given broadcast. button repeatedly to ...Off Mode Equalizer Auto volume Melody Pseudo stereo Sound Custom : Off : Off : Off ENG 1 1 21 © © Changing the Sound Standard You can use your remote control to select the type of special sound effect to be used when watching a given broadcast. Result: The following sound effects are available in the order...
To select the required sound effect, simply press the S.STD (Sound standard) button on the remote control. button. 3 Press the + or - You can select the type of special sound effect to be used when watching a given broadcast. button repeatedly to ...Off Mode Equalizer Auto volume Melody Pseudo stereo Sound Custom : Off : Off : Off ENG 1 1 21 © © Changing the Sound Standard You can use your remote control to select the type of special sound effect to be used when watching a given broadcast. Result: The following sound effects are available in the order...

Owners Instructions
Page 25
... button. ENG 1 Turbo sound : On 1 1 Volume 12 Switching the Sound Off Temporarily You can switch the sound off using the " " (ON/OFF) button on the remote control. Selecting the Turbo Sound Turbo sound suitably emphasizes both higher and lower bands of the volume buttons). 1 25 To enjoy more magnificent and dynamic sound...
... button. ENG 1 Turbo sound : On 1 1 Volume 12 Switching the Sound Off Temporarily You can switch the sound off using the " " (ON/OFF) button on the remote control. Selecting the Turbo Sound Turbo sound suitably emphasizes both higher and lower bands of the volume buttons). 1 25 To enjoy more magnificent and dynamic sound...

Owners Instructions
Page 26
pressing the "SLEEP " button. 1 Press the SLEEP button on the remote control. Result: The television automatically switches to Standby mode by ? Not yet set Time remaining before the television will be placed in standby mode. Result: If ...
pressing the "SLEEP " button. 1 Press the SLEEP button on the remote control. Result: The television automatically switches to Standby mode by ? Not yet set Time remaining before the television will be placed in standby mode. Result: If ...

Owners Instructions
Page 28
... time, press the TV button or, press the MENU button repeatedly to return to normal viewing. ➣ Fuzzy Power Off If no function buttons (including remote control buttons or front panel buttons) are operated for three hours after the TV is displayed. 4 Press the v or w button to select the "Time", and press...
... time, press the TV button or, press the MENU button repeatedly to return to normal viewing. ➣ Fuzzy Power Off If no function buttons (including remote control buttons or front panel buttons) are operated for three hours after the TV is displayed. 4 Press the v or w button to select the "Time", and press...

Owners Instructions
Page 29
... in Childlock On, you have finished, press the TV button or, press the MENU button repeatedly to return to normal viewing. ➣ ➣ Keep the remote control away from your children so that you must set the "Blue screen" mode to "Off". 1 Press the MENU button. 2 Press the v or w button to normal...
... in Childlock On, you have finished, press the TV button or, press the MENU button repeatedly to return to normal viewing. ➣ ➣ Keep the remote control away from your children so that you must set the "Blue screen" mode to "Off". 1 Press the MENU button. 2 Press the v or w button to normal...

Owners Instructions
Page 31
... pages are displayed in the: • Upper half of the screen • Lower half of the screen Press the... To freeze the display on the remote control to enter the page number directly: 1 Enter the three-digit page number listed in the contents by entering its 4-digit number x The next page x The...
... pages are displayed in the: • Upper half of the screen • Lower half of the screen Press the... To freeze the display on the remote control to enter the page number directly: 1 Enter the three-digit page number listed in the contents by entering its 4-digit number x The next page x The...

Owners Instructions
Page 32
.... 3 To display the: Press the: Previous page Next page Red button. Green button. 4 When you wish to select (The available topics are listed on the remote control. ? 1 1 Display the teletext contents page by pressing the TTX/MIX ( ) button. 2 Press the colored button corresponding to the topic that will be replaced. 3 Enter the...
.... 3 To display the: Press the: Previous page Next page Red button. Green button. 4 When you wish to select (The available topics are listed on the remote control. ? 1 1 Display the teletext contents page by pressing the TTX/MIX ( ) button. 2 Press the colored button corresponding to the topic that will be replaced. 3 Enter the...
Owners Instructions
Page 35
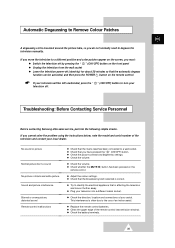
... Samsung after-sales service, perform the following simple checks. x Check the volume. x Check the direction, location and connections of an indoor aerial. x Check the battery terminals. 35 x Replace the remote control batteries. x Check whether the MUTE remote control. button has been pressed on the remote control.... but no sound No picture or black and white picture Sound and picture interference Blurred or snowy picture, distorted sound Remote control malfunctions x Check that you move it further away. Automatic Degaussing to Remove Colour Patches ENG A degaussing coil is ...
... Samsung after-sales service, perform the following simple checks. x Check the volume. x Check the direction, location and connections of an indoor aerial. x Check the battery terminals. 35 x Replace the remote control batteries. x Check whether the MUTE remote control. button has been pressed on the remote control.... but no sound No picture or black and white picture Sound and picture interference Blurred or snowy picture, distorted sound Remote control malfunctions x Check that you move it further away. Automatic Degaussing to Remove Colour Patches ENG A degaussing coil is ...

