
User Manual
Page 4
... may result if instructions are not followed. REFER ALL SERVICING TO QUALIFIED PERSONNEL. It is present inside. Before Using the Product Safety Precautions CAUTION RISK OF ELECTRIC SHOCK DO NOT OPEN CAUTION : TO REDUCE THE RISK OF ELECTRIC SHOCK, DO NOT REMOVE COVER (OR BACK)....part of this product. Instructions marked by this symbol must be followed. 4 Before Using the Product Personal injury or damage to make any kind of contact with this product. Symbols Warning Caution A serious or fatal injury may result if instructions are prohibited. THERE ARE NO USER SERVICEABLE PARTS ...
... may result if instructions are not followed. REFER ALL SERVICING TO QUALIFIED PERSONNEL. It is present inside. Before Using the Product Safety Precautions CAUTION RISK OF ELECTRIC SHOCK DO NOT OPEN CAUTION : TO REDUCE THE RISK OF ELECTRIC SHOCK, DO NOT REMOVE COVER (OR BACK)....part of this product. Instructions marked by this symbol must be followed. 4 Before Using the Product Personal injury or damage to make any kind of contact with this product. Symbols Warning Caution A serious or fatal injury may result if instructions are prohibited. THERE ARE NO USER SERVICEABLE PARTS ...

User Manual
Page 6
... an electric shock. Hold the plug when disconnecting the power cord from the wall to the product when ! Do not install the product near heat sources. Install the product at least 10cm away from the power socket. Before Using the Product Caution Do not disconnect the power cord while the product is connected unobstructed. Do not use approved cabinets. Have a technician install the wall-mount hanger.
... an electric shock. Hold the plug when disconnecting the power cord from the wall to the product when ! Do not install the product near heat sources. Install the product at least 10cm away from the power socket. Before Using the Product Caution Do not disconnect the power cord while the product is connected unobstructed. Do not use approved cabinets. Have a technician install the wall-mount hanger.

User Manual
Page 15
... Connection Using the AV Cable Connection Using the RGB-component Cable Connection Using an HDMI-DVI Cable Connecting to a TV Tuner Box (US Only) Connecting and Using a Source Device Source List/Edit Name USING MDC 65 65 65 66 66 67 68 68 70 92 93 Configuring Settings for Multi Control Configuring settings for Multi Control Connection Using the RS232C Cable MDC Program Installation/Uninstallation Installation Uninstallation Using the MDC Program (Serial MDC) Starting MDC Configuring Settings for Main Functions Troubleshooting Guide How display...
... Connection Using the AV Cable Connection Using the RGB-component Cable Connection Using an HDMI-DVI Cable Connecting to a TV Tuner Box (US Only) Connecting and Using a Source Device Source List/Edit Name USING MDC 65 65 65 66 66 67 68 68 70 92 93 Configuring Settings for Multi Control Configuring settings for Multi Control Connection Using the RS232C Cable MDC Program Installation/Uninstallation Installation Uninstallation Using the MDC Program (Serial MDC) Starting MDC Configuring Settings for Main Functions Troubleshooting Guide How display...
User Manual
Page 18
... the Resolution (Resolution Select) 139 Power On Adjustment 139 Setting Power On Adjustment 140 OSD Rotation 140 Changing the Menu Orientation (OSD Rotation) 141 Advanced Settings 141 Temperature 142 Auto Power 142 User Auto Color 143 Standby Control 144 Lamp Schedule 144 OSD Display 146 Setup Reset 146 Resetting Setup (Setup Reset) 146 Reset All 146 Resetting All Settings (Reset All) TROUBLESHOOTI 147 NG GUIDE 147 147 148 151 Requirements Before Contacting Samsung Customer Service Center Testing the Product Checking the Resolution and Frequency Check the followings. Q & A SPECIFICATIONS...
... the Resolution (Resolution Select) 139 Power On Adjustment 139 Setting Power On Adjustment 140 OSD Rotation 140 Changing the Menu Orientation (OSD Rotation) 141 Advanced Settings 141 Temperature 142 Auto Power 142 User Auto Color 143 Standby Control 144 Lamp Schedule 144 OSD Display 146 Setup Reset 146 Resetting Setup (Setup Reset) 146 Reset All 146 Resetting All Settings (Reset All) TROUBLESHOOTI 147 NG GUIDE 147 147 148 151 Requirements Before Contacting Samsung Customer Service Center Testing the Product Checking the Resolution and Frequency Check the followings. Q & A SPECIFICATIONS...

User Manual
Page 23
Specifications are thademarks of SRS Labs, Inc. DVI IN AV IN AUDIO IN RGB/COMPONENT IN DC OUT (5V/1.5A) RS232C IN PS BN64-01674A-00 Port [POWER S/W] ON [ I ] / OFF [POWER IN] [DVI IN] [AV IN] [AUDIO IN] [RGB/COMPONENT IN] [DC OUT (5V/1.5A)] [RS232C IN] Description Power switch Connects to the power cord Connects to a source device using a DVI cable or HDMI-DVI cable Connects to a source device using the AV cable Connects to the audio of a source device...
Specifications are thademarks of SRS Labs, Inc. DVI IN AV IN AUDIO IN RGB/COMPONENT IN DC OUT (5V/1.5A) RS232C IN PS BN64-01674A-00 Port [POWER S/W] ON [ I ] / OFF [POWER IN] [DVI IN] [AV IN] [AUDIO IN] [RGB/COMPONENT IN] [DC OUT (5V/1.5A)] [RS232C IN] Description Power switch Connects to the power cord Connects to a source device using a DVI cable or HDMI-DVI cable Connects to a source device using the AV cable Connects to the audio of a source device...

User Manual
Page 25
... MagicInfo Power off the product. Unmuting the sound: Press MUTE again or press the volume control (+ VOL -) button. Exit the current menu. Configure the audio settings. 25 1 Preparations Not enabled on this product. Change the input source. GUIDE ABC DEF 23 JKL MNO 56 TUV WXY 89 SYMBOL ENTER 0 PRE-CH MUTE VOL SOURCE CH/P D.MENU MENU TV RETURN TOOLS Display information about the current input source. Move...
... MagicInfo Power off the product. Unmuting the sound: Press MUTE again or press the volume control (+ VOL -) button. Exit the current menu. Configure the audio settings. 25 1 Preparations Not enabled on this product. Change the input source. GUIDE ABC DEF 23 JKL MNO 56 TUV WXY 89 SYMBOL ENTER 0 PRE-CH MUTE VOL SOURCE CH/P D.MENU MENU TV RETURN TOOLS Display information about the current input source. Move...

User Manual
Page 38
..., ID 0 must be displayed as shown below (11+FF+01+01=112), the first digit is removed. E.g. 1 Preparations 1.5.2 Control Codes Viewing control state (Get control command) Header Command 0xAA Command ID type Controlling (Set control command) Data length 0 Checksum Header Command Data length Data 0xAA Command ID type 1 Value Checksum Command No. 1 2 3 4 5 6 7 8 9 Command type Power control Volume control Input source control Screen mode control Screen size control PIP on/off control Auto adjustment control Video wall mode control Safety Lock Command 0x11 0x12...
..., ID 0 must be displayed as shown below (11+FF+01+01=112), the first digit is removed. E.g. 1 Preparations 1.5.2 Control Codes Viewing control state (Get control command) Header Command 0xAA Command ID type Controlling (Set control command) Data length 0 Checksum Header Command Data length Data 0xAA Command ID type 1 Value Checksum Command No. 1 2 3 4 5 6 7 8 9 Command type Power control Volume control Input source control Screen mode control Screen size control PIP on/off control Auto adjustment control Video wall mode control Safety Lock Command 0x11 0x12...

User Manual
Page 49
..., camcorders, speakers, set top boxes and DVD/Blu-ray Disc players. Connecting the power cable during connection may differ from device to device. z Connect the sound ports correctly: left = white and right = red. Devices that can be outputted via the PC, DVI, Source, or Component port. z Check the types of ports at the back of ports on source devices may damage the product. 2 Connecting and Using a Source Device 2.1 Before Connecting Check the following...
..., camcorders, speakers, set top boxes and DVD/Blu-ray Disc players. Connecting the power cable during connection may differ from device to device. z Connect the sound ports correctly: left = white and right = red. Devices that can be outputted via the PC, DVI, Source, or Component port. z Check the types of ports at the back of ports on source devices may damage the product. 2 Connecting and Using a Source Device 2.1 Before Connecting Check the following...
User Manual
Page 52
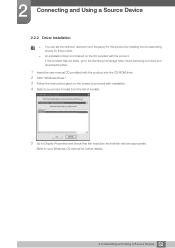
... the user manual CD provided with the product into the CD-ROM drive. 2 Click "Windows Driver." 3 Follow the instructions given on the CD supplied with installation. 4 Select your Windows OS manual for this product by installing the corresponding drivers for further details. 52 2 Connecting and Using a Source Device Refer to your product model from the list of models. 5 Go to Display Properties and check that the resolution and refresh rate are...
... the user manual CD provided with the product into the CD-ROM drive. 2 Click "Windows Driver." 3 Follow the instructions given on the CD supplied with installation. 4 Select your Windows OS manual for this product by installing the corresponding drivers for further details. 52 2 Connecting and Using a Source Device Refer to your product model from the list of models. 5 Go to Display Properties and check that the resolution and refresh rate are...

User Manual
Page 53
The picture quality of TFT-LCDs may degrade if the optimum resolution is not selected. Changing the Resolution on your PC to Control Panel ĺ Display ĺ Settings, and change the resolution. 53 2 Connecting and Using a Source Device 2 Connecting and Using a Source Device 2.2.3 Changing the Resolution Adjust the resolution and refresh rate in Control Panel on Windows XP Go to obtain optimum picture quality.
The picture quality of TFT-LCDs may degrade if the optimum resolution is not selected. Changing the Resolution on your PC to Control Panel ĺ Display ĺ Settings, and change the resolution. 53 2 Connecting and Using a Source Device 2 Connecting and Using a Source Device 2.2.3 Changing the Resolution Adjust the resolution and refresh rate in Control Panel on Windows XP Go to obtain optimum picture quality.

User Manual
Page 58
... DVI. z Supported resolutions include 1080p (50/60Hz), 720p (50/60Hz), 480p, and 576p. 58 2 Connecting and Using a Source Device 2 Connecting and Using a Source Device 2.3.3 Connection Using an HDMI-DVI Cable DVI IN AUDIO IN 1 Connect an HDMI-DVI cable to the [DVI IN] port on the product and the HDMI port on the video device. 2 Connect the RCA stereo cable to the [AUDIO IN] port on the product and the matching-colored AUDIO OUT ports on the video device. 3 Press the SOURCE button on the remote control...
... DVI. z Supported resolutions include 1080p (50/60Hz), 720p (50/60Hz), 480p, and 576p. 58 2 Connecting and Using a Source Device 2 Connecting and Using a Source Device 2.3.3 Connection Using an HDMI-DVI Cable DVI IN AUDIO IN 1 Connect an HDMI-DVI cable to the [DVI IN] port on the product and the HDMI port on the video device. 2 Connect the RCA stereo cable to the [AUDIO IN] port on the product and the matching-colored AUDIO OUT ports on the video device. 3 Press the SOURCE button on the remote control...

User Manual
Page 86
... adjust the backlight to the displays that have the TV function. Maintenance settings can be configured for Auto Lamp Control will automatically run if the resolution is only available on products that are turned on. Auto Lamp Control and Manual Lamp Control will automatically disable Auto Lamp Control. z TV mode is changed. z Auto Adjustment will automatically disable Manual Lamp Control. Configuring the settings for all the connected input sources. 3 Using MDC z Changes will only be applied to reduce power...
... adjust the backlight to the displays that have the TV function. Maintenance settings can be configured for Auto Lamp Control will automatically run if the resolution is only available on products that are turned on. Auto Lamp Control and Manual Lamp Control will automatically disable Auto Lamp Control. z TV mode is changed. z Auto Adjustment will automatically disable Manual Lamp Control. Configuring the settings for all the connected input sources. 3 Using MDC z Changes will only be applied to reduce power...
User Manual
Page 92
... selected. The remote control does not work if the RS-232C cable is removed or the program is closed abnormally while the Remote Control function is within the range of 0 and 99. (Change the ID using the Display menu.) For a display that supports the ID in the system information chart.) Ensure you select the input source the display is set between the connected displays. Check that the display ID is Disable. Displays power on the...
... selected. The remote control does not work if the RS-232C cable is removed or the program is closed abnormally while the Remote Control function is within the range of 0 and 99. (Change the ID using the Display menu.) For a display that supports the ID in the system information chart.) Ensure you select the input source the display is set between the connected displays. Check that the display ID is Disable. Displays power on the...

User Manual
Page 103
... position after Fine adjustment, adjust the frequency using Coarse until noise is PC. 4.6.1 Configuring the Image Lock Settings This product can be controlled by using the remote control. 1 Press MENU on the remote control. 2 Press / to move to Picture and press [ ]. 3 Press / to move the screen to the center by removing noise (static) such as flickering and shaking. This option is available when the input source is minimized and then adjust using the H-Position/V-Position menu. 4 Screen Adjustment 4.6 Image Lock...
... position after Fine adjustment, adjust the frequency using Coarse until noise is PC. 4.6.1 Configuring the Image Lock Settings This product can be controlled by using the remote control. 1 Press MENU on the remote control. 2 Press / to move to Picture and press [ ]. 3 Press / to move the screen to the center by removing noise (static) such as flickering and shaking. This option is available when the input source is minimized and then adjust using the H-Position/V-Position menu. 4 Screen Adjustment 4.6 Image Lock...
User Manual
Page 147
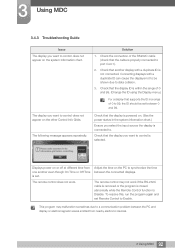
... your product is operating normally. If the problem persists, contact Samsung Customer Service Center. If the screen remains blank while the power LED blinks even when the product is correctly connected to Supported Resolutions). 147 7 Troubleshooting Guide If the screen remains blank, check the PC system, video controller and cable. 7.1.2 Checking the Resolution and Frequency "Not Optimum Mode" will briefly be displayed if a mode that exceeds a supported resolution is selected (refer to a PC, perform product...
... your product is operating normally. If the problem persists, contact Samsung Customer Service Center. If the screen remains blank while the power LED blinks even when the product is correctly connected to Supported Resolutions). 147 7 Troubleshooting Guide If the screen remains blank, check the PC system, video controller and cable. 7.1.2 Checking the Resolution and Frequency "Not Optimum Mode" will briefly be displayed if a mode that exceeds a supported resolution is selected (refer to a PC, perform product...

User Manual
Page 148
...'s maximum resolution and frequency. Make sure that the device connected to the product ("2.2Connecting and Using a PC") 148 7 Troubleshooting Guide Refer to the Standard Signal Mode Table and set the maximum resolution and frequency according to a PC"). Check the cable connection between the product and PC, and ensure the connection is the PC or graphics card, and can be fixed by the monitor. Installation issue (PC mode) The screen keeps switching on...
...'s maximum resolution and frequency. Make sure that the device connected to the product ("2.2Connecting and Using a PC") 148 7 Troubleshooting Guide Refer to the Standard Signal Mode Table and set the maximum resolution and frequency according to a PC"). Check the cable connection between the product and PC, and ensure the connection is the PC or graphics card, and can be fixed by the monitor. Installation issue (PC mode) The screen keeps switching on...

User Manual
Page 149
... Picture and adjust the Color Control settings. The screen is blurry. Screen color is too low. Press any accessories (video extension cable, etc) and try again. The volume is inconsistent. Adjust Coarse and Fine. Check that the resolution and frequency of the audio cable or adjust the volume ("2.2Connecting and Using a PC") Check the volume. The product is no image on the product menu and the Standard Signal Mode Table. There is in power-saving mode. The sound is really flat. Adjust Brightness...
... Picture and adjust the Color Control settings. The screen is blurry. Screen color is too low. Press any accessories (video extension cable, etc) and try again. The volume is inconsistent. Adjust Coarse and Fine. Check that the resolution and frequency of the audio cable or adjust the volume ("2.2Connecting and Using a PC") Check the volume. The product is no image on the product menu and the Standard Signal Mode Table. There is in power-saving mode. The sound is really flat. Adjust Brightness...
User Manual
Page 152
... user manual for your PC or graphics card for further instructions on the PC. z "Windows 7": Go to Control Panel ĺ Appearance and Personalization ĺ Personalize ĺ Display Settings and adjust the resolution. z Windows ME/2000: Set power-saving mode in Control Panel ĺ Appearance and Personalization ĺ Personalize ĺ Screen Saver Settings or BIOS SETUP on the PC. z "Windows ME/2000": Go to Control Panel ĺ Appearance and Themes ĺ Display ĺ Settings and adjust the resolution. z Windows Vista: Set power-saving mode...
... user manual for your PC or graphics card for further instructions on the PC. z "Windows 7": Go to Control Panel ĺ Appearance and Personalization ĺ Personalize ĺ Display Settings and adjust the resolution. z Windows ME/2000: Set power-saving mode in Control Panel ĺ Appearance and Personalization ĺ Personalize ĺ Screen Saver Settings or BIOS SETUP on the PC. z "Windows ME/2000": Go to Control Panel ĺ Appearance and Themes ĺ Display ĺ Settings and adjust the resolution. z Windows Vista: Set power-saving mode...

User Manual
Page 162
... picture quality, go to Control Panel on a stationary image for an extended period of time may cause afterimage burn-in or defective pixels. † Activate power-saving mode or a dynamic screen saver if you select the optimum resolution specified for an extended period of time. The picture quality of TFT-LCDs may degrade if the optimum resolution is not selected. † Resolution: 1920 X 1080 † Vertical frequency (refresh rate...
... picture quality, go to Control Panel on a stationary image for an extended period of time may cause afterimage burn-in or defective pixels. † Activate power-saving mode or a dynamic screen saver if you select the optimum resolution specified for an extended period of time. The picture quality of TFT-LCDs may degrade if the optimum resolution is not selected. † Resolution: 1920 X 1080 † Vertical frequency (refresh rate...

User Manual
Page 165
... the monitor from afterimage burn-in is switching the power off or setting the PC or system to run a screen saver when not in use. z Screen Scroll Function † Screen Scroll Effect: A black bar moves horizontally. Horizontal bar with Black color FLIGHT TIME OZ348 20:30 UA102 21:10 † Screen Bar Effect: Two black bars move vertically and horizontally. Also, Warranty service may be limited depending on instruction guide.
... the monitor from afterimage burn-in is switching the power off or setting the PC or system to run a screen saver when not in use. z Screen Scroll Function † Screen Scroll Effect: A black bar moves horizontally. Horizontal bar with Black color FLIGHT TIME OZ348 20:30 UA102 21:10 † Screen Bar Effect: Two black bars move vertically and horizontally. Also, Warranty service may be limited depending on instruction guide.


