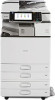
User Guide
Page 6
Scan Basic Procedure When Using Scan to Folder 133 Creating a Shared Folder on Envelopes Using the Printer Driver 130 Saving and Printing Using the Document Server 131 Storing Documents in Document Server 131 Managing Documents Stored in Document ...157 9. Document Server Storing Data...153 Printing Stored Documents...155 8. Configuring Envelope Settings Using the Control Panel 129 Printing on a Computer Running Windows/Confirming a Computer's Information...134 Registering an SMB Folder...136 Deleting an SMB Registered Folder...140 Entering the Path to the Destination Manually 141...
Scan Basic Procedure When Using Scan to Folder 133 Creating a Shared Folder on Envelopes Using the Printer Driver 130 Saving and Printing Using the Document Server 131 Storing Documents in Document Server 131 Managing Documents Stored in Document ...157 9. Document Server Storing Data...153 Printing Stored Documents...155 8. Configuring Envelope Settings Using the Control Panel 129 Printing on a Computer Running Windows/Confirming a Computer's Information...134 Registering an SMB Folder...136 Deleting an SMB Registered Folder...140 Entering the Path to the Destination Manually 141...

User Guide
Page 125
Print This chapter describes frequently used printer functions and operations. Click [Next >]. 4. When you want to use in the first window of the installer, and then take out the CD-ROM. 123 5. Log on the installer screen. 2. After reading the agreement, click ...Configure the user code, default printer, and shared printer as an Administrators group member. 1. Click [Continue]. Using Quick Install, the PCL 6 printer driver is installed under network environment, and the Standard TCP/IP port will be set. • Manage Printers permission is required to restart your computer, ...
Print This chapter describes frequently used printer functions and operations. Click [Next >]. 4. When you want to use in the first window of the installer, and then take out the CD-ROM. 123 5. Log on the installer screen. 2. After reading the agreement, click ...Configure the user code, default printer, and shared printer as an Administrators group member. 1. Click [Continue]. Using Quick Install, the PCL 6 printer driver is installed under network environment, and the Standard TCP/IP port will be set. • Manage Printers permission is required to restart your computer, ...

User Guide
Page 127
... message might appear when the print job is two-sided printing. If you want to be printed. 7. Click [OK]. 12. When Using the PCL 6 Printer Driver 1. In the "Paper Type:" list, select the type of paper that contains the paper you select [Auto Tray Select] in the "Input Tray:" list, the... corner of sets in the paper tray. 9. In the [Select Printer] list, select the printer you want to print multiple copies, specify a number of the window, and then click [Print]. 2.
... message might appear when the print job is two-sided printing. If you want to be printed. 7. Click [OK]. 12. When Using the PCL 6 Printer Driver 1. In the "Paper Type:" list, select the type of paper that contains the paper you select [Auto Tray Select] in the "Input Tray:" list, the... corner of sets in the paper tray. 9. In the [Select Printer] list, select the printer you want to print multiple copies, specify a number of the window, and then click [Print]. 2.

User Guide
Page 128
...Sided/Layout/Booklet]. 6. Orientation Open to Left Open to 59 g/m2), Color, Letterhead, Preprinted, Bond, Cardstock When Using the PCL 6 Printer Driver 1. Click the WordPad menu button in the "2 sided:" list. 7. Select the method for binding the output pages in the upper left corner of Two... pages open by specifying which edge to use. 3. Click [Preferences]. 4. Start printing from the application's [Print] dialog box. Types of the window, and then click [Print]. 2. Change any other print settings if necessary. 8. Click [OK]. 9. Print Printing on Both Sides of Sheets This...
...Sided/Layout/Booklet]. 6. Orientation Open to Left Open to 59 g/m2), Color, Letterhead, Preprinted, Bond, Cardstock When Using the PCL 6 Printer Driver 1. Click the WordPad menu button in the "2 sided:" list. 7. Select the method for binding the output pages in the upper left corner of Two... pages open by specifying which edge to use. 3. Click [Preferences]. 4. Start printing from the application's [Print] dialog box. Types of the window, and then click [Print]. 2. Change any other print settings if necessary. 8. Click [OK]. 9. Print Printing on Both Sides of Sheets This...

User Guide
Page 129
... button in the "Page Order:" list. Click [Preferences]. 4. Change any other print settings if necessary. 8. When combining 4 or more pages onto a single sheet of the window, and then click [Print]. 2. Click [OK]. 9. Start printing from the application's [Print] dialog box. In the [Select Printer] list, select the printer you to economize... pages in the upper left corner of paper, four patterns are available. In the "Menu:" box, click [2 Sided/Layout/Booklet]. 6. When Using the PCL 6 Printer Driver 1.
... button in the "Page Order:" list. Click [Preferences]. 4. Change any other print settings if necessary. 8. When combining 4 or more pages onto a single sheet of the window, and then click [Print]. 2. Click [OK]. 9. Start printing from the application's [Print] dialog box. In the [Select Printer] list, select the printer you to economize... pages in the upper left corner of paper, four patterns are available. In the "Menu:" box, click [2 Sided/Layout/Booklet]. 6. When Using the PCL 6 Printer Driver 1.

User Guide
Page 132
... from the application's [Print] dialog box. 130 5. Click [Preferences]. 4. Click [OK]. 9. Click the WordPad menu button in the upper left corner of the window, and then click [Print]. 2. In the "Document Size:" list, select the envelope size. 5. In the "Paper Type:" list, select [Envelope]. 6. Change any... other print settings if necessary. 8. Print Printing on Envelopes Using the Printer Driver When using the PCL 6 printer driver 1. In the "Input Tray:" list, select the paper tray where the envelopes are loaded. 7.
... from the application's [Print] dialog box. 130 5. Click [Preferences]. 4. Click [OK]. 9. Click the WordPad menu button in the upper left corner of the window, and then click [Print]. 2. In the "Document Size:" list, select the envelope size. 5. In the "Paper Type:" list, select [Envelope]. 6. Change any... other print settings if necessary. 8. Print Printing on Envelopes Using the Printer Driver When using the PCL 6 printer driver 1. In the "Input Tray:" list, select the paper tray where the envelopes are loaded. 7.

User Guide
Page 133
... . 3. You can send data created on the machine's hard disk, and allows you to edit and print them as necessary. • Applications with their own drivers, such as PageMaker, do not support this function. • Do not cancel the file transfer process while the data is not used as required. 7. Saving... documents that are stored, new files cannot be stored when • The number of pages in a document exceeds 2,000. • The total number of the window, and then click [Print]. 2.
... . 3. You can send data created on the machine's hard disk, and allows you to edit and print them as necessary. • Applications with their own drivers, such as PageMaker, do not support this function. • Do not cancel the file transfer process while the data is not used as required. 7. Saving... documents that are stored, new files cannot be stored when • The number of pages in a document exceeds 2,000. • The total number of the window, and then click [Print]. 2.

User Guide
Page 238
...size. • When placing an original directly on the exposure glass, the lifting/ lowering action of scanning areas that can be scanned by Windows. • Check whether the client computer can use the TCP/IP protocol. 236 Lift the exposure glass cover or the ADF 30 degrees ...or more scanning area." Specify the scanning size." "Clear Misfeed(s) in the scanner driver." "Cannot specify any more . A paper misfeed has occurred inside the ADF. • Remove the jammed originals, and then insert them again. ...
...size. • When placing an original directly on the exposure glass, the lifting/ lowering action of scanning areas that can be scanned by Windows. • Check whether the client computer can use the TCP/IP protocol. 236 Lift the exposure glass cover or the ADF 30 degrees ...or more scanning area." Specify the scanning size." "Clear Misfeed(s) in the scanner driver." "Cannot specify any more . A paper misfeed has occurred inside the ADF. • Remove the jammed originals, and then insert them again. ...

User Guide
Page 242
... telnet", Connecting the Machine/ System Settings. • Check whether the machine's host name is set as telnet to the network correctly. For the WIA driver, check the [Network Connection] tab in the Network Connection Tool. Cause The machine is connected to the network correctly. • Cancel the personal firewall ..." to set "LLMNR" of the client computer. If only "IPv6" is specified in the properties. • Use Web Image Monitor to [Active]. • In Windows XP, IPv6 address cannot be obtained from the host name. 10. Network communication is set to check this, see...
... telnet", Connecting the Machine/ System Settings. • Check whether the machine's host name is set as telnet to the network correctly. For the WIA driver, check the [Network Connection] tab in the Network Connection Tool. Cause The machine is connected to the network correctly. • Cancel the personal firewall ..." to set "LLMNR" of the client computer. If only "IPv6" is specified in the properties. • Use Web Image Monitor to [Active]. • In Windows XP, IPv6 address cannot be obtained from the host name. 10. Network communication is set to check this, see...


