
User Guide
Page 7
... Machine Makes a Beeping Sound 190 When You Have Problems Operating the Machine 191 When Multiple Functions Cannot Be Executed Simultaneously 195 Messages Displayed When You Use the Copy/Document Server Function 197 Messages Displayed When You Use the Facsimile Function 201 When Network Setting Problems Occur 202 When the Remote Fax Function Cannot Be Used 208 Messages Displayed When You Use the Printer Function 211 Messages Displayed on the Control Panel When You Use the Printer Function 211 Messages Printed on the Error Logs or Reports When You Use the Printer Function 214 Messages...
... Machine Makes a Beeping Sound 190 When You Have Problems Operating the Machine 191 When Multiple Functions Cannot Be Executed Simultaneously 195 Messages Displayed When You Use the Copy/Document Server Function 197 Messages Displayed When You Use the Facsimile Function 201 When Network Setting Problems Occur 202 When the Remote Fax Function Cannot Be Used 208 Messages Displayed When You Use the Printer Function 211 Messages Displayed on the Control Panel When You Use the Printer Function 211 Messages Printed on the Error Logs or Reports When You Use the Printer Function 214 Messages...

User Guide
Page 23
Sending and Receiving Faxes by the main machine with the facsimile function to the public switched telephone network (PSTN). • For details about the machine's settings, see "Sending/Receiving Documents Using a Remote Machine (Remote Fax)", Fax. 21 CJQ612 • To use the remote fax function, install the fax connection unit on reports. • You can receive documents sent via a network (Remote Fax). What You Can Do with the fax unit. When a job has finished, confirm results displayed on sending history or printed on the main-machine and...
Sending and Receiving Faxes by the main machine with the facsimile function to the public switched telephone network (PSTN). • For details about the machine's settings, see "Sending/Receiving Documents Using a Remote Machine (Remote Fax)", Fax. 21 CJQ612 • To use the remote fax function, install the fax connection unit on reports. • You can receive documents sent via a network (Remote Fax). What You Can Do with the fax unit. When a job has finished, confirm results displayed on sending history or printed on the main-machine and...

User Guide
Page 59
.... [Start] key Press to start copying, printing, scanning, or sending. 14. [Sample Copy] key Press to make interrupt copies. You can also print these details. See "Sample Copy", Copy/ Document Server. 15. [Stop] key Press to stop a job in or log out. 10. [User Tools/Counter] key • User Tools Press to change the default settings to delete a number entered. 17. When the machine is turned on the main power switch. 8. [Energy Saver] key Press to switch to enter the numbers for copies, fax numbers and data for the initial display when modes are cleared...
.... [Start] key Press to start copying, printing, scanning, or sending. 14. [Sample Copy] key Press to make interrupt copies. You can also print these details. See "Sample Copy", Copy/ Document Server. 15. [Stop] key Press to stop a job in or log out. 10. [User Tools/Counter] key • User Tools Press to change the default settings to delete a number entered. 17. When the machine is turned on the main power switch. 8. [Energy Saver] key Press to switch to enter the numbers for copies, fax numbers and data for the initial display when modes are cleared...

User Guide
Page 75
...: 100 programs • Scanner: 25 programs The following settings can be registered to programs: Copier: Original type, density, Special Original, paper tray, Store File (except for User Name, File Name, and Password), Auto Reduce / Enlarge, Create Margin, ID Card Copy, Finishing, Cover/Slip Sheet, Edit / Stamp, Dup./Combine/Series, Reduce / Enlarge, number of copies Document Server (on the initial document print screen): 2 Sided Copy Top to Top, 2 Sided Copy Top to register functions in Designate / Chapter), Edit / Stamp, number of the control panel, and...
...: 100 programs • Scanner: 25 programs The following settings can be registered to programs: Copier: Original type, density, Special Original, paper tray, Store File (except for User Name, File Name, and Password), Auto Reduce / Enlarge, Create Margin, ID Card Copy, Finishing, Cover/Slip Sheet, Edit / Stamp, Dup./Combine/Series, Reduce / Enlarge, number of copies Document Server (on the initial document print screen): 2 Sided Copy Top to Top, 2 Sided Copy Top to register functions in Designate / Chapter), Edit / Stamp, number of the control panel, and...
User Guide
Page 80
... the machine's Address Book, and then specify the scan settings. For details, see "Functions Requiring Optional Configurations", Getting Started. • The names of originals and send the scanned originals as a single job. Getting Started Program name Program description Effect High resolution scan Specify settings to specify them when sending a scanned file. You can skip the procedures to save scanned data in [Scan Settings]. This setting can send a fax at a specified transmission time. Specified time fax Specify [Send Later] in [TX transmission Mode]. Departmental fax...
... the machine's Address Book, and then specify the scan settings. For details, see "Functions Requiring Optional Configurations", Getting Started. • The names of originals and send the scanned originals as a single job. Getting Started Program name Program description Effect High resolution scan Specify settings to specify them when sending a scanned file. You can skip the procedures to save scanned data in [Scan Settings]. This setting can send a fax at a specified transmission time. Specified time fax Specify [Send Later] in [TX transmission Mode]. Departmental fax...

User Guide
Page 125
... Select the machine model you are prompted to restart your computer, restart it by following the instructions that appear. 9. 5. Click [Install]. 6. Click [Next >]. 4. Click [Continue]. Log on the installer screen. 2. When you want to install the drivers. Configure the user code, default printer, and shared printer as an Administrators group member. 1. For information not included in the [Select Printer] dialog box. 5. Print This chapter describes frequently used printer functions and operations.
... Select the machine model you are prompted to restart your computer, restart it by following the instructions that appear. 9. 5. Click [Install]. 6. Click [Next >]. 4. Click [Continue]. Log on the installer screen. 2. When you want to install the drivers. Configure the user code, default printer, and shared printer as an Administrators group member. 1. For information not included in the [Select Printer] dialog box. 5. Print This chapter describes frequently used printer functions and operations.

User Guide
Page 127
... menu button in Low Power mode or Sleep mode, an error message might appear when the print job is complete. If you select [Auto Tray Select] in the "Copies:" box. 11. In the [Select Printer] list, select the printer you want to print on only one side, select [Off] for the two-sided printing setting. • If you send a print job via USB 2.0 while the machine is automatically selected according to use. 3. Click [OK]. 12. Click [Preferences]. 4. Start printing...
... menu button in Low Power mode or Sleep mode, an error message might appear when the print job is complete. If you select [Auto Tray Select] in the "Copies:" box. 11. In the [Select Printer] list, select the printer you want to print on only one side, select [Off] for the two-sided printing setting. • If you send a print job via USB 2.0 while the machine is automatically selected according to use. 3. Click [OK]. 12. Click [Preferences]. 4. Start printing...

User Guide
Page 128
... g/m2), Color, Letterhead, Preprinted, Bond, Cardstock When Using the PCL 6 Printer Driver 1. Start printing from the application's [Print] dialog box. Click the [Detailed Settings] tab. 5. Click [OK]. 9. Print Printing on Both Sides of Sheets This section explains how to print on both sides of each page using the printer driver. • The types of the window, and then click [Print]. 2. Change any other print settings if necessary. 8. 5. In the [Select Printer] list, select the printer you want...
... g/m2), Color, Letterhead, Preprinted, Bond, Cardstock When Using the PCL 6 Printer Driver 1. Start printing from the application's [Print] dialog box. Click the [Detailed Settings] tab. 5. Click [OK]. 9. Print Printing on Both Sides of Sheets This section explains how to print on both sides of each page using the printer driver. • The types of the window, and then click [Print]. 2. Change any other print settings if necessary. 8. 5. In the [Select Printer] list, select the printer you want...

User Guide
Page 131
...of the control panel. Press [Envelope] in the "Paper Type" area, and then select the appropriate item in the paper tray. 2. Press [OK]. 10. Close the initial settings screen. • When using the standard operation panel Press the [User Tools/Counter] key. • When using the Smart Operation Panel Press [User Tools/Counter] ( ) on Envelopes Configure the paper settings appropriately using the standard operation panel Press the [User Tools/Counter] key. Printing on Envelopes Printing on the top right of the screen. 129 Configuring Envelope Settings Using the Control Panel 1. Load...
...of the control panel. Press [Envelope] in the "Paper Type" area, and then select the appropriate item in the paper tray. 2. Press [OK]. 10. Close the initial settings screen. • When using the standard operation panel Press the [User Tools/Counter] key. • When using the Smart Operation Panel Press [User Tools/Counter] ( ) on Envelopes Configure the paper settings appropriately using the standard operation panel Press the [User Tools/Counter] key. Printing on Envelopes Printing on the top right of the screen. 129 Configuring Envelope Settings Using the Control Panel 1. Load...

User Guide
Page 155
... scanned document. Document Server This chapter describes frequently used Document Server functions and operations. It is automatically attached to identify the user or user group that all other users. User Name You can only be accessed by the scanner, make sure that stored the documents. For details about the Address Book, see Copy/ Document Server available on the security setting, [Access Privileges] may appear instead of the file name. 153 Depending on our website. If a password...
... scanned document. Document Server This chapter describes frequently used Document Server functions and operations. It is automatically attached to identify the user or user group that all other users. User Name You can only be accessed by the scanner, make sure that stored the documents. For details about the Address Book, see Copy/ Document Server available on the security setting, [Access Privileges] may appear instead of the file name. 153 Depending on our website. If a password...

User Guide
Page 164
... control panel have priority over the printer driver settings. For details, see "Copying from a computer, see page 172 "Recommended Paper Sizes and Types". Adding Paper and Toner • You can be loaded in a specific orientation. For details about [Panel Key Sound], see "Printing Documents", Print. • The default setting for [Printer Bypass Paper Size] in [System] of [Bypass Tray] is [Auto Detect]. For details about the sizes that are changed. • For details about setting printer drivers, see "General Features", Connecting the Machine...
... control panel have priority over the printer driver settings. For details, see "Copying from a computer, see page 172 "Recommended Paper Sizes and Types". Adding Paper and Toner • You can be loaded in a specific orientation. For details about [Panel Key Sound], see "Printing Documents", Print. • The default setting for [Printer Bypass Paper Size] in [System] of [Bypass Tray] is [Auto Detect]. For details about the sizes that are changed. • For details about setting printer drivers, see "General Features", Connecting the Machine...

User Guide
Page 171
... . • Printer mode Specify [Auto Detect] or [On (Always)] for example, letterhead paper, punched paper, or copied paper) might not be printed correctly, depending on how the originals and paper are placed. Settings for the User Tools • Copier mode Specify [Yes] for [Letterhead Setting] in [System] under the Copier / Document Server Features menu, and then place the original and paper as follows: Icon Meaning Place or load paper scanned or printed side face...
... . • Printer mode Specify [Auto Detect] or [On (Always)] for example, letterhead paper, punched paper, or copied paper) might not be printed correctly, depending on how the originals and paper are placed. Settings for the User Tools • Copier mode Specify [Yes] for [Letterhead Setting] in [System] under the Copier / Document Server Features menu, and then place the original and paper as follows: Icon Meaning Place or load paper scanned or printed side face...
User Guide
Page 191
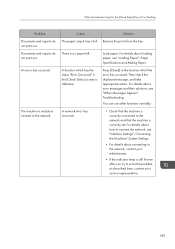
... no paper left. Remove the prints from the tray. There is unable to connect to solve the problem as described here, contact your administrator. • If the indicator lamp is defective. For details about connecting to connect the network, see "Interface Settings", Connecting the Machine/ System Settings. • For details about error messages and their solutions, see "Loading Paper", Paper Specifications and Adding Paper. For details about how to the network, contact your service...
... no paper left. Remove the prints from the tray. There is unable to connect to solve the problem as described here, contact your administrator. • If the indicator lamp is defective. For details about connecting to connect the network, see "Interface Settings", Connecting the Machine/ System Settings. • For details about error messages and their solutions, see "Loading Paper", Paper Specifications and Adding Paper. For details about how to the network, contact your service...

User Guide
Page 215
... paper type the same type as the specified paper specified in the printer driver. Check that is mismatched. Be sure the tray you select for other pages is installed properly, or contact your service representative. An error has occurred in the IEEE 1284 interface board. Reset the job. Please call service." (A "wireless LAN board" or "Bluetooth unit" is not providing paper for slip sheets is referred to as a "wireless card".) The machine...
... paper type the same type as the specified paper specified in the printer driver. Check that is mismatched. Be sure the tray you select for other pages is installed properly, or contact your service representative. An error has occurred in the IEEE 1284 interface board. Reset the job. Please call service." (A "wireless LAN board" or "Bluetooth unit" is not providing paper for slip sheets is referred to as a "wireless card".) The machine...

User Guide
Page 218
... settings, see Security Guide. Enter the correct classification code. 216 In [Administrator Tools] under [System Settings], priority was aborted. "You reach the usage limit. Check the settings for the printer driver. Turn off the power, and then back on this machine. Data reception was specified to be given to stop transmission from the printer driver. Troubleshooting Message Cause Solution "Error occurred while processing an Unauthorized Copy Prevention job. Job cancelled." For details about print volume use...
... settings, see Security Guide. Enter the correct classification code. 216 In [Administrator Tools] under [System Settings], priority was aborted. "You reach the usage limit. Check the settings for the printer driver. Turn off the power, and then back on this machine. Data reception was specified to be given to stop transmission from the printer driver. Troubleshooting Message Cause Solution "Error occurred while processing an Unauthorized Copy Prevention job. Job cancelled." For details about print volume use...

User Guide
Page 219
...Message "Classification Code is not supported with . For details about the maximum number of the specified output tray is limited. "Duplex Cancelled" Duplex printing was exceeded. Solution Select [Optional] for the duplex function. For details about setting "Apply Duplex", see "Specifications for the Main Unit", Maintenance and Specifications. • Change the setting for the paper tray. For details about paper, see "Tray Paper Settings", Connecting the Machine/ System Settings. "Output Tray Changed" The output tray was changed because the paper size of multi-sheet...
...Message "Classification Code is not supported with . For details about the maximum number of the specified output tray is limited. "Duplex Cancelled" Duplex printing was exceeded. Solution Select [Optional] for the duplex function. For details about setting "Apply Duplex", see "Specifications for the Main Unit", Maintenance and Specifications. • Change the setting for the paper tray. For details about paper, see "Tray Paper Settings", Connecting the Machine/ System Settings. "Output Tray Changed" The output tray was changed because the paper size of multi-sheet...

User Guide
Page 226
... "List / Test Print", Print. 224 If the message appears again, replace the RAM. In some cases, it will take a long time to complete a print job. A memory allocation error occurred. "Insufficient Memory" "Memory Retrieval Error" Cause An input buffer overflow occurred. 10. Troubleshooting Message "I /O Buffer], and then set the maximum buffer size to a larger value. • Reduce the number of errors may be printed on again. For details about how to the machine.
... "List / Test Print", Print. 224 If the message appears again, replace the RAM. In some cases, it will take a long time to complete a print job. A memory allocation error occurred. "Insufficient Memory" "Memory Retrieval Error" Cause An input buffer overflow occurred. 10. Troubleshooting Message "I /O Buffer], and then set the maximum buffer size to a larger value. • Reduce the number of errors may be printed on again. For details about how to the machine.

User Guide
Page 233
... folder are correct. • A password of the SMTP server, FTP server, or client computer at the destination. "Exceeded max. "Sending the data has failed. The entered user name or password was not enough free space on the hard disk of 128 or more characters may not be sent correctly. Check [Max. Email Size]. • Change the [Divide & Send Email] setting to [Yes (per Page)] or [Yes (per page has reached the maximum email size...
... folder are correct. • A password of the SMTP server, FTP server, or client computer at the destination. "Exceeded max. "Sending the data has failed. The entered user name or password was not enough free space on the hard disk of 128 or more characters may not be sent correctly. Check [Max. Email Size]. • Change the [Divide & Send Email] setting to [Yes (per Page)] or [Yes (per page has reached the maximum email size...

User Guide
Page 261
..., 42, 43, 46, 48, 50, 52, 54, 166, 172 Tray 4 172 Turning off the power 79 Turning on the power 79 Two-sided combine 97 Two-sided paper 169 Two-sided printing 126 U Unauthorized copy prevention 25 Used toner 185 User certificate 245 User Code Authentication 80 User information on electrical and electronic equipment 252 User Tools/Counter key 57 Using scanned files on the computer 12 V Vents 28, 29, 30, 31, 33...
..., 42, 43, 46, 48, 50, 52, 54, 166, 172 Tray 4 172 Turning off the power 79 Turning on the power 79 Two-sided combine 97 Two-sided paper 169 Two-sided printing 126 U Unauthorized copy prevention 25 Used toner 185 User certificate 245 User Code Authentication 80 User information on electrical and electronic equipment 252 User Tools/Counter key 57 Using scanned files on the computer 12 V Vents 28, 29, 30, 31, 33...

Getting Started Guide
Page 8
... Machine Troubleshooting Provides a guide for originals. Extended Feature Settings Describes how to print using the control panel or Web Image Monitor. For enhanced security, we recommend that you first make the following settings: • Install the Device Certificate. • Enable SSL (Secure Sockets Layer) Encryption. • Change the user name and password of the machine. Print Describes how to configure the extended features using the printer driver. Scan Describes how to scan paper data using this machine and how to send...
... Machine Troubleshooting Provides a guide for originals. Extended Feature Settings Describes how to print using the control panel or Web Image Monitor. For enhanced security, we recommend that you first make the following settings: • Install the Device Certificate. • Enable SSL (Secure Sockets Layer) Encryption. • Change the user name and password of the machine. Print Describes how to configure the extended features using the printer driver. Scan Describes how to scan paper data using this machine and how to send...


