User Guide
Page 4
... machine's IP address manually 46 Configuring Telephone Network Settings 49 Selecting the telephone line type 49 Selecting the telephone network connection type 50 Setting the outside line access number 51 Sharing the Printer on a Network 52 Installing Options 53 Installing the Paper Feed Unit TK1010 (Tray 2 53 Installing the Memory Unit Type F 256MB (DDR-SDRAM Module 55 Paper and Other Media 58 Supported Paper for Each Tray 58 Specifications of Paper Types 60 Unsupported Types of Paper 63 Paper Storage Precautions 64 Printable Area ...64 Loading Paper ...66 Loading Paper in Tray...
... machine's IP address manually 46 Configuring Telephone Network Settings 49 Selecting the telephone line type 49 Selecting the telephone network connection type 50 Setting the outside line access number 51 Sharing the Printer on a Network 52 Installing Options 53 Installing the Paper Feed Unit TK1010 (Tray 2 53 Installing the Memory Unit Type F 256MB (DDR-SDRAM Module 55 Paper and Other Media 58 Supported Paper for Each Tray 58 Specifications of Paper Types 60 Unsupported Types of Paper 63 Paper Storage Precautions 64 Printable Area ...64 Loading Paper ...66 Loading Paper in Tray...

User Guide
Page 5
... 96 Windows ...96 Mac OS X ...96 Basic Operation in Scanner Mode 119 Registering Scan Destinations 120 Modifying Scan Destinations 123 Deleting Scan Destinations 123 Scanning Using the Control Panel 124 Basic Operation for TWAIN Scanning 131 Scanning from a computer (Windows 132 Scanning from a Computer 131 Basic Operation for Sending Scanned Files 124 Specifying the scan destination 126 Specifying the Scan Settings 127 Specifying the scanning size according to Original 114 Making 2-sided Copies 116 5. Using the Scanner Function The Screen in Printer Mode 97 If a Paper...
... 96 Windows ...96 Mac OS X ...96 Basic Operation in Scanner Mode 119 Registering Scan Destinations 120 Modifying Scan Destinations 123 Deleting Scan Destinations 123 Scanning Using the Control Panel 124 Basic Operation for TWAIN Scanning 131 Scanning from a computer (Windows 132 Scanning from a Computer 131 Basic Operation for Sending Scanned Files 124 Specifying the scan destination 126 Specifying the Scan Settings 127 Specifying the scanning size according to Original 114 Making 2-sided Copies 116 5. Using the Scanner Function The Screen in Printer Mode 97 If a Paper...
User Guide
Page 14
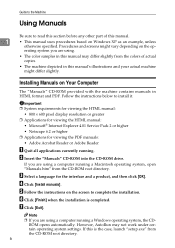
... root directory. ROM opens automatically. D Click [Install manuals]. erating system you are using . • The color samples in HTML format and PDF. Installing Manuals on Your Computer The "Manuals" CD-ROM provided with the machine contains manuals in this manual may not work under certain operating system settings. Important ❒ System requirements for viewing the HTML manual: • 800 × 600 pixel display resolution or greater ❒...
... root directory. ROM opens automatically. D Click [Install manuals]. erating system you are using . • The color samples in HTML format and PDF. Installing Manuals on Your Computer The "Manuals" CD-ROM provided with the machine contains manuals in this manual may not work under certain operating system settings. Important ❒ System requirements for viewing the HTML manual: • 800 × 600 pixel display resolution or greater ❒...
User Guide
Page 17
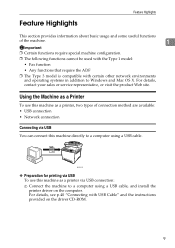
...; Fax function • Any functions that require the ADF ❒ The Type 3 model is compatible with USB Cable" and the instructions provided on the computer. For details, see p.40 "Connecting with certain other network environments and operating systems in addition to a computer using a USB cable. For details, contact your sales or service representative, or visit the product Web site. Using the Machine as a Printer To use this machine directly to a computer using a USB cable, and install...
...; Fax function • Any functions that require the ADF ❒ The Type 3 model is compatible with USB Cable" and the instructions provided on the computer. For details, see p.40 "Connecting with certain other network environments and operating systems in addition to a computer using a USB cable. For details, contact your sales or service representative, or visit the product Web site. Using the Machine as a Printer To use this machine directly to a computer using a USB cable, and install...

User Guide
Page 101
...the printer's option settings. Using the Printer Function This chapter describes the printer function. Configuring Option Settings for Bidirectional Communication Bidirectional communication allows information about paper settings to the computer's USB port using a USB interface cable. Conditions for the Printer If bidirectional communication is supported by Windows 2000/XP/Vista, and Windows Server 2003. You can update printer status manually. 93 To support bidirectional communication, the following conditions must be met: ❖ When connected via a network The printer must...
...the printer's option settings. Using the Printer Function This chapter describes the printer function. Configuring Option Settings for Bidirectional Communication Bidirectional communication allows information about paper settings to the computer's USB port using a USB interface cable. Conditions for the Printer If bidirectional communication is supported by Windows 2000/XP/Vista, and Windows Server 2003. You can update printer status manually. 93 To support bidirectional communication, the following conditions must be met: ❖ When connected via a network The printer must...

User Guide
Page 102
... the option you are using the PostScript 3 printer driver, click the [Device Settings] tab. The [Printers] window appears. per size, and then click [Update]. sion is installed, specify the total amount of the PPD file displayed in the dialog box. 94 E In the [Options] area, select the options that are disabled. B Click [Print & Fax]. Important ❒ Under Windows 2000/XP and Windows Server 2003, Manage Printers permis- Log on as an Administrators or Power Users...
... the option you are using the PostScript 3 printer driver, click the [Device Settings] tab. The [Printers] window appears. per size, and then click [Update]. sion is installed, specify the total amount of the PPD file displayed in the dialog box. 94 E In the [Options] area, select the options that are disabled. B Click [Print & Fax]. Important ❒ Under Windows 2000/XP and Windows Server 2003, Manage Printers permis- Log on as an Administrators or Power Users...

User Guide
Page 248
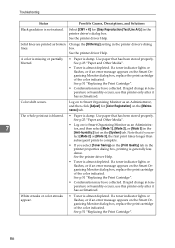
... a fax machine. • Confirm that you cannot make calls using the telephone. Press the {Pause/Redial} key after, for printing photocopies in the Remove the jammed paper. Confirm that the line is properly connected to use the exposure glass, turn off [2in1], [4in1], or [Sort] under [Copy Settings], and then try again. See p.166 "Copy Legal size. See p.180 "Machine Settings". If you can make calls this way, contact your sales or service machine's memory. See...
... a fax machine. • Confirm that you cannot make calls using the telephone. Press the {Pause/Redial} key after, for printing photocopies in the Remove the jammed paper. Confirm that the line is properly connected to use the exposure glass, turn off [2in1], [4in1], or [Sort] under [Copy Settings], and then try again. See p.166 "Copy Legal size. See p.180 "Machine Settings". If you can make calls this way, contact your sales or service machine's memory. See...

User Guide
Page 251
... . Paper type X not supported by Duplex printing is not enough memory. nation to oper- On board memory check error An error was detected in the tray. Paper size X not supported by duplex Duplex printing is associ- • Press a different One ated with the One Touch but- turn it back on X The tray does not support Jams". See p.130 "Specifying resolution". Load paper of pa- Paper type X mismatch on X The paper size set for the document differs from the size of Memory Press Clear Key A scanned file...
... . Paper type X not supported by Duplex printing is not enough memory. nation to oper- On board memory check error An error was detected in the tray. Paper size X not supported by duplex Duplex printing is associ- • Press a different One ated with the One Touch but- turn it back on X The tray does not support Jams". See p.130 "Specifying resolution". Load paper of pa- Paper type X mismatch on X The paper size set for the document differs from the size of Memory Press Clear Key A scanned file...

User Guide
Page 252
...reached. Set CorrectPaper The tray set for changing the paper size appears on the screen. representative. eration again. Select a different tray, or install tray 2. Server Response Error Press Clear Key An error occurred in the machine. try the op- Troubleshooting Message Causes Solutions Refill X Toner Cartridge A non-supported print cartridge is displayed, press the {OK} key. Remove and replace it . Scan Calibration Error A calibration error occurred while copying, scanning, or faxing. Scan Network Disconnect Press Clear Key A scanned file could not...
...reached. Set CorrectPaper The tray set for changing the paper size appears on the screen. representative. eration again. Select a different tray, or install tray 2. Server Response Error Press Clear Key An error occurred in the machine. try the op- Troubleshooting Message Causes Solutions Refill X Toner Cartridge A non-supported print cartridge is displayed, press the {OK} key. Remove and replace it . Scan Calibration Error A calibration error occurred while copying, scanning, or faxing. Scan Network Disconnect Press Clear Key A scanned file could not...

User Guide
Page 254
... on image volume and 9 density, number of children. • If toner or used toner is inhaled, gargle with cold water. R CAUTION: • Keep toner (used or unused) and toner containers out of reach of pages printed at a time, paper type and size, and environmental conditions such as temperature and humidity. Troubleshooting Replacing Print Cartridges R WARNING: • Do not incinerate used toner gets into your clothes or skin when removing a paper jam or replacing toner. Early replacement...
... on image volume and 9 density, number of children. • If toner or used toner is inhaled, gargle with cold water. R CAUTION: • Keep toner (used or unused) and toner containers out of reach of pages printed at a time, paper type and size, and environmental conditions such as temperature and humidity. Troubleshooting Replacing Print Cartridges R WARNING: • Do not incinerate used toner gets into your clothes or skin when removing a paper jam or replacing toner. Early replacement...

Administration Guide
Page 61
... the power cable. A Turn off the printer's power switch and un- For loading paper into the paper tray, see Software Guide. Important ❒ Before touching the memory unit, ground yourself by touching something metal to physical shocks. B Remove the memory cover. 16 ASH026S Reference For printing the configuration page, see p.34 "Loading Paper". When adjusting the printing position, see Software Guide. Installing the Printer and Options Note ❒ When moving the printer, remove the optional paper feed unit. ❒ Before using the optional paper feed unit, you...
... the power cable. A Turn off the printer's power switch and un- For loading paper into the paper tray, see Software Guide. Important ❒ Before touching the memory unit, ground yourself by touching something metal to physical shocks. B Remove the memory cover. 16 ASH026S Reference For printing the configuration page, see p.34 "Loading Paper". When adjusting the printing position, see Software Guide. Installing the Printer and Options Note ❒ When moving the printer, remove the optional paper feed unit. ❒ Before using the optional paper feed unit, you...

Administration Guide
Page 119
.... Turn power switch off the main power, and then turn it on . Open the indicated cover, and then replace the Toner Cartridge. Open the indicated cover, and then replace the Toner Cartridge. Front Cover : [Waste Toner Bottle] Tray Not Detected The selected paper source tray is not set properly. Check the indicated tray. [Tray 1] The indicated paper input tray is not installed correctly, or not installed. Install the indicated paper input tray correctly. Functional problem within the printer. If the error appears again, please call service.
.... Turn power switch off the main power, and then turn it on . Open the indicated cover, and then replace the Toner Cartridge. Open the indicated cover, and then replace the Toner Cartridge. Front Cover : [Waste Toner Bottle] Tray Not Detected The selected paper source tray is not set properly. Check the indicated tray. [Tray 1] The indicated paper input tray is not installed correctly, or not installed. Install the indicated paper input tray correctly. Functional problem within the printer. If the error appears again, please call service.

Administration Guide
Page 121
... requires Color registration failed. See p.64 "Cleaning the Toner Density Sensor" 7 76 Check the main power switch is securely connected. cleaning. Troubleshooting Message Explanation Functional problem within the printer. If the error occurs again, contact service people to communicate with the engine. Recommended Action Turn off , then on. Turn power switch off the main power, and then turn it . Check the USB or network cables are securely connected also. and main switch. Clean the toner density sensor. No Response from I/O Device...
... requires Color registration failed. See p.64 "Cleaning the Toner Density Sensor" 7 76 Check the main power switch is securely connected. cleaning. Troubleshooting Message Explanation Functional problem within the printer. If the error occurs again, contact service people to communicate with the engine. Recommended Action Turn off , then on. Turn power switch off the main power, and then turn it . Check the USB or network cables are securely connected also. and main switch. Clean the toner density sensor. No Response from I/O Device...

Administration Guide
Page 130
... making prints. The color of the correct size, use the same size paper as printer driver's dialog box. See the printer driver Help. • Some applications print color files in the Energy Saver mode. Solid areas, lines or text are using paper smaller than the paper size selected in the application, use the reduction function to reduce the image, and then print. If you cannot load paper of the printout is missing, turn the power switch off , or excess pages are printed...
... making prints. The color of the correct size, use the same size paper as printer driver's dialog box. See the printer driver Help. • Some applications print color files in the Energy Saver mode. Solid areas, lines or text are using paper smaller than the paper size selected in the application, use the reduction function to reduce the image, and then print. If you cannot load paper of the printout is missing, turn the power switch off , or excess pages are printed...
Administration Guide
Page 131
..., replace the print cartridge of the color indicated. See the printer driver Help. If rapid change in temperature or humidity occurs, use this printer only after it has acclimatized. Color shift occurs. If rapid change in temperature or humidity occurs, use this printer only after it has acclimatized. See the printer driver Help. Use paper that has been stored properly. White streaks or color streaks appear. • Toner is damp. Solid lines are printed...
..., replace the print cartridge of the color indicated. See the printer driver Help. If rapid change in temperature or humidity occurs, use this printer only after it has acclimatized. Color shift occurs. If rapid change in temperature or humidity occurs, use this printer only after it has acclimatized. See the printer driver Help. Use paper that has been stored properly. White streaks or color streaks appear. • Toner is damp. Solid lines are printed...

Administration Guide
Page 170
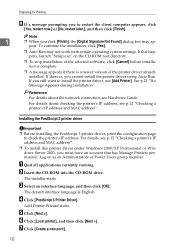
... changing the port settings to use TCP/IP Port Type P9100, see p.7 "Configuring TCP/IP Port Type P9100". See p.21 "If a Message Appears during Installation". Reference For details about changing the port settings to use [Add Printer]. C Double-click the Add Printer icon. E Click [Local Printer], and then click [Next >]. If necessary, click [Configure port] to [Settings], and then click [Printers]. To install the printer driver, use , and then click [Next >]. B On the [Start] menu, point to make port settings. Installing the Printer Driver under a Network Environment...
... changing the port settings to use TCP/IP Port Type P9100, see p.7 "Configuring TCP/IP Port Type P9100". See p.21 "If a Message Appears during Installation". Reference For details about changing the port settings to use [Add Printer]. C Double-click the Add Printer icon. E Click [Local Printer], and then click [Next >]. If necessary, click [Configure port] to [Settings], and then click [Printers]. To install the printer driver, use , and then click [Next >]. B On the [Start] menu, point to make port settings. Installing the Printer Driver under a Network Environment...

Administration Guide
Page 172
... can change the port settings to use TCP/IP Port Type P9100 after the installation of the printer you want to use . F Click [Finish]. On the [File] menu, click [Properties]. Add TCP/IP Port Type P9100 Wizard starts. B Click the [Details] tab, and then click [Port Settings...]. D Click [Next >]. For details about printing the test page, see p.12 "Checking a printer's IP address and MAC address". A In the [Printers] window, click the icon of the printer driver. Configuring the port settings A In the [Printers] window...
... can change the port settings to use TCP/IP Port Type P9100 after the installation of the printer you want to use . F Click [Finish]. On the [File] menu, click [Properties]. Add TCP/IP Port Type P9100 Wizard starts. B Click the [Details] tab, and then click [Port Settings...]. D Click [Next >]. For details about printing the test page, see p.12 "Checking a printer's IP address and MAC address". A In the [Printers] window, click the icon of the printer driver. Configuring the port settings A In the [Printers] window...
Administration Guide
Page 175
... 3 printer driver, print the configuration page to check the printer's IP address. Add Printer Wizard starts. E Click [Next >]. The installer starts. C Select an interface language, and then click [OK]. G Click [Create a new port:]. 10 Reference For details about checking the printer's IP address, see p.12 "Checking a printer's IP address and MAC address" . For details about the network connection, see p.12 "Checking a printer's IP address and MAC address". ❒ To install this happens, launch "Setup.exe" on as an Administrators or Power Users group...
... 3 printer driver, print the configuration page to check the printer's IP address. Add Printer Wizard starts. E Click [Next >]. The installer starts. C Select an interface language, and then click [OK]. G Click [Create a new port:]. 10 Reference For details about checking the printer's IP address, see p.12 "Checking a printer's IP address and MAC address" . For details about the network connection, see p.12 "Checking a printer's IP address and MAC address". ❒ To install this happens, launch "Setup.exe" on as an Administrators or Power Users group...
Administration Guide
Page 180
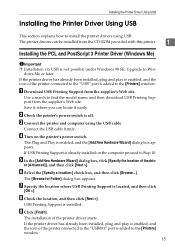
... then download USB Printing Support from the supplier's Web site. er (Advanced)], and then click [Next >]. Save it easily. C Connect the printer and computer using USB. Upgrade to install the printer drivers using the USB cable. If the printer driver has already been installed, plug and play is enabled, and the icon of the printer connected to the "USB" port is already installed on the printer's power switch. A Download USB Printing Support from the CD-ROM provided with this printer. 1 Installing the PCL and PostScript 3 Printer Driver (Windows...
... then download USB Printing Support from the supplier's Web site. er (Advanced)], and then click [Next >]. Save it easily. C Connect the printer and computer using USB. Upgrade to install the printer drivers using the USB cable. If the printer driver has already been installed, plug and play is enabled, and the icon of the printer connected to the "USB" port is already installed on the printer's power switch. A Download USB Printing Support from the CD-ROM provided with this printer. 1 Installing the PCL and PostScript 3 Printer Driver (Windows...

Administration Guide
Page 276
... access code control. ❖ [Change Access Code...] If you selected [Use] for example RGB, are counted as color pages. ❖ Auto E-mail Notification Select whether or not to send e-mail notification of machine status or errors. ❖ Print Error Page Prints an error report if an error occurs during print data processing. ❖ Device Comment Enter a note about the machine, using up to 32 alphanumeric characters. ❖ [Restore Factory Defaults] Resets all pages are counted as black and white pages. ❒ Grayscale pages of indexed colors are individually counted...
... access code control. ❖ [Change Access Code...] If you selected [Use] for example RGB, are counted as color pages. ❖ Auto E-mail Notification Select whether or not to send e-mail notification of machine status or errors. ❖ Print Error Page Prints an error report if an error occurs during print data processing. ❖ Device Comment Enter a note about the machine, using up to 32 alphanumeric characters. ❖ [Restore Factory Defaults] Resets all pages are counted as black and white pages. ❒ Grayscale pages of indexed colors are individually counted...


