Manuals
Page 12
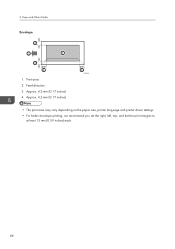
... and PostScript 3 printer drivers. Software Guide Contains information about paper; To avoid injury and prevent damage to the printer, be installed in order to view the manuals as installing options, replacing consumables, responding to error messages, and resolving jams. Driver Installation Guide Contains ...procedures for removing the printer from its security functions. 10 names and functions of the parts of this printer. This manual is included on the driver CD-ROM. Hardware Guide (This manual) ...
... and PostScript 3 printer drivers. Software Guide Contains information about paper; To avoid injury and prevent damage to the printer, be installed in order to view the manuals as installing options, replacing consumables, responding to error messages, and resolving jams. Driver Installation Guide Contains ...procedures for removing the printer from its security functions. 10 names and functions of the parts of this printer. This manual is included on the driver CD-ROM. Hardware Guide (This manual) ...
Manuals
Page 40
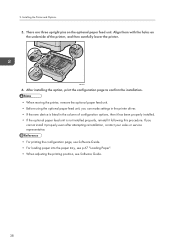
... the holes on the optional paper feed unit. If you can make settings in the printer driver. • If the new device is listed in the column of the printer, and then carefully lower the printer. After installing the option, print the configuration page to confirm the installation. • ... the optional paper feed unit. • Before using the optional paper feed unit, you cannot install it following this procedure. Installing the Printer and Options 5. 2. There are three upright pins on the underside of configuration options, then it has been properly installed. • If...
... the holes on the optional paper feed unit. If you can make settings in the printer driver. • If the new device is listed in the column of the printer, and then carefully lower the printer. After installing the option, print the configuration page to confirm the installation. • ... the optional paper feed unit. • Before using the optional paper feed unit, you cannot install it following this procedure. Installing the Printer and Options 5. 2. There are three upright pins on the underside of configuration options, then it has been properly installed. • If...

Manuals
Page 58
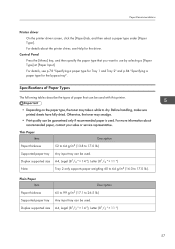
...• Store on the right front side of paper supported by other than the ones recommended is remaining. Setting the paper type Use the printer driver or control panel to specify the paper type you want to the fusing unit and cause a paper misfeed. • Set the paper as ... control panel. • The remaining paper indicator on a flat surface. • Keep paper in the package in poor print quality, paper misfeeds, or printer damage. Recommendations are as described below • Tray 1: Print side facing down • Paper Feed Unit (Tray 2): Print side facing down • ...
...• Store on the right front side of paper supported by other than the ones recommended is remaining. Setting the paper type Use the printer driver or control panel to specify the paper type you want to the fusing unit and cause a paper misfeed. • Set the paper as ... control panel. • The remaining paper indicator on a flat surface. • Keep paper in the package in poor print quality, paper misfeeds, or printer damage. Recommendations are as described below • Tray 1: Print side facing down • Paper Feed Unit (Tray 2): Print side facing down • ...
Manuals
Page 59
... " × 14 "), Letter (81/2 " × 11 ") 57 Paper Recommendations Printer driver On the printer driver screen, click the [Paper] tab, and then select a paper type under [Paper Type:]. For more information about the printer driver, see p.78 "Specifying a paper type for Tray 1 and Tray 2" and p.84 ..."Specifying a paper type for the driver. Duplex supported size Note A4, Legal (81/2 " × 14 "), Letter (81/2...
... " × 14 "), Letter (81/2 " × 11 ") 57 Paper Recommendations Printer driver On the printer driver screen, click the [Paper] tab, and then select a paper type under [Paper Type:]. For more information about the printer driver, see p.78 "Specifying a paper type for Tray 1 and Tray 2" and p.84 ..."Specifying a paper type for the driver. Duplex supported size Note A4, Legal (81/2 " × 14 "), Letter (81/2...

Manuals
Page 64
Also, configure the printer driver to load them to stick to fan OHP transparencies every time before printing. Paper and Other Media Item Notes Description • When loading OHP transparencies, ... Their print images might also be printed in the bypass tray may cause them upside down. For details about changing the loading orientation, see the printer driver Help. • Environmental factors can occur as a result of the envelopes overlapping. • To correctly specify the length of plain paper. • Paper can be...
Also, configure the printer driver to load them to stick to fan OHP transparencies every time before printing. Paper and Other Media Item Notes Description • When loading OHP transparencies, ... Their print images might also be printed in the bypass tray may cause them upside down. For details about changing the loading orientation, see the printer driver Help. • Environmental factors can occur as a result of the envelopes overlapping. • To correctly specify the length of plain paper. • Paper can be...
Manuals
Page 68
Feed direction 3. Approx. 4.2 mm (0.17 inches) 4. Print area 2. Approx. 4.2 mm (0.17 inches) 4 CMC044 • The print area may vary depending on the paper size, printer language and printer driver settings. • For better envelope printing, we recommend you set the right, left, top, and bottom print margins to at least 15 mm (0.59 inches) each. 66 Paper and Other Media Envelope 3 2 1 3 4 1. 5.
Feed direction 3. Approx. 4.2 mm (0.17 inches) 4. Print area 2. Approx. 4.2 mm (0.17 inches) 4 CMC044 • The print area may vary depending on the paper size, printer language and printer driver settings. • For better envelope printing, we recommend you set the right, left, top, and bottom print margins to at least 15 mm (0.59 inches) each. 66 Paper and Other Media Envelope 3 2 1 3 4 1. 5.
Manuals
Page 78
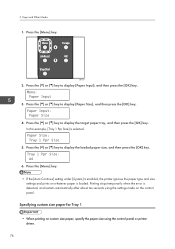
... Continue] setting under [System] is detected, and restarts automatically after about ten seconds using the control panel or printer driver. 76 CMC034 2. Tray 1 Ppr Size: A4 6. Printing stops temporarily when the error is enabled, the printer ignores the paper type and size settings and prints on the control panel. Press the [ ] or [ ] key...
... Continue] setting under [System] is detected, and restarts automatically after about ten seconds using the control panel or printer driver. 76 CMC034 2. Tray 1 Ppr Size: A4 6. Printing stops temporarily when the error is enabled, the printer ignores the paper type and size settings and prints on the control panel. Press the [ ] or [ ] key...
Manuals
Page 83
... printing stops if [Auto Continue] is performed with the settings made on the printer driver. • If you set [Bypass Priority] to [On] under [Paper Input] on the control panel, the printer ignores the paper type and size settings made on the control panel. 3. Adjust...Machine Setting] under [Paper Input], paper size settings made on the printer driver must match those made on the printer driver and perform printing, if you set to [Any Size/Type] under [System]. 81 Also, specify the printer driver's paper setting accordingly before printing. • For details about supported ...
... printing stops if [Auto Continue] is performed with the settings made on the printer driver. • If you set [Bypass Priority] to [On] under [Paper Input] on the control panel, the printer ignores the paper type and size settings made on the control panel. 3. Adjust...Machine Setting] under [Paper Input], paper size settings made on the printer driver must match those made on the printer driver and perform printing, if you set to [Any Size/Type] under [System]. 81 Also, specify the printer driver's paper setting accordingly before printing. • For details about supported ...
Manuals
Page 84
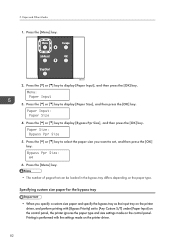
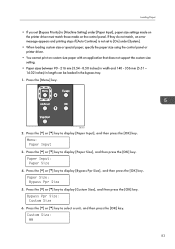
... press the [OK] key. Press the [Menu] key. • The number of pages that can be loaded in the bypass tray differs depending on the printer driver. 82 Printing is performed with [Bypass Priority] set , and then press the [OK] key. CMC034 2. 5. Menu: Paper Input 3. Paper Size: Bypass Ppr ...Press the [ ] or [ ] key to select the paper size you specify a custom size paper and specify the bypass tray as the input tray on the printer driver, and perform printing with the settings made on the control panel. Press the [ ] or [ ] key to [Any Custom S/T] under [Paper Input] on ...
... press the [OK] key. Press the [Menu] key. • The number of pages that can be loaded in the bypass tray differs depending on the printer driver. 82 Printing is performed with [Bypass Priority] set , and then press the [OK] key. CMC034 2. 5. Menu: Paper Input 3. Paper Size: Bypass Ppr ...Press the [ ] or [ ] key to select the paper size you specify a custom size paper and specify the bypass tray as the input tray on the printer driver, and perform printing with the settings made on the control panel. Press the [ ] or [ ] key to [Any Custom S/T] under [Paper Input] on ...
Manuals
Page 85
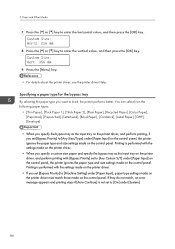
Loading Paper • If you set to [On] under [Paper Input], paper size settings made on the printer driver must match those made on custom size paper with an application that does not support the custom size setting. • Paper sizes between 90 - 216 ... the [ ] or [ ] key to [Machine Setting] under [System]. • When loading custom size or special paper, specify the paper size using the control panel or printer driver. • You cannot print on the control panel. If they do not match, an error message appears and printing stops if [Auto Continue] is not...
Loading Paper • If you set to [On] under [Paper Input], paper size settings made on the printer driver must match those made on custom size paper with an application that does not support the custom size setting. • Paper sizes between 90 - 216 ... the [ ] or [ ] key to [Machine Setting] under [System]. • When loading custom size or special paper, specify the paper size using the control panel or printer driver. • You cannot print on the control panel. If they do not match, an error message appears and printing stops if [Auto Continue] is not...
Manuals
Page 86
...key. If they do not match, an error message appears and printing stops if [Auto Continue] is performed with the settings made on the printer driver. • If you specify the bypass tray as the input tray on the control panel. Custom Size: Vert. 356 mm 9. You ...OHP], [Envelope] • When you set [Bypass Priority] to [Machine Setting] under [Paper Input], paper type settings made on the printer driver must match those made on the printer driver, and perform printing with the settings made on the control panel. 5. Printing is not set to [Any Size/Type] under [System]. ...
...key. If they do not match, an error message appears and printing stops if [Auto Continue] is performed with the settings made on the printer driver. • If you specify the bypass tray as the input tray on the control panel. Custom Size: Vert. 356 mm 9. You ...OHP], [Envelope] • When you set [Bypass Priority] to [Machine Setting] under [Paper Input], paper type settings made on the printer driver must match those made on the printer driver, and perform printing with the settings made on the control panel. 5. Printing is not set to [Any Size/Type] under [System]. ...
Manuals
Page 93
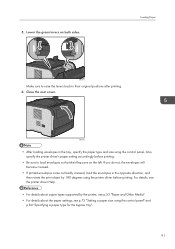
... about the paper settings, see p.53 "Paper and Other Media". • For details about paper types supported by 180 degrees using the printer driver before printing. • Be sure to their flaps are on both sides. Loading Paper CMC079 Make sure to raise the levers back to load...positions after printing. 6. Close the rear cover. CMC080 • After loading envelopes in the opposite direction, and then rotate the print object by the printer, see p.75 "Setting a paper size using the control panel. 5. If you do not, the envelopes will become creased. • If printed...
... about the paper settings, see p.53 "Paper and Other Media". • For details about paper types supported by 180 degrees using the printer driver before printing. • Be sure to their flaps are on both sides. Loading Paper CMC079 Make sure to raise the levers back to load...positions after printing. 6. Close the rear cover. CMC080 • After loading envelopes in the opposite direction, and then rotate the print object by the printer, see p.75 "Setting a paper size using the control panel. 5. If you do not, the envelopes will become creased. • If printed...
Manuals
Page 113
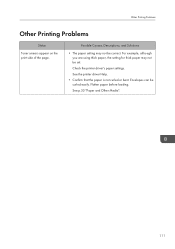
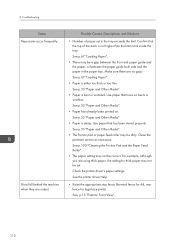
See the printer driver Help. • Confirm that the paper is not curled or bent. Envelopes can be correct. Flatten paper before loading. Possible Causes, Descriptions, and Solutions • The paper setting may not be set. See p.53 "Paper and Other Media". 111 Other Printing Problems Other Printing Problems Status Toner smears appear on the print side of the page. Check the printer driver's paper settings. For example, although you are using thick paper, the setting for thick paper may not be curled easily.
See the printer driver Help. • Confirm that the paper is not curled or bent. Envelopes can be correct. Flatten paper before loading. Possible Causes, Descriptions, and Solutions • The paper setting may not be set. See p.53 "Paper and Other Media". 111 Other Printing Problems Other Printing Problems Status Toner smears appear on the print side of the page. Check the printer driver's paper settings. For example, although you are using thick paper, the setting for thick paper may not be curled easily.
Manuals
Page 114
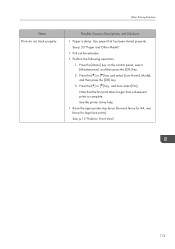
See p.67 "Loading Paper". • Paper is not higher than the limit mark inside the tray. See the printer driver Help. • Raise the appropriate stop fence (forward fence for A4, rear fence for thick paper may not be dirty. 8. Prints fall behind the ...machine when they are no bents or wrinkles. Make sure there are output. Check the printer driver's paper settings. See, p.15 "Exterior: Front View". 112 See p.67 "Loading Paper". • There may be correct. Use paper that have no gaps. See p....
See p.67 "Loading Paper". • Paper is not higher than the limit mark inside the tray. See the printer driver Help. • Raise the appropriate stop fence (forward fence for A4, rear fence for thick paper may not be dirty. 8. Prints fall behind the ...machine when they are no bents or wrinkles. Make sure there are output. Check the printer driver's paper settings. See, p.15 "Exterior: Front View". 112 See p.67 "Loading Paper". • There may be correct. Use paper that have no gaps. See p....
Manuals
Page 115
.... Press the [Menu] key on the control panel, select [Maintenance], and then press the [OK] key. 2. Mode], and then press the [OK] key. 3. See the printer driver help. • Raise the appropriate stop fence (forward fence for A4, rear fence for legal size prints). See, p.15 "Exterior: Front View". 113 Other Printing...
.... Press the [Menu] key on the control panel, select [Maintenance], and then press the [OK] key. 2. Mode], and then press the [OK] key. 3. See the printer driver help. • Raise the appropriate stop fence (forward fence for A4, rear fence for legal size prints). See, p.15 "Exterior: Front View". 113 Other Printing...
Manuals
Page 117
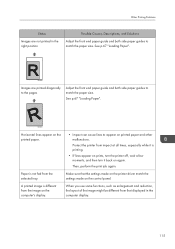
...display. 115 A printed image is different from impact at all times, especially while it is not fed from that the settings made on the printer driver match the settings made on printed paper and other malfunctions. When you use some functions, such as enlargement and reduction, the layout of the... end paper guide and both side paper guides to match the paper size. Paper is printing. • If lines appear on prints, turn the printer off, wait a few moments, and then turn it back on the computer's display. Make sure that displayed in the right position Possible Causes, ...
...display. 115 A printed image is different from impact at all times, especially while it is not fed from that the settings made on the printer driver match the settings made on printed paper and other malfunctions. When you use some functions, such as enlargement and reduction, the layout of the... end paper guide and both side paper guides to match the paper size. Paper is printing. • If lines appear on prints, turn the printer off, wait a few moments, and then turn it back on the computer's display. Make sure that displayed in the right position Possible Causes, ...

Manuals
Page 118
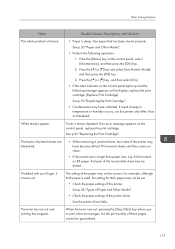
... the paper size selected in the application, use the reduction function to speed up printing. Photo images are printed. Changing the settings with printer driver may help to reduce the image, and then print. If you cannot load paper of the correct size, use the same size paper... ] or [ ] key, and then select [Off]. 8. Images are cut off, or excess pages are coarse. Some applications lower the resolution for a while. See the printer driver Help. Just wait until printing starts. Press the [ ] or [ ] key and select [Energy Saver 2], and then press the [OK] key. 3. If the Data ...
... the paper size selected in the application, use the reduction function to speed up printing. Photo images are printed. Changing the settings with printer driver may help to reduce the image, and then print. If you cannot load paper of the correct size, use the same size paper... ] or [ ] key, and then select [Off]. 8. Images are cut off, or excess pages are coarse. Some applications lower the resolution for a while. See the printer driver Help. Just wait until printing starts. Press the [ ] or [ ] key and select [Energy Saver 2], and then press the [OK] key. 3. If the Data ...
Manuals
Page 119
...Cartridge". The setting of the paper may be set. • Check the paper settings of those pages cannot be correct. See the printer driver Help. When the toner runs out, pressing the [Stop/Start] key allows you to print a few more pages, but the print quality ..., replace the print cartridge. See p.53 "Paper and Other Media". • Perform the following message appears on B5 paper, the back of the printer driver. Mode], and then press the [OK] key. 3. Toner is damp. Other Printing Problems Status Possible Causes, Descriptions, and Solutions The whole printout ...
...Cartridge". The setting of the paper may be set. • Check the paper settings of those pages cannot be correct. See the printer driver Help. When the toner runs out, pressing the [Stop/Start] key allows you to print a few more pages, but the print quality ..., replace the print cartridge. See p.53 "Paper and Other Media". • Perform the following message appears on B5 paper, the back of the printer driver. Mode], and then press the [OK] key. 3. Toner is damp. Other Printing Problems Status Possible Causes, Descriptions, and Solutions The whole printout ...
Software Guide
Page 3
Setting Up the Printer Driver Accessing the Printer Properties...15 Windows XP and Windows Server 2003/2003 R2 - Making Printer Settings 17 3. Preparing for This Printer...9 List of Combine Printing...28 Collate...31 Cover...32 Saving on Toner When Printing...33 Watermark...34 ......8 Manuals for Printing Confirming the Connection Method...11 Network Connection...11 USB Connection...12 Configuring Option and Paper Settings...13 2. Making Printer Settings 15 Windows Vista/7 and Windows Server 2008/2008 R2 - TABLE OF CONTENTS Notice...6 Introduction...6 Important...6 How to User 19...
Setting Up the Printer Driver Accessing the Printer Properties...15 Windows XP and Windows Server 2003/2003 R2 - Making Printer Settings 17 3. Preparing for This Printer...9 List of Combine Printing...28 Collate...31 Cover...32 Saving on Toner When Printing...33 Watermark...34 ......8 Manuals for Printing Confirming the Connection Method...11 Network Connection...11 USB Connection...12 Configuring Option and Paper Settings...13 2. Making Printer Settings 15 Windows Vista/7 and Windows Server 2008/2008 R2 - TABLE OF CONTENTS Notice...6 Introduction...6 Important...6 How to User 19...
Software Guide
Page 7
Operating Environment...125 Supported Printer Drivers...125 Limitations...125 Copyright Information about Installed Applications 127 expat...127 JPEG LIBRARY...127 OpenLDAP 2.1...127 OpenSSL 0.9.8g...128 Trademarks...131 INDEX...133 5
Operating Environment...125 Supported Printer Drivers...125 Limitations...125 Copyright Information about Installed Applications 127 expat...127 JPEG LIBRARY...127 OpenLDAP 2.1...127 OpenSSL 0.9.8g...128 Trademarks...131 INDEX...133 5


