Ricoh Aficio SP C240SF Support and Manuals
Get Help and Manuals for this Ricoh item
View All Support Options Below
Free Ricoh Aficio SP C240SF manuals!
Problems with Ricoh Aficio SP C240SF?
Ask a Question
Free Ricoh Aficio SP C240SF manuals!
Problems with Ricoh Aficio SP C240SF?
Ask a Question
Most Recent Ricoh Aficio SP C240SF Questions


Downloading Aficio Sp C240sf Drivers To A Mac Running El Capitan
I have downloaded the driver from the Ricoh site, installed the printer, but when I send to print, t...
I have downloaded the driver from the Ricoh site, installed the printer, but when I send to print, t...
(Posted by davidallen68948 8 years ago)

How Do I Add Email Addresses To Address Book?
I cannot log into web monitor for my new SP C240 SF
I cannot log into web monitor for my new SP C240 SF
(Posted by mike18536 10 years ago)

Problem . Alert Light Comes On Check Envelope Lever Will Not Print
(Posted by scruggslarry 11 years ago)
Fax Color Options
in the fax mode, it's possible to print only in black color so you save the color's print? thanks
in the fax mode, it's possible to print only in black color so you save the color's print? thanks
(Posted by ragioneria 12 years ago)
Ricoh Aficio SP C240SF Videos

RICOH Aficio SP C240SF
Duration: 3:17
Total Views: 89
Duration: 3:17
Total Views: 89
RICOH Aficio SP C240SF
Duration: 3:17
Total Views: 4,381
Duration: 3:17
Total Views: 4,381
Popular Ricoh Aficio SP C240SF Manual Pages
User Manual - Page 5
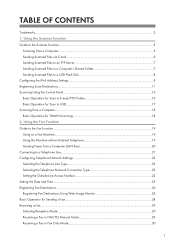
... Scanner Function Guide to the Scanner Function...5
Scanning from a Computer...5 Sending Scanned Files via E-mail...6 Sending Scanned Files to an FTP Server...7 Sending Scanned Files to a Computer's Shared Folder 7 Sending Scanned Files to a USB Flash Disk 8 Configuring the IPv4 Address Settings...9 Registering Scan Destinations...11 Scanning Using the Control Panel...16 Basic Operation for Scan...
User Manual - Page 10
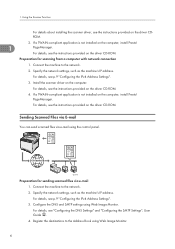
... see p.9 "Configuring the IPv4 Address Settings".
3. Configure the DNS and SMTP settings using the control panel. Install the scanner driver on the driver CDROM.
2. For details, see "Configuring the DNS Settings" and "Configuring the SMTP Settings", User Guide . 4.
For details, see the instructions provided on the driver CD-ROM. Sending Scanned Files via E-mail
You can send...
User Manual - Page 11
For details, see p.9 "Configuring the IPv4 Address Settings". 3. CES190
Preparation for sending scanned files to an FTP server 1. Connect the machine to the network. 2.
Sending Scanned Files to a Computer's Shared Folder
You can send scanned files to a computer's shared folder 1. Guide to the Scanner Function
1
CES187
Preparation for sending scanned files to an FTP server using the ...
User Manual - Page 12
For details, see p.9 "Configuring the IPv4 Address Settings".
3.
Create a destination folder on a USB flash disk using Web Image Monitor.
Using the Scanner Function
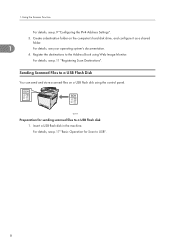
For details, see p.11 "Registering Scan Destinations". Sending Scanned Files to a USB Flash Disk
You can send and store scanned files on the computer's hard disk drive, and configure it as a shared folder...
User Manual - Page 13
... If you are requested to enter a password, enter the password using the number keys,
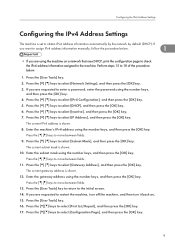
and then press the [OK] key. 4. Press the [ ] [ ] keys to select [Network Settings], and then press the [OK] key.... print the configuration page to check the IPv4 address information assigned to assign IPv4 address information manually, follow the procedure below .
1. Press the [ ] [ ] keys to select [Inactive...
User Manual - Page 15
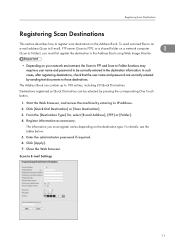
... Type] list, select [E-mail Address], [FTP] or [Folder]. 4. Enter the administrator password if required. 6.
Scan to 100 entries, including 20 Quick Dial entries. To send scanned files to an
e-mail address (Scan to E-mail), FTP server (Scan to FTP), or a shared folder on a network computer
1
(Scan to Folder), you must first register the destination in the Address...
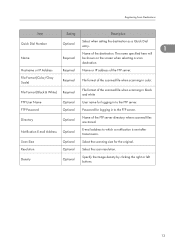
User Manual - Page 16
... here will be shown on the screen when selecting a scan destination. Destination E-mail Address Required E-mail address of the scanned file when scanning in black and white.
Density
Optional
Specify the image density by clicking the right or left buttons. 1. Using the Scanner Function
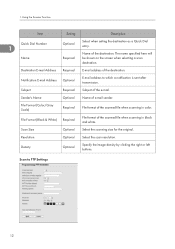
Item
Setting
Description
Quick Dial Number
1
Name
Optional Required
Select when...
User Manual - Page 17
...the scan resolution.
FTP Password
Optional Password for logging in color.
The name specified here will
Required be shown on the screen when selecting a scan
destination....server.
Registering Scan Destinations
Item
Setting
Description
Quick Dial Number Name
Optional
Select when setting the destination as a Quick Dial entry.
1
Name of the scanned file when scanning in to...
User Manual - Page 18
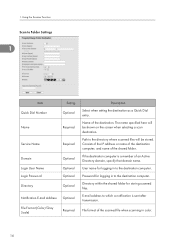
...
Service Name
Required
Domain Login User Name Login Password Directory
Optional Optional Optional Optional
Notification E-mail Address Optional
File Format (Color/Gray Scale)
Required
Description
Select when setting the destination as a Quick Dial entry.
File format of an Active Directory domain, specify that domain name. User name for storing scanned files. Using the Scanner...
User Manual - Page 19
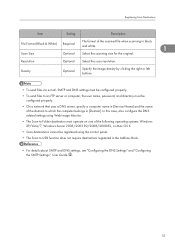
.../7, Windows Server 2003/2003 R2/2008/2008 R2, or Mac OS X. • Scan destinations cannot be
configured properly. • On a network that uses a DNS server, specify a computer name in [Service Name] and the name
of the scanned file when scanning in black and white.
1
Scan Size
Optional Select the scanning size for the original. Registering Scan Destinations
Item
Setting...
User Manual - Page 20
...scanned file.
• For complete information about the scanner function, see User Guide .
16 Using the Scanner Function
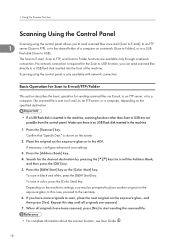
Scanning Using the Control Panel
Scanning using the control panel is required for sending scanned... scanning functions other than Scan to place another original on the exposure glass, and then press [Yes]. Depending on the machine's settings, you to send scanned files...
User Manual - Page 21
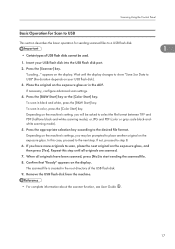
... and PDF (halftone black-and-white scanning mode), or JPG and PDF (color or gray scale black-andwhite scanning mode). 5. In this step until the display changes to show "Save Scn Data to start sending the scanned file. 8. Remove the USB flash disk from the machine.
• For complete information about the scanner function, see User Guide...
User Manual - Page 22
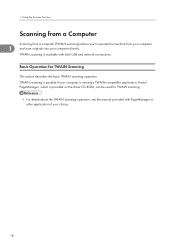
... on the driver CD-ROM, can be used for TWAIN Scanning
This section describes the basic TWAIN scanning operation. 1. Basic Operation for TWAIN scanning.
• For details about the TWAIN scanning operation, see the manual provided with both USB and network connections. Presto!
Using the Scanner Function
Scanning from a Computer
Scanning from a computer (TWAIN scanning) allows you...
User Manual - Page 27
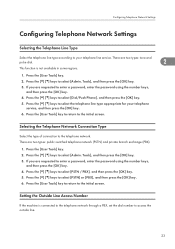
... to your telephone service, and then press the [OK] key.
6. If you are requested to enter a password, enter the password using the number keys,
and then press the [OK] key. 4. Press the [ ] [ ] keys to select [Admin. Press the [User Tools] key.
2. Press the [ ] [ ] keys to select [Admin.
Press the [User Tools] key. 2. Setting the Outside Line...
User Manual - Page 32
...scan settings.
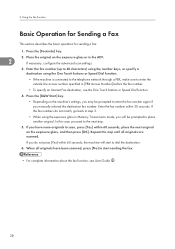
3. Press the [Facsimile] key.
2. Repeat this case, proceed to scan, press [Yes] within 60 seconds, place the next original on the machine's settings, you will start sending the fax.
• For complete information about the fax function, see User Guide...have more originals to the next step.
5. If you manually entered the destination fax number. If you do not match...
Ricoh Aficio SP C240SF Reviews
We have not received any reviews for Ricoh yet.