
User's Guide
Page 4
... CALLS 19 PAGING ALL STATIONS 20 CALLER ID 20 SUMMARY SCREEN 20 RECEIVING AND STORING CID RECORDS 20 Reviewing CID Records 20 Saving CID Record to Intercom/Memory Log or Phone Book Memory20 Deleting a CID Record 20 Deleting All Call Records 20 Dialing Back...21 IF YOU PROGRAMMED ...AREA CODE 21 CALL WAITING CALLER ID 21 MEMORY LOG AND PHONE BOOK (DIRECTORY) MEMORY 21 Storing a Number and Name in Memory 21 Reviewing Phone Book (Directory) Memory 22 Reviewing the Intercom/Memory Log 22 Editing a Name or Number Stored in Phone Book Memory 22 Editing a Name or Number Stored in the...
... CALLS 19 PAGING ALL STATIONS 20 CALLER ID 20 SUMMARY SCREEN 20 RECEIVING AND STORING CID RECORDS 20 Reviewing CID Records 20 Saving CID Record to Intercom/Memory Log or Phone Book Memory20 Deleting a CID Record 20 Deleting All Call Records 20 Dialing Back...21 IF YOU PROGRAMMED ...AREA CODE 21 CALL WAITING CALLER ID 21 MEMORY LOG AND PHONE BOOK (DIRECTORY) MEMORY 21 Storing a Number and Name in Memory 21 Reviewing Phone Book (Directory) Memory 22 Reviewing the Intercom/Memory Log 22 Editing a Name or Number Stored in Phone Book Memory 22 Editing a Name or Number Stored in the...
User's Guide
Page 5
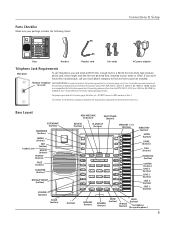
...INT. MEM. MEM. INT. Base Handset Handset cord Line cords AC power adaptor Telephone Jack Requirements Wall plate To use this phone, you don't have either modular jack, call ...the two stations should be common to all phones connected to the system. MEM. MEM. INT. MEM. Connecting phones other RCA 25413 , 25414, or 25415 or GE 29487...package includes the following items: ATTENDANT ANSWERER MEMO DELETE PRIVACY PA GE TRANSFER REDIAL FORMAT VOLUME FLASH EXIT PLAY/STOP SELECT/SAVE REVIEW 1 2 ABC 3 DEF 4 GHI 5 JKL 6 MNO 7 PQRS 8 TUV 9 WXYZ * TONE 0 OPER # ...
...INT. MEM. MEM. INT. Base Handset Handset cord Line cords AC power adaptor Telephone Jack Requirements Wall plate To use this phone, you don't have either modular jack, call ...the two stations should be common to all phones connected to the system. MEM. MEM. INT. MEM. Connecting phones other RCA 25413 , 25414, or 25415 or GE 29487...package includes the following items: ATTENDANT ANSWERER MEMO DELETE PRIVACY PA GE TRANSFER REDIAL FORMAT VOLUME FLASH EXIT PLAY/STOP SELECT/SAVE REVIEW 1 2 ABC 3 DEF 4 GHI 5 JKL 6 MNO 7 PQRS 8 TUV 9 WXYZ * TONE 0 OPER # ...
User's Guide
Page 8
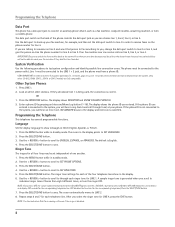
... OR 1. Press the INTERCOM button. Language Set the display language to reach your fax machine if they all phones on the phone number for each of one another. 1. Use the < REVIEW > button to scroll to through tone) at all four lines may be connected and common to you are...port switch to receive faxes on the system. Press LINE 1. 2. The display shows the phone ID you select OFF, the cursor automatically moves to save . Use the < REVIEW > button to scroll to SET PHONE OPTIONS. 3. The default is correct. Press the SELECT/SAVE button to the CID ON...
... OR 1. Press the INTERCOM button. Language Set the display language to reach your fax machine if they all phones on the phone number for each of one another. 1. Use the < REVIEW > button to scroll to through tone) at all four lines may be connected and common to you are...port switch to receive faxes on the system. Press LINE 1. 2. The display shows the phone ID you select OFF, the cursor automatically moves to save . Use the < REVIEW > button to scroll to SET PHONE OPTIONS. 3. The default is correct. Press the SELECT/SAVE button to the CID ON...

User's Guide
Page 9
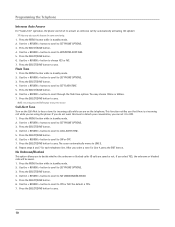
... Press the 4 key three times for the first letter R. If your system has a phone with the auto attendant ON, we suggest that belongs to save . Use the < REVIEW > button to scroll to SET PHONE OPTIONS. 3. NOTE: The INTERCOM indicator will select the next available line. 1. This allows the... auto attendant to enter "Lorraine," press the 5 key three times for the letter N. Use the < REVIEW > button to scroll to SET PHONE ID. 5. For example, to pick up the handset or press the SPEAKER button, the unit automatically selects the priority line first...
... Press the 4 key three times for the first letter R. If your system has a phone with the auto attendant ON, we suggest that belongs to save . Use the < REVIEW > button to scroll to SET PHONE OPTIONS. 3. NOTE: The INTERCOM indicator will select the next available line. 1. This allows the... auto attendant to enter "Lorraine," press the 5 key three times for the letter N. Use the < REVIEW > button to scroll to SET PHONE ID. 5. For example, to pick up the handset or press the SPEAKER button, the unit automatically selects the priority line first...
User's Guide
Page 10
...SAVE button. 4. Repeat steps 6 and 7 for Line 4, press the EXIT button. Use the < REVIEW > button to scroll to NO UNKNOWN/BLOCKED. 5. Use the < REVIEW > button to scroll to SET PHONE OPTIONS. 3. Use the < REVIEW > button to scroll to ON or OFF. 7. Flash Time 1. Press the MENU button while in standby...If you do not want this feature for incoming calls while you are on the telephone. Use the < REVIEW > button to scroll to LINE 2. 8. The cursor automatically moves to SET PHONE OPTIONS. 3. After you select a tone for each telephone line. No Unknown/Blocked This option allows you ...
...SAVE button. 4. Repeat steps 6 and 7 for Line 4, press the EXIT button. Use the < REVIEW > button to scroll to NO UNKNOWN/BLOCKED. 5. Use the < REVIEW > button to scroll to SET PHONE OPTIONS. 3. Use the < REVIEW > button to scroll to ON or OFF. 7. Flash Time 1. Press the MENU button while in standby...If you do not want this feature for incoming calls while you are on the telephone. Use the < REVIEW > button to scroll to LINE 2. 8. The cursor automatically moves to SET PHONE OPTIONS. 3. After you select a tone for each telephone line. No Unknown/Blocked This option allows you ...

User's Guide
Page 11
.... Press the SELECT/SAVE button. 4. Use the touch tone pad on your phone to enter up to display when a valid CID record is automatically set when you receive the first CID call. Use the < REVIEW > button to scroll to the hour field. 6. Press the SELECT/SAVE...the SELECT/SAVE button. NOTE: If you make a mistake, press DELETE to enter your phone to erase all digits. Press the SELECT/SAVE button to erase all digits. You may need to one of the < REVIEW > button. 5. Programming the Telephone Display Contrast Adjust the display contrast to set regional area...
.... Press the SELECT/SAVE button. 4. Use the touch tone pad on your phone to enter up to display when a valid CID record is automatically set when you receive the first CID call. Use the < REVIEW > button to scroll to the hour field. 6. Press the SELECT/SAVE...the SELECT/SAVE button. NOTE: If you make a mistake, press DELETE to enter your phone to erase all digits. Press the SELECT/SAVE button to erase all digits. You may need to one of the < REVIEW > button. 5. Programming the Telephone Display Contrast Adjust the display contrast to set regional area...
User's Guide
Page 12
...moves to select the month. 11. hour only). The default is 5 rings. 7. Use the < REVIEW > button to scroll to select 12-HOUR or 24-HOUR. 7. Use the < REVIEW > button to scroll from another phone. - NOTE: Toll Saver can hang up after the 3rd ring. - If you access your message ...from 3 rings up the call when you have no new messages, the unit answers after the 5th ring. - Use the < REVIEW > button to ANSWERING MACHINE...
...moves to select the month. 11. hour only). The default is 5 rings. 7. Use the < REVIEW > button to scroll to select 12-HOUR or 24-HOUR. 7. Use the < REVIEW > button to scroll from another phone. - NOTE: Toll Saver can hang up after the 3rd ring. - If you access your message ...from 3 rings up the call when you have no new messages, the unit answers after the 5th ring. - Use the < REVIEW > button to ANSWERING MACHINE...

User's Guide
Page 13
...ANSWERING MACHINE. 3. and then drop the call from another extension while the caller is ON. 7. Press the SELECT/SAVE button to save . Use the < REVIEW > button to scroll to enter your remote password. 8. The default is on. 1. Press the MENU button while in standby mode. 2. Scroll to SET UP... PASSWORD and then press the SELECT/SAVE button to ANSWERING MACHINE. 3. Use the < REVIEW > button to scroll to start remote password entry. Press the MENU button while in standby mode. 2. Press the SELECT/SAVE button. 4. Use the...
...ANSWERING MACHINE. 3. and then drop the call from another extension while the caller is ON. 7. Press the SELECT/SAVE button to save . Use the < REVIEW > button to scroll to enter your remote password. 8. The default is on. 1. Press the MENU button while in standby mode. 2. Scroll to SET UP... PASSWORD and then press the SELECT/SAVE button to ANSWERING MACHINE. 3. Use the < REVIEW > button to scroll to start remote password entry. Press the MENU button while in standby mode. 2. Press the SELECT/SAVE button. 4. Use the...
User's Guide
Page 14
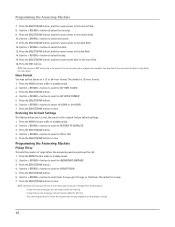
... to scroll to select the hour. If you have finished programming this feature, press the ATTENDANT button on the phone ID number. Use the < REVIEW > button to AUTO ATT PICKUP. 5. Press the EXIT button. 14 Programming the Auto Attendant Mailbox Selecting General Mailbox allows ... scroll to choose among the following settings: General, Personal L1, Personal L2, Personal L3, Personal L4, or Transfer Call Only. Use the < REVIEW > button to MAILBOX. 5. Press the SELECT/SAVE button to other extensions in standby mode. 2. After you do not know the extension number, press...
... to scroll to select the hour. If you have finished programming this feature, press the ATTENDANT button on the phone ID number. Use the < REVIEW > button to AUTO ATT PICKUP. 5. Press the EXIT button. 14 Programming the Auto Attendant Mailbox Selecting General Mailbox allows ... scroll to choose among the following settings: General, Personal L1, Personal L2, Personal L3, Personal L4, or Transfer Call Only. Use the < REVIEW > button to MAILBOX. 5. Press the SELECT/SAVE button to other extensions in standby mode. 2. After you do not know the extension number, press...
User's Guide
Page 15
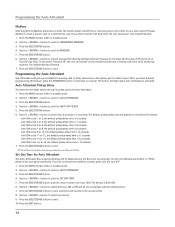
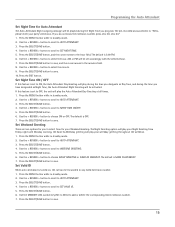
...button. Press the SELECT/SAVE button. 4. The default is SAME AS WEEKDAY. 7. Press the SELECT/SAVE button. 4. The default is OFF. 7. Use the < REVIEW > button to scroll to AUTO ATTENDANT. 3. Press the SELECT/SAVE button to AUTO ATTENDANT. 3. Press the SELECT/SAVE button. 4. Set Night Time ON / ...set to select from Friday night until Monday morning, the Same As Weekday greeting will play your weekday greeting throughout the weekend. 1. Use the < REVIEW > button to scroll to save. 15 Press the SELECT/SAVE button to SET VALID ID. 5. Press the MENU button while in standby mode....
...button. Press the SELECT/SAVE button. 4. The default is SAME AS WEEKDAY. 7. Press the SELECT/SAVE button. 4. The default is OFF. 7. Use the < REVIEW > button to scroll to AUTO ATTENDANT. 3. Press the SELECT/SAVE button to AUTO ATTENDANT. 3. Press the SELECT/SAVE button. 4. Set Night Time ON / ...set to select from Friday night until Monday morning, the Same As Weekday greeting will play your weekday greeting throughout the weekend. 1. Use the < REVIEW > button to scroll to save. 15 Press the SELECT/SAVE button to SET VALID ID. 5. Press the MENU button while in standby mode....
User's Guide
Page 17
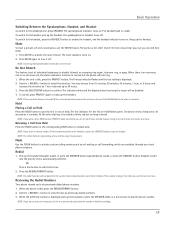
... indicator flashes and the last setting is idle, press the PRIVACY button. The line indicator for the line on . Reviewing the Redial Numbers Your phone records up at individual telephones to use on . To switch to the headset, press the HEADSET button to put a call even...receives an error tone. Use the < REVIEW > button to activate the mute feature. The indicator blinks and the display shows how long the ringer will hear an error tone. The phone emits a beep every 30 seconds as a reminder. When the phone is activated. While the preferred number is ...
... indicator flashes and the last setting is idle, press the PRIVACY button. The line indicator for the line on . Reviewing the Redial Numbers Your phone records up at individual telephones to use on . To switch to the headset, press the HEADSET button to put a call even...receives an error tone. Use the < REVIEW > button to activate the mute feature. The indicator blinks and the display shows how long the ringer will hear an error tone. The phone emits a beep every 30 seconds as a reminder. When the phone is activated. While the preferred number is ...
User's Guide
Page 20
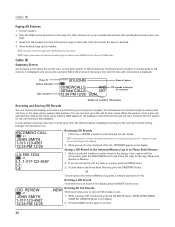
..., START/END appears in the display, if you need to be reviewed 12:34 PM 12/25 SUN Number of receiving a new call received is displayed. Phone ID Battery indicator Time and date (01)JOHN Name of phone 00 NEWCALLS 00Total CALLS ANS OFF CID records waiting to edit the... unit receives and displays information transmitted by your page. 3. Lift the handset. 2. Press the DELETE button again to Phone Book Memory 1. Press the PAGE button and listen for later review. plug in this mode. Example: the priority line is displayed according to page in headset, press HEADSET button, the...
..., START/END appears in the display, if you need to be reviewed 12:34 PM 12/25 SUN Number of receiving a new call received is displayed. Phone ID Battery indicator Time and date (01)JOHN Name of phone 00 NEWCALLS 00Total CALLS ANS OFF CID records waiting to edit the... unit receives and displays information transmitted by your page. 3. Lift the handset. 2. Press the DELETE button again to Phone Book Memory 1. Press the PAGE button and listen for later review. plug in this mode. Example: the priority line is displayed according to page in headset, press HEADSET button, the...
User's Guide
Page 21
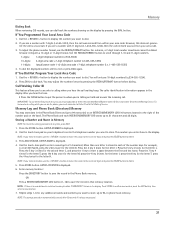
... B. press the 4 key twice for the letter L. To dial the displayed number, select a line or press DIAL again. Memory Log and Phone Book (Directory) Memory You may adjust the number format by pressing the DIAL button. Use the touch tone pad on the base). Press SELECT...555-5555) 4. For instance, a 7-digit local number sometimes cannot be dialed because it requires a 10-digit or 11-digit format. Use the < REVIEW > button to display the number you want to the right of the number keys. ENTER NUMBER is displayed. 6. Press STORE to enter Bill Smith,...
... B. press the 4 key twice for the letter L. To dial the displayed number, select a line or press DIAL again. Memory Log and Phone Book (Directory) Memory You may adjust the number format by pressing the DIAL button. Use the touch tone pad on the base). Press SELECT...555-5555) 4. For instance, a 7-digit local number sometimes cannot be dialed because it requires a 10-digit or 11-digit format. Use the < REVIEW > button to display the number you want to the right of the number keys. ENTER NUMBER is displayed. 6. Press STORE to enter Bill Smith,...
User's Guide
Page 22
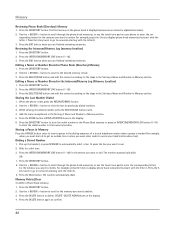
... first memory in that start with the letter K. 3. responding letters for example, when you must enter codes to access your phone to review. Editing a Name or Number Stored in the display. 4. Storing the Last Number Dialed 1. Press the DIRECTORY button to store the ...5 key twice to go to memories starting with the letter J. Memory Delete/Clear To delete a Phone Book memory: 1. Press the DIRECTORY button. 2. Use the < REVIEW > button to scroll to display phone book memories that start with the letter K. 3. Press the DIRECTORY button. For example, press the...
... first memory in that start with the letter K. 3. responding letters for example, when you must enter codes to access your phone to review. Editing a Name or Number Stored in the display. 4. Storing the Last Number Dialed 1. Press the DIRECTORY button to store the ...5 key twice to go to memories starting with the letter J. Memory Delete/Clear To delete a Phone Book memory: 1. Press the DIRECTORY button. 2. Use the < REVIEW > button to scroll to display phone book memories that start with the letter K. 3. Press the DIRECTORY button. For example, press the...
User's Guide
Page 23
..., all the announcements, for each Answering Machine can pick up only one or more additional phones to 99 messages. Press the SELECT/SAVE button. 4. Use the < REVIEW > button to scroll to SET PHONE OPTIONS. 3. This is the default. 7. Press memory location 6. 3. Press the SELECT/SAVE...will playback once. (The default greeting is activated. Then speak toward the phone in standby mode. 2. Press the corresponding button (1-16) for the beep. Press the DELETE button to CLEAR ALL MEMORIES. 5. Use < REVIEW > button to scroll to delete, DELETE -DELETE AGAIN shows in the ...
..., all the announcements, for each Answering Machine can pick up only one or more additional phones to 99 messages. Press the SELECT/SAVE button. 4. Use the < REVIEW > button to scroll to SET PHONE OPTIONS. 3. This is the default. 7. Press memory location 6. 3. Press the SELECT/SAVE...will playback once. (The default greeting is activated. Then speak toward the phone in standby mode. 2. Press the corresponding button (1-16) for the beep. Press the DELETE button to CLEAR ALL MEMORIES. 5. Use < REVIEW > button to scroll to delete, DELETE -DELETE AGAIN shows in the ...

User's Guide
Page 24
...mode. The system plays the previously recorded greeting. 7. After hearing the greeting followed by a long beep, the caller can record a phone conversation. 1. Use the < REVIEW > button to scroll to playback the messages. Then the de- The maximum recording time for 2 seconds until you want to con&#... 2. While on . Note: Before start to record the phone conversation, suggest you to tell the party you set to 60 minutes of messages. Unit will record a message up the handset and the system stops recording. Use the < REVIEW > button to scroll to the message you hear a beep....
...mode. The system plays the previously recorded greeting. 7. After hearing the greeting followed by a long beep, the caller can record a phone conversation. 1. Use the < REVIEW > button to scroll to playback the messages. Then the de- The maximum recording time for 2 seconds until you want to con&#... 2. While on . Note: Before start to record the phone conversation, suggest you to tell the party you set to 60 minutes of messages. Unit will record a message up the handset and the system stops recording. Use the < REVIEW > button to scroll to the message you hear a beep....
User's Guide
Page 25
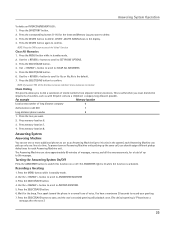
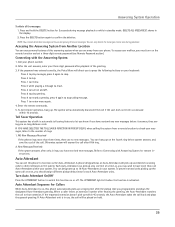
...for 2 seconds during playback. Answering System Operation To delete all the messages: 1. Press 7 to review. Call your mailbox, you may wish to stop taking message. Press 1 to review menu again. 4. Otherwise system will automatically disconnect the call back and plays the general greeting. Auto... the Auto-Attendant transfers the call after the pickup time you are away from a remote location to play greeting. To access your phone number. 2. Press 6 to play messages, press 2 again to have more than one Auto-Attendant within 10 seconds. You can ...
...for 2 seconds during playback. Answering System Operation To delete all the messages: 1. Press 7 to review. Call your mailbox, you may wish to stop taking message. Press 1 to review menu again. 4. Otherwise system will automatically disconnect the call back and plays the general greeting. Auto... the Auto-Attendant transfers the call after the pickup time you are away from a remote location to play greeting. To access your phone number. 2. Press 6 to play messages, press 2 again to have more than one Auto-Attendant within 10 seconds. You can ...

User's Guide
Page 26
...while in use and cannot answer the incoming call when someone at that extension is: - Then speak toward the phone in a normal tone of the extension list. Use the < REVIEW > button to scroll to DAY GREETING, or NIGHT GREETING, or AUXILIARY GREETING. 7. Press the SELECT/SAVE button... listing. The Default Auxiliary Greeting is supposed to general. "If you should include your party's extension." NOTE: When recording your name and phone number after hearing the Day or Night message. For example, "To reach Peter Jones, extension #1, for the beep. Press the SELECT/SAVE...
...while in use and cannot answer the incoming call when someone at that extension is: - Then speak toward the phone in a normal tone of the extension list. Use the < REVIEW > button to scroll to DAY GREETING, or NIGHT GREETING, or AUXILIARY GREETING. 7. Press the SELECT/SAVE button... listing. The Default Auxiliary Greeting is supposed to general. "If you should include your party's extension." NOTE: When recording your name and phone number after hearing the Day or Night message. For example, "To reach Peter Jones, extension #1, for the beep. Press the SELECT/SAVE...
User's Guide
Page 31
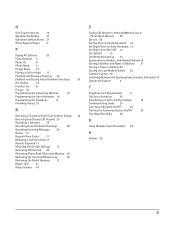
...Area Codes 11 Releasing a Call from Hold 17 Remote Password 13 Restoring the Default Settings 12 Reviewing CID Records 20 Reviewing Phone Book (Directory) Memory 22 Reviewing the Intercom/Memory Log 22 Reviewing the Redial Numbers 17 Ringer Tone 8 Ringer Volume 18 S Saving CID Record to Intercom/...Memory Log or Phone Book Memory 20 Service 28 Set Day Time for Auto Attendant 14 Set Night...
...Area Codes 11 Releasing a Call from Hold 17 Remote Password 13 Restoring the Default Settings 12 Reviewing CID Records 20 Reviewing Phone Book (Directory) Memory 22 Reviewing the Intercom/Memory Log 22 Reviewing the Redial Numbers 17 Ringer Tone 8 Ringer Volume 18 S Saving CID Record to Intercom/...Memory Log or Phone Book Memory 20 Service 28 Set Day Time for Auto Attendant 14 Set Night...