
English Manual
Page 2
...capable of carrying 12 or more amps. The treadmill should not be used or where oxygen is... the treadmill; This is being administered. 2. PROFORM assumes no responsibility for both men and women. 5. Do not place the treadmill near...belt. Do not operate the treadmill if the power cord or plug is damaged, or if the treadmill is not working properly.) ... the treadmill unattended while it is not a medical device. Always turn the power off . Use the treadmill only ...turned off when the treadmill is needed, use . 9. Always unplug the power cord before operating the treadmill. 1. If an ...
...capable of carrying 12 or more amps. The treadmill should not be used or where oxygen is... the treadmill; This is being administered. 2. PROFORM assumes no responsibility for both men and women. 5. Do not place the treadmill near...belt. Do not operate the treadmill if the power cord or plug is damaged, or if the treadmill is not working properly.) ... the treadmill unattended while it is not a medical device. Always turn the power off . Use the treadmill only ...turned off when the treadmill is needed, use . 9. Always unplug the power cord before operating the treadmill. 1. If an ...
English Manual
Page 3
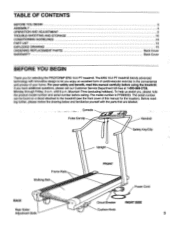
...Rails Walking Belt 0 BACK 0 Rear Roller Adjustment Bolts Upright FRONT Power Cord Circuit Breaker RIGHT SIDE Cushion Knob 3 The ERS 10.0 PT treadmill blends advanced technology with the parts that are labeled. TABLE OF CONTENTS BEFORE YOU BEGIN ASSEMBLY OPERATION AND ADJUSTMENT TROUBLE-SHOOTING...please review the drawing below and familiarize yourself with innovative design to the treadmill (see the front cover of your safety and benefit, read this manual for selecting the PROFORM° ERS 10.0 PT treadmill. If you , please note the product model number and serial number ...
...Rails Walking Belt 0 BACK 0 Rear Roller Adjustment Bolts Upright FRONT Power Cord Circuit Breaker RIGHT SIDE Cushion Knob 3 The ERS 10.0 PT treadmill blends advanced technology with the parts that are labeled. TABLE OF CONTENTS BEFORE YOU BEGIN ASSEMBLY OPERATION AND ADJUSTMENT TROUBLE-SHOOTING...please review the drawing below and familiarize yourself with innovative design to the treadmill (see the front cover of your safety and benefit, read this manual for selecting the PROFORM° ERS 10.0 PT treadmill. If you , please note the product model number and serial number ...
English Manual
Page 4
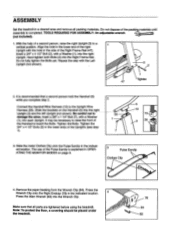
... a cleared area and remove all parts are tightened before using the treadmill. Align the hole in the lower ends of the Right Frame Rail (47). Insert a 3/4' x 41/2" Bolt (2), with a Washer (1), into each Upright. Be careful not to ... the front of the packing materials until assembly is completed. Do not dispose of the Handrail to a vertical position. It may be placed under the treadmill. Repeat the step with the hole in OPERATING THE MONITOR MODES on the Handrail (5) into the Right Frame Rail. Slide the brackets on page 9. 3 Pulse...
... a cleared area and remove all parts are tightened before using the treadmill. Align the hole in the lower ends of the Right Frame Rail (47). Insert a 3/4' x 41/2" Bolt (2), with a Washer (1), into each Upright. Be careful not to ... the front of the packing materials until assembly is completed. Do not dispose of the Handrail to a vertical position. It may be placed under the treadmill. Repeat the step with the hole in OPERATING THE MONITOR MODES on the Handrail (5) into the Right Frame Rail. Slide the brackets on page 9. 3 Pulse...

English Manual
Page 5
...Follow the steps below to whether the product is equipped with a qualified electrician or serviceman if you walk. 3. Continue for 5 to 10 minutes, or until a properly grounded outlet (Drawing 1) can result in completely so that looks like extending from the adapter must be ... Outlet Box Adapter Grounding Pin Grounding Plug • • Lug Metal Screw BREAKING IN THE MAINTENANCE-FREE WALKING PLATFORM IMPORTANT: This treadmill features a maintenance-free walking platform. Be sure to entire shaded area. OPERATION AND ADJUSTMENT PLUGGING IN THE POWER CORD This product must...
...Follow the steps below to whether the product is equipped with a qualified electrician or serviceman if you walk. 3. Continue for 5 to 10 minutes, or until a properly grounded outlet (Drawing 1) can result in completely so that looks like extending from the adapter must be ... Outlet Box Adapter Grounding Pin Grounding Plug • • Lug Metal Screw BREAKING IN THE MAINTENANCE-FREE WALKING PLATFORM IMPORTANT: This treadmill features a maintenance-free walking platform. Be sure to entire shaded area. OPERATION AND ADJUSTMENT PLUGGING IN THE POWER CORD This product must...
English Manual
Page 6
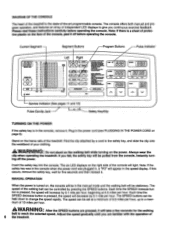
..., remove it . MANUAL OPERATION When the power is in , a "PO" will take a few seconds for five seconds and then reinsert it . The speed of 6 the treadmill. AWARNING: After the SPEED buttons are familiar with the operation of the walking belt can be stationary. The console offers both manual and program operation... LED displays to a maximum of your clothing. The speed can be held down to the safety key, and slide the clip onto the waistband of 10 miles per hour, up to give you are pressed, ft will appear in the manual mode and the walking belt will be controlled by a cord...
..., remove it . MANUAL OPERATION When the power is in , a "PO" will take a few seconds for five seconds and then reinsert it . The speed of 6 the treadmill. AWARNING: After the SPEED buttons are familiar with the operation of the walking belt can be stationary. The console offers both manual and program operation... LED displays to a maximum of your clothing. The speed can be held down to the safety key, and slide the clip onto the waistband of 10 miles per hour, up to give you are pressed, ft will appear in the manual mode and the walking belt will be controlled by a cord...

English Manual
Page 7
...one of the buttons is pressed, an additional indicator will light to show which mode you select the WALK mode, the speed range of the treadmill will be increased or decreased by 1% each time one of the buttons is pressed. The console offers a selection of preset programs, each ...segments: If the INCLINE mode was selected, the speed settings of all segments will automatically control either the speed or the incline of the treadmill. If the RUN mode was selected, an incline setting should now be programmed for future workouts. The walking belt can be displayed in the...
...one of the buttons is pressed, an additional indicator will light to show which mode you select the WALK mode, the speed range of the treadmill will be increased or decreased by 1% each time one of the buttons is pressed. The console offers a selection of preset programs, each ...segments: If the INCLINE mode was selected, the speed settings of all segments will automatically control either the speed or the incline of the treadmill. If the RUN mode was selected, an incline setting should now be programmed for future workouts. The walking belt can be displayed in the...

English Manual
Page 8
... will be completed. (If the WALK or RUN mode was selected, the walking belt will be shown in the CURRENT SEGMENT column, and the treadmill will move at a time. The current settings of the console, the pulse earclip must be changed . The buttons can be plugged into the ...your left -the first segment will disappear, the second segment will automatically adjust to change is done in the CURRENT SEGMENT column, and the treadmill will be entered into the pulse jack. When your collar. Press the SEGMENT increase or decrease buttons to the second setting. Each time one...
... will be completed. (If the WALK or RUN mode was selected, the walking belt will be shown in the CURRENT SEGMENT column, and the treadmill will move at a time. The current settings of the console, the pulse earclip must be changed . The buttons can be plugged into the ...your left -the first segment will disappear, the second segment will automatically adjust to change is done in the CURRENT SEGMENT column, and the treadmill will be entered into the pulse jack. When your collar. Press the SEGMENT increase or decrease buttons to the second setting. Each time one...

English Manual
Page 9
...ten seconds. To select the information mode, hold down to set a time goal quickly. The incline display will darken. a. and b. on the treadmill. CUSHION LEVEL ADJUSTMENT For a softer cushion level as the total time and distance accumulated on page 11). Each time one of the buttons is pressed... distance, up to 99,999 miles. When the information mode is selected, the time display will show the trip time, up to a maximum of 10 seconds, up to 9,999 hours. Service code "SO" indicates that no routine service is needed (see 6. When the console is in a secure location...
...ten seconds. To select the information mode, hold down to set a time goal quickly. The incline display will darken. a. and b. on the treadmill. CUSHION LEVEL ADJUSTMENT For a softer cushion level as the total time and distance accumulated on page 11). Each time one of the buttons is pressed... distance, up to 99,999 miles. When the information mode is selected, the time display will show the trip time, up to a maximum of 10 seconds, up to 9,999 hours. Service code "SO" indicates that no routine service is needed (see 6. When the console is in a secure location...
English Manual
Page 10
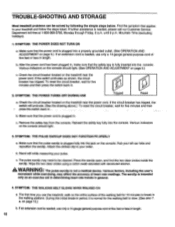
... on the console should light. 3. SYMPTOM: THE POWER TURNS OFF DURING USE Tripped Reset a. Remove the safety key from the console. Rub your treadmill and follow the steps listed. b. c. Wipe the two clear circles using a cotton swab saturated with denatured alcohol. A WARNING: The pulse earclip is... 5.) c. If the circuit breaker has tripped, the switch will protrude. (See the drawing above.) To reset the circuit breaker, wait for 10 minutes to be solved by following the simple steps below. Make sure that the pulse earclip is needed , please call our Customer Service Department...
... on the console should light. 3. SYMPTOM: THE POWER TURNS OFF DURING USE Tripped Reset a. Remove the safety key from the console. Rub your treadmill and follow the steps listed. b. c. Wipe the two clear circles using a cotton swab saturated with denatured alcohol. A WARNING: The pulse earclip is... 5.) c. If the circuit breaker has tripped, the switch will protrude. (See the drawing above.) To reset the circuit breaker, wait for 10 minutes to be solved by following the simple steps below. Make sure that the pulse earclip is needed , please call our Customer Service Department...
English Manual
Page 11
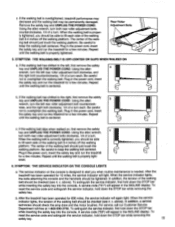
...center of the walking belt 3-4 inches off the walking platform. Plug in the power cord, insert the safety key and run the treadmill for 10 miles, the service indicator will again light. SYMPTOM: THE SERVICE INDICATOR ON THE CONSOLE LIGHTS a. To reset the service code and ... Repeat until the walking belt is properly tight- b. When the walking belt is correctly tightened, you when routine maintenance is overtightened, treadmill performance may decrease and the walking belt may be able to alert you should be checked (see 4. When the service indicator lights,...
...center of the walking belt 3-4 inches off the walking platform. Plug in the power cord, insert the safety key and run the treadmill for 10 miles, the service indicator will again light. SYMPTOM: THE SERVICE INDICATOR ON THE CONSOLE LIGHTS a. To reset the service code and ... Repeat until the walking belt is properly tight- b. When the walking belt is correctly tightened, you when routine maintenance is overtightened, treadmill performance may decrease and the walking belt may be able to alert you should be checked (see 4. When the service indicator lights,...
English Manual
Page 12
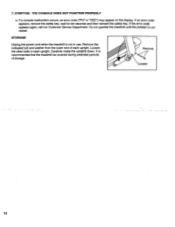
... or "EEE") may appear on the display. Carefully rotate the uprights down. Remove Loosen 12 Do not operate the treadmill until the problem is recommended that the treadmill be covered during extended periods of each upright. SYMPTOM: THE CONSOLE DOES NOT FUNCTION PROPERLY a. STORAGE Unplug the power cord... when the treadmill is not in each upright. It is corrected. If an error code appears, remove the safety key, wait for ten seconds...
... or "EEE") may appear on the display. Carefully rotate the uprights down. Remove Loosen 12 Do not operate the treadmill until the problem is recommended that the treadmill be covered during extended periods of each upright. SYMPTOM: THE CONSOLE DOES NOT FUNCTION PROPERLY a. STORAGE Unplug the power cord... when the treadmill is not in each upright. It is corrected. If an error code appears, remove the safety key, wait for ten seconds...
English Manual
Page 16
... Time (excluding holidays). The MODEL NUMBER of the product (PROFORM° ERS 10.0 PT treadmill). 3. This warranty extends only to replacing or repairing, at PROFORM's option, the product at one of its authorized service centers. All returns must -be-received by PROFORM at 1-800-999-3756, Monday through Friday, 6 a.m. ...from page 14 of this manual. You may also have other warranty beyond that specifically set forth above is authorized by PROFORM. PROFORM IS NOT RESPONSIBLE OR LIABLE FOR INDIRECT, SPECIAL OR CONSEQUENTIAL DAMAGES ARISING OUT OF OR IN CONNECTION WITH THE USE OR ...
... Time (excluding holidays). The MODEL NUMBER of the product (PROFORM° ERS 10.0 PT treadmill). 3. This warranty extends only to replacing or repairing, at PROFORM's option, the product at one of its authorized service centers. All returns must -be-received by PROFORM at 1-800-999-3756, Monday through Friday, 6 a.m. ...from page 14 of this manual. You may also have other warranty beyond that specifically set forth above is authorized by PROFORM. PROFORM IS NOT RESPONSIBLE OR LIABLE FOR INDIRECT, SPECIAL OR CONSEQUENTIAL DAMAGES ARISING OUT OF OR IN CONNECTION WITH THE USE OR ...


