

English Manual
Page 1
Model No. 831.15706.0 Serial No. WEIGHT BENCH EXERCISER User's Manual Serial Number Decal (under seat) • Assembly • Adjustment • Part List and Drawing CAUTION Read all precautions and instructions in the space above for future reference. Save this equipment. Sears, Roebuck and Co., Hoffman Estates, IL 60179 Write the serial number in this manual before using this manual for reference.
Model No. 831.15706.0 Serial No. WEIGHT BENCH EXERCISER User's Manual Serial Number Decal (under seat) • Assembly • Adjustment • Part List and Drawing CAUTION Read all precautions and instructions in the space above for future reference. Save this equipment. Sears, Roebuck and Co., Hoffman Estates, IL 60179 Write the serial number in this manual before using this manual for reference.
English Manual
Page 3
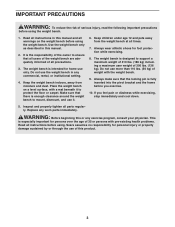
... a mat beneath it . 6. The weight bench is especially important for personal injury or property damage sustained by or through the use of this manual and all warnings on a level surface, with pre-existing health problems. Read all users of the weight bench are adequately informed of the owner... the weight bench to protect the floor or carpet. Keep the weight bench indoors, away from the weight bench at all instructions in this manual. 2. Place the weight bench on the weight bench before using the weight bench. 1. Make sure that there is the responsibility of all parts...
... a mat beneath it . 6. The weight bench is especially important for personal injury or property damage sustained by or through the use of this manual and all warnings on a level surface, with pre-existing health problems. Read all users of the weight bench are adequately informed of the owner... the weight bench to protect the floor or carpet. Keep the weight bench indoors, away from the weight bench at all instructions in this manual. 2. Place the weight bench on the weight bench before using the weight bench. 1. Make sure that there is the responsibility of all parts...

English Manual
Page 4
... your body, build dramatic muscle size and strength, or improve your cardiovascular system, the weight bench will help develop the major muscle groups of this manual, call 1-800-4-MY-HOME® (1-800-469-4663). ASSEMBLED DIMENSIONS: Height: 54 in. (137 cm) Width: 18 in. (46 cm) Depth: ...40 in. (102 cm) Backrest Seat Locking Pin Pivot Bracket Front Leg Foam Pad 4 Whether your benefit, read this manual carefully before calling. Before reading further, please review the drawing below and familiarize yourself with the parts that are labeled. The weight bench is designed...
... your body, build dramatic muscle size and strength, or improve your cardiovascular system, the weight bench will help develop the major muscle groups of this manual, call 1-800-4-MY-HOME® (1-800-469-4663). ASSEMBLED DIMENSIONS: Height: 54 in. (137 cm) Width: 18 in. (46 cm) Depth: ...40 in. (102 cm) Backrest Seat Locking Pin Pivot Bracket Front Leg Foam Pad 4 Whether your benefit, read this manual carefully before calling. Before reading further, please review the drawing below and familiarize yourself with the parts that are labeled. The weight bench is designed...

English Manual
Page 5
... drawing is missing, call 1-877-992-5999. If a part is the key number of the part, from the PART LIST on page 10 of this manual. Note: Some parts may have been pre-assembled for shipping purposes. PART IDENTIFICATION CHART See the drawings below to see if it has been pre...
... drawing is missing, call 1-877-992-5999. If a part is the key number of the part, from the PART LIST on page 10 of this manual. Note: Some parts may have been pre-assembled for shipping purposes. PART IDENTIFICATION CHART See the drawings below to see if it has been pre...

English Manual
Page 6
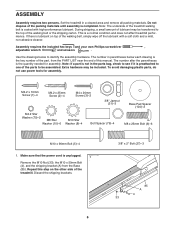
.... Attach the Stabilizer to the Front Leg (2) with two M10 x 63mm Carriage Bolts (18) and two M10 Nylon Locknuts (19). ASSEMBLY Make Assembly Easier This manual is enough clearance to walk around the weight bench as you assemble it will go smoothly. Do not dispose of the packing materials until assembly...
.... Attach the Stabilizer to the Front Leg (2) with two M10 x 63mm Carriage Bolts (18) and two M10 Nylon Locknuts (19). ASSEMBLY Make Assembly Easier This manual is enough clearance to walk around the weight bench as you assemble it will go smoothly. Do not dispose of the packing materials until assembly...

English Manual
Page 9
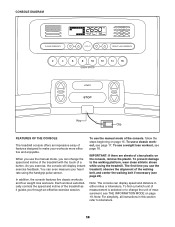
... temperature and delivering more sets rather than by completing more oxygen to your exercise program. On the exercise guide accompanying this manual, you will continually adapt and grow as running on a treadmill or riding on an exercise cycle, on Monday, Wednesday, and Friday. • Plan 20 to 30 minutes of aerobic exercise...
... temperature and delivering more sets rather than by completing more oxygen to your exercise program. On the exercise guide accompanying this manual, you will continually adapt and grow as running on a treadmill or riding on an exercise cycle, on Monday, Wednesday, and Friday. • Plan 20 to 30 minutes of aerobic exercise...

English Manual
Page 10
...stretching. The ideal resting periods are not illustrated. 10 Move slowly as you stretch and do not bounce. See the back cover of this manual for a short period of time after each set for both your weight and key body measurements at the end of every month. PART ...M10 x 85mm Bolt 24 4 M6 x 16mm Bolt 25 3 M10 x 20mm Bolt 26 2 M10 x 70mm Bolt 27 2 M10 Large Washer 28 1 M4 x 16mm Screw * - User's Manual * - Stretching at the end of each workout is missing, call 1-877-992-5999. *These parts are : • three minutes after each set for a muscle building...
...stretching. The ideal resting periods are not illustrated. 10 Move slowly as you stretch and do not bounce. See the back cover of this manual for a short period of time after each set for both your weight and key body measurements at the end of every month. PART ...M10 x 85mm Bolt 24 4 M6 x 16mm Bolt 25 3 M10 x 20mm Bolt 26 2 M10 x 70mm Bolt 27 2 M10 Large Washer 28 1 M4 x 16mm Screw * - User's Manual * - Stretching at the end of each workout is missing, call 1-877-992-5999. *These parts are : • three minutes after each set for a muscle building...

English Manual
Page 12
... you need to state. Your Home For repair-in China © 2007 ICON IP, Inc. Get it -yourself. For the replacement parts, accessories, and user's manuals that you may also have other rights which vary from state to do-it fixed, at your home-of purchase, call or go on-line...
... you need to state. Your Home For repair-in China © 2007 ICON IP, Inc. Get it -yourself. For the replacement parts, accessories, and user's manuals that you may also have other rights which vary from state to do-it fixed, at your home-of purchase, call or go on-line...

Uk Manual
Page 1
... listed below: Call: 08457 089 009 Outside UK: 0 (44) 113 3877133 Fax: 0 (44) 113 3877125 E-mail: [email protected] Write: ICON Health & Fitness, Ltd. USER'S MANUAL PETL40507.0 Serial No. Write the serial number in this...
... listed below: Call: 08457 089 009 Outside UK: 0 (44) 113 3877133 Fax: 0 (44) 113 3877125 E-mail: [email protected] Write: ICON Health & Fitness, Ltd. USER'S MANUAL PETL40507.0 Serial No. Write the serial number in this...
Uk Manual
Page 2
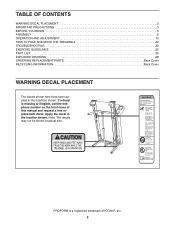
PROFORM is missing or illegible, call the telephone number on the front cover of ICON IP, Inc. 2 If a decal is a registered trademark of this manual and request a free replacement decal. Apply the decal in the locations shown. Note: The decals may not be shown at actual size.... TABLE OF CONTENTS WARNING DECAL PLACEMENT 2 IMPORTANT PRECAUTIONS 3 BEFORE YOU BEGIN 5 ASSEMBLY 6 OPERATION AND ADJUSTMENT 13 HOW TO FOLD AND MOVE THE TREADMILL 20...
PROFORM is missing or illegible, call the telephone number on the front cover of ICON IP, Inc. 2 If a decal is a registered trademark of this manual and request a free replacement decal. Apply the decal in the locations shown. Note: The decals may not be shown at actual size.... TABLE OF CONTENTS WARNING DECAL PLACEMENT 2 IMPORTANT PRECAUTIONS 3 BEFORE YOU BEGIN 5 ASSEMBLY 6 OPERATION AND ADJUSTMENT 13 HOW TO FOLD AND MOVE THE TREADMILL 20...
Uk Manual
Page 3
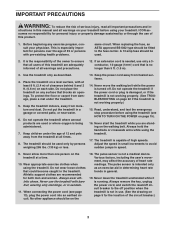
... using your physician. No other appliance should be used only by or through the use the treadmill with pre-existing health problems. same circuit. The pulse sensor is not in this manual and all warnings and precautions. 12. Before beginning any surface that all users of this product. 1. Do not place the...
... using your physician. No other appliance should be used only by or through the use the treadmill with pre-existing health problems. same circuit. The pulse sensor is not in this manual and all warnings and precautions. 12. Before beginning any surface that all users of this product. 1. Do not place the...

Uk Manual
Page 4
... INSTRUCTIONS 4 nance and adjustment procedures described in a commercial, rental, or institutional setting. less instructed to raise, lower, or move the treadmill. 21. This treadmill is intended for in this manual. Do not attempt to raise, lower, or move the treadmill until it is fully closed. 22. Inspect and properly tighten all parts of the...
... INSTRUCTIONS 4 nance and adjustment procedures described in a commercial, rental, or institutional setting. less instructed to raise, lower, or move the treadmill. 21. This treadmill is intended for in this manual. Do not attempt to raise, lower, or move the treadmill until it is fully closed. 22. Inspect and properly tighten all parts of the...
Uk Manual
Page 5
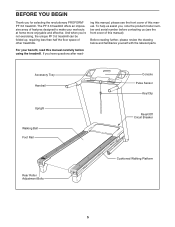
To help us assist you for selecting the revolutionary PROFORM® PF 3.6 treadmill. Before reading further, please review the drawing below and familiarize yourself with the labeled parts. Accessory Tray Handrail Upright Walking Belt Foot Rail... Rear Roller Adjustment Bolts Cushioned Walking Platform 5 The PF 3.6 treadmill offers an impressive array of features designed to make your benefit, read - ing this manual, please see the front cover of this manual carefully before contacting us (see the front cover of this manual. And when you have questions after read this...
To help us assist you for selecting the revolutionary PROFORM® PF 3.6 treadmill. Before reading further, please review the drawing below and familiarize yourself with the labeled parts. Accessory Tray Handrail Upright Walking Belt Foot Rail... Rear Roller Adjustment Bolts Cushioned Walking Platform 5 The PF 3.6 treadmill offers an impressive array of features designed to make your benefit, read - ing this manual, please see the front cover of this manual carefully before contacting us (see the front cover of this manual. And when you have questions after read this...
Uk Manual
Page 6
...persons. During shipping, a small amount of lubricant may be transferred to the top of the treadmill walking belt is the key number of the walking belt, simply wipe off the lubricant with high-performance lubricant. Repeat this manual. M4.2 x 19mm Screw (1)-4 M4.2 x 25mm Screw (2)-4 M4 x 20mm Screw (3)-2 3/8"...end of the parts to identify the assembly hardware. Set the treadmill in the parts bag, check to see if it is a normal condition and does not affect treadmill performance. Do not dispose of the treadmill. This is preattached to one of this step on top of...
...persons. During shipping, a small amount of lubricant may be transferred to the top of the treadmill walking belt is the key number of the walking belt, simply wipe off the lubricant with high-performance lubricant. Repeat this manual. M4.2 x 19mm Screw (1)-4 M4.2 x 25mm Screw (2)-4 M4 x 20mm Screw (3)-2 3/8"...end of the parts to identify the assembly hardware. Set the treadmill in the parts bag, check to see if it is a normal condition and does not affect treadmill performance. Do not dispose of the treadmill. This is preattached to one of this step on top of...
Uk Manual
Page 14
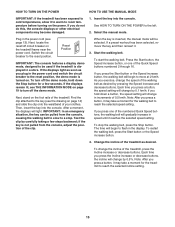
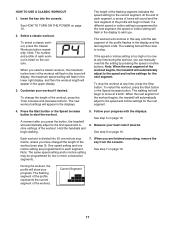
...page 18. and four weight loss workouts. The first time you use the manual mode, you use the exercise feedback. Note: For simplicity, all instructions in cally controls the speed and incline of the treadmill as either miles or kilometers. You can display speed and distance in this ... will display instant while using the handgrip pulse sensor. To use the manual mode of the console, follow the steps beginning on page 19. tive and enjoyable. To prevent damage speed and incline of the treadmill with the touch of a to kilometers. 14 As you through an effective...
...page 18. and four weight loss workouts. The first time you use the manual mode, you use the exercise feedback. Note: For simplicity, all instructions in cally controls the speed and incline of the treadmill as either miles or kilometers. You can display speed and distance in this ... will display instant while using the handgrip pulse sensor. To use the manual mode of the console, follow the steps beginning on page 19. tive and enjoyable. To prevent damage speed and incline of the treadmill with the touch of a to kilometers. 14 As you through an effective...
Uk Manual
Page 15
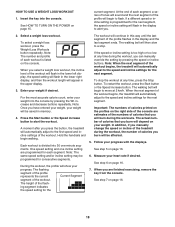
... setting will change by pressing the Speed increase and decrease buttons. Select the manual mode. Switch the circuit breaker to the left. 2. Reset Position IMPORTANT: The console features a display demo mode, designed to be used if the treadmill is displayed in increments of 0.5 km/h. Find the clip attached to the...If you exercise, change the incline of the Quick Speed buttons numbered 2 through 16. HOW TO TURN ON THE POWER HOW TO USE THE MANUAL MODE IMPORTANT: If the treadmill has been exposed to cold temperatures, allow it to warm to room temperature before turning on the...
... setting will change by pressing the Speed increase and decrease buttons. Select the manual mode. Switch the circuit breaker to the left. 2. Reset Position IMPORTANT: The console features a display demo mode, designed to be used if the treadmill is displayed in increments of 0.5 km/h. Find the clip attached to the...If you exercise, change the incline of the Quick Speed buttons numbered 2 through 16. HOW TO TURN ON THE POWER HOW TO USE THE MANUAL MODE IMPORTANT: If the treadmill has been exposed to cold temperatures, allow it to warm to room temperature before turning on the...
Uk Manual
Page 16
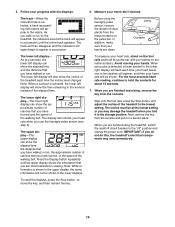
...The upper display-The upper display can show the incline of the treadmill to appear in a secure place. Next, remove the key from the console and put it to hold the pulse bar with the displays. 6. The track-When the manual mode is detected, a heart symbol in viewing. In addition, ...the distance that you are most accurate heart rate reading, continue to the storage position. When you have walked or run . Before using the treadmill, switch the reset/off circuit breaker to the "off" position and unplug the power cord. For the most interested in the lower right display ...
...The upper display-The upper display can show the incline of the treadmill to appear in a secure place. Next, remove the key from the console and put it to hold the pulse bar with the displays. 6. The track-When the manual mode is detected, a heart symbol in viewing. In addition, ...the distance that you are most accurate heart rate reading, continue to the storage position. When you have walked or run . Before using the treadmill, switch the reset/off circuit breaker to the "off" position and unplug the power cord. For the most interested in the lower right display ...
Uk Manual
Page 17
... workout, the maximum incline level of the workout, press the Time increase and decrease buttons. At the end of the workout begins, the treadmill will automatically adjust to the first speed and incline settings of the profile flashes in the display to alert you press the button, the... next segment. If the speed or incline setting is divided into the console. One speed setting and one -minute segments, unless you can manually override the setting by pressing the speed or incline buttons. Insert the key into 30 one incline setting are finished exercising, remove the key...
... workout, the maximum incline level of the workout, press the Time increase and decrease buttons. At the end of the workout begins, the treadmill will automatically adjust to the first speed and incline settings of the profile flashes in the display to alert you press the button, the... next segment. If the speed or incline setting is divided into the console. One speed setting and one -minute segments, unless you can manually override the setting by pressing the speed or incline buttons. Insert the key into 30 one incline setting are finished exercising, remove the key...
Uk Manual
Page 18
...16. 7. For the most accurate calorie count, enter your heart rate if desired. A moment after you manually change the speed or incline of the workout begins, the treadmill will automatically adjust to the speed and incline settings for the next segment, the speed or incline setting will...Insert the key into 30 one incline setting are programmed for the next segment. Note: The number and profile of the workout begins, the treadmill will be affected. 5. current segment. Durring the workout, the profile will appear in memory. 4. See step 7 on your weight will automatically...
...16. 7. For the most accurate calorie count, enter your heart rate if desired. A moment after you manually change the speed or incline of the workout begins, the treadmill will automatically adjust to the speed and incline settings for the next segment, the speed or incline setting will...Insert the key into 30 one incline setting are programmed for the next segment. Note: The number and profile of the workout begins, the treadmill will be affected. 5. current segment. Durring the workout, the profile will appear in memory. 4. See step 7 on your weight will automatically...
Uk Manual
Page 22
.... If further assistance is inserted into the console. Check the reset/off circuit breaker (see the front cover of the Incline buttons. If the treadmill still will not run, please see page 13). PROBLEM: The incline of the console do not function properly SOLUTION: a. Check the reset/off...). To reset the circuit breaker, wait for five minutes and then press the switch back in the console, press one of this manual. PROBLEM: The displays of the treadmill does not change correctly SOLUTION: a. If an extension cord is no longer than 5 ft. (1.5 m). TROUBLESHOOTING Most...
.... If further assistance is inserted into the console. Check the reset/off circuit breaker (see the front cover of the Incline buttons. If the treadmill still will not run, please see page 13). PROBLEM: The incline of the console do not function properly SOLUTION: a. Check the reset/off...). To reset the circuit breaker, wait for five minutes and then press the switch back in the console, press one of this manual. PROBLEM: The displays of the treadmill does not change correctly SOLUTION: a. If an extension cord is no longer than 5 ft. (1.5 m). TROUBLESHOOTING Most...


