
Owner's Manual
Page 2
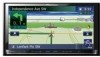
... rear view camera image 36 How to use the navigation menu screens Screen switching overview 34 What you can do on internal memory 26...Notices for future reference. Rear view camera 23 Notes Before Using the System 23 - Failure to use the map How to User 9 License Agreement 10 - Inserting an SD memory card...map of the map 39 - Terms and Conditions for buying this manual in a USB storage device 31 - When using a display connected to operate your iPod 31 - Terminology 24 - Contents Thank you for the Tele Atlas Data 14 - Please read the map screen 37 - PIONEER AVIC-Z110BT...
... rear view camera image 36 How to use the navigation menu screens Screen switching overview 34 What you can do on internal memory 26...Notices for future reference. Rear view camera 23 Notes Before Using the System 23 - Failure to use the map How to User 9 License Agreement 10 - Inserting an SD memory card...map of the map 39 - Terms and Conditions for buying this manual in a USB storage device 31 - When using a display connected to operate your iPod 31 - Terminology 24 - Contents Thank you for the Tele Atlas Data 14 - Please read the map screen 37 - PIONEER AVIC-Z110BT...
Owner's Manual
Page 3
...59 - Registering a location by scroll mode 62 Editing registered locations 62 - Editing your destination The basic flow of the city map display 42 - Scrolling the map to the position you searched for recently 60 Searching for Points of the facilities 58 - Bluetooth Connected 43 - Adding a waypoint... maneuvers 43 - Displaying the customized POIs 45 Switching the view mode 45 Setting the map color change between day and night 46 Changing the road color 46 Changing the setting of navigation interruption screen 47 Selecting "Quick Access" 47 Setting a route to see 40 - ...
...59 - Registering a location by scroll mode 62 Editing registered locations 62 - Editing your destination The basic flow of the city map display 42 - Scrolling the map to the position you searched for recently 60 Searching for Points of the facilities 58 - Bluetooth Connected 43 - Adding a waypoint... maneuvers 43 - Displaying the customized POIs 45 Switching the view mode 45 Setting the map color change between day and night 46 Changing the road color 46 Changing the setting of navigation interruption screen 47 Selecting "Quick Access" 47 Setting a route to see 40 - ...

Owner's Manual
Page 4
... hands-free phoning Displaying the Phone Menu 82 Making a phone call 86 - Dialing the entry in "History" 65 Browsing information on "AVIC FEEDS" 64 Deleting an entry in the "Favorites" 85 - Dialing from your Bluetooth devices 79 - Editing the password 88 - Answering... Echo canceling and noise reduction 88 - Contents - Calling a number in "Favorites" 64 - Dialing a facility's phone number 85 - Pairing from the map 85 Receiving a phone call 82 - Answering an incoming call history 84 - Clearing memory 89 - Searching for a movie title by selecting a movie title ...
... hands-free phoning Displaying the Phone Menu 82 Making a phone call 86 - Dialing the entry in "History" 65 Browsing information on "AVIC FEEDS" 64 Deleting an entry in the "Favorites" 85 - Dialing from your Bluetooth devices 79 - Editing the password 88 - Answering... Echo canceling and noise reduction 88 - Contents - Calling a number in "Favorites" 64 - Dialing a facility's phone number 85 - Pairing from the map 85 Receiving a phone call 82 - Answering an incoming call history 84 - Clearing memory 89 - Searching for a movie title by selecting a movie title ...

Owner's Manual
Page 14
Tele Atlas grants you a non-transferable, nonexclusive license to Tele Atlas and its licensors and they retain all copies) to use the map data and business points of interest information (the "POIs"), (together, the "Data") contained on the Data. 3 Warranty Disclaimer. You are prohibited from removing or obscuring ...
Tele Atlas grants you a non-transferable, nonexclusive license to Tele Atlas and its licensors and they retain all copies) to use the map data and business points of interest information (the "POIs"), (together, the "Data") contained on the Data. 3 Warranty Disclaimer. You are prohibited from removing or obscuring ...

Owner's Manual
Page 20
..., construction and other non-standard vehicles are not reflected in the map database applies only to Tele Atlas. Inevitably, those modifications after that regulations for Map Version, Tele Atlas. The traffic regulation data used in this navigation system, refer to the terms of a License Agreement. As of the...the copyright notice for infoUSA, Inc. Note that period are not included in part from the copyright owner. ! For more details about the map coverage of this database. ! Rel. 07/2008. 20 En You will be construed as construction, weather, etc.). ! The use any...
..., construction and other non-standard vehicles are not reflected in the map database applies only to Tele Atlas. Inevitably, those modifications after that regulations for Map Version, Tele Atlas. The traffic regulation data used in this navigation system, refer to the terms of a License Agreement. As of the...the copyright notice for infoUSA, Inc. Note that period are not included in part from the copyright owner. ! For more details about the map coverage of this database. ! Rel. 07/2008. 20 En You will be construed as construction, weather, etc.). ! The use any...

Owner's Manual
Page 24
...the product for aftersales service (including warranty conditions) or any other notes are described in ALL CAPITAL, BOLD lettering: e.g.) MENU button, MAP button. ! Touch panel keys that are available on your product. Box 1760 Long Beach, CA 90801-1760 800-421-1404 ! We... screen or "AV Source" screen ! scribed in bold with your navigation system are described in bold in the event of an insurance claim such as loss or theft. 2 Receive updates on the screen, you need from the "Contents". U.S.A Pioneer Electronics (USA) Inc. Finding the operation procedure from a menu name...
...the product for aftersales service (including warranty conditions) or any other notes are described in ALL CAPITAL, BOLD lettering: e.g.) MENU button, MAP button. ! Touch panel keys that are available on your product. Box 1760 Long Beach, CA 90801-1760 800-421-1404 ! We... screen or "AV Source" screen ! scribed in bold with your navigation system are described in bold in the event of an insurance claim such as loss or theft. 2 Receive updates on the screen, you need from the "Contents". U.S.A Pioneer Electronics (USA) Inc. Finding the operation procedure from a menu name...

Owner's Manual
Page 26
... due to the resulting high temperatures. and other countries. Read Returning the na- iPhone; ferred to touch the touch panel keys with a Pioneer USB interface cable for iPod (CDIU50V) (sold separately), you use this function. = For more details about the items which would be reprogramed...the cellular phone away from damage, be re- p Some data remains. p Operation methods may vary depending on our website. Map coverage For more detailed information about iPod compatibility with this navigation system, refer to prevent disruption of the video in the U.S.
... due to the resulting high temperatures. and other countries. Read Returning the na- iPhone; ferred to touch the touch panel keys with a Pioneer USB interface cable for iPod (CDIU50V) (sold separately), you use this function. = For more details about the items which would be reprogramed...the cellular phone away from damage, be re- p Some data remains. p Operation methods may vary depending on our website. Map coverage For more detailed information about iPod compatibility with this navigation system, refer to prevent disruption of the video in the U.S.

Owner's Manual
Page 28
... and the AV operation screen. ! The "Monitor Setup" screen appears. 2 Touch or to display the "Top Menu". ! Press to display the map screen while the navigation function screen is displayed. ! When opening , closing and adjusting the angle of the LCD panel will be careful not to Operating the picture adjustment on ...
... and the AV operation screen. ! The "Monitor Setup" screen appears. 2 Touch or to display the "Top Menu". ! Press to display the map screen while the navigation function screen is displayed. ! When opening , closing and adjusting the angle of the LCD panel will be careful not to Operating the picture adjustment on ...

Owner's Manual
Page 35
...be referred to the registered menu screen by a simple touch on the "Shortcut Menu" screen. Press the MODE button to display the navigation map screen. 7 AV operation screen This is the starting menu to see remaining characters. Operating list screens (e.g. POI list) 1 4 5 How to use the...". 2 Destination Menu You can search for your set route from this menu. p To return to display the "Top Menu". How to use the navigation menu screens 2 Classic Menu Shortcut Menu p In this manual, "Classic Menu" will be displayed within the displayed area, touching the key to the ...
...be referred to the registered menu screen by a simple touch on the "Shortcut Menu" screen. Press the MODE button to display the navigation map screen. 7 AV operation screen This is the starting menu to see remaining characters. Operating list screens (e.g. POI list) 1 4 5 How to use the...". 2 Destination Menu You can search for your set route from this menu. p To return to display the "Top Menu". How to use the navigation menu screens 2 Classic Menu Shortcut Menu p In this manual, "Classic Menu" will be displayed within the displayed area, touching the key to the ...

Owner's Manual
Page 36
... button to display the "Top Menu". 2 Touch [Settings]. The "Settings Menu" screen appears. 3 Touch [System Settings]. The selected item is indicated on the right. = For details, refer to Setting for rear view camera...to shortcut. 5 Move the icon to the left -hand side of the screen, while the map of the screen, and then release it. Displaying the rear view camera image Rear view image...[Camera] to display the "Shortcut Menu" screen. 2 Touch [Shortcut]. Chapter 03 How to use the navigation menu screens Selecting the Shortcut p Up to 15 menu items can be registered in shortcuts. 1 Press the HOME...
... button to display the "Top Menu". 2 Touch [Settings]. The "Settings Menu" screen appears. 3 Touch [System Settings]. The selected item is indicated on the right. = For details, refer to Setting for rear view camera...to shortcut. 5 Move the icon to the left -hand side of the screen, while the map of the screen, and then release it. Displaying the rear view camera image Rear view image...[Camera] to display the "Shortcut Menu" screen. 2 Touch [Shortcut]. Chapter 03 How to use the navigation menu screens Selecting the Shortcut p Up to 15 menu items can be registered in shortcuts. 1 Press the HOME...

Owner's Manual
Page 37
...to there. = For details, refer to Displaying maneuvers on the map. p Depending on the map. The apex of the item changes to green. How to use the map Chapter 04 Most of the information provided by your navigation system can select between display and non-display. = For details, ... your orientation and the display moves automatically as you to hear the next guidance again. How to use the map How to read the map screen This example shows an example of a 2D map screen. 1 h g 2 f e 3 d c 4 b 5 a 6 7 p Information with how information appears on page 43. 5 Zoom in/Zoom...
...to there. = For details, refer to Displaying maneuvers on the map. p Depending on the map. The apex of the item changes to green. How to use the map Chapter 04 Most of the information provided by your navigation system can select between display and non-display. = For details, ... your orientation and the display moves automatically as you to hear the next guidance again. How to use the map How to read the map screen This example shows an example of a 2D map screen. 1 h g 2 f e 3 d c 4 b 5 a 6 7 p Information with how information appears on page 43. 5 Zoom in/Zoom...

Owner's Manual
Page 38
..., is displayed. c Current route* The route currently set on the map. Estimated time of guidance flags : Destination The checkered flag indicates your destination. : Waypoint The blue flags indicate your iPod to this navigation system, the artwork for the AV information bar Touching this tab opens the ...the display information. ! f Bluetooth Connected icon This icon shows whether the device featuring Bluetooth technology is active. Chapter 04 How to use the map = For details, refer to Setting the current street name display on page 43. 8 Extension tab for the album that time. ! e...
..., is displayed. c Current route* The route currently set on the map. Estimated time of guidance flags : Destination The checkered flag indicates your destination. : Waypoint The blue flags indicate your iPod to this navigation system, the artwork for the AV information bar Touching this tab opens the ...the display information. ! f Bluetooth Connected icon This icon shows whether the device featuring Bluetooth technology is active. Chapter 04 How to use the map = For details, refer to Setting the current street name display on page 43. 8 Extension tab for the album that time. ! e...

Owner's Manual
Page 39
...the road number and give directional information. p If you do not operate the function for these items is not contained in the built-in the "Map Settings" screen is available, indicating the recommended lane to be displayed when in to easily maneuver the next guidance. 1 Operating the...for a few seconds, the display is not available even if there are the signs on the actual road. Heading up ". ! How to use the map Chapter 04 Enlarged map of the intersection When "Close Up View" in memory, the information is automatically re- turned. # Touch the direct scale key to change the...
...the road number and give directional information. p If you do not operate the function for these items is not contained in the built-in the "Map Settings" screen is available, indicating the recommended lane to be displayed when in to easily maneuver the next guidance. 1 Operating the...for a few seconds, the display is not available even if there are the signs on the actual road. Heading up ". ! How to use the map Chapter 04 Enlarged map of the intersection When "Close Up View" in memory, the information is automatically re- turned. # Touch the direct scale key to change the...

Owner's Manual
Page 40
... a few seconds, the display is automatically returned. Quick Access "Quick Access" allow you want to see 1 Display the map screen. 2 Touch and drag the map in [Favorites], faster than using the navigation menu. North up: The map display always has north at "Heading up " in the following situation. - cess" on screen. You can customize...
... a few seconds, the display is automatically returned. Quick Access "Quick Access" allow you want to see 1 Display the map screen. 2 Touch and drag the map in [Favorites], faster than using the navigation menu. North up: The map display always has north at "Heading up " in the following situation. - cess" on screen. You can customize...

Owner's Manual
Page 41
... [Close] Hides the Quick Access menu. En 41 This item can modify the conditions for surrounding facilities (POI) on the map. = For details, refer to Displaying POI on the map on page 44. : Volume Displays the "Volume Settings" screen. = For more details about "Volume", refer to Calling ... on page 58. : Overlay POI Displays icons for route calculation and recalculate the current route. = For details, refer to use the map Chapter 04 % When the map is displayed, touch . = For details, refer to Setting the Volume for Guidance and Phone on page 53. : Destination* Displayed when...
... [Close] Hides the Quick Access menu. En 41 This item can modify the conditions for surrounding facilities (POI) on the map. = For details, refer to Displaying POI on the map on page 44. : Volume Displays the "Volume Settings" screen. = For more details about "Volume", refer to Calling ... on page 58. : Overlay POI Displays icons for route calculation and recalculate the current route. = For details, refer to use the map Chapter 04 % When the map is displayed, touch . = For details, refer to Setting the Volume for Guidance and Phone on page 53. : Destination* Displayed when...

Owner's Manual
Page 42
..., entrance/exit of the city map display Sets whether to switch to the city map display when the vehicle is within a city map area. % Touch [City Map Barrier]. The "Map Settings" screen appears. p The city map is displayed when the map scale is no city map data. The "Displayed Information" screen.... p Even if you touch the key changes that setting. ! [On] (default): Automatically switches to the city map when in a city map area. ! [Off]: Does not show the city map. Setting the switching of freeway or a junction. % Touch [Close Up View]. Each time you touch the key...
..., entrance/exit of the city map display Sets whether to switch to the city map display when the vehicle is within a city map area. % Touch [City Map Barrier]. The "Map Settings" screen appears. p The city map is displayed when the map scale is no city map data. The "Displayed Information" screen.... p Even if you touch the key changes that setting. ! [On] (default): Automatically switches to the city map when in a city map area. ! [Off]: Does not show the city map. Setting the switching of freeway or a junction. % Touch [Close Up View]. Each time you touch the key...

Owner's Manual
Page 43
... lower. % Touch [3D Land Mark]. Each time you touch the key changes that setting. ! [View] (default): Displays the street name (or city name) on the map. ! [Hide]: Hides the street name (or city name) on page 38. p 3D Landmark only appears when the view mode is [3D View] and the... whether to display or hide the street name (or city name) that setting. ! [On] (default): Displays the 3D Landmark on the map. ! [Off]: Hides the 3D Landmark on the map. Setting the current street name display Selects whether to display or hide the icon for current status of the vehicle on the...
... lower. % Touch [3D Land Mark]. Each time you touch the key changes that setting. ! [View] (default): Displays the street name (or city name) on the map. ! [Hide]: Hides the street name (or city name) on page 38. p 3D Landmark only appears when the view mode is [3D View] and the... whether to display or hide the street name (or city name) that setting. ! [On] (default): Displays the 3D Landmark on the map. ! [Off]: Hides the 3D Landmark on the map. Setting the current street name display Selects whether to display or hide the icon for current status of the vehicle on the...

Owner's Manual
Page 44
...(1 kilometers) or more . 3 Touch [Display] to display. Returns previous screen. 6 Touch the subcategory. Displaying POI on the map Displays icons for the surrounding facilities (POI) on the map. p POI icons are displayed: - Movie Times - The "Overlay POI" screen appears. 44 En # Touch [OK]. A red... check mark appears next to 10 items from the detailed category. 1 Display the "Map Settings" screen. 2 Touch [Overlay POI]. Each time you touch the key changes that setting. ! [View] (default): Displays the next turn ahead of...
...(1 kilometers) or more . 3 Touch [Display] to display. Returns previous screen. 6 Touch the subcategory. Displaying POI on the map Displays icons for the surrounding facilities (POI) on the map. p POI icons are displayed: - Movie Times - The "Overlay POI" screen appears. 44 En # Touch [OK]. A red... check mark appears next to 10 items from the detailed category. 1 Display the "Map Settings" screen. 2 Touch [Overlay POI]. Each time you touch the key changes that setting. ! [View] (default): Displays the next turn ahead of...

Owner's Manual
Page 45
... POI properly and inserting the SD memory card enables the system to display the icons on page 29. 2 Display the "Map Settings" screen. 3 Touch [Overlay POI]. Customizing the map screen settings # If you want to display. 7 To...utility program "AVIC FEEDS" which is available separately, on your PC. ("AVIC FEEDS" will appear. The "Overlay POI" screen appears. 6 Touch the category you do not want to display the POI icon on the map, touch [Display... categories are selected, blue check marks will be selected for navigation guidance. 2D map screen En 45 p If you want to turn it [On].
... POI properly and inserting the SD memory card enables the system to display the icons on page 29. 2 Display the "Map Settings" screen. 3 Touch [Overlay POI]. Customizing the map screen settings # If you want to display. 7 To...utility program "AVIC FEEDS" which is available separately, on your PC. ("AVIC FEEDS" will appear. The "Overlay POI" screen appears. 6 Touch the category you do not want to display the POI icon on the map, touch [Display... categories are selected, blue check marks will be selected for navigation guidance. 2D map screen En 45 p If you want to turn it [On].

Owner's Manual
Page 46
... that setting. ! [Automatic] (default): You can change between daytime and nighttime according to Setting for changing the combination of the navigation system must be connected correctly. Chapter 05 Customizing the map screen settings 3D map screen p This type is available when [Back Camera Settings] is set . ! [Rear View]: Displays the rear view images. Street...
... that setting. ! [Automatic] (default): You can change between daytime and nighttime according to Setting for changing the combination of the navigation system must be connected correctly. Chapter 05 Customizing the map screen settings 3D map screen p This type is available when [Back Camera Settings] is set . ! [Rear View]: Displays the rear view images. Street...


