
Operating Instructions
Page 5
... of this may not be possible with certain discs. Below are just a few questions and have multiple language and/or audio soundtracks recorded on the remote control to open the Setup screen and you 'd like to use when watching DVDs in the Video menu (page 28). All rights reserved. ** "DTS" and...
... of this may not be possible with certain discs. Below are just a few questions and have multiple language and/or audio soundtracks recorded on the remote control to open the Setup screen and you 'd like to use when watching DVDs in the Video menu (page 28). All rights reserved. ** "DTS" and...
Operating Instructions
Page 6
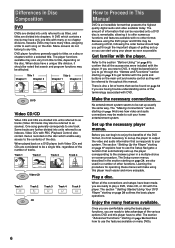
... This Manual DVD is first necessary to set up the necessary player menus. The section "Setting Up the Player" starting on the main unit and remote control as tracks (Video CD tracks may have to offer. Once you are comfortable using the basic player functions, you can be a single title, regardless...
... This Manual DVD is first necessary to set up the necessary player menus. The section "Setting Up the Player" starting on the main unit and remote control as tracks (Video CD tracks may have to offer. Once you are comfortable using the basic player functions, you can be a single title, regardless...

Operating Instructions
Page 7
... 8 Names and Functions 9 Front Panel 9 Display Window 10 Rear Panel 11 Remote Control 12 Making Connections 14 Connecting Your DVD Player 14 Audio Connections 15 Video Connections 16 System Control Connections 16 Setting Up the Player 17 ...
... 8 Names and Functions 9 Front Panel 9 Display Window 10 Rear Panel 11 Remote Control 12 Making Connections 14 Connecting Your DVD Player 14 Audio Connections 15 Video Connections 16 System Control Connections 16 Setting Up the Player 17 ...

Operating Instructions
Page 8
... the player and within a 30° angle on each side of the sensor. 30 30 7m (23ft.) Notes • Exposing the remote sensor to direct sunlight or strong light may cause faulty operation. • If the CONTROL IN jack on the player's front panel. Before... the following were received with the marks inside the battery compartment. Make sure to 23 feet (7 m) from the battery component, then insert new batteries. The remote control can be possible when pointed at this manual) 8 RANDOM PROGRAM SEARCH MODE Î 0 9 8 7 ¶ 6 +10 5 4 CLEAR 3 2 1 eSTEP/SLOWE 1REV FWD ¡...
... the player and within a 30° angle on each side of the sensor. 30 30 7m (23ft.) Notes • Exposing the remote sensor to direct sunlight or strong light may cause faulty operation. • If the CONTROL IN jack on the player's front panel. Before... the following were received with the marks inside the battery compartment. Make sure to 23 feet (7 m) from the battery component, then insert new batteries. The remote control can be possible when pointed at this manual) 8 RANDOM PROGRAM SEARCH MODE Î 0 9 8 7 ¶ 6 +10 5 4 CLEAR 3 2 1 eSTEP/SLOWE 1REV FWD ¡...

Operating Instructions
Page 9
Press and hold to perform reverse playback scanning (pages 22). 9 Remote sensor Point the remote control toward the remote sensor to previous chapters/tracks. BEFORE USING/NAMES AND FUNCTIONS Names and Functions Front Panel 1 2 STANDBY/ON DVD PLAYER 3 45 6 0 41 ¡¢ 7 8 3 ÎA 0 1 STANDBY/...
Press and hold to perform reverse playback scanning (pages 22). 9 Remote sensor Point the remote control toward the remote sensor to previous chapters/tracks. BEFORE USING/NAMES AND FUNCTIONS Names and Functions Front Panel 1 2 STANDBY/ON DVD PLAYER 3 45 6 0 41 ¡¢ 7 8 3 ÎA 0 1 STANDBY/...

Operating Instructions
Page 11
... your TV or monitor has an S-video input, clear picture reproduction is possible by connecting the player to your TV or monitor by pointing the remote control at the component that has both connections (pages 14, 15). 5 CONTROL IN jack Use to connect this output, be sure to set VIDEO OUT... on your TV or monitor via the S-Video jack. Player operations are connecting to a receiver that the player is used to another component bearing the Pioneer Î mark. When using this unit as though it may be sure to set VIDEO OUT SELECT to the right position (page 16). 2 DIGITAL OUT...
... your TV or monitor has an S-video input, clear picture reproduction is possible by connecting the player to your TV or monitor by pointing the remote control at the component that has both connections (pages 14, 15). 5 CONTROL IN jack Use to connect this output, be sure to set VIDEO OUT... on your TV or monitor via the S-Video jack. Player operations are connecting to a receiver that the player is used to another component bearing the Pioneer Î mark. When using this unit as though it may be sure to set VIDEO OUT SELECT to the right position (page 16). 2 DIGITAL OUT...

Operating Instructions
Page 12
... disc to return to resume from the point you want to resume playback of that disc, press LAST MEMORY in either play or stop playback. Remote Control 1 2 3 4 5 6 7 8 9 0 = ~ ! @ OPEN/ LAST CONDITION CLOSE MEMORY MEMORY AUDIO SUB TITLE ANGLE REPEAT SETUP REPEAT MENU TOP MENU A-B DISPLAY RETURN ¶ 5 ¶ ENTER 2 5 5 3 PREV 4 NEXT ¢...
... disc to return to resume from the point you want to resume playback of that disc, press LAST MEMORY in either play or stop playback. Remote Control 1 2 3 4 5 6 7 8 9 0 = ~ ! @ OPEN/ LAST CONDITION CLOSE MEMORY MEMORY AUDIO SUB TITLE ANGLE REPEAT SETUP REPEAT MENU TOP MENU A-B DISPLAY RETURN ¶ 5 ¶ ENTER 2 5 5 3 PREV 4 NEXT ¢...

Operating Instructions
Page 16
...in the Setup screen Video menu (page 28). Video Connections This player features S-video, composite, and component video output possibilities. with S- Point the remote control unit at the component (AV amplifier, etc.) connected to the CONTROL OUT jack to operate. • When controlling as though it is also...amplifier using an audio or video cord, even when using only digital components. • For details, refer to the CONTROL OUT jack of another PIONEER component bearing the Î mark, you can control the player as a system, be sure to make sure to set the VIDEO OUT SELECT...
...in the Setup screen Video menu (page 28). Video Connections This player features S-video, composite, and component video output possibilities. with S- Point the remote control unit at the component (AV amplifier, etc.) connected to the CONTROL OUT jack to operate. • When controlling as though it is also...amplifier using an audio or video cord, even when using only digital components. • For details, refer to the CONTROL OUT jack of another PIONEER component bearing the Î mark, you can control the player as a system, be sure to make sure to set the VIDEO OUT SELECT...

Operating Instructions
Page 17
... on the following pages. Please note that no settings are changed . Please note that if the Setup Navigator is finished. 17 The procedure on the remote control). 2 Press SETUP. Please note, however, that was returned to. Because the Setup Navigator cannot be sure to press STOP 7 before loading a DVD for the...
... on the following pages. Please note that no settings are changed . Please note that if the Setup Navigator is finished. 17 The procedure on the remote control). 2 Press SETUP. Please note, however, that was returned to. Because the Setup Navigator cannot be sure to press STOP 7 before loading a DVD for the...

Operating Instructions
Page 21
... 1 Don't Tekno for DVDs that have menu screens or Video CDs that can be advanced to or returned to move around the options on the remote control. To play Video CDs without displaying menu screens. Example: When a DVD that has menu screens is loaded 1 Highlight Clips 2 Chapter List 3 Commercial Header 4 Subtitles...
... 1 Don't Tekno for DVDs that have menu screens or Video CDs that can be advanced to or returned to move around the options on the remote control. To play Video CDs without displaying menu screens. Example: When a DVD that has menu screens is loaded 1 Highlight Clips 2 Chapter List 3 Commercial Header 4 Subtitles...

Operating Instructions
Page 24
... the screen and cannot be adjusted. To make the necessary settings in the Setup screen Audio 1, Audio 2, Video, and Language menus as described on the remote control) 2 Press SETUP. The various functions that can be sure to press STOP 7 before pressing SETUP. • Operating the menu after pressing STOP 7 may still...
... the screen and cannot be adjusted. To make the necessary settings in the Setup screen Audio 1, Audio 2, Video, and Language menus as described on the remote control) 2 Press SETUP. The various functions that can be sure to press STOP 7 before pressing SETUP. • Operating the menu after pressing STOP 7 may still...

Operating Instructions
Page 50
..., having the TV or radio on the lowest shelf possible (however, not where it damaged, ask your nearest PIONEER authorized service center or your hands are not likely to STANDBY when not using the remote control. Switch POWER to be routed in a while. However, this unit or the TV or radio. In...
..., having the TV or radio on the lowest shelf possible (however, not where it damaged, ask your nearest PIONEER authorized service center or your hands are not likely to STANDBY when not using the remote control. Switch POWER to be routed in a while. However, this unit or the TV or radio. In...

Operating Instructions
Page 52
... press STANDBY/ON and check that there is something wrong with this type of this component, check the points below , ask your nearest PIONEER authorized service center or your TV, receiver, or amplifier is resumed, the new settings should move the player (page 50). Player malfunctions.... \ Stop disc playback (press STOP 7), then start playback again. When playback is set to operate the remote from a location within its operating range (page 8). When making settings in the Setup screen menus may lie in the playback picture. Picture ...
... press STANDBY/ON and check that there is something wrong with this type of this component, check the points below , ask your nearest PIONEER authorized service center or your TV, receiver, or amplifier is resumed, the new settings should move the player (page 50). Player malfunctions.... \ Stop disc playback (press STOP 7), then start playback again. When playback is set to operate the remote from a location within its operating range (page 8). When making settings in the Setup screen menus may lie in the playback picture. Picture ...

Operating Instructions
Page 55
...- PEAK) or lower Digital output Optical digital output Optical digital jack Coaxial digital output RCA jack Other terminals CONTROL IN Minijack (3.5 ø) Accessories Remote control unit 1 AA (R6P) dry cell batteries 2 Audio cord 1 Video cord 1 Power cord 1 Operating Instructions 1 Note The specifications and design...used to select the language of this player via an S-video cable produces clearer picture reproduction by the television to another Pioneer component such as though it were a component in to improvement. Subtitle Subtitles are subject to change without notice, due...
...- PEAK) or lower Digital output Optical digital output Optical digital jack Coaxial digital output RCA jack Other terminals CONTROL IN Minijack (3.5 ø) Accessories Remote control unit 1 AA (R6P) dry cell batteries 2 Audio cord 1 Video cord 1 Power cord 1 Operating Instructions 1 Note The specifications and design...used to select the language of this player via an S-video cable produces clearer picture reproduction by the television to another Pioneer component such as though it were a component in to improvement. Subtitle Subtitles are subject to change without notice, due...


