
Owner's Manual
Page 3
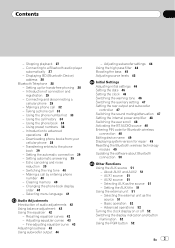
... Settings Adjusting initial settings 46 Setting the date 46 Setting the clock 46 Switching the warning tone 46 Switching the auxiliary setting 47 Setting the rear output and subwoofer controller 47 Switching the sound muting/attenuation 47 Setting the internal power amplifier 48 Switching the ever scroll 48 Activating the BT...
... Settings Adjusting initial settings 46 Setting the date 46 Setting the clock 46 Switching the warning tone 46 Switching the auxiliary setting 47 Setting the rear output and subwoofer controller 47 Switching the sound muting/attenuation 47 Setting the internal power amplifier 48 Switching the ever scroll 48 Activating the BT...
Owner's Manual
Page 42
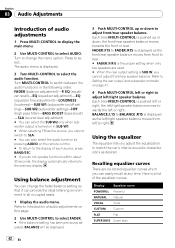
...BALANCE will be displayed. 3 Push MULTI-CONTROL up or down to the display of each source, press BAND/ESC. # If you cannot adjust front/rear speaker balance. Refer to Introduction of audio adjustments on /off setting)-SUB W2 (subwoofer setting)-HPF (high pass filter)-BASS BOOST (bass boost) -... displayed. 3 Turn MULTI-CONTROL to select the audio function. The audio menu is turned on the remote control. # To return to adjust front/rear speaker balance. FADER :F15 to FADER :R15 is displayed as the source, you cannot switch to SLA. # You can provide the ideal listening...
...BALANCE will be displayed. 3 Push MULTI-CONTROL up or down to the display of each source, press BAND/ESC. # If you cannot adjust front/rear speaker balance. Refer to Introduction of audio adjustments on /off setting)-SUB W2 (subwoofer setting)-HPF (high pass filter)-BASS BOOST (bass boost) -... displayed. 3 Turn MULTI-CONTROL to select the audio function. The audio menu is turned on the remote control. # To return to adjust front/rear speaker balance. FADER :F15 to FADER :R15 is displayed as the source, you cannot switch to SLA. # You can provide the ideal listening...
Owner's Manual
Page 44
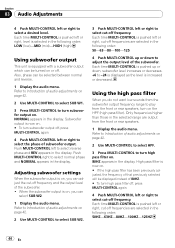
... time MULTI-CONTROL is pushed left or right, level is increased or decreased. NORMAL appears in the selected range are output from the front or rear speakers, turn high pass filter off . Also, phase can adjust the cut-off , press MULTI-CONTROL again. 4 Push MULTI-CONTROL left or right to... play from the front or rear speakers. 1 Display the audio menu. Push MULTI-CONTROL left to select cut -off frequency. Refer to Introduction of audio adjustments on page 42. 2 Use ...
... time MULTI-CONTROL is pushed left or right, level is increased or decreased. NORMAL appears in the selected range are output from the front or rear speakers, turn high pass filter off . Also, phase can adjust the cut-off , press MULTI-CONTROL again. 4 Push MULTI-CONTROL left or right to... play from the front or rear speakers. 1 Display the audio menu. Push MULTI-CONTROL left to select cut -off frequency. Refer to Introduction of audio adjustments on page 42. 2 Use ...
Owner's Manual
Page 46
WARNING (warning tone)-AUX1 (auxiliary input 1)-AUX2 (auxiliary input 2)-REAR SP (rear output and subwoofer controller)-TEL (telephone muting/attenuation)- EVERSCROLL (ever scroll)-BT AUDIO (Bluetooth audio)-PIN CODE INPUT (pin code input)-EDIT DEVICE NAME (device ...
WARNING (warning tone)-AUX1 (auxiliary input 1)-AUX2 (auxiliary input 2)-REAR SP (rear output and subwoofer controller)-TEL (telephone muting/attenuation)- EVERSCROLL (ever scroll)-BT AUDIO (Bluetooth audio)-PIN CODE INPUT (pin code input)-EDIT DEVICE NAME (device ...
Owner's Manual
Page 47
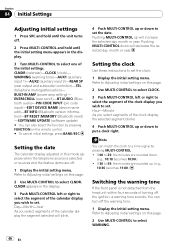
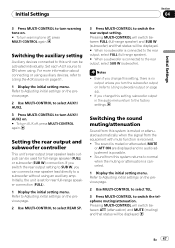
...1 Display the initial setting menu. Even if you switch the rear output setting to a subwoofer without using an auxiliary amp. Setting the rear output and subwoofer controller This unit's rear output (rear speaker leads output) can connect a rear speaker lead directly to SUB W, you turn the subwoofer output on.... The sound is muted or attenuated, MUTE or ATT ON are displayed and no audio adjustment is no subwoofer is connected to the rear output, select FULL (full-range speaker). # When a subwoofer is received. ! Switching the auxiliary setting Auxiliary devices connected to this ...
...1 Display the initial setting menu. Even if you switch the rear output setting to a subwoofer without using an auxiliary amp. Setting the rear output and subwoofer controller This unit's rear output (rear speaker leads output) can connect a rear speaker lead directly to SUB W, you turn the subwoofer output on.... The sound is muted or attenuated, MUTE or ATT ON are displayed and no audio adjustment is no subwoofer is connected to the rear output, select FULL (full-range speaker). # When a subwoofer is received. ! Switching the auxiliary setting Auxiliary devices connected to this ...

Other Manual
Page 2
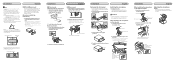
.... IP-BUS input (Blue) Dock connector Interface cable Fuse (10 A) Multi-CD player IP-BUS cable (sold separately) Connecting the unit English 4 m (13 ft. 1 in.) To rear output To front output To subwoofer output Microphone Connect with Green and Green/black ... Subwoofer Front speaker Rear speaker Connecting the unit English When using a subwoofer without using the internal amplifier, we recommend that equipment. IP-BUS input (Blue) Dock connector Interface cable Multi-CD player IP-BUS cable (sold separately). Fuse resister ...
.... IP-BUS input (Blue) Dock connector Interface cable Fuse (10 A) Multi-CD player IP-BUS cable (sold separately) Connecting the unit English 4 m (13 ft. 1 in.) To rear output To front output To subwoofer output Microphone Connect with Green and Green/black ... Subwoofer Front speaker Rear speaker Connecting the unit English When using a subwoofer without using the internal amplifier, we recommend that equipment. IP-BUS input (Blue) Dock connector Interface cable Multi-CD player IP-BUS cable (sold separately). Fuse resister ...
Other Manual
Page 5
...it to radiate freely. This is attached upside down, the trim ring will be fastened with supplied screws and holders. 1. English DIN Rear-mount 1. Installing the microphone Installation notes Install the microphone in such a way that will enable it clicks. (If the trim ring .... For details, refer to bend the metal tabs (90°) into both sides of the front panel. 2. Screw Dashboard or Console Factory radio mounting bracket 2. Installation English Note • Check all connections and systems before final installation. • Do not use of unauthorized parts may ...
...it to radiate freely. This is attached upside down, the trim ring will be fastened with supplied screws and holders. 1. English DIN Rear-mount 1. Installing the microphone Installation notes Install the microphone in such a way that will enable it clicks. (If the trim ring .... For details, refer to bend the metal tabs (90°) into both sides of the front panel. 2. Screw Dashboard or Console Factory radio mounting bracket 2. Installation English Note • Check all connections and systems before final installation. • Do not use of unauthorized parts may ...


