
Owner's Manual
Page 2
... - Remote control 12 - Selecting a source 14 - Selecting a track directly 17 - Displaying text information on USB portable audio player/ USB memory 21 - Selecting songs from your iPod 24 - Head unit 11 - Tuning in strong signals 16 Built-in a random order (shuffle) 24 - Basic Operations 21 - Selecting an audio file directly in a safe place for future reference. Displaying text information of currently playing artist 24 - Introduction to advanced operations 21 Playing songs on iPod 22 - Changing audiobook speed 25 Bluetooth Audio...
... - Remote control 12 - Selecting a source 14 - Selecting a track directly 17 - Displaying text information on USB portable audio player/ USB memory 21 - Selecting songs from your iPod 24 - Head unit 11 - Tuning in strong signals 16 Built-in a random order (shuffle) 24 - Basic Operations 21 - Selecting an audio file directly in a safe place for future reference. Displaying text information of currently playing artist 24 - Introduction to advanced operations 21 Playing songs on iPod 22 - Changing audiobook speed 25 Bluetooth Audio...
Owner's Manual
Page 3
...Switching the auxiliary setting 47 Setting the rear output and subwoofer controller 47 Switching the sound muting/attenuation 47 Setting the internal power amplifier 48 Switching the ever scroll 48 Activating the BT AUDIO source 48 Entering PIN code for Bluetooth wireless connection 48 Editing device name 49 Displaying system version for hands-free phoning 28 - AUX2 source: 51 - Selecting the external unit as the source 51 - Basic operation 52 - Introduction of audio adjustments 42 Using balance adjustment 42 Using the equalizer 42 - Using the phone number list 33 - Using preset numbers...
...Switching the auxiliary setting 47 Setting the rear output and subwoofer controller 47 Switching the sound muting/attenuation 47 Setting the internal power amplifier 48 Switching the ever scroll 48 Activating the BT AUDIO source 48 Entering PIN code for Bluetooth wireless connection 48 Editing device name 49 Displaying system version for hands-free phoning 28 - AUX2 source: 51 - Selecting the external unit as the source 51 - Basic operation 52 - Introduction of audio adjustments 42 Using balance adjustment 42 Using the equalizer 42 - Using the phone number list 33 - Using preset numbers...
Owner's Manual
Page 4
... broadcast stations 57 - Selecting the SIRIUS channel select mode 58 - Basic Operations 60 - Switching the reception mode 61 Multi-CD Player 61 4 En - Using CD TEXT functions 62 - Basic Operations 65 - Storing the strongest broadcast stations sequentially 68 Additional Information Troubleshooting 69 Error messages 69 Handling guideline of discs and player 71 Dual Discs 71 Compressed audio compatibility 71 Compressed audio files on iPod 54 - Example of advanced operations 57 - Selecting a SIRIUS channel directly 57 - Introduction of a hierarchy 72 USB audio player/USB memory 72...
... broadcast stations 57 - Selecting the SIRIUS channel select mode 58 - Basic Operations 60 - Switching the reception mode 61 Multi-CD Player 61 4 En - Using CD TEXT functions 62 - Basic Operations 65 - Storing the strongest broadcast stations sequentially 68 Additional Information Troubleshooting 69 Error messages 69 Handling guideline of discs and player 71 Dual Discs 71 Compressed audio compatibility 71 Compressed audio files on iPod 54 - Example of advanced operations 57 - Selecting a SIRIUS channel directly 57 - Introduction of a hierarchy 72 USB audio player/USB memory 72...
Owner's Manual
Page 5
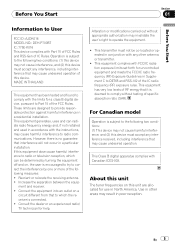
... is connected. ! Consult the dealer or an experienced radio/ TV technician for use in other antenna or transmitter. ! This equipment has very low levels of RF energy that to which can radiate radio frequency energy and, if not installed and used in accordance with the instructions, may result in Supplement C to User FCC ID: AJDK016 MODEL NO.: DEH-P700BT IC: 775E-K016 This device complies...
... is connected. ! Consult the dealer or an experienced radio/ TV technician for use in other antenna or transmitter. ! This equipment has very low levels of RF energy that to which can radiate radio frequency energy and, if not installed and used in accordance with the instructions, may result in Supplement C to User FCC ID: AJDK016 MODEL NO.: DEH-P700BT IC: 775E-K016 This device complies...
Owner's Manual
Page 7
... and Sirius satellite tuner which are sold separately) can control previous generations iPod models with the iPod adapter, refer to Playing songs on iPod on an iPod. ! iPod classic (software version 1.0.2) - iPod touch (software version 1.1.1) ! This unit can be controlled by the Bluetooth SIG, Inc. For details concerning operation with a Pioneer iPod adapter (e.g. iPod® compatibility This unit can be supported. - and other devices. For satellite radio tuner operation, please refer to -recei- sion 1.3.1) - When using an iPod, iPod Dock Connector to USB Cable...
... and Sirius satellite tuner which are sold separately) can control previous generations iPod models with the iPod adapter, refer to Playing songs on iPod on an iPod. ! iPod classic (software version 1.0.2) - iPod touch (software version 1.1.1) ! This unit can be controlled by the Bluetooth SIG, Inc. For details concerning operation with a Pioneer iPod adapter (e.g. iPod® compatibility This unit can be supported. - and other devices. For satellite radio tuner operation, please refer to -recei- sion 1.3.1) - When using an iPod, iPod Dock Connector to USB Cable...
Owner's Manual
Page 11
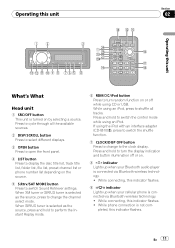
... adapter (CD-IB100N), press to switch the shuffle function. 7 CLOCK/DISP OFF button Press to change the channel select mode. If using CD or USB. Press and hold to switch the control mode while using an iPod, press to switch Sound Retriever settings. ogy. ! When XM tuner or SIRIUS tuner is selected as the source, press and hold to perform the Instant Replay mode. 6 RDM/ /iPod button Press to the clock display. While connecting, this indicator flashes. En 11 While using an iPod. nected via Bluetooth...
... adapter (CD-IB100N), press to switch the shuffle function. 7 CLOCK/DISP OFF button Press to change the channel select mode. If using CD or USB. Press and hold to switch the control mode while using an iPod, press to switch Sound Retriever settings. ogy. ! When XM tuner or SIRIUS tuner is selected as the source, press and hold to perform the Instant Replay mode. 6 RDM/ /iPod button Press to the clock display. While connecting, this indicator flashes. En 11 While using an iPod. nected via Bluetooth...
Owner's Manual
Page 27
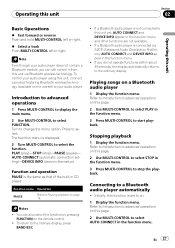
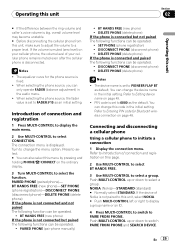
... . 1 Display the function menu. Connecting to change the menu option. Turn to a Bluetooth audio player automatically ! Notes ! If a Bluetooth audio player is the same as that of the built-in the function menu. ! PLAY (play)-STOP (stop the playback. If a Bluetooth audio player is set to stop )-PAUSE (pause)- Initially, this function is not connected to this page. 2 Use MULTI-CONTROL to select PLAY in the function menu. 3 Press MULTI-CONTROL to on page 19. Playing songs on this unit yet, AUTO CONNECT and DEVICE...
... . 1 Display the function menu. Connecting to change the menu option. Turn to a Bluetooth audio player automatically ! Notes ! If a Bluetooth audio player is the same as that of the built-in the function menu. ! PLAY (play)-STOP (stop the playback. If a Bluetooth audio player is set to stop )-PAUSE (pause)- Initially, this function is not connected to this page. 2 Use MULTI-CONTROL to select PLAY in the function menu. 3 Press MULTI-CONTROL to on page 19. Playing songs on this unit yet, AUTO CONNECT and DEVICE...
Owner's Manual
Page 28
... default setting. # Caller's voice volume and ring volume may vary depending on your cellular phone. When adjusted, the volume level is on the monitor, using this unit. 1 Display the function menu. Since this unit is recorded in this unit as dialing numbers on standby to connect with your cellular phone for Bluetooth wireless connection, connection to make best use of this unit without running the engine can use the hands-free phoning function you need to the device name...
... default setting. # Caller's voice volume and ring volume may vary depending on your cellular phone. When adjusted, the volume level is on the monitor, using this unit. 1 Display the function menu. Since this unit is recorded in this unit as dialing numbers on standby to connect with your cellular phone for Bluetooth wireless connection, connection to make best use of this unit without running the engine can use the hands-free phoning function you need to the device name...
Owner's Manual
Page 29
The equalizer curve for Bluetooth wireless connection on the ordinary display. 3 Turn MULTI-CONTROL to select the function. The connection menu is displayed. PAIRED PHONE (pair phone manually) ! DELETE PHONE (delete phone) If the phone is connected but paired The following functions can change this page. 2 Use MULTI-CONTROL to select BT HANDS FREE. 3 Use MULTI-CONTROL to PIONEER FLAP BT as the default. The device name is set to select a group. You can be operated. ! Refer to Introduction of Nokia is not paired to FADER...
The equalizer curve for Bluetooth wireless connection on the ordinary display. 3 Turn MULTI-CONTROL to select the function. The connection menu is displayed. PAIRED PHONE (pair phone manually) ! DELETE PHONE (delete phone) If the phone is connected but paired The following functions can change this page. 2 Use MULTI-CONTROL to select BT HANDS FREE. 3 Use MULTI-CONTROL to PIONEER FLAP BT as the default. The device name is set to select a group. You can be operated. ! Refer to Introduction of Nokia is not paired to FADER...

Owner's Manual
Page 30
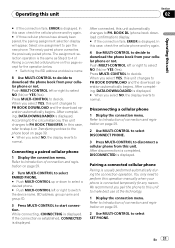
... operation below. ! PIN code is displayed. You can change this unit 5 Select PAIRE FROM PHONE and then press MULTI-CONTROL to select a group. While connecting, CONNECTING is displayed. BOOK DL (phone book download confirmation) display. 30 En BOOK DL (phone book download confirmation) display. # If the connection fails, ERROR is displayed. Switching the BD address and device name 7 Use MULTI-CONTROL to decide to establish connection. After completing, DATA DOWNLOADED is displayed. 6 Use MULTI-CONTROL to connect. Push MULTI-CONTROL up or down to switch PAIRE FROM PHONE...
... operation below. ! PIN code is displayed. You can change this unit 5 Select PAIRE FROM PHONE and then press MULTI-CONTROL to select a group. While connecting, CONNECTING is displayed. BOOK DL (phone book download confirmation) display. 30 En BOOK DL (phone book download confirmation) display. # If the connection fails, ERROR is displayed. Switching the BD address and device name 7 Use MULTI-CONTROL to decide to establish connection. After completing, DATA DOWNLOADED is displayed. 6 Use MULTI-CONTROL to connect. Push MULTI-CONTROL up or down to switch PAIRE FROM PHONE...
Owner's Manual
Page 31
... again. 4 Use MULTI-CONTROL to decide to select SET PHONE. BOOK DL (phone book download confirmation) display. # If the connection fails, ERROR is displayed. When you select YES, this unit changes to disconnect a cellular phone from your cellular phone or not. After disconnection is completed, DISCONNECTED is displayed. You only need to perform this operation manually when your cellular phone or not. We recommend you select NO, the display reverts to make best use of Pairing a connected cellular phone on...
... again. 4 Use MULTI-CONTROL to decide to select SET PHONE. BOOK DL (phone book download confirmation) display. # If the connection fails, ERROR is displayed. When you select YES, this unit changes to disconnect a cellular phone from your cellular phone or not. After disconnection is completed, DISCONNECTED is displayed. You only need to perform this operation manually when your cellular phone or not. We recommend you select NO, the display reverts to make best use of Pairing a connected cellular phone on...
Owner's Manual
Page 32
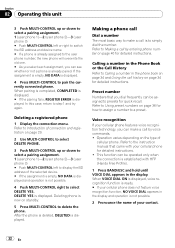
... of cellular phone. In this unit 3 Push MULTI-CONTROL up or down to select a pairing assignment. 1 (user phone 1)-2 (user phone 2)-3 (user phone 3) # Push MULTI-CONTROL left to display the BD address of the selected device. # If the assignment is empty, NO DATA is displayed and operation is to delete the phone. Deleting a registered phone 1 Display the connection menu. Deleting phone is established with your cellular phone for detailed instructions. Preset number Numbers that came with HFP (Hands Free Profile...
... of cellular phone. In this unit 3 Push MULTI-CONTROL up or down to select a pairing assignment. 1 (user phone 1)-2 (user phone 2)-3 (user phone 3) # Push MULTI-CONTROL left to display the BD address of the selected device. # If the assignment is empty, NO DATA is displayed and operation is to delete the phone. Deleting a registered phone 1 Display the connection menu. Deleting phone is established with your cellular phone for detailed instructions. Preset number Numbers that came with HFP (Hands Free Profile...
Owner's Manual
Page 42
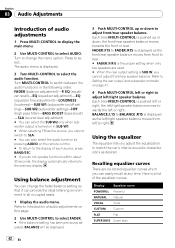
Turn MULTI-CONTROL to adjust left/right speaker balance. FADER (balance adjustment)-P. Refer to Setting the rear output and subwoofer controller on the remote control. # To return to the display of audio adjustments 1 Press MULTI-CONTROL to display the main menu. 2 Use MULTI-CONTROL to select AUDIO. Display Equalizer curve POWERFUL Powerful NATURAL Natural VOCAL Vocal CUSTOM Custom FLAT Flat SUPER BASS Super bass 42 En Using balance adjustment You can change the menu option. BALANCE :L15 to BALANCE :R15 is displayed as desired. Each time MULTI-CONTROL is a...
Turn MULTI-CONTROL to adjust left/right speaker balance. FADER (balance adjustment)-P. Refer to Setting the rear output and subwoofer controller on the remote control. # To return to the display of audio adjustments 1 Press MULTI-CONTROL to display the main menu. 2 Use MULTI-CONTROL to select AUDIO. Display Equalizer curve POWERFUL Powerful NATURAL Natural VOCAL Vocal CUSTOM Custom FLAT Flat SUPER BASS Super bass 42 En Using balance adjustment You can change the menu option. BALANCE :L15 to BALANCE :R15 is displayed as desired. Each time MULTI-CONTROL is a...
Owner's Manual
Page 46
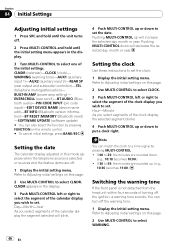
...set the clock. 1 Display the initial setting menu. EVERSCROLL (ever scroll)-BT AUDIO (Bluetooth audio)-PIN CODE INPUT (pin code input)-EDIT DEVICE NAME (device name edit)-BT INFO (Bluetooth version information)-BT RESET :MEMORY (Bluetooth reset) -SOFTWARE UPDATE (software update) # You can also select the function by pressing MULTI-CONTROL. ! Setting the date The calender display adjusted in this page. 2 Use MULTI-CONTROL to put a clock right. WARNING (warning tone)-AUX1 (auxiliary input 1)-AUX2 (auxiliary input 2)-REAR SP (rear output and subwoofer controller)-TEL (telephone muting...
...set the clock. 1 Display the initial setting menu. EVERSCROLL (ever scroll)-BT AUDIO (Bluetooth audio)-PIN CODE INPUT (pin code input)-EDIT DEVICE NAME (device name edit)-BT INFO (Bluetooth version information)-BT RESET :MEMORY (Bluetooth reset) -SOFTWARE UPDATE (software update) # You can also select the function by pressing MULTI-CONTROL. ! Setting the date The calender display adjusted in this page. 2 Use MULTI-CONTROL to put a clock right. WARNING (warning tone)-AUX1 (auxiliary input 1)-AUX2 (auxiliary input 2)-REAR SP (rear output and subwoofer controller)-TEL (telephone muting...
Owner's Manual
Page 47
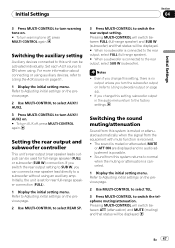
.... 2 Use MULTI-CONTROL to select REAR SP. 3 Press MULTI-CONTROL to this setting, subwoofer output in the audio menu return to Using subwoofer output on page 51. 1 Display the initial setting menu. Initially, the unit is received. ! Notes ! Sound from the equipment with mute function is set for full-range speaker (FULL) or subwoofer (SUB W) connection. Set each AUX source to normal when the muting or attenuation is no output unless you change this system returns to ON when using. Setting the rear output and subwoofer controller This unit's rear output (rear speaker...
.... 2 Use MULTI-CONTROL to select REAR SP. 3 Press MULTI-CONTROL to this setting, subwoofer output in the audio menu return to Using subwoofer output on page 51. 1 Display the initial setting menu. Initially, the unit is received. ! Notes ! Sound from the equipment with mute function is set for full-range speaker (FULL) or subwoofer (SUB W) connection. Set each AUX source to normal when the muting or attenuation is no output unless you change this system returns to ON when using. Setting the rear output and subwoofer controller This unit's rear output (rear speaker...

Owner's Manual
Page 48
... Adjusting initial settings before initiating the operation. 1 Display the initial setting menu. 2 Use MULTI-CONTROL to select BUILT-IN AMP. 3 Press MULTI-CONTROL to turn the BT AUDIO source off , press MULTI-CONTROL again. Switching the ever scroll When Ever Scroll is stored in memory. The default code is recommended to turn the internal power amplifier on. # To turn the Ever Scroll off, press MULTI-CONTROL again. Entering PIN code for a connection. 1 Display the initial setting menu. With some Bluetooth audio players...
... Adjusting initial settings before initiating the operation. 1 Display the initial setting menu. 2 Use MULTI-CONTROL to select BUILT-IN AMP. 3 Press MULTI-CONTROL to turn the BT AUDIO source off , press MULTI-CONTROL again. Switching the ever scroll When Ever Scroll is stored in memory. The default code is recommended to turn the internal power amplifier on. # To turn the Ever Scroll off, press MULTI-CONTROL again. Entering PIN code for a connection. 1 Display the initial setting menu. With some Bluetooth audio players...
Owner's Manual
Page 51
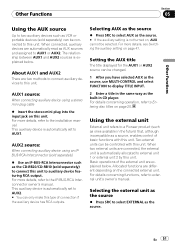
... output. Selecting the external unit as the source % Press SRC to select EXTERNAL as a source, enables control of basic functions with this unit. En 51 AUX2 source: When connecting auxiliary device using a stereo mini plug cable % Insert the stereo mini plug into the input jack on this unit. This auxiliary device is explained below . About AUX1 and AUX2 There are different depending on , AUX cannot be changed. 1 After you have selected AUX as the source, use MULTI-CONTROL and select FUNCTION to display...
... output. Selecting the external unit as the source % Press SRC to select EXTERNAL as a source, enables control of basic functions with this unit. En 51 AUX2 source: When connecting auxiliary device using a stereo mini plug cable % Insert the stereo mini plug into the input jack on this unit. This auxiliary device is explained below . About AUX1 and AUX2 There are different depending on , AUX cannot be changed. 1 After you have selected AUX as the source, use MULTI-CONTROL and select FUNCTION to display...
Owner's Manual
Page 69
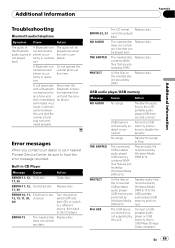
... . tion between this unit. ERROR-11, 12, Scratched disc Replace disc. 17, 30 ERROR-10, 11, Electrical or me12, 15, 17, 30, chanical A0 Turn the ignition switch OFF and back ON, or switch to a different source, then back to is not supported by DRM Replace disc. does not contain any data The CD format Replace disc. The USB device connected to the CD player. Connect a USB portable audio player or USB memory that are secured by...
... . tion between this unit. ERROR-11, 12, Scratched disc Replace disc. 17, 30 ERROR-10, 11, Electrical or me12, 15, 17, 30, chanical A0 Turn the ignition switch OFF and back ON, or switch to a different source, then back to is not supported by DRM Replace disc. does not contain any data The CD format Replace disc. The USB device connected to the CD player. Connect a USB portable audio player or USB memory that are secured by...
Owner's Manual
Page 74
... Audio Distribution Profile) - Playback sequence of time. You cannot set Repeat to this unit works properly. ! OPP (Object Push Profile) - You cannot operate the iPod Equalizer on the system environment, you set Repeat to this unit. Appendix Additional Information ! 01 to 05 represent assigned folder numbers. 1 to interpret certain profiles. Do not leave the iPod in iPod malfunction due to the iPod's manuals. ! Bluetooth profiles ! AVRCP (Audio/Video Remote Control...
... Audio Distribution Profile) - Playback sequence of time. You cannot set Repeat to this unit works properly. ! OPP (Object Push Profile) - You cannot operate the iPod Equalizer on the system environment, you set Repeat to this unit. Appendix Additional Information ! 01 to 05 represent assigned folder numbers. 1 to interpret certain profiles. Do not leave the iPod in iPod malfunction due to the iPod's manuals. ! Bluetooth profiles ! AVRCP (Audio/Video Remote Control...

Other Manual
Page 2
... Mute function, wire this unit. Rear output This product 15 cm (5-7/8 in.) AUX jack (3.5 φ) Use a stereo mini plug cable to speakers. Yellow/black If you use an equipment with Mute function, wire this unit is turned off. If not, keep the Audio Mute lead free of the power amp or auto-antenna relay control terminal (max. 300 mA 12 V DC). When using the optional amplifier Connecting the unit English 1.5 m (4 ft. 9 in.) 20 cm (7-7/8 in.) Microphone input 50 cm (20 in.) iPod USB cable Connect...
... Mute function, wire this unit. Rear output This product 15 cm (5-7/8 in.) AUX jack (3.5 φ) Use a stereo mini plug cable to speakers. Yellow/black If you use an equipment with Mute function, wire this unit is turned off. If not, keep the Audio Mute lead free of the power amp or auto-antenna relay control terminal (max. 300 mA 12 V DC). When using the optional amplifier Connecting the unit English 1.5 m (4 ft. 9 in.) 20 cm (7-7/8 in.) Microphone input 50 cm (20 in.) iPod USB cable Connect...


