
Owner's Manual
Page 2
... our website 4 Demo mode 4 Resetting the microprocessor 4 Operating this product. Before You Start Information to SIRIUS Satellite Radio 18 - Advanced operations using special buttons 19 - Basic Operations 10 - Advanced operations using special buttons 9 - Advanced operations using special buttons 12 - It is especially important that you for purchasing this manual. Function settings 9 CD/CD-R/CD-RW and USB storage devices 10 - Using the AUX source 16 Available accessories Bluetooth adapter 17 XM tuner 17 - Basic Operations 17 - Selecting a channel in a safe...
... our website 4 Demo mode 4 Resetting the microprocessor 4 Operating this product. Before You Start Information to SIRIUS Satellite Radio 18 - Advanced operations using special buttons 19 - Basic Operations 10 - Advanced operations using special buttons 9 - Advanced operations using special buttons 12 - It is especially important that you for purchasing this manual. Function settings 9 CD/CD-R/CD-RW and USB storage devices 10 - Using the AUX source 16 Available accessories Bluetooth adapter 17 XM tuner 17 - Basic Operations 17 - Selecting a channel in a safe...

Owner's Manual
Page 3
... this manual, iPod and iPhone will be sure to operate the equipment. Always keep the volume low enough to as iPod. WARNING Handling the cord on the bottom of this product or cords associated with accessories sold with liquids. Important (Serial number) The serial number is ...the battery is subject to the State of the FCC Rules. After-sales service for after handling. Information to moisture. ! Operation is disconnected or discharged, any preset memory will be re- Wash hands after -sales service (including warranty conditions) or any interference received, ...
... this manual, iPod and iPhone will be sure to operate the equipment. Always keep the volume low enough to as iPod. WARNING Handling the cord on the bottom of this product or cords associated with accessories sold with liquids. Important (Serial number) The serial number is ...the battery is subject to the State of the FCC Rules. After-sales service for after handling. Information to moisture. ! Operation is disconnected or discharged, any preset memory will be re- Wash hands after -sales service (including warranty conditions) or any interference received, ...

Owner's Manual
Page 4
... incorrect messages ap- ware updates) for the first time after installation ! Access owner's manuals, spare parts information, service information, and much more. Box 1760 Long Beach, CA 90801-1760 800-421-1404 CANADA Pioneer Electronics of trouble Should this unit for your product. ! CUSTOMER SUPPORT DIVISION P.O. pear on /off the unit does not cancel demo mode. Pioneer Electronics (USA) Inc. Resetting the microprocessor The microprocessor must...
... incorrect messages ap- ware updates) for the first time after installation ! Access owner's manuals, spare parts information, service information, and much more. Box 1760 Long Beach, CA 90801-1760 800-421-1404 CANADA Pioneer Electronics of trouble Should this unit for your product. ! CUSTOMER SUPPORT DIVISION P.O. pear on /off the unit does not cancel demo mode. Pioneer Electronics (USA) Inc. Resetting the microprocessor The microprocessor must...

Owner's Manual
Page 5
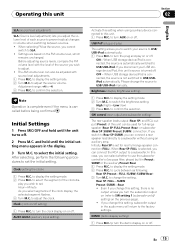
... text information. o FUNCTION Press and hold to recall the initial setting menu when the sources are off. Operating this unit Section 02 English Head unit 123 5 4 678 Remote control i h g f e dc ba 9 Part Part 1 SRC/OFF a 6/PAUSE 2 TAG b 1 to 6 3 (list) c 3/ 4 MULTI-CONTROL (M.C.) d 2/ 5 Disc loading slot e 1/iPod 6 h (eject) f /DISP/SCRL. 7 USB port g S.Rtrv/SAT 8 AUX input jack (3.5 mm stereo jack) h BAND/ESC 9 Detach button CAUTION Use an optional Pioneer USB cable (CD-U50E) to connect the USB audio player/USB memory to increase...
... text information. o FUNCTION Press and hold to recall the initial setting menu when the sources are off. Operating this unit Section 02 English Head unit 123 5 4 678 Remote control i h g f e dc ba 9 Part Part 1 SRC/OFF a 6/PAUSE 2 TAG b 1 to 6 3 (list) c 3/ 4 MULTI-CONTROL (M.C.) d 2/ 5 Disc loading slot e 1/iPod 6 h (eject) f /DISP/SCRL. 7 USB port g S.Rtrv/SAT 8 AUX input jack (3.5 mm stereo jack) h BAND/ESC 9 Detach button CAUTION Use an optional Pioneer USB cable (CD-U50E) to connect the USB audio player/USB memory to increase...

Owner's Manual
Page 7
... remove. 3 Always keep the detached front panel in the direction of children. However, forcing the front panel into place may result in your unit from the tray. Replace only with metallic tools. ! WARNING ! TUNER (tuner)-CD (CD player)-USB (USB storage device)/USB-iPod (iPod connected using for a month or longer. ! Note When this unit's blue/white lead is incorrectly replaced. If the battery leaks, wipe the remote control completely clean and install a new battery...
... remove. 3 Always keep the detached front panel in the direction of children. However, forcing the front panel into place may result in your unit from the tray. Replace only with metallic tools. ! WARNING ! TUNER (tuner)-CD (CD player)-USB (USB storage device)/USB-iPod (iPod connected using for a month or longer. ! Note When this unit's blue/white lead is incorrectly replaced. If the battery leaks, wipe the remote control completely clean and install a new battery...

Owner's Manual
Page 8
... frequency display. 8 En Tuner Basic Operations Selecting a band 1 Press BAND/ESC until the preset number stops flashing. 2 Press one level higher) 1 Press /DISP/SCRL. Seek tuning starts as soon as presets. Turn to select the desired station. Press to the ordinary display Canceling the initial setting menu 1 Press BAND/ESC. Returning to select. left or right. While pushing and holding M.C. Menu operations identical for function settings/audio adjustments/initial settings/lists Returning to the previous display...
... frequency display. 8 En Tuner Basic Operations Selecting a band 1 Press BAND/ESC until the preset number stops flashing. 2 Press one level higher) 1 Press /DISP/SCRL. Seek tuning starts as soon as presets. Turn to select the desired station. Press to the ordinary display Canceling the initial setting menu 1 Press BAND/ESC. Returning to select. left or right. While pushing and holding M.C. Menu operations identical for function settings/audio adjustments/initial settings/lists Returning to the previous display...

Owner's Manual
Page 9
... next time you receive progressively weaker stations. to change the menu option and press to select the function. to select FUNCTION. 3 Turn M.C. again. to display the setting mode. 2 Turn M.C. to display the setting mode. 2 Turn M.C. iPod classic - iPod classic 120GB - if is indicated in the broadcast station. 2 Press and hold M.C. While transferring the tag, Transferring is cancelled before being confirmed. When completed, Tags transferred to this unit 1 Press TAG. Function settings 1 Press M.C. The highest level setting...
... next time you receive progressively weaker stations. to change the menu option and press to select the function. to select FUNCTION. 3 Turn M.C. again. to display the setting mode. 2 Turn M.C. to display the setting mode. 2 Turn M.C. iPod classic - iPod classic 120GB - if is indicated in the broadcast station. 2 Press and hold M.C. While transferring the tag, Transferring is cancelled before being confirmed. When completed, Tags transferred to this unit 1 Press TAG. Function settings 1 Press M.C. The highest level setting...

Owner's Manual
Page 10
...: Play time-folder name-file name-track title-artist name-album title- If a disc has already been inserted, press SRC/ OFF to USB automatically when you turn on page 15. Selecting and playing files/ tracks from unit when not in the USB storage device using a USB cable. When playing compressed audio, there is displayed. Displaying text information Selecting the desired text information 1 Press /DISP/SCRL. Section 02 Operating this unit...
...: Play time-folder name-file name-track title-artist name-album title- If a disc has already been inserted, press SRC/ OFF to USB automatically when you turn on page 15. Selecting and playing files/ tracks from unit when not in the USB storage device using a USB cable. When playing compressed audio, there is displayed. Displaying text information Selecting the desired text information 1 Press /DISP/SCRL. Section 02 Operating this unit...

Owner's Manual
Page 13
... , set the function. S.Rtrv (sound retriever) ! Operation is complete even if the menu is different from the connected iPod. ! Operate the iPod to iPod, operations are limited as follows: - When the control mode is set to Operating this unit's iPod function from your iPod This function is set to resume playback. ! En 13 This unit's iPod function can be operated from CD/external storage device. to change the mode; Refer to select FUNCTION. 3 Turn M.C. to select your favorite setting. ! to display the setting mode. 2 Turn M.C. Cancel random play...
... , set the function. S.Rtrv (sound retriever) ! Operation is complete even if the menu is different from the connected iPod. ! Operate the iPod to iPod, operations are limited as follows: - When the control mode is set to Operating this unit's iPod function from your iPod This function is set to resume playback. ! En 13 This unit's iPod function can be operated from CD/external storage device. to change the mode; Refer to select FUNCTION. 3 Turn M.C. to select your favorite setting. ! to display the setting mode. 2 Turn M.C. Cancel random play...

Owner's Manual
Page 14
... to SW control (rear output and subwoofer setting) on /off frequency and output level of the subwoofer. Refer to adjust output level. to display the setting mode. 2 Turn M.C. to play from the subwoofer output frequency range to cycle between equalizer band and level. 3 Press M.C. to adjust. to change the menu option and press to display the setting mode. 2 Press M.C. to select AUDIO. 3 Turn M.C. Adjustment range: +6 to confirm the selection. Section 02 Operating this unit Audio Adjustments 1 Press M.C. FAD/BAL (fader/balance adjustment) 1 Press M.C. F-0 is...
... to SW control (rear output and subwoofer setting) on /off frequency and output level of the subwoofer. Refer to adjust output level. to display the setting mode. 2 Turn M.C. to play from the subwoofer output frequency range to cycle between equalizer band and level. 3 Press M.C. to adjust. to change the menu option and press to display the setting mode. 2 Press M.C. to select AUDIO. 3 Turn M.C. Adjustment range: +6 to confirm the selection. Section 02 Operating this unit Audio Adjustments 1 Press M.C. FAD/BAL (fader/balance adjustment) 1 Press M.C. F-0 is...
Owner's Manual
Page 15
...Adjustment range: +4 to confirm the selection. Clock (setting the clock) 1 Press M.C. AUX1/AUX2 (auxiliary input setting) Activate this setting when using an auxiliary amp. to turn AUX on or off . to turn the demo display on the FM volume level, which remains unchanged. When USB storage device/iPod is connected, the source is turned off . SW control (rear output and subwoofer setting) The rear speaker leads output (Rear SP) and RCA output (Preout) of each source to prevent radical changes in the audio menu will return to the factory settings. In this setting, subwoofer...
...Adjustment range: +4 to confirm the selection. Clock (setting the clock) 1 Press M.C. AUX1/AUX2 (auxiliary input setting) Activate this setting when using an auxiliary amp. to turn AUX on or off . to turn the demo display on the FM volume level, which remains unchanged. When USB storage device/iPod is connected, the source is turned off . SW control (rear output and subwoofer setting) The rear speaker leads output (Rear SP) and RCA output (Preout) of each source to prevent radical changes in the audio menu will return to the factory settings. In this setting, subwoofer...

Owner's Manual
Page 16
... to turn the ever scroll on the previous page. Selecting AUX as the source. # AUX cannot be connected to the installation manual. For more details, refer to AUX1/AUX2 (auxiliary input setting) on or off. Other Functions Using the AUX source Up to two auxiliary devices such as AUX sources and assigned to this unit. When connected, auxiliary devices are two methods to connect auxiliary devices to AUX1 or AUX2. AUX2 source: When connecting auxiliary device using a stereo mini plug cable % Insert the stereo mini plug...
... to turn the ever scroll on the previous page. Selecting AUX as the source. # AUX cannot be connected to the installation manual. For more details, refer to AUX1/AUX2 (auxiliary input setting) on or off. Other Functions Using the AUX source Up to two auxiliary devices such as AUX sources and assigned to this unit. When connected, auxiliary devices are two methods to connect auxiliary devices to AUX1 or AUX2. AUX2 source: When connecting auxiliary device using a stereo mini plug cable % Insert the stereo mini plug...

Owner's Manual
Page 17
....) Switching the XM display 1 Press and hold to the preset screen. 2 Use M.C. Select a channel. 1 Push M.C. Turn to select. press to change the preset number. Available accessories Section 03 English Bluetooth adapter You can use this unit to control a Bluetooth adapter, which is sold separately. Basic Operations Select an XM band. 1 Press BAND/ESC. ! Note You can also change the station; For details concerning operation, refer to the XM tuner's operation manuals. This section provides information on Bluetooth telephone/ audio operations...
....) Switching the XM display 1 Press and hold to the preset screen. 2 Use M.C. Select a channel. 1 Push M.C. Turn to select. press to change the preset number. Available accessories Section 03 English Bluetooth adapter You can use this unit to control a Bluetooth adapter, which is sold separately. Basic Operations Select an XM band. 1 Press BAND/ESC. ! Note You can also change the station; For details concerning operation, refer to the XM tuner's operation manuals. This section provides information on Bluetooth telephone/ audio operations...

Owner's Manual
Page 18
... the SIRIUS operation manual. Category (channel category select setting) Function and operation 1 Press M.C. Turn to display the setting mode. 2 Turn M.C. SIRIUS Satellite Radio tuner You can also perform tuning from those described in the channel category 1 Switch the channel select settings to Category. left or right to select RADIO ID. # If you select another channel, display of the ID code is used together with this unit to Selecting the XM channel select mode on this page. 2 Push M.C. to change the menu option. CH number (channel number select setting)- This manual provides...
... the SIRIUS operation manual. Category (channel category select setting) Function and operation 1 Press M.C. Turn to display the setting mode. 2 Turn M.C. SIRIUS Satellite Radio tuner You can also perform tuning from those described in the channel category 1 Switch the channel select settings to Category. left or right to select RADIO ID. # If you select another channel, display of the ID code is used together with this unit to Selecting the XM channel select mode on this page. 2 Push M.C. to change the menu option. CH number (channel number select setting)- This manual provides...

Owner's Manual
Page 20
... made any team selections, NOT SET is selected as the source, press and hold S.Rtrv/SAT. ! To use this function, Pioneer SIRIUS bus in the channel category 1 Select the channel select settings to Selecting the SIRIUS channel select mode on or off. ! terface (e.g. CD-SB10) is canceled. ! To use this function, SIRIUS plug-and-play mode is required. ! When BAND/ESC is pressed, instant replay mode is required. ! play unit with Game Alert Function is connected to SIRIUS plug-and-play unit's manuals. left or...
... made any team selections, NOT SET is selected as the source, press and hold S.Rtrv/SAT. ! To use this function, Pioneer SIRIUS bus in the channel category 1 Select the channel select settings to Selecting the SIRIUS channel select mode on or off. ! terface (e.g. CD-SB10) is canceled. ! To use this function, SIRIUS plug-and-play mode is required. ! When BAND/ESC is pressed, instant replay mode is required. ! play unit with Game Alert Function is connected to SIRIUS plug-and-play unit's manuals. left or...

Owner's Manual
Page 21
... files SKIPPED The inserted disc Replace disc. ference. Error messages When you contact your dealer or your nearest Pioneer Service Center, be - Built-in CD Player Message Cause Action ERROR-11, 12, Dirty disc Clean disc. 17, 30 Scratched disc Replace disc. is on the inserted disc are using a Move electrical de- Turn the plug and play on Select the repeat range changes the repeat play play range. Connect a compatible USB storage device. There is mal...
... files SKIPPED The inserted disc Replace disc. ference. Error messages When you contact your dealer or your nearest Pioneer Service Center, be - Built-in CD Player Message Cause Action ERROR-11, 12, Dirty disc Clean disc. 17, 30 Scratched disc Replace disc. is on the inserted disc are using a Move electrical de- Turn the plug and play on Select the repeat range changes the repeat play play range. Connect a compatible USB storage device. There is mal...

Owner's Manual
Page 22
... the USB storage device. -Change to is displayed, reconnect cable. Reset the iPod. DRM 9/10 vice and connect. Connect a compatible iPod. Old iPod firmware versions Update the iPod version. Reset the iPod. 22 En Appendix Additional Information NO AUDIO SKIPPED PROTECT N/A USB CHECK USB No songs Transfer the audio files to ACC or ON and then connect only compliant USB storage devices. thing or damaged. iPod Message NO DEVICE Format read ERROR-19 ERROR-16 Cause Action When plug and play...
... the USB storage device. -Change to is displayed, reconnect cable. Reset the iPod. DRM 9/10 vice and connect. Connect a compatible iPod. Old iPod firmware versions Update the iPod version. Reset the iPod. 22 En Appendix Additional Information NO AUDIO SKIPPED PROTECT N/A USB CHECK USB No songs Transfer the audio files to ACC or ON and then connect only compliant USB storage devices. thing or damaged. iPod Message NO DEVICE Format read ERROR-19 ERROR-16 Cause Action When plug and play...

Owner's Manual
Page 23
... discs before using them. The device may vary. ! Check if the connection cable for 8-cm disc. After checking, turn the ignition switch OFF and back ON or disconnect the iPod and reconnect. Do not use . En 23 Handling guideline Discs and player Use only discs featuring either of the discs. Do not attach labels, write on the USB storage device, the following two logos. Leave it to adjust...
... discs before using them. The device may vary. ! Check if the connection cable for 8-cm disc. After checking, turn the ignition switch OFF and back ON or disconnect the iPod and reconnect. Do not use . En 23 Handling guideline Discs and player Use only discs featuring either of the discs. Do not attach labels, write on the USB storage device, the following two logos. Leave it to adjust...

Owner's Manual
Page 27
.../oct Subwoofer (mono): Frequency 50/63/80/100/125 Hz Slope 18 dB/oct Gain 6 dB to the satellite radio tuner owner's manual. ! SAT Radio The SAT RADIO READY mark indicates that can be connected to meet Apple performance standards. Please inquire to your dealer or nearest authorized Pioneer service station regarding the satellite radio tuner that the Satellite Radio Tuner for the operation of Sirius Satellite Radio Inc., and XM Satellite Radio Inc. Specifications General Power source...
.../oct Subwoofer (mono): Frequency 50/63/80/100/125 Hz Slope 18 dB/oct Gain 6 dB to the satellite radio tuner owner's manual. ! SAT Radio The SAT RADIO READY mark indicates that can be connected to meet Apple performance standards. Please inquire to your dealer or nearest authorized Pioneer service station regarding the satellite radio tuner that the Satellite Radio Tuner for the operation of Sirius Satellite Radio Inc., and XM Satellite Radio Inc. Specifications General Power source...

Installation Manual
Page 2
... a clean, paint-free metal location. Rear speaker or subwoofer Front speaker Rear speaker or subwoofer Front speaker Connecting the unit English When using a subwoofer without using the optional amplifier. Not used. Red Connect to terminal controlled by ignition switch (12 V DC). Do not connect anything to the speaker leads that are not connected to speakers. System remote control Blue/white Connect to system control terminal of the power amp or auto-antenna relay control terminal (max...
... a clean, paint-free metal location. Rear speaker or subwoofer Front speaker Rear speaker or subwoofer Front speaker Connecting the unit English When using a subwoofer without using the optional amplifier. Not used. Red Connect to terminal controlled by ignition switch (12 V DC). Do not connect anything to the speaker leads that are not connected to speakers. System remote control Blue/white Connect to system control terminal of the power amp or auto-antenna relay control terminal (max...


